I'm going to stop updating this repo in favor of a new fork based on Let's Robot Repo instead of the old runmyrobot one. Keep an eye out!
LetsRobot.tv is a site for interacts with others using telepresence robots. Users create their own robots and add them to the site. https://letsrobot.tv
You can find additional documentation including information about our API on our readme.io page as well.
This fork does not utilize the main forks quick install method.
We recommend using Raspbian Lite, however any version of Raspbian or NOOBS should work.
Enable SSH and the Raspberry Pi Camera with sudo rasp-config. You may need to reboot.
Make sure the Raspberry Pi software is up to date.
sudo apt update
Install ffmpeg and other software needed to run our code.
sudo apt install ffmpeg python-serial python-dev libgnutls28-dev espeak python-smbus python-pip git sl
Download the Let's Robot / Run My Robot software from this fork.
git clone https://github.com/skeetermcbee/runmyrobot
Enter the runmyrobot directory.
cd runmyrobot
Install the required Python libraries
sudo python -m pip install socketIO-client configparser
On LetsRobot.tv, click the link that allows you to register a new bot. You will get a Robot ID and a Camera ID.
These two scripts need to be running in the background to bring your robot to life: controller.py and send_video.py. Here are the inscructions about how to start them.
cp ~/runmyrobot/scripts/start_robot ~/
Edit the script so you can adjust some settings for controller.py and send_video.py:
nano ~/start_robot
Edit the YOURROBOTID with your robot ID.
Edit the YOURCAMERAID with your camera ID.
You should not need to change any other settings.
Use crontab to start the start_robot script on booting.
crontab -e
Insert the following line and save:
@reboot /bin/bash /home/pi/start_robot
On any machine with an Arduino IDE (available at arduino.cc), Install arduino_code.ino onto the Arduino.
That's it!
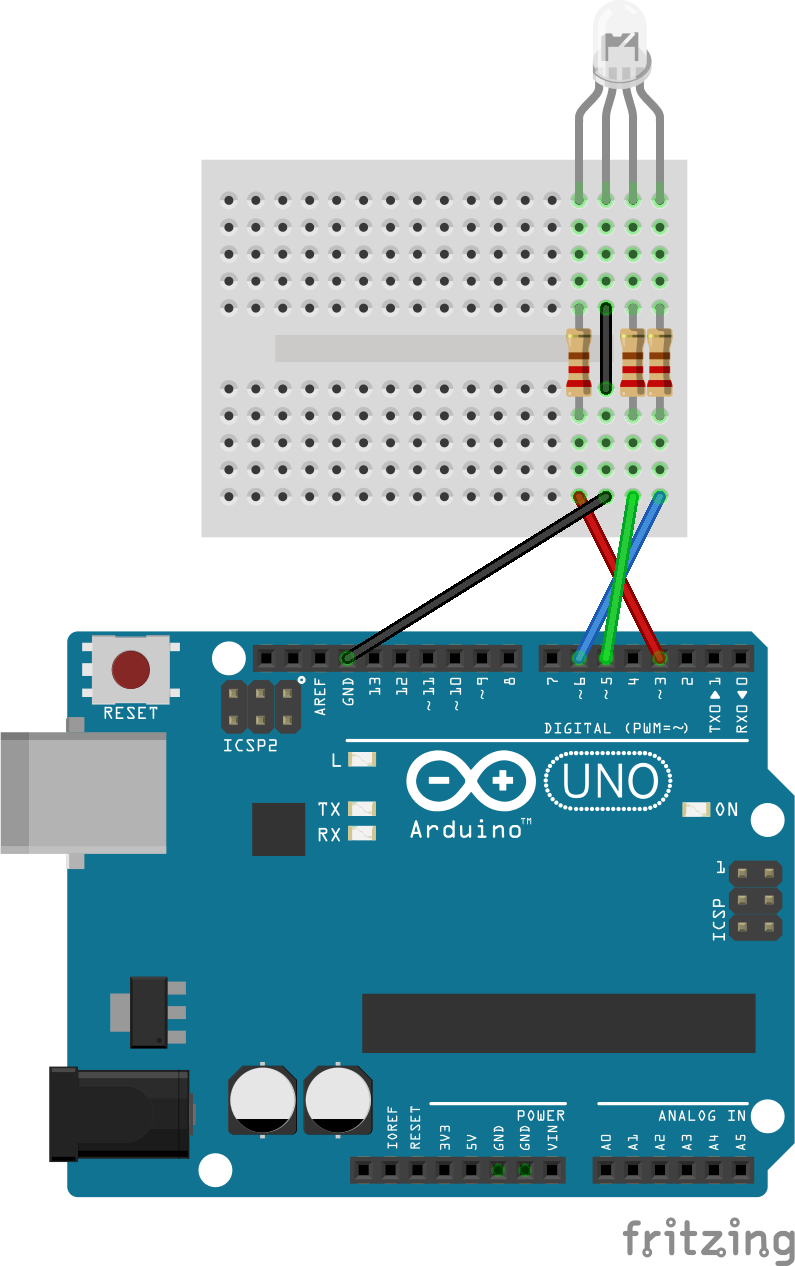
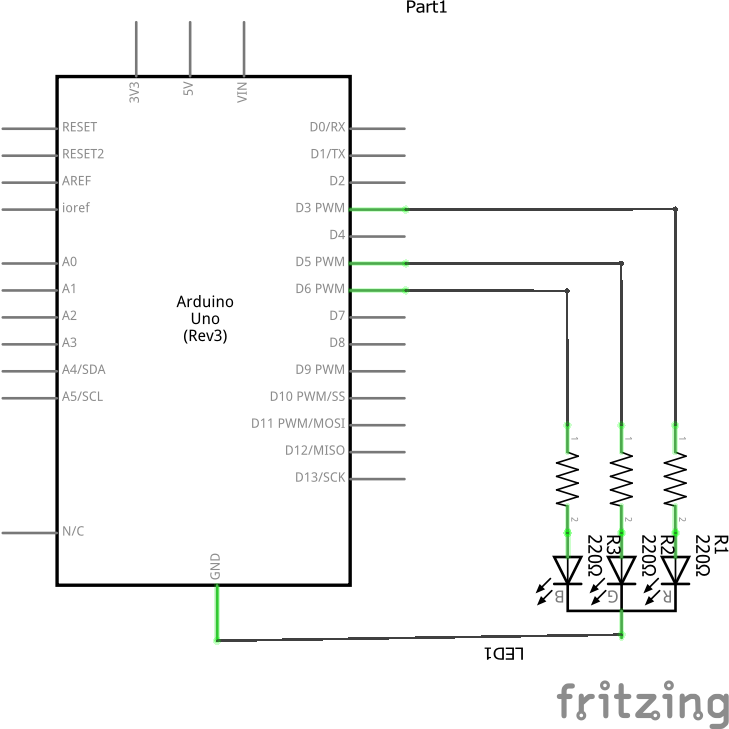
The following hardware is required to make an accurate clone of LED bot.
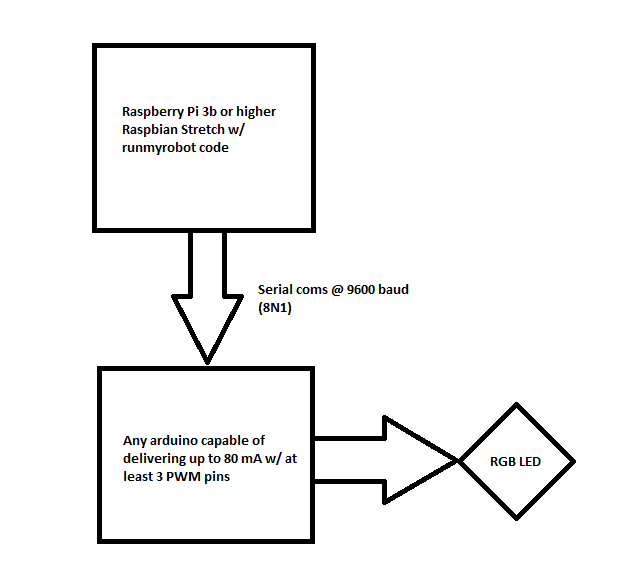
- Raspberry Pi 3b or above
- Arduino with at least 1 serial port, capable of delivering 80 mA through 3 PWM pins. I used an Uno Rev. 3.
- Breadboard
- RGB LED
- Resistors
- Hookup wire
- USB for powering Arduino and sending serial data.
- Connect the arduino to the raspberry pi using a USB cable.
You can monitor the serial data with minicom.
sudo apt install minicom
You'll need to change some settings before we can see anything.
sudo minicom -s
Go to Serial port setup. You want your Serial Device to be /dev/ttyACM0, and Bps/Par/Bits to show 9600 8N1.
Save your settings as default by selecting Save setup as dfl
From minicom, you can send data to the arduino, but it will not show on the screen. That is not a bug.
This repository has been forked from RunMyRobot to run specifically with an LED bot clone. If there is an issue with this repository, or if help is needed, I can be reached in the following ways:
- Discord: @skeetermcbee#5194
- Twitter: @skeetermcbee
- email: skeeter_mcbee@live.com