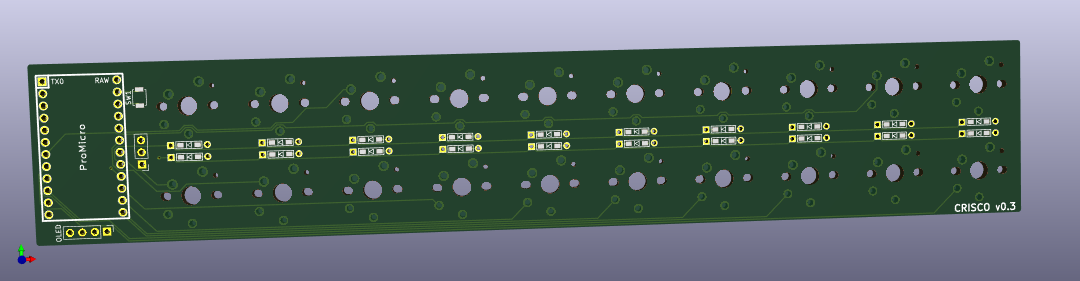
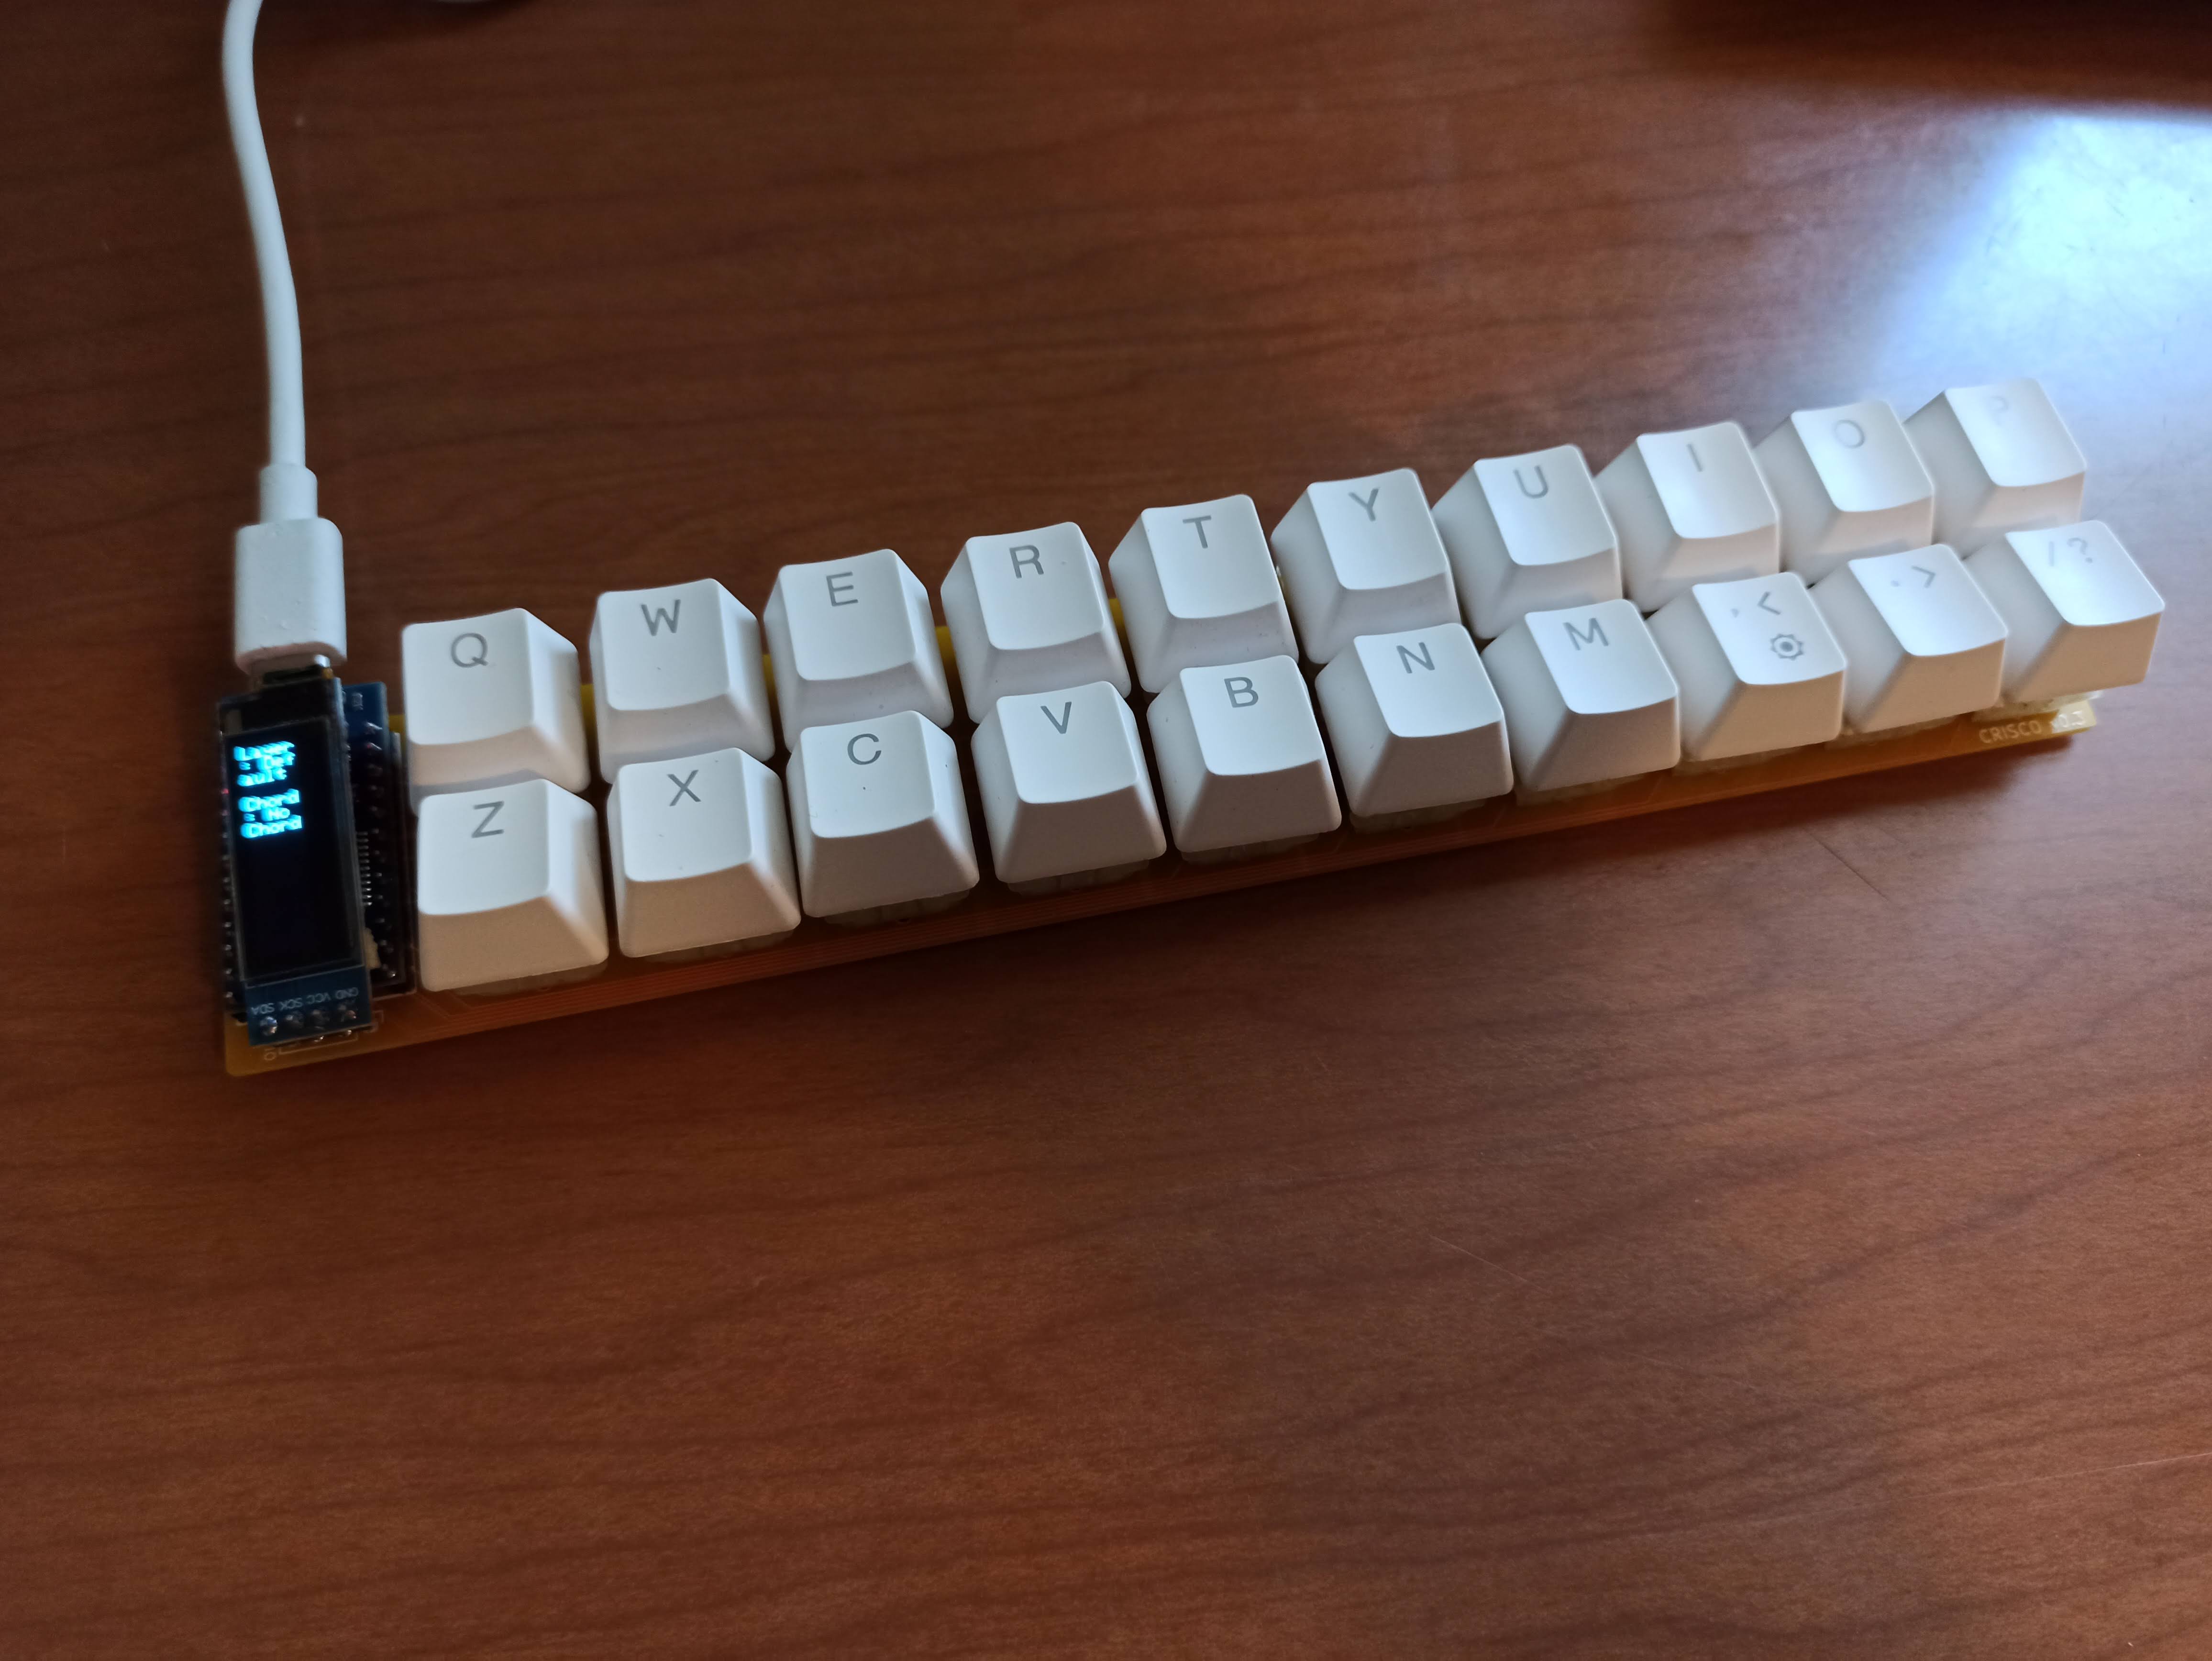
Crisco is a 20% chorded keyboard inspired by the Butterstick, originally created by Germ at gboards.ca. The Crisco has a greater saturated fat content and is therefore bigger than it's cousin, being promicro-based instead of SMD, and MX switch spaced. But, it boasts LED strip support, and an OLED 128x32 display.
Butterstick's open source firmware in the qmk repo was used to help create firmware for the Crisco. Thanks also to the cookpad-pad repo, which jump started the PCB design.
Download the latest gerber
- 1x Arduino Pro Micro (or compatible)
- 20x 1N4148 or 1N4007 through-hole or SMD diodes (or similar)
- 20x 5-pin MX/Choc switches (choc is better for chorded typing because of lower travel)
- 20x MX/Choc keycaps (I recommend even height keycaps like DSA if you choose MX switches)
- 6x 8x2mm rubber feet (or similar, or check out this cool case https://www.thingiverse.com/thing:5538732)
- 1x B3U-1000P reset switch (optional, or similar; I've used a 2x3x4mm switch with mild success)
- capton tape or electrical tape (optional for the next two components)
- 1x 128x32 SSD1306 OLED display (optional)
- 11 LEDs worth of WS2812B 60/m RGB LED strip (optional, or 5 LEDs at 30/m)
- Solder the diodes D1 through D20 to the top side of the board (on top of the silk screen).
- Solder the legs for the Pro Micro and the Pro Micro itself on the top side of the board, component side up, with the USB port towards the top edge of the board. Check the silk screen for proper pin orientation.
- Solder the switches in place.
- Add some capton tape to the top of the Pro Micro.
- Solder the OLED screen on top of the Pro Micro with the pins to the bottom of the board. Ground will be the square pad.
- Cut and solder the LED strip to the bottom of the board. Ground is the square pad, and "Din" on the strip should go to the middle pin. Keep the strip in place with some more capton tape.
- Apply rubber feet to the bottom of the board to keep it from moving around. If you added the LED strip, you may need some thicker feet.
- Copy the firmware folder contents into your qmk keyboards directory under a new 'crisco' folder. If you used a 30/m strip instead of 60/m, then change config.h to reflect 5 LEDs instead of 11. Regardless of whether you added LEDs or the OLED display, you shouldn't need to turn anything on or off for those specifically. It will work just fine with or without.
- Compile and flash the firmware.
- Show it off to your discord buddies..
- Get frustrated with the keymap...
- Put it in a drawer for a few months....
- Sell it on /r/mechmarket.....
- Repeat!
The default keymap is more or less identical to the original butterstick keymap. The keymap doesn't indicate, but backspace is "vbnm" chorded. I reccomend checking out the keymap file, though its keynames are inherited from steno machines: https://github.com/ch604/crisco/blob/main/firmware/keymaps/default/keymap.c