Instructions for enabling tigervnc-standalone-server on Radxa Zero 3W.
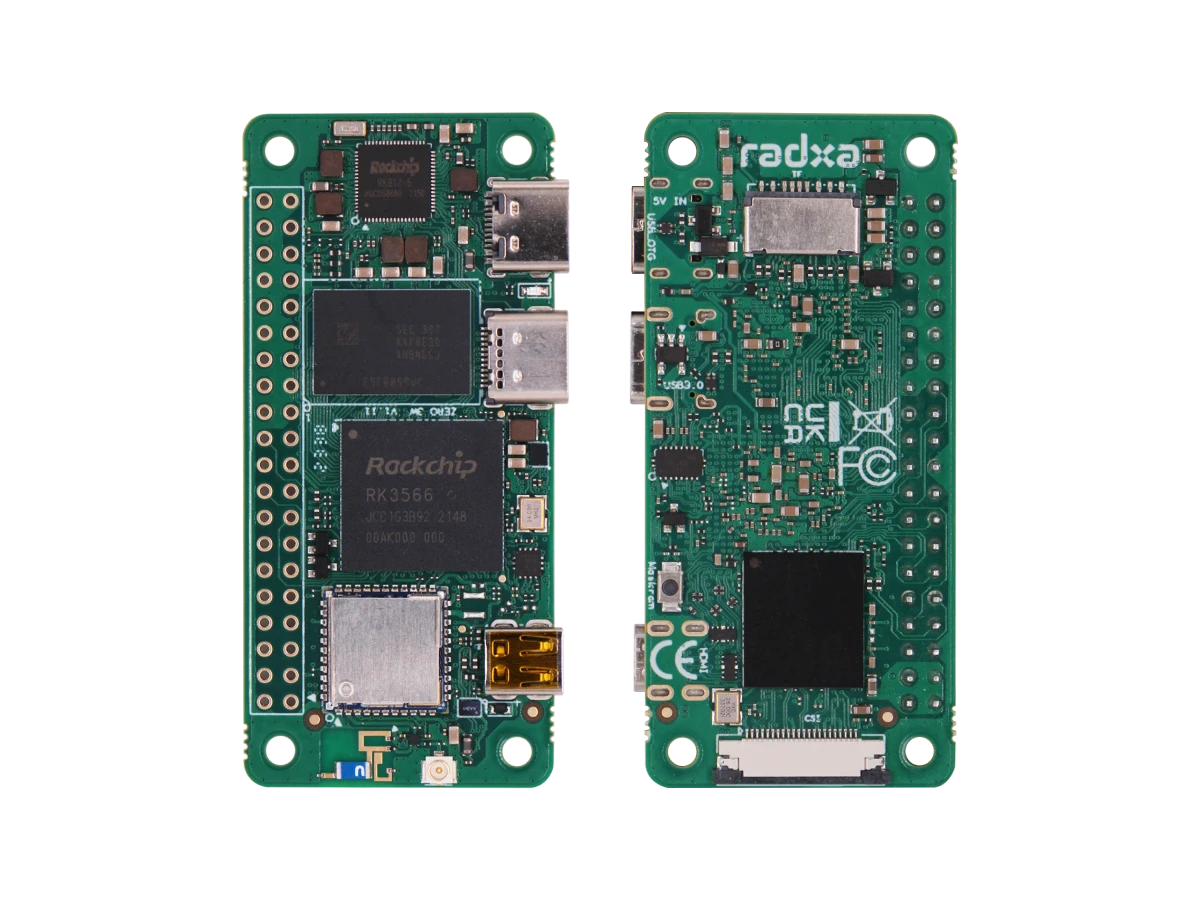
Product Page https://radxa.com/products/zeros/zero3w/
Steps:
(1) Install server program and dbus:
sudo apt-get install tigervnc-standalone-server dbus-x11
(2) Define tigervnc password:
tigervncpasswd
(3) Create ~/.vnc/xstartup script with the following contents:
#!/bin/sh
unset SESSION_MANAGER
unset DBUS_SESSION_BUS_ADDRESS
exec startxfce4
(4) Edit /etc/tigervnc/vncserver-config-defaults and add:
$localhost = "no";
That's it, now you can just start the server with:
tigervncserver
Add service to systemctl
(1) Edit /etc/tigervnc/vncserver.users and add:
:1=radxa
(2) Test service by running:
sudo systemctl start tigervncserver@:1.service
systemctl status tigervncserver@:1.service
(3) Enable service by running:
sudo systemctl enable tigervncserver@:1.service
Connect using xtigervncviewer
(1) The following command line can be used:
xtigervncviewer -SecurityTypes VncAuth,TLSVnc 192.168.0.71:1 &
(2) The TigerVnc GUI can be used, in Options -> Security tab,
Encryption
TLS with anonymous certificates
Authentication
Standard VNC (insecure without encryption)
(1) Add new file /etc/udev/rules.d/90-usb-gadget.rules
SUBSYSTEM=="net",ACTION=="add",KERNEL=="usb0",RUN+="/sbin/ifconfig usb0 192.168.1.2 netmask 255.255.255.0",RUN+="/usr/bin/python -c 'import time; time.sleep(20)'",RUN+="/sbin/ip route add 192.168.1.1 dev usb0"
Problems:
(1) The hardware MAC address is always randomized at boot and is immediately passed to the connected PC. Even if I disconnect networking on the Radxa Zero 3W, change the hardware address and then re-enable networking, the connected PC will still use the original randomized address.
(2) g_ether is not used, but rather cdc_ether. This means no Windows support as a RNDIS device. This is a deal breaker for me.
(1) Run:
sudo rsetup
(2) Select Overlays --> Manage overlays select Enable I2C3-M0 and Enable spidev on SPI3-M1 over CS0
(3) For pin information (which ones to use), select Overlays --> View overlay info
(4) Install i2c-tools, and add /usr/sbin to $PATH in ~.bashrc:
PATH=$PATH:/usr/sbin
(5) Now i2cdetect should find connected slaves (using same pins a raspberry pi):
i2cdetect -y 3
Problems:
(1) pip modules smbus and spidev don't install clean. I can't find similar modules for use in Python (and this is a deal breaker for me)
Great hardware and the 1GB ram works without any issues. Software wise I can't use it the same way I do with Raspberry Pi. Availability wise it takes 2 weeks to ship from China, and the total price (including shipping) is very similar to RPi4 1GB. I like the Zero form factor, but will continue to buy RPi4 1GB (software works and runs faster than Radxa Zero 3W). Even if Radxa improved the software to run identically to RPi, there really is no effective price difference... no motivation to switch. However if the Radxa Zero 3W is compared against the RPi Zero 2W, it is supperior is every way... my RPi Zero 2W is very unstable with the 512MB ram running a 64bit OS (even without a windows manager).