Conexant4Mic Raspberry Pi

This guide provides step-by-step instructions for setting up a Conexant AudioSmart™ 4-Mic Development Kit for Amazon AVS with a Raspberry Pi 2. It demonstrates how to access and test Amazon AVS, Amazon's Java sample app (running on the Raspberry Pi 2), a Node.js server for authorization (running on the Raspberry Pi 2), and a third-party wake word engine that responds to "Alexa" (running the low-power Sensory wake word engine or the high-performance Sensory wake word engine).
When finished, you'll have a fully functioning Amazon AVS prototype that uses the Conexant AudioSmart™ 4-Mic Development Kit for Amazon AVS as an audio front end.
Before you get started, let's review what you'll need:
- Conexant AudioSmart™ 4-Mic Development Kit for Amazon AVS - Buy
- Raspberry Pi 2 - Buy at Amazon - RPi 2
- Micro SD Card (Recommended 16 GB) - You will need Raspbian Jessie with PIXEL, which you can download and install on your SD card (follow instructions here).
- External Speaker with 3.5mm audio cable - Buy on Amazon
- A USB Keyboard & Mouse, and an external HDMI Monitor to connect to the Raspberry Pi 2.
- Internet connection (Ethernet or WiFi) - For WiFi, you will need a USB WiFi Dongle
Using Win32DiskImager
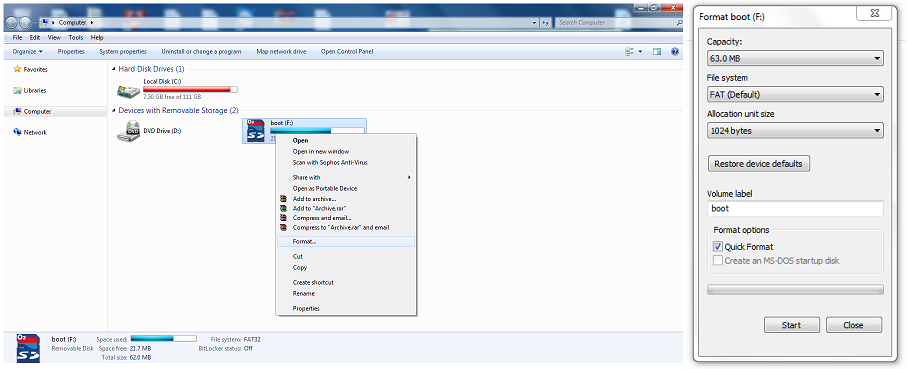
- Format the SD card. This can be done by going to the ‘Computer’ folder and right clicking on the SD card. Click ‘Format…’ to display the format options. When reformatting, make sure the File system is FAT32 or FAT.
-
Download the Raspbian Jessie OS. The zip file is located at the following link: http://downloads.raspberrypi.org/raspbian/images/raspbian-2017-07-05/
-
Unzip and write the downloaded image to the SD card using Win32DiskImager. This tool can be found at the following link: https://sourceforge.net/projects/win32diskimager/
-
Run the Win32DiskImager to write the image to the SD card.

a. Select the path to choose an image by clicking the subdirectory icon in the Image File field.
b. Select the device drive in the Device drop down menu to write the Raspbian OS.
c. Click Write to write the image to the SD card.
- After the image has finished writing, insert the microSD card into the RPi 2.
Make the following hardware connections between the CX20924 EVK board, the Microphone/LED module, and the RPi 2 (Connections between the CX20924 EVK and Microphone / LED module are already established.) Make sure the microSD card with the Raspbian OS and AVS sample app is inserted into the RPi 2 microSD card slot.

- Connect the cable assembly to the GPIO pins on the RPi. Align the sticker labeled ‘1’ with physical pin 1 on the RPi 2.

-
Connect output of 4-Mic processed signal a. Use the USB cable to connect J4 on the CX20924 EVK board to an USB port on the RPi 2.
-
Connect the powered speakers to the LineOut port. a. Connect the 3.5mm jack from the powered speakers to J8 (labeled LINEOUT) on the CX20924 EVK board.

-
Using the HDMI and USB ports on the RPi 2, connect the RPi 2 to the monitor, keyboard, and mouse.
-
Connect the 5V supply to the J1 connector on the CX20924 EVK board. Use the +5V power supply included with the kit to power the CX20924 EVK board, Microphone / LED module, and the RPi 2.
Note: Power to the RPi 2 is provided from the CX20924 EVK board and the microUSB power on the RPi 2 is not used.

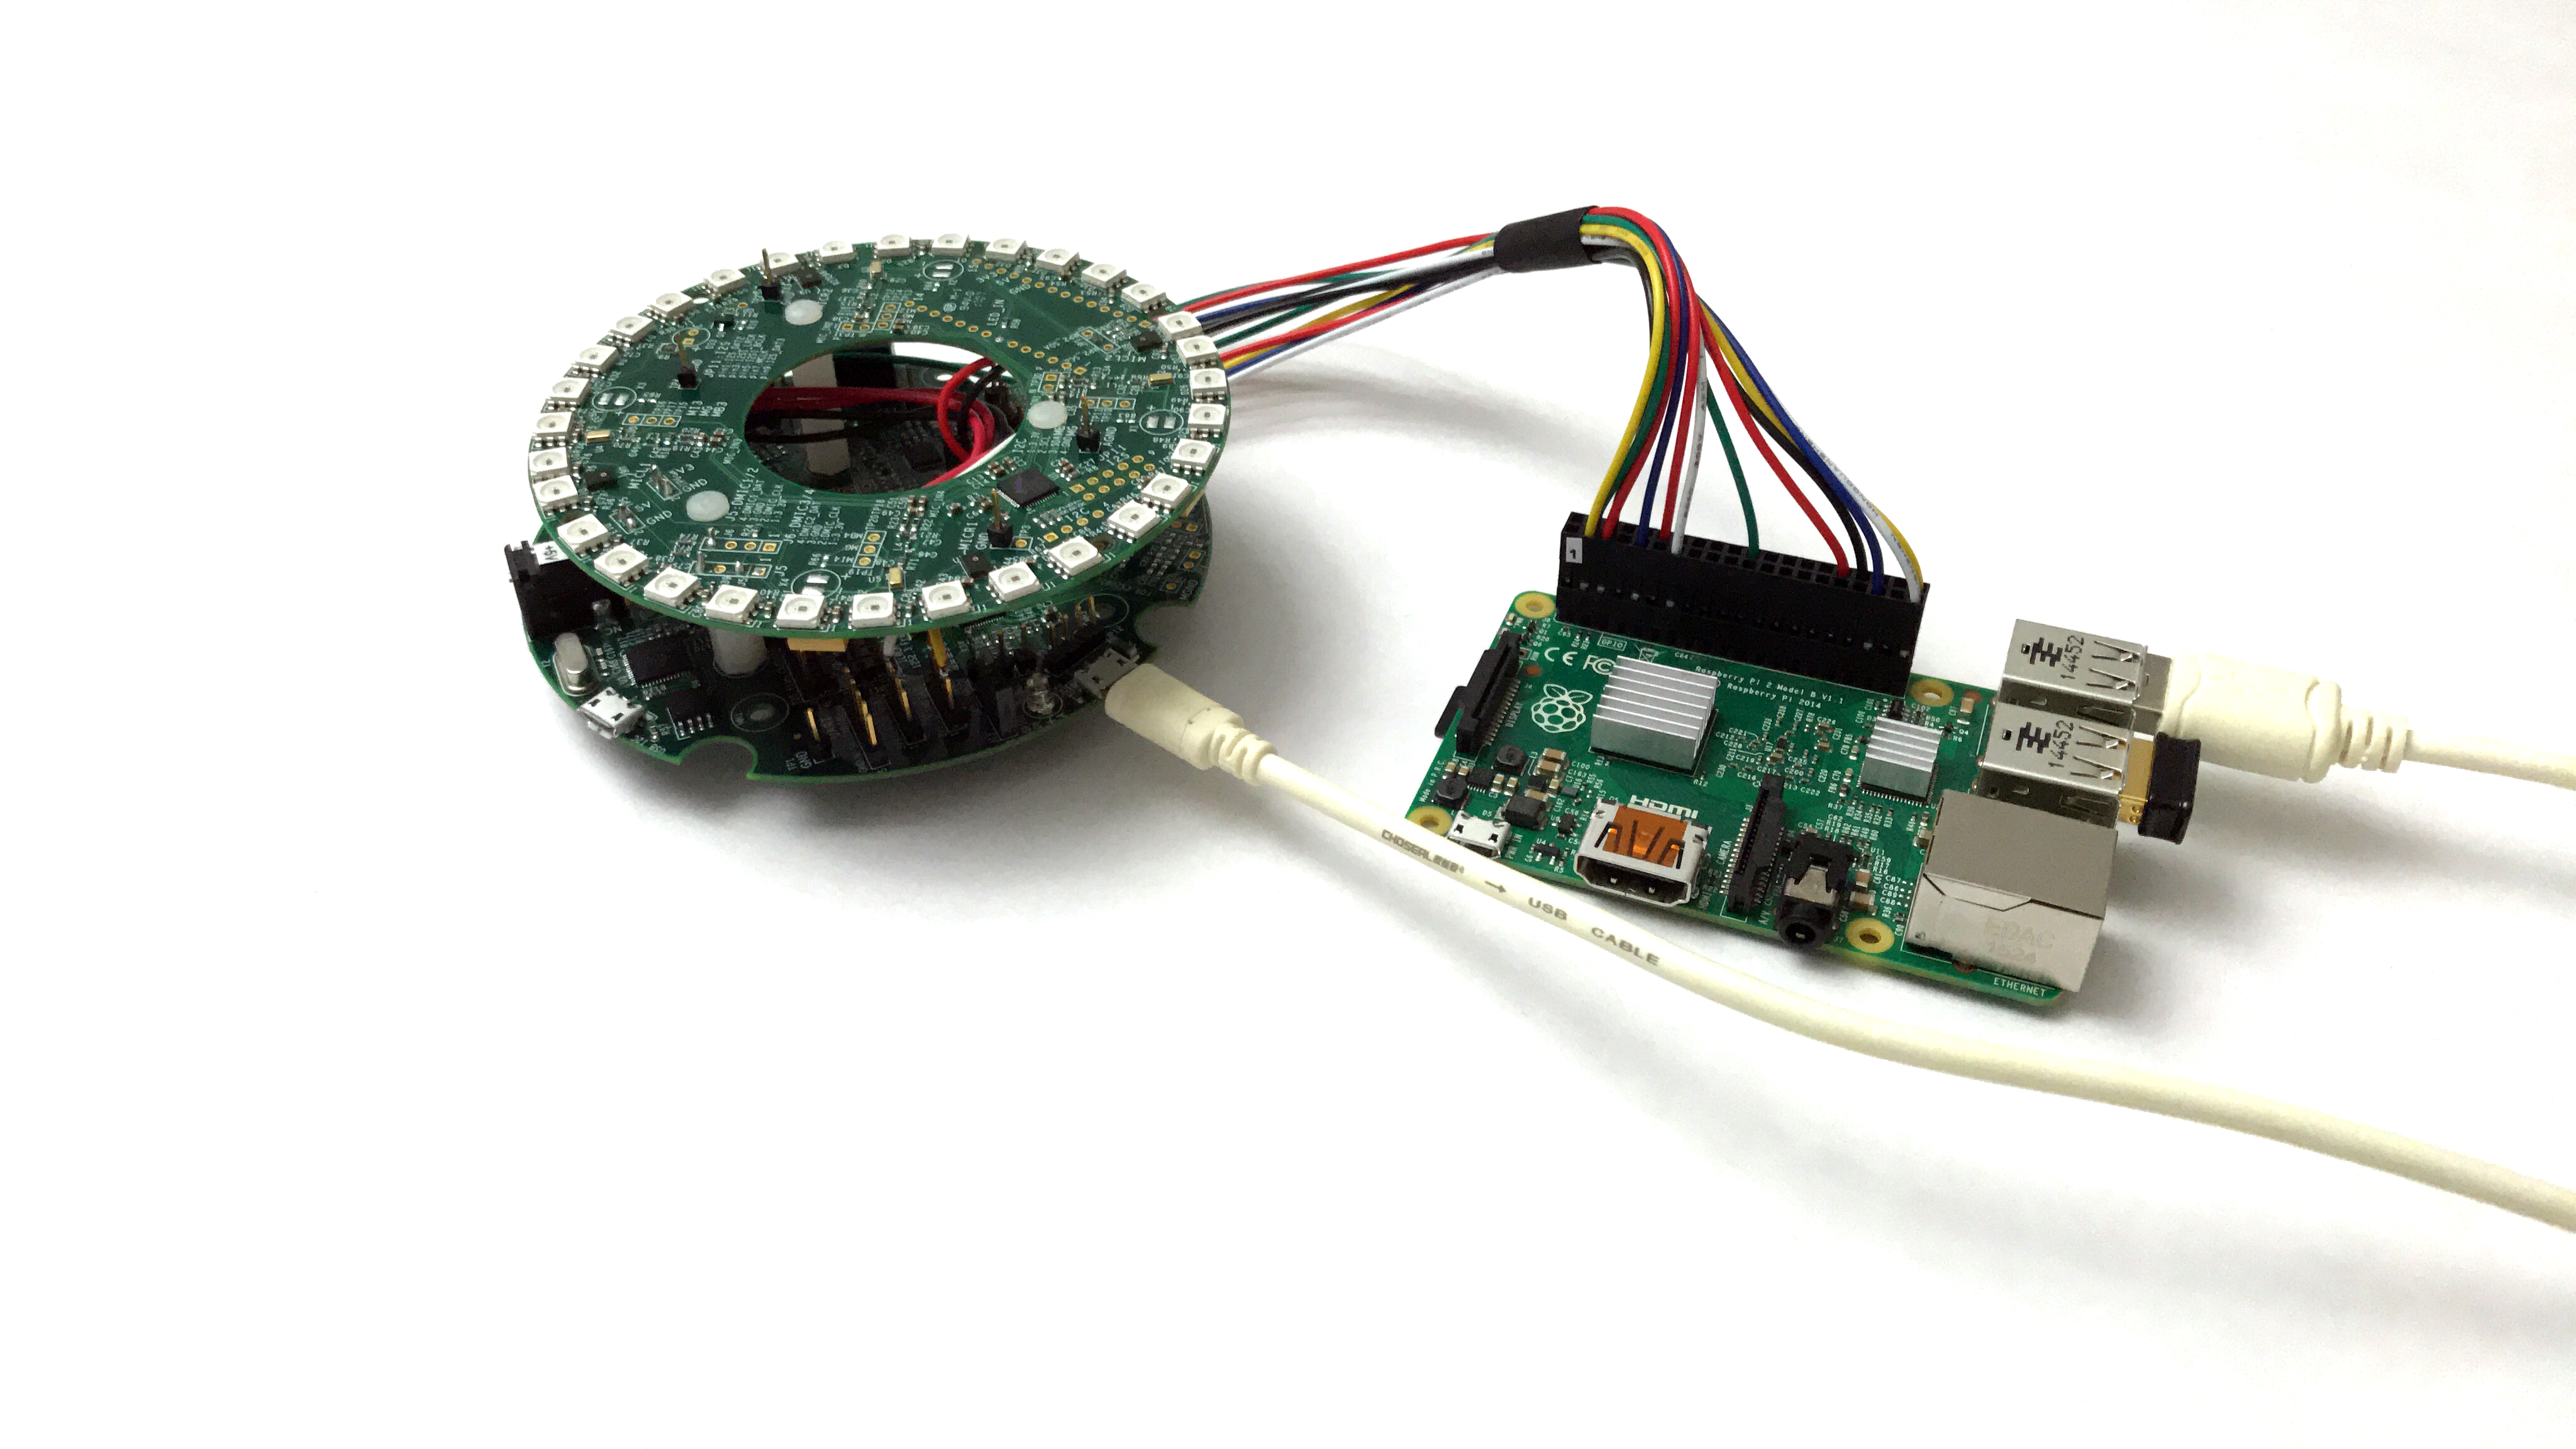
When assembled, your setup should look like this:
Note: The unit should be placed on top of the speakers, with some material, such as putty or foam, in between to minimize vibrations from the speaker.

NOTE: You will be using the Terminal utility on your RPi 2 to install the utilities you need for this AVS walkthrough. Terminal comes preinstalled on the RPi 2, and you can get to it from the Desktop. You can learn more about Terminal here.
![]()

Unless you already have one, go ahead and create a free developer account at developer.amazon.com. You should review the AVS Terms and Agreements here.

Follow the steps here to register your product and create a security profile.
Make note of the following parameters. You'll need these in Step 6 below.
-
ProductID(also referred to as Device Type ID in the Amazon Developer Portal), -
ClientID, and ClientSecret
Important: Make sure your Allowed Origins and Allowed Return URLs are set under Security Profile > Web Settings (see Create a device and security profile).
-
Allowed Origins:
https://localhost:3000 -
Allowed Return URLs:
https://localhost:3000/authresponse

Prior to completing the steps described in this section, the following tasks should be completed:
- Raspbian OS loaded onto the microSD card
- HDMI monitor, keyboard, and mouse are connected
- LAN or WiFi connection has been established
- Hardware setup complete
Send the following command to clone the repository from the Conexant GitHub:
git clone https://github.com/conexant/alexa-avs-sample-app.git
Before running the install script, you'll need to update it with the credentials you got in step 4 - ProductID, ClientID, ClientSecret. Type the following in terminal:
cd ~/alexa-avs-sample-app
nano automated_install.sh
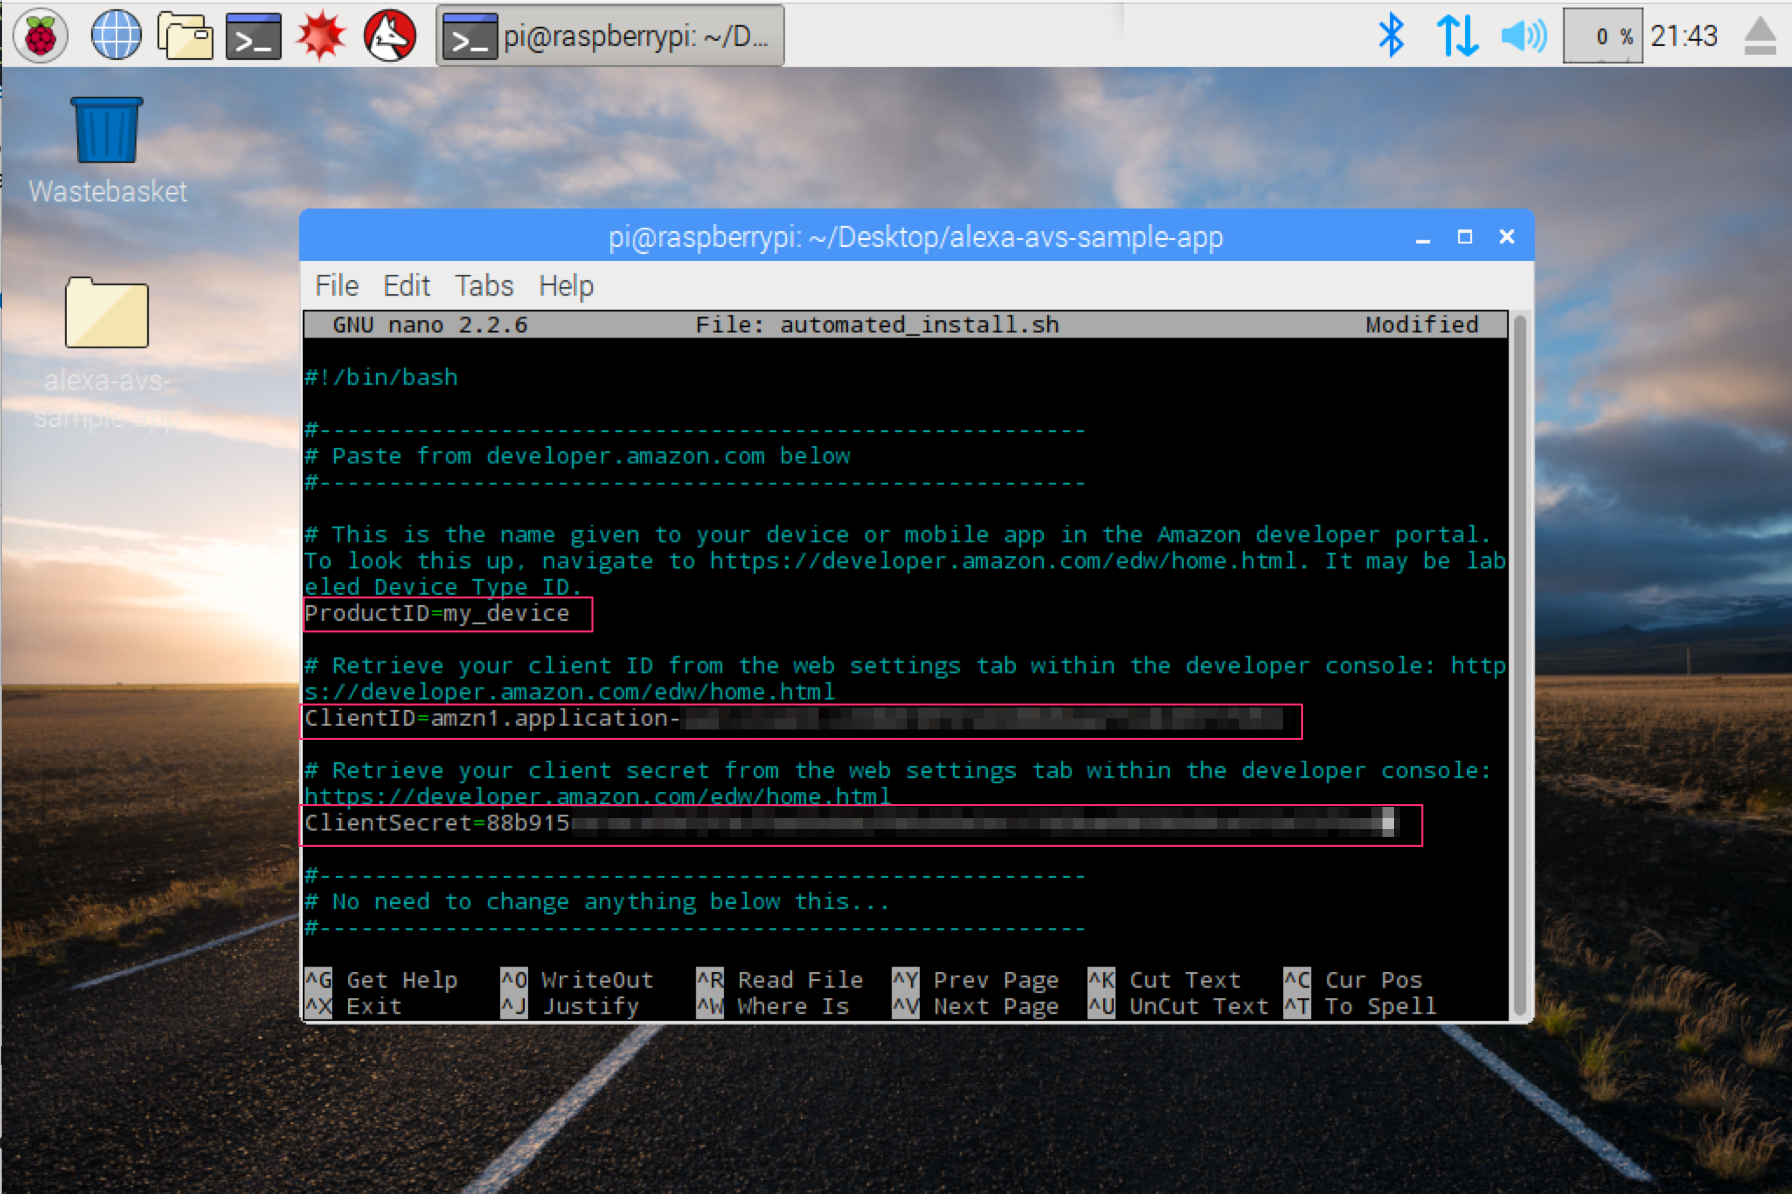
Paste the values for ProductID, ClientID, and ClientSecret that you got in Step 4.
The changes should look like this:
ProductID="RaspberryPi2"ClientID="amzn.xxxxx.xxxxxxxxx"ClientSecret="4e8cb14xxxxxxxxxxxxxxxxxxxxxxxxxxxxx6b4f9"
Type ctrl-X and then Y, and then press Enter to save the changes to the file.
Now you're ready to run the automated install script. It will install all required dependencies, and wake word engines from Sensory and KITT.AI.
Note: The install script will install all project files in the folder that it is executed.
To run the script, open terminal and navigate to the folder where the project was cloned. Then run the following command:
cd ~/alexa-avs-sample-app
chmod +x automated_install.sh
. automated_install.sh
You'll be prompted to answer a few simple questions. These help to ensure that you've completed all necessary prerequisites before continuing.

When the wizard starts, go grab another drink - it takes about 30 minutes.
Prior to completing the steps described in this section, the following tasks should be completed:
- Before installing the kernel, the microSD card should have completed the AVS setup.
The linux kernel with the necessary drivers for the Conexant AudioSmart™ 4-Mic Development Kit for Amazon AVS is located at rpi-linux . Refer to the README.md for instructions on building/installing the kernel.
After the installation of the kernel is complete, edit the /boot/config.txt file. On the RPi 2, send the following command to edit the file:
sudo pico /boot/config.txt
In the text editor, add the following options:
dtoverlay=rpi-cxsmartspk-usb
dtoverlay=i2s-mmap
dtparam=i2c_arm=on
program_usb_boot_mode=1
Note: To ensure audio playback is through the driver just built, the default audio device should be disabled. Make the following change to the /boot/config.txt file.
dtparam=audio=off
Note: After the /boot/config.txt file is changed, reboot the device.
Once the installation of the Linux driver is complete, you are ready to try out the Conexant AudioSmart™ 4-Mic Development Kit for Amazon AVS. On the home directory, run the startup.sh script to open all necessary windows at once.
./startup.sh
Alternatively, these windows can be opened manually. See the following for more information.
- Terminal Window 1: for LED functionality
- Terminal Window 2: to run the web service for authorization
- Terminal Window 3: to run the sample app to communicate with AVS
- Terminal Window 4: to run the wake word engine which allows you to start an interaction using the phrase "Alexa"
- Terminal Window 5: to run the recordingAgent, which sends audio content continuously to the sample app
Note: These commands should be run in this order.
Open a new terminal window and type the following command to run the LED server.
cd ~/alexa-avs-sample-app/samples/tLED && sudo python tLEDServer.py
Open a new terminal window and type the following command to bring up the web service which is used to authorize the sample app with Amazon AVS:
cd ~/alexa-avs-sample-app/samples/companionService && npm start


The server is now running on port 3000 and you are ready to start the client.
First, configure the .asoundrc file with the correct settings. Note: This step is necessary to ensure correct audio playback and recording
cd ~/alexa-avs-sample-app/samples
cp ~/leftarc ~/.asoundrc
Open a new terminal window and type the following commands to run the sample app, which communicates with Amazon AVS:
cd ~/alexa-avs-sample-app/samples/javaclient && mvn exec:exec

Let's walk through the next few steps relevant to Window 3.
-
A window should pop up with a message that says -
Please register your device by visiting the following URL in a web browser and following the instructions:
https://localhost:3000/provision/d340f629bd685deeff28a917. Would you like to open the URL automatically in your default browser?
Click on "Yes" to open the URL in your default browser. IMPORTANT NOTE: Don't respond to the second pop up until after you've logged in to your Amazon account.
-
If you're running Raspbian Jessie with Pixel desktop (and with Chromium browser), you may get a warning from the browser. You can get around it by clicking on Advanced -> Proceed to localhost(unsafe).


-
You'll be taken to a Login with Amazon web page. Enter your Amazon credentials.

-
You'll be taken to a Dev Authorization page, confirming that you’d like your device to access the Security Profile created earlier.

Click Okay.
-
You will now be redirected to a URL beginning with
https://localhost:3000/authresponsefollowed by a query string. The body of the web page will say device tokens ready.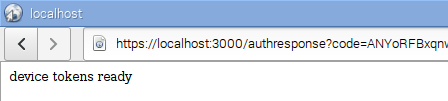
-
Return to the Java application and click the OK button. The sample app is now ready to accept Alexa requests.


Note: Skip this step to run the same app without a wake word engine.
This project supports two versions of Sensory's TrulyHandsFree wake word engine. The -e option is used to select the low-power embedded wake word engine running on the Conexant AudioSmart™ 4-Mic Development Kit for Amazon AVS or the high-performance wake word engine running on the Raspberry Pi 2.
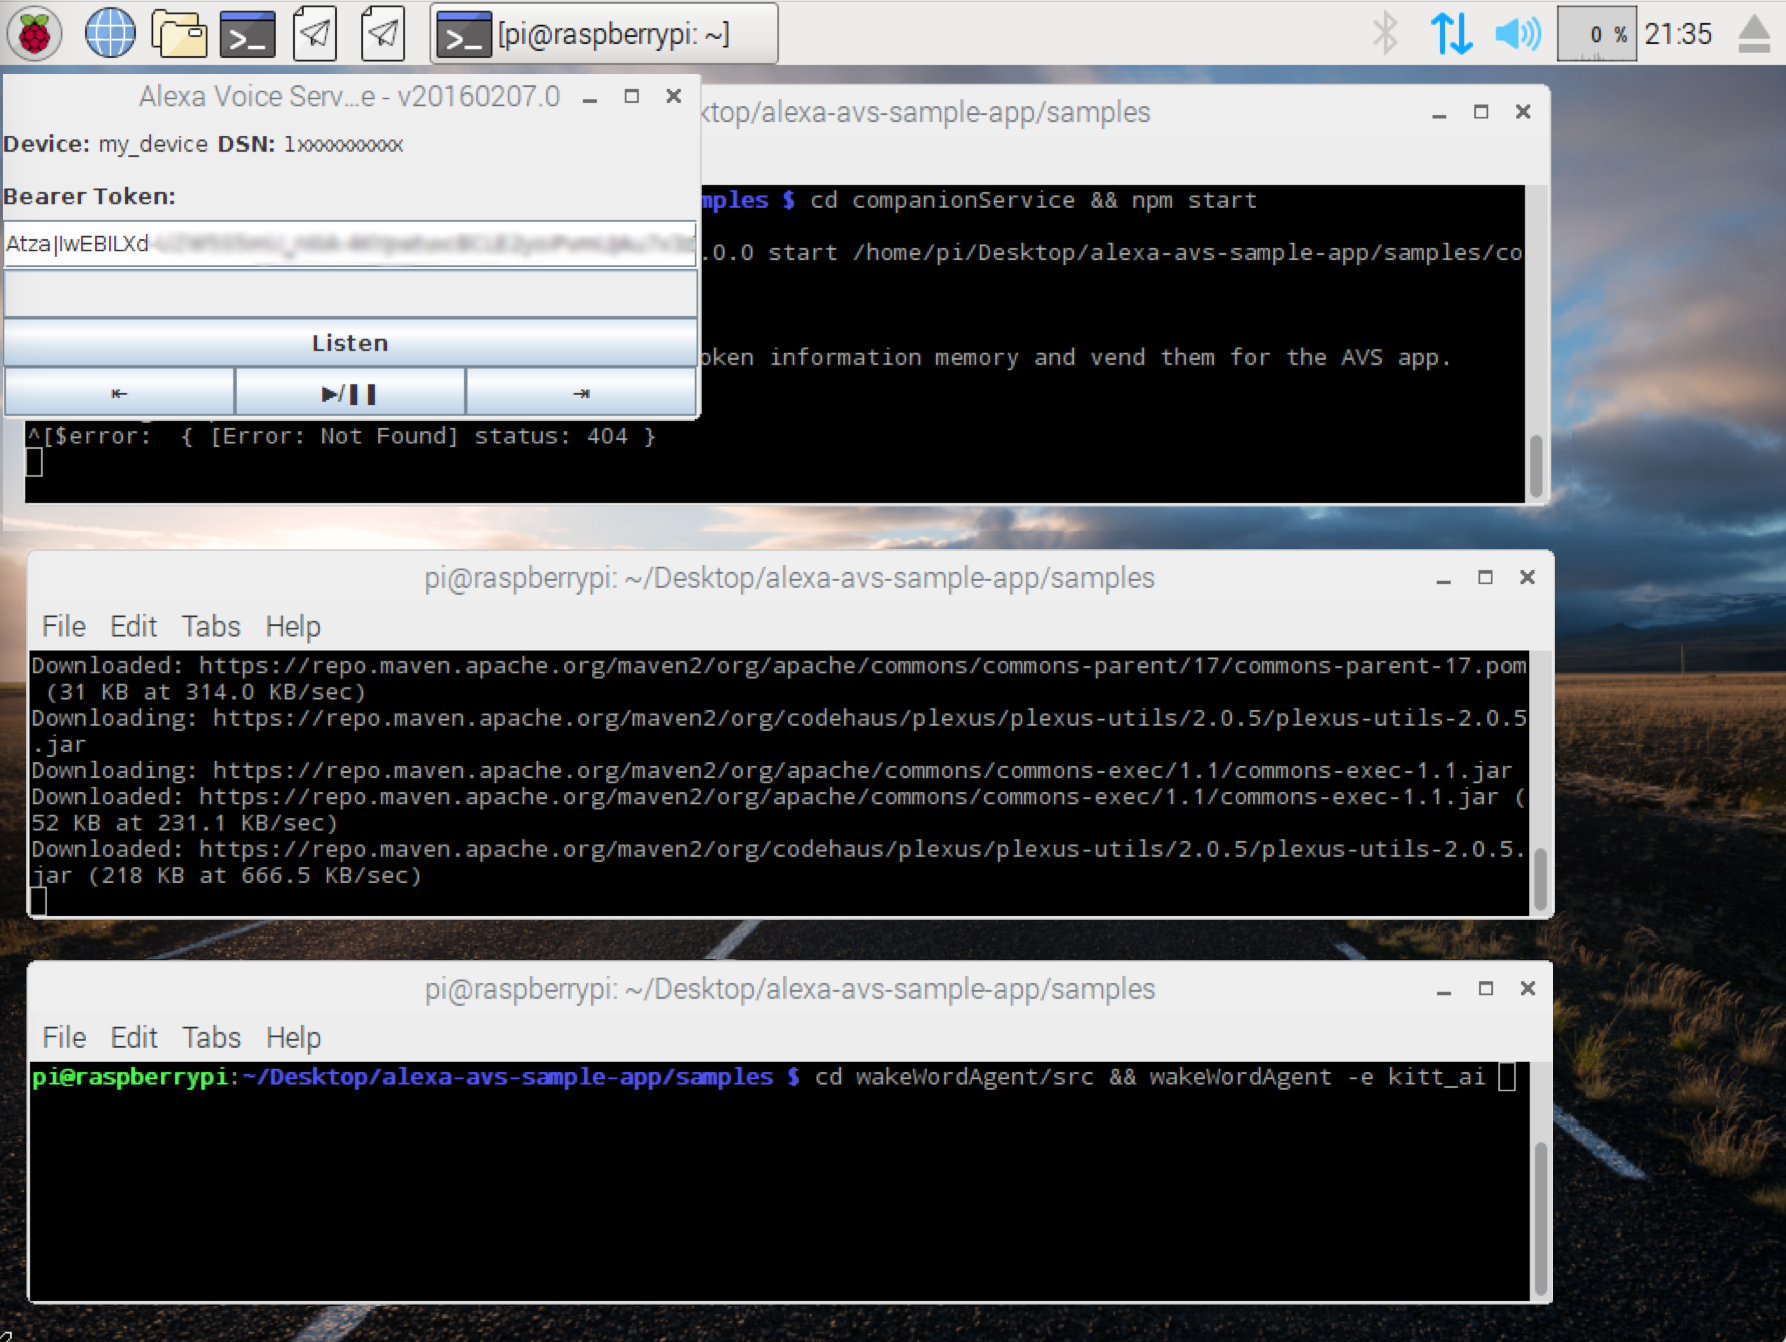
Open a new terminal window and use the following commands to bring up the wake word engine from Sensory. The wake word engine will allow you to initiate interactions using the phrase "Alexa".
To run the embedded low-power Sensory wake word engine (on the Conexant CX20924), type -
cd ~/alexa-avs-sample-app/samples/wakeWordAgent/src
sudo ./wakeWordAgent -e gpio
IMPORTANT NOTE: You must run the wake word agent as admin.
or, to run the high-performance Sensory wake word engine (on the Raspberry Pi 2), type -
cd ~/alexa-avs-sample-app/samples/wakeWordAgent/src && ./wakeWordAgent -e sensory
Open a new terminal window and type the following command to run the recordingAgent, which sends the processed microphone signals to the javaclient:
cd ~/alexa-avs-sample-app/samples/recordingAgent && ./run.sh
Now you have a working hands-free AVS prototype!
Use the following resources to learn more:
You can now talk to Alexa by simply using the wake word "Alexa". Try the following -
- Say "Alexa", then ask "What time is it?"
- Say "Alexa", then ask "What’s the weather in Las Vegas?"
- Say "Alexa", then say "Set a timer for 5 seconds."
- Say "Alexa", then say "Play Z100."
- Say "Alexa", then say "Good afternoon."
- Say "Alexa", then say "Tell me a joke?"
- Say "Alexa", then ask "What’s the meaning of life?"
- Say "Alexa", then say "Sing happy birthday."
- Say "Alexa", then ask "What day of the week does Christmas fall on?"
- Say "Alexa", then ask "Where were you born?"
- Say "Alexa", then ask "Can you rap?"
If you prefer, you can also click on the "Listen" button, instead of using the wake word. Click the "Listen" button and wait for the LED cue before beginning to speak. It may take a second or two before you see the LED cue.