
🖥🎤 Practical help for managing audio and screen sharing
⏬ Download now
🛎 One click for everything - seriously!
💡 Clear vision of the situation
🤚 Drag participants
🔍 Flexible search
✏️ Add your notes
... and more
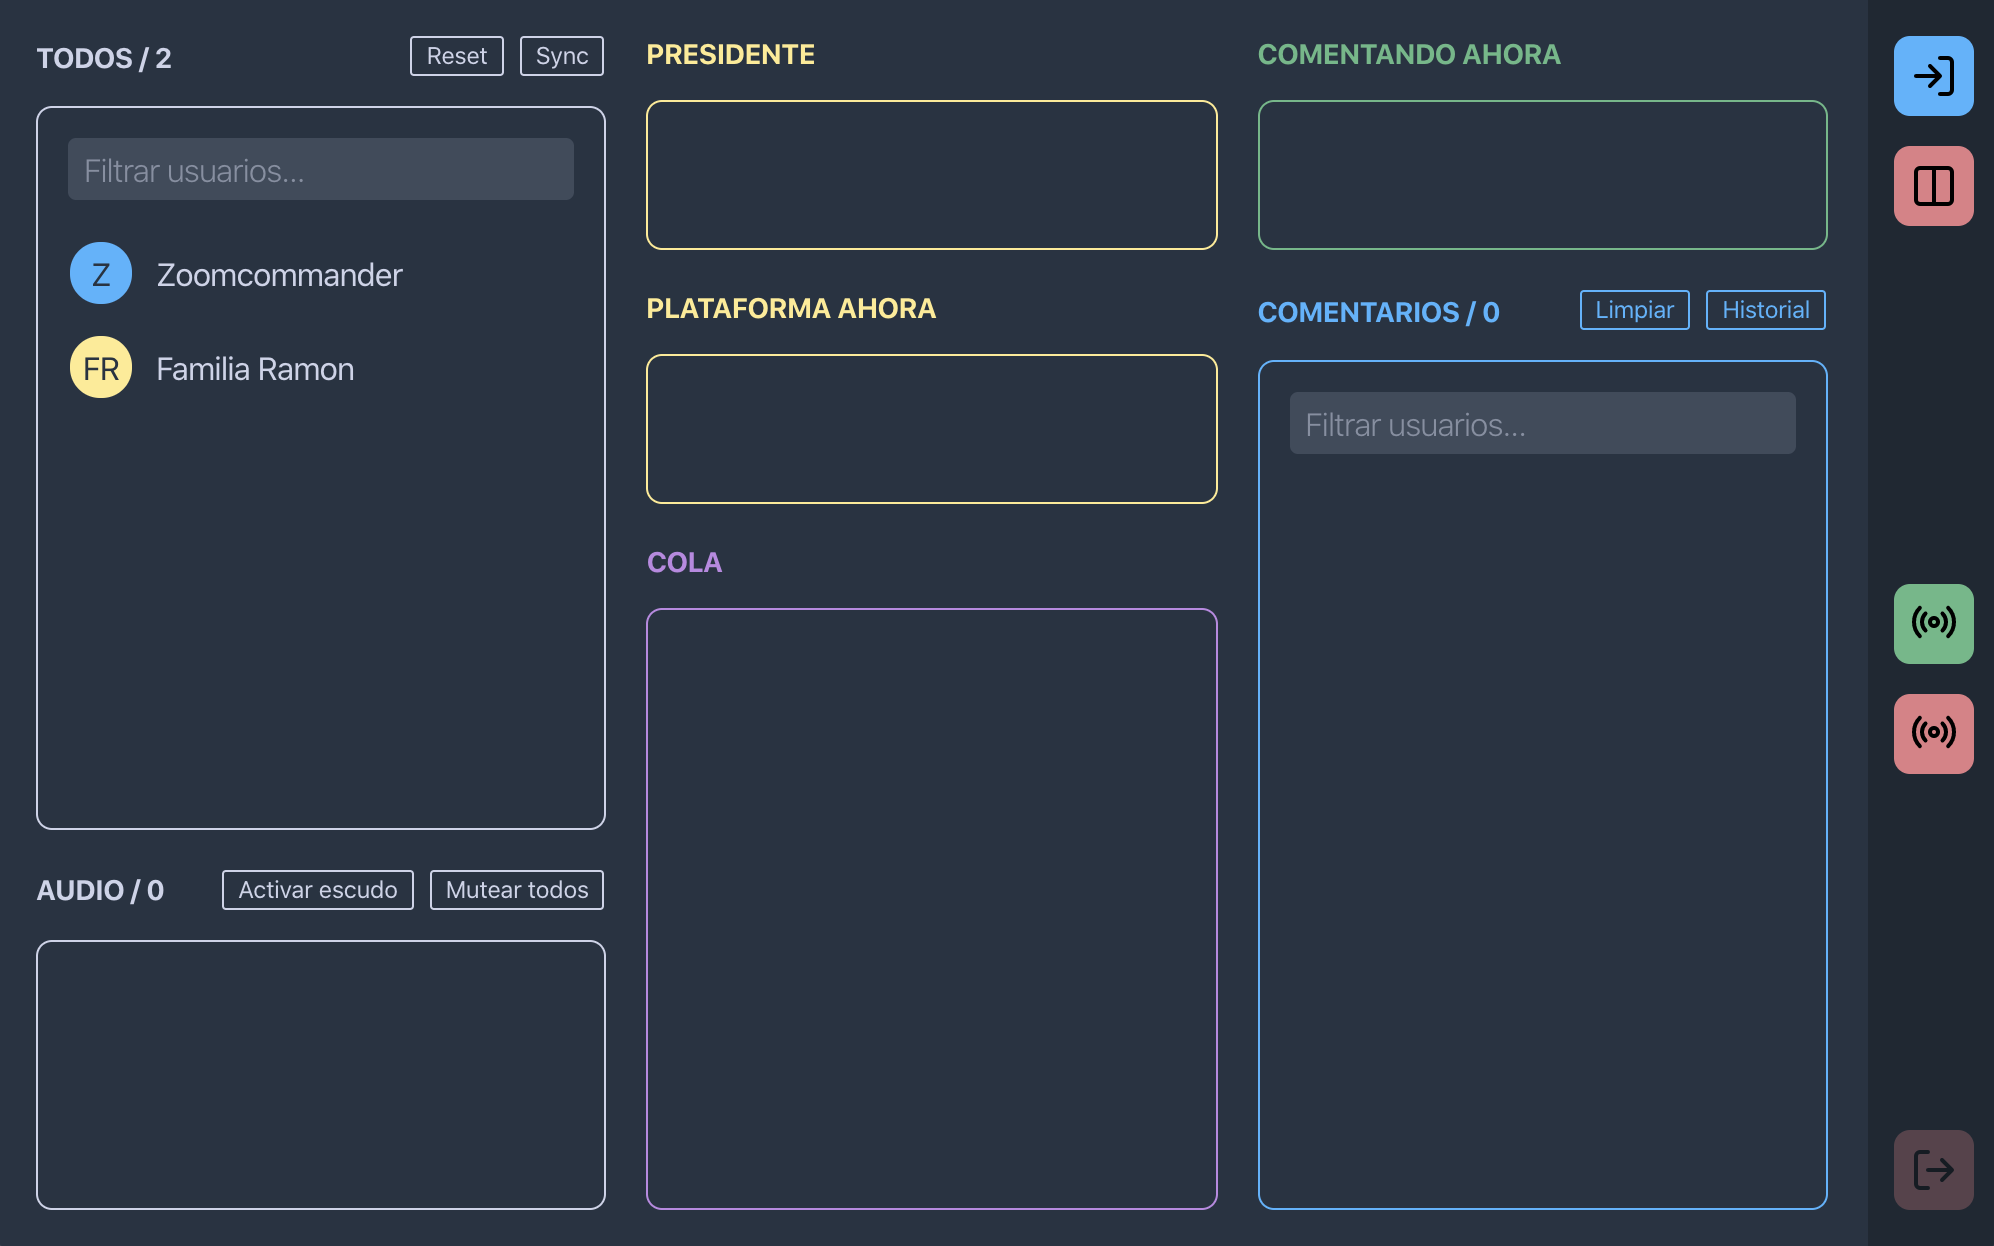
By using Zoom Commander you can join a Zoom meeting and have two different windows running at the same time:
- The original Zoom application.
- An additional control panel (previous image).
In this control panel, you will have functions that simplify the management of a very specific meeting model - in which there is a role of president, a platform where different conference-style participations take place and an audience that raises its hand to provide comments— where every audio transition is orchestrated by a manager (namely you) who mutes and un-mutes as needed, shares screen, etc.
Please, if the kind of meetings you have in Zoom does not look like this, do not use Zoom Commander, because it is not designed to offer another kind of solution.
It should be noted that the development kit on which it is based (Electron Zoom SDK) imposes a series of limitations that cannot be solved right now. This does not prevent Zoom Commander from being helpful, but you can find them at the end of the document.
Provides a list of all meeting participants, including you. It is the block closest to the standard Zoom participant list.
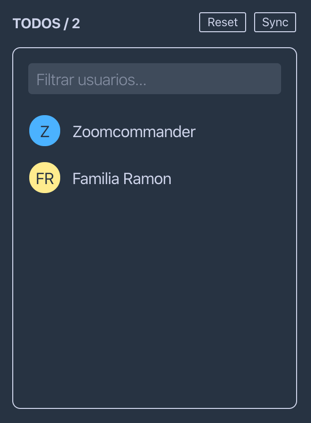
It works by similarity algorithm, so no capital letters or misspelled ones will prevent you from finding the user you are looking for.
🖱 Give comment (see block explanation Comments).

The icon that appears when hovering over with the mouse indicates the action that will be done on the user if we click.
The actions we can do will depend on the block where we are, but they will always be indicated by the icon that we will see. Almost all blocks allow alternative actions if we hold down any of these keys: Ctrl Shift <
In the Everyone block the actions are:
🖱 Give comment (see block explanation Comments)
Ctrl + 🖱 Give/remove audio (simple)
< + 🖱 Add to Queue
Participants can be dragged to other lists mentioned below, to have more vision and control of certain groups.
Some blocks have buttons in their upper right corner.
In this case, both serve to "refresh" user information, to different degrees. Most likely, you will never need to use them, but they are there in case inconsistencies occur between the user list of the original Zoom interface and the Zoom Commander interface (in known and very specific cases due to the aforementioned limitations of the Zoom SDK) .
Reset Asks Zoom again for the list of users and leaves the interface as if you had just entered the meeting. It is the most aggressive "reloading".
Sync Asks Zoom again for the information of the users that are already being shown, but keeps the interface with any changes you have made so far.
Here you can see who has the mic open real time. No more checking one by one making sure that no one who should not have audio has no audio.
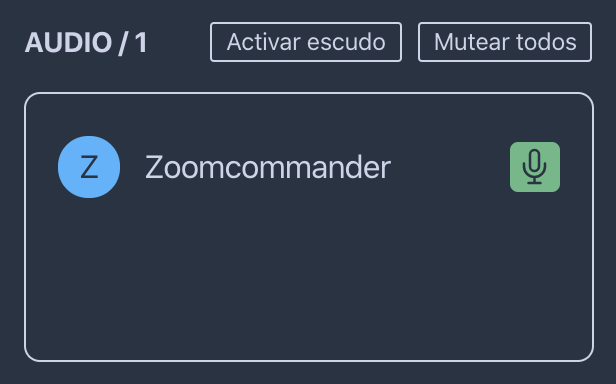
The audio is immediately removed, that is, it is muted, and therefore disappears from this list.
There are no additional actions.
Activate shield Warning: DO NOT ACTIVATE IT if you are not going to actively manage the President, Platform and Commenting blocks during the meeting, because with the shield activated ONLY the participants who are in those blocks will be able to receive audio, no one else. This button activates an "anti-spontaneous" shield that automatically and immediately silences any user who receives audio illegitimately (a clueless host, someone who accepts the audio later, etc), so he/she won't have time to interrupt. This works thanks to the fact that the users considered legitimate are those who are in President*, Platform or Commenting, the rest are illegitimate. As long as the shield is active, the button will be green. Click again to deactivate it.
Mute all silences all users, and also enables the relevant options so that no one has permission to unmute (current participants or those who join later). It makes sense to use it at the beginning of the meeting, although for that there is another button in the sidebar that does this and a few other things.
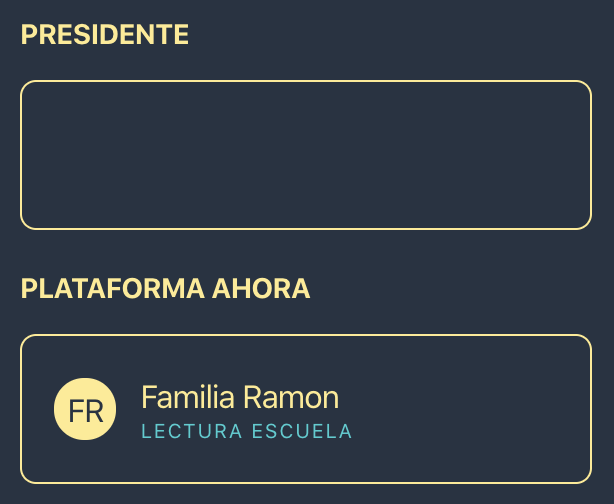
Here you can drag any participant who has a part of the meeting, so that you can have it prepared for later. Also, you should know that by right clicking on someone you can add notes like the one you can see in the image.
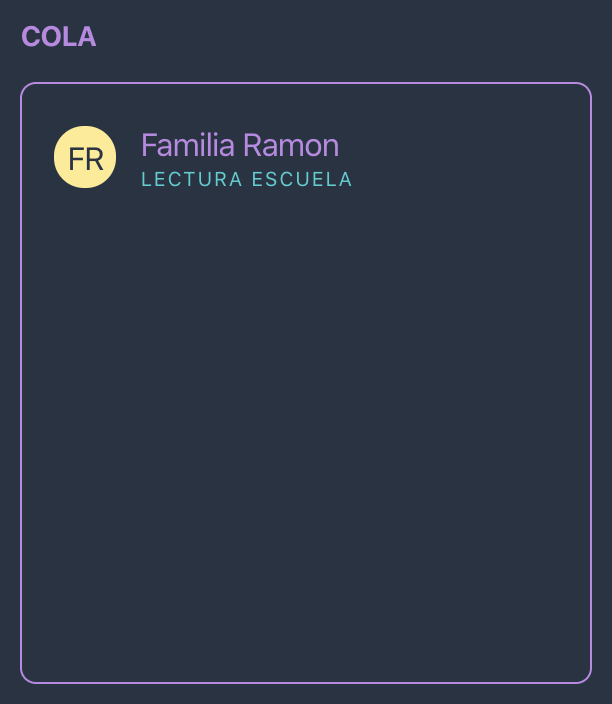
🖱 Move to Platform, he/she will also receive audio while it is removed for the rest.
Ctrl + 🖱 Give/remove audio (simple)
Shift + 🖱 Remove from the Queue
< + 🖱 Move to Platform, but without giving or removing audio to anyone.
Dragging a user back to Everyone will remove it from Queue. Furthermore, you can also sort the Queue users by dragging them together.
The interesting thing about these blocks, unified by the yellow color, is that clicking on a user will give them audio and the others will be automatically silenced. This is convenient to, for example, give way to the President with a single click, without having to worry about manually silencing whoever had the previous part. It's just as convenient to switch audio between different Platform participants, regardless of the number.
🖱 Give audio and remove from the rest
Ctrl + 🖱 Give/remove audio (simple)
Shift + 🖱 Remove from the block
We can move them freely.
All participants who raise their hands will appear in the Comments block (the one below). The upper block in green shows the participant who has been selected to comment, so that it is visible and thus can be removed from there when finished.
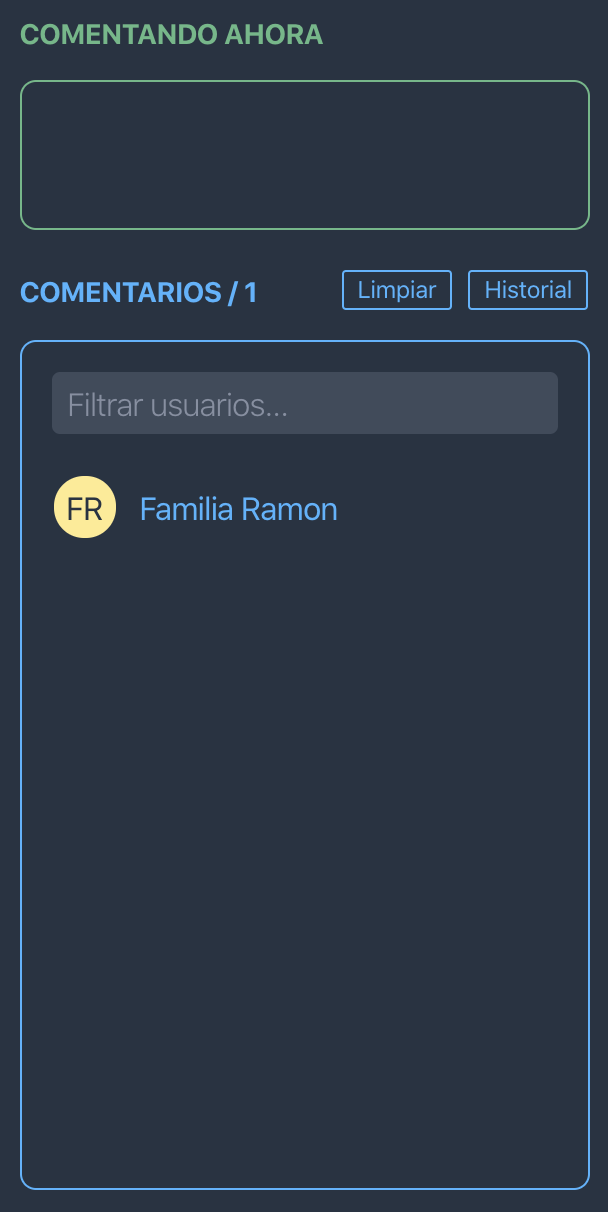
🖱 Give comment. Several things will happen: the user will be given audio and it will be shown in the green area. Hands will be lowered automatically only when his/her audio is activated. This means that if his/her audio never gets activated, we can remove it from there by clicking it while the rest continue with their hand raised and we can select another participant.
Ctrl + 🖱 Give/remove audio (simple)
Clean up Lowers all hands.
History Change the view of the block to the history of raised hands. This can help if we have mistakenly lowered hands and need to give comment to someone who was raising it up.
![]()
By clicking this button, the following chain of actions will happen in just 1 or 2 seconds automatically:
- The anti-spontaneous shield is activated.
- All participants are muted.
- The relevant options are configured so that no one has permission to unmute (current participants or those who join later).
- Screen sharing is stopped (if it is being carried out).
- Audio is given to the President.
![]()
Keyboard shortcut Alt + Shift + A
Important: to be able to share videos WITH AUDIO, you must share screen from Zoom's original interface AT LEAST ONCE PER MEETING by checking the "share computer sound" box. You can do this before the meeting starts, this way you will be able to use this button during the meeting (or keyboard shortcut) to share both images and videos, and Zoom will remember to share the sound every time.
This button immediately shares a window previously configured. This is useful since generally the same program is always shared and it does not make sense to go through the options that the original Zoom interface forces you to go through.
It comes preconfigured to share the Media Portal Portal, but if you don't use Media Portal, you can change the target window by right clicking on the button. The settings you apply will be saved and kept in future Zoom Commander sessions. For example, to use JW Library you can enter ApplicationFrameHost.exe/JW Library in the configuration.
![]()
Keyboard shortcut Alt + Shift + 0
Stops screen sharing. It does nothing different than the original Zoom button, except for the fact that it has a new keyboard shortcut (which expressly matches one of Media Portal, to stop showing the image or video on the portal).
The Electron Zoom SDK development kit is missing a number of functionalities that impose limitations on Zoom Commander:
If you silence everyone using Zoom Commander there is no problem, but if another host launches "silence everyone" you will not see it reflected in the state of the participants within Zoom Commander (many will continue to appear as if they have audio even if they do not). If that happens, just click the Sync button in the Everyone block to refresh the status of the participants. In general, this limitation will not be a problem because no one other than the person using the Zoom Commander should launch a "silence everyone".
In a similar way to the above, if you lower all the hands using Zoom Commander there is no problem (Clean up button), but if another host "lowers all hands" you will not see it reflected in the Comments column by Zoom Commander. In general, this limitation will not be a problem either because no one other than the person using the Zoom Commander should "lower all hands".
Electron Zoom SDK has no means of knowing if we move between additional meeting rooms. To correctly see the list of participants once we join an additional room, we will have to use the Reset button.