2) Eclipse Setup
This wiki page is migrating to jda.wiki/setup/eclipse
To start developing with Eclipse, follow one of the guides below:
- Gradle Setup (recommended)
- Maven Setup
- Jar Setup
- If you have Eclipse IDE for Java Developers installed, skip to 2., otherwise you need to install the Buildship Gradle Integration plugin first:
- Open up Eclipse and go to the Marketplace (located under the Help tab)
- Search for "gradle" and install Buildship Gradle Integration (Plugin-Page)
- After the plugin is installed, relaunch Eclipse
- Right click within Package/Project Explorer and select New > Other...
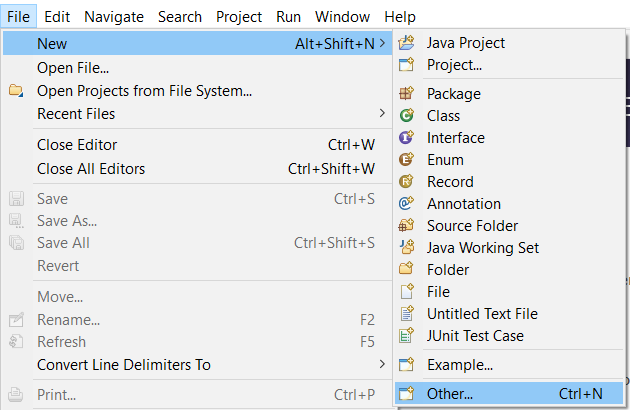
- In the Gradle folder, select Gradle Project
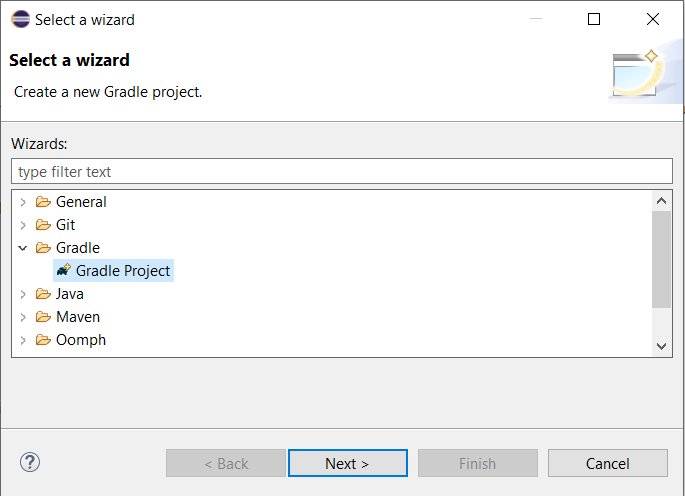
- Type a name for your Project and click on Finish. Your setup should look like this at this point:
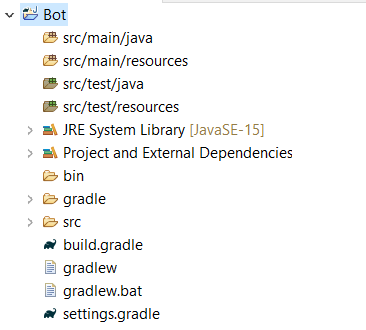
- Delete the classes within
src/main/javaandsrc/test/java

- Open up and edit the file
build.gradle

- Replace its content with the following code:
plugins {
  id("java")
  id("application")
  id("com.github.johnrengelman.shadow") version "6.0.0"
}

mainClassName = "com.example.jda.Bot"

version '1.0'

sourceCompatibility = 1.8

repositories {
  mavenCentral()
  maven { // on kotlin dsl use `maven("https://m2.dv8tion.net/releases")` instead
      url "https://m2.dv8tion.net/releases"
  }
}

dependencies {
  implementation("net.dv8tion:JDA:#.#.#_###")
}

compileJava.options.encoding = "UTF-8"- Adjust the version of JDA you want to use (see dependencies-section of file) and fill in your Main-Class as soon as you have one (the one containing your
public static void main(String[] args)method) - Save the file and do the following: Right click your project > Gradle > Refresh All

- Once all the dependencies have been downloaded, create your desired packages/classes in
src/main/javaand start coding! - To build your project you can run
gradlew shadowJarin a terminal of your project root, and it will produce a jar filled with your compiled code and JDA included in a single jar file! The jar can be found inbuild/libs - Setup Logback
Prerequisites: Maven-Plugin and local Maven installation
- Create a new Maven project. (File -> New -> Other -> Maven -> Maven Project)
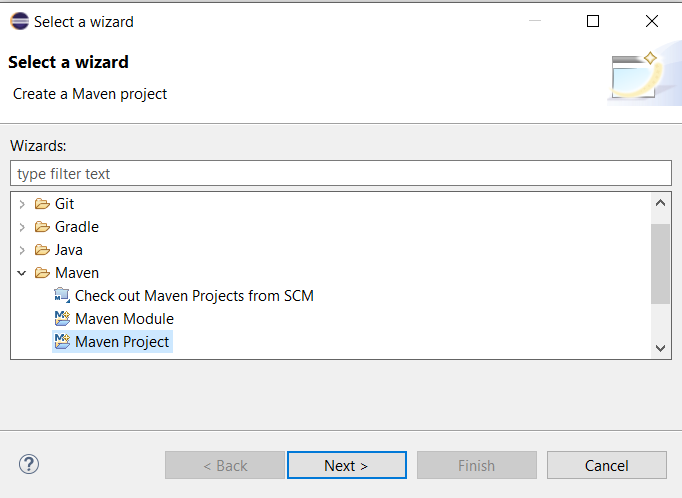
- Check the
Create a simple projectbox on the next page as we don't need to worry about archetypes.

- Add a groupId, artifactId and a name. Make sure you try to follow the naming conventions while you are at this step. The result could look like the image below.

- Now let's start configuring it, first off, open up your pom.xml and add the following lines right after
</description>
<properties>
  <project.build.sourceEncoding>UTF-8</project.build.sourceEncoding>
  <project.reporting.outputEncoding>UTF-8</project.reporting.outputEncoding>
</properties>- This will make your project support UTF-8 characters (So you can have it on Japanese servers for example) and also force Java 8, which is needed.
- Now let's add JDA's repository, so we can fetch the jar (Place this after
</properties>)
<repositories>
  <repository>
      <id>dv8tion</id>
      <name>m2-dv8tion</name>
      <url>https://m2.dv8tion.net/releases</url>
  </repository>
</repositories>- Now, add the dependency, make sure you change
X.X.X_XXXto the latest version number (Check out at https://ci.dv8tion.net/job/JDA/)
<dependencies>
  <dependency>
    <groupId>net.dv8tion</groupId>
    <artifactId>JDA</artifactId>
    <version>X.X.X_XXX</version>
  </dependency>
</dependencies>- Now you need to set up the (build) maven-shade and maven-compile plugins, add the following lines right after
</dependencies>
- NOTE: The following changes will force the compiler to use Java 8 (JDA needs it), so make sure you have it installed.
<build>
  <plugins>
      <plugin>
          <artifactId>maven-compiler-plugin</artifactId>
          <version>3.8.1</version>
          <configuration>
              <source>1.8</source>
              <target>1.8</target>
          </configuration>
      </plugin>
      <plugin>
          <artifactId>maven-shade-plugin</artifactId>
          <version>3.2.4</version>
          <configuration>
              <transformers>
                  <transformer implementation="org.apache.maven.plugins.shade.resource.ManifestResourceTransformer">
                      <mainClass>YourMainClass</mainClass> <!-- You have to replace this with a path to your main class like me.myname.mybotproject.Main -->
                  </transformer>
              </transformers>
              <createDependencyReducedPom>false</createDependencyReducedPom>
          </configuration>
          <executions>
              <execution>
                  <phase>package</phase>
                  <goals>
                      <goal>shade</goal>
                  </goals>
              </execution>
          </executions>
      </plugin>
  </plugins>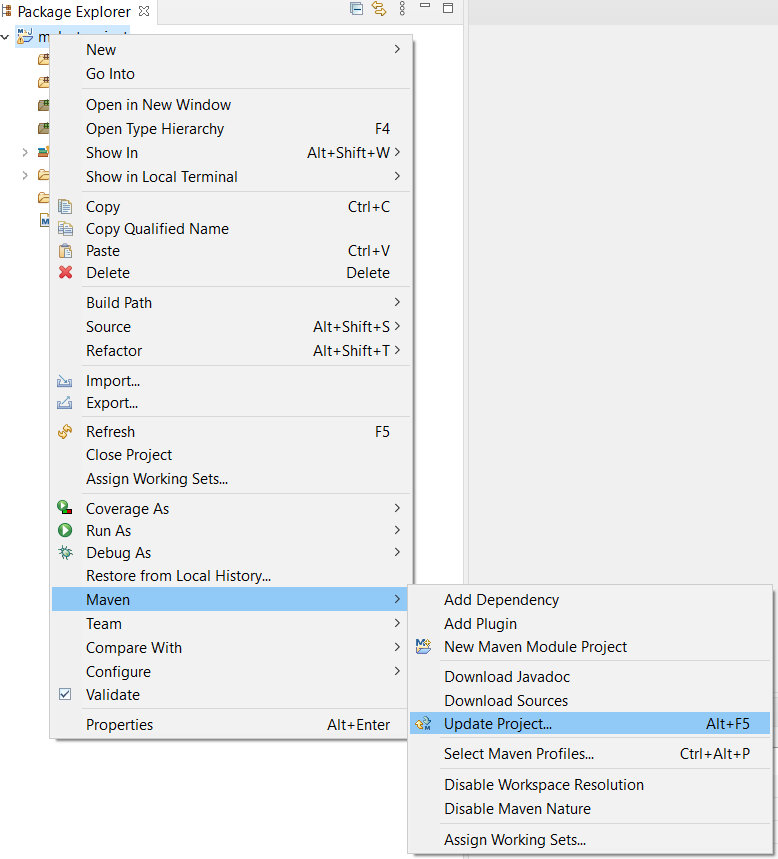
</build>- After that, the project must be updated to download the dependencies *Right click > Maven > Update Project
- You are done! Now you can head to the Javadocs or see examples at the Examples page.
- Setup Logback
- Download the latest (Binary) version of JDA (with Dependencies):
- (Recommended) https://github.com/DV8FromTheWorld/JDA/releases/
- (Latest/Dev) https://ci.dv8tion.net/job/JDA/
- Create a new Java Project

- Fill out the bot name, and set it to Java 8 (or above if available). This option might be set automatically when the
Use default locationbox is checked.

- Right click the project, go to Properties
- Click on Java Build Path, then click on Libraries, then on Classpath, Add External JARs...
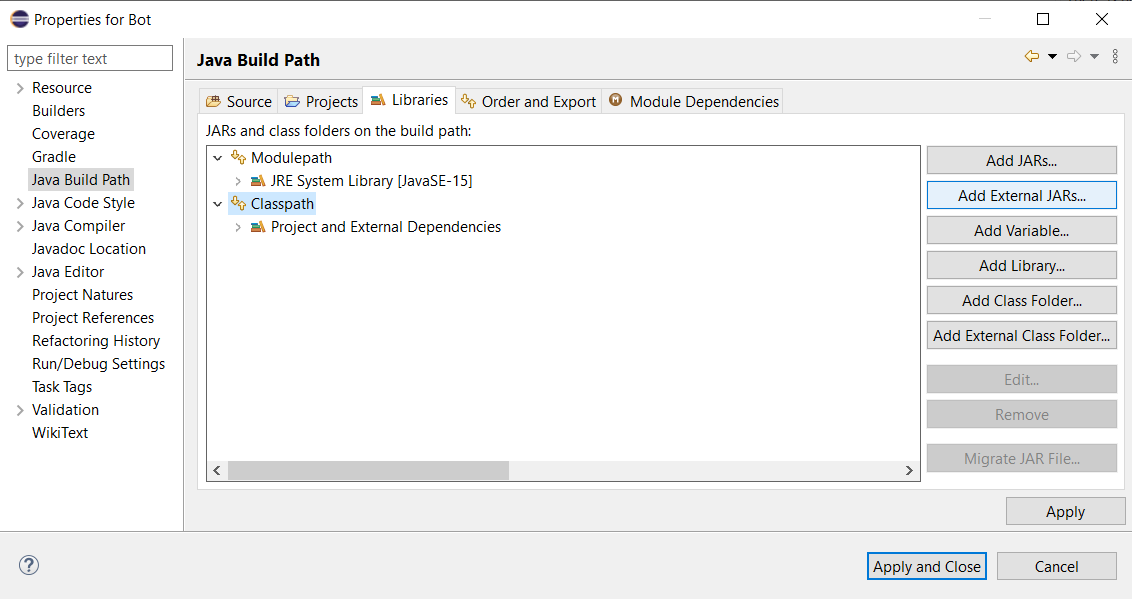
- Add your downloaded JDA-withDependencies-x.x.x_xxx.jar and expand its properties
- If you don't want Javadoc and source annotations, skip to 11 (not recommended).
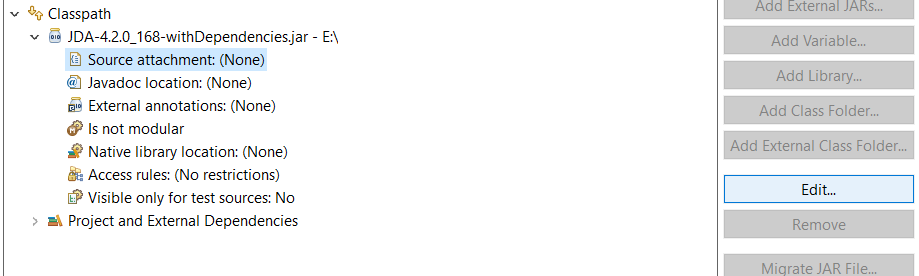
- Click on Source Attachment, then on Edit..., then mark External Locations and click on External File
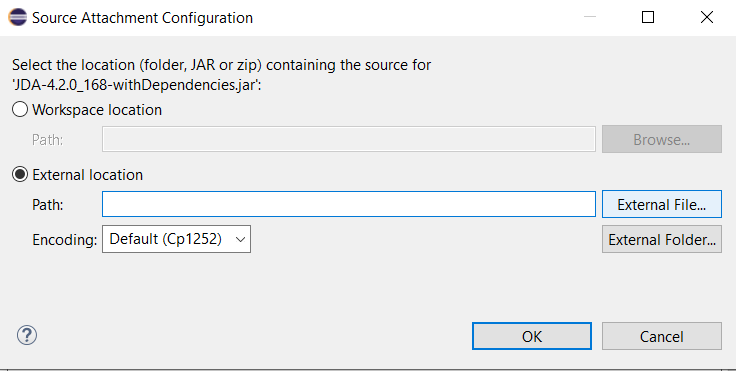
- Here, add your JDA-x.x.x_xxx-sources.jar and click on OK
- Next, click on Javadoc Location, then on Edit..., then mark Javadoc in archive and click on Browse
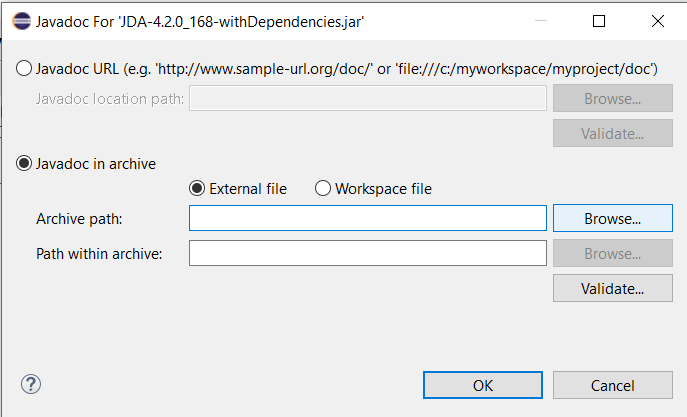
- Here, add your JDA-x.x.x_xxx-javadoc.jar and click on OK
- Setup Logback
You Are Done! You can start by taking a look at the examples Here or Reading the docs Here.