Getting Started
CloudCrowd is intended to make distributed processing easy for Ruby programmers. Some jobs that would be appropriate for CloudCrowd are:
- Generating or resizing images.
- Running text extraction or OCR on PDFs.
- Encoding video.
- Migrating a large file set or database.
- Web scraping.
These instructions will walk you through installing and configuring CloudCrowd, creating the central database, launching the central server and a worker node, running your first job, and watching and graphing the progress of all the above in an Operations Center. The first step is to install the Ruby Gem:
sudo gem install cloud-crowd
All of the CloudCrowd commands can be used through the crowd executable, which is installed alongside the gem. Try typing crowd --help to get a brief overview of the available options. For every machine that you’d like to make part of a CloudCrowd cluster, you’ll need to install a CloudCrowd configuration folder, which includes YAML configuration files and all of your custom actions. To get started, use crowd to unpack an example configuration folder:
crowd install path/to/config
Move into the configuration folder, and you’ll find config.yml, config.ru, database.yml, and the actions folder. More information about all of these can be found in The Configuration Folder as well as by reading the files. At this point, you’ll want to edit config.yml and database.yml to add your AWS credentials, turn authentication on or off, and set up the backing database. CloudCrowd uses ActiveRecord on the central server, so any ActiveRecord compatible database will do nicely. Once your database has been created on your central server (which in this case is your laptop, if you’re just giving it a spin) and configured in database.yml, you can load in the schema:
crowd load_schema
With the database ready, let’s start a single instance of the central server. In production, you can use the config.ru rackup file to launch the desired number of server instances, and hide them behind a load balancer as you would any other Rack application. But for now we’ll just use crowd to launch one.
crowd server
Visit the URL that you configured for the central server (localhost:9173 by default), and you should see the Operations Center showing an empty queue with no active jobs, and no nodes online. As you launch nodes and start jobs, they’ll show up on this screen. Here’s what the Operations Center looks like in the middle of running a series of quick jobs:
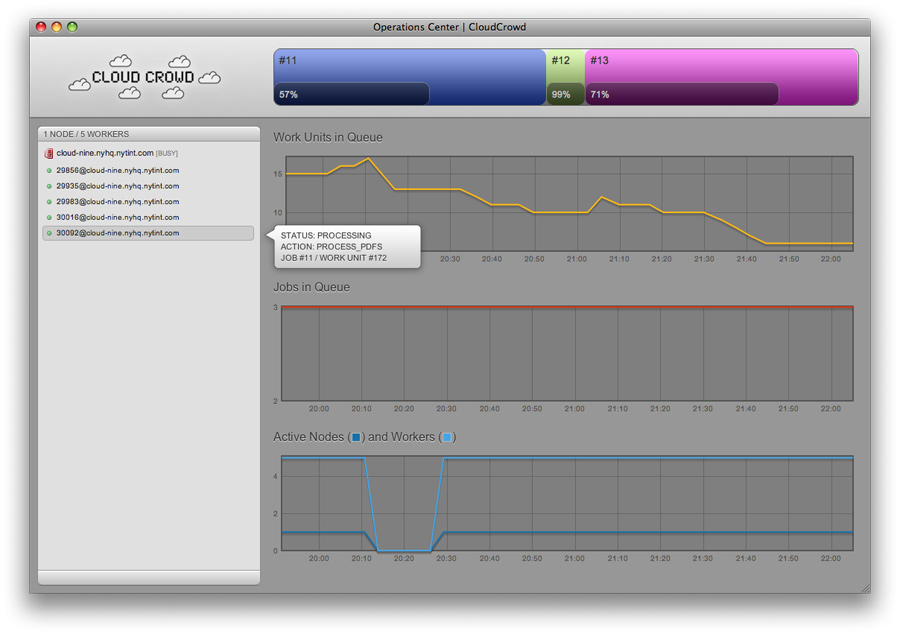
Let’s start a node locally. You only need to run a single node per physical machine — it will add and remove workers as load demands. You can configure the maximum number of workers that a node is allowed to run concurrently with max_workers in config.yml. The node in the picture above had max_workers set to 5.
crowd node
You should see the node come online in the Operations Center. It’s identified by the hostname of the server its running on, should you have the need to go investigate. When you launch a job and workers come online, they’ll be identified by their process id and hostname. You can click on a worker to see the work unit that it’s currently processing, and the stage of computation (splitting, processing, or merging) that it’s performing. Let’s try an example job that uses the built-in word_count action, which simply shells out to the UNIX wc utility. Here’s a link to a job that uses word_count to count all of the words in the most famous Shakespeare plays, in parallel. You can run the example as a vanilla Ruby script, but let’s load it inside of a CloudCrowd console, to keep an eye on things.
crowd console

irb(main)> load '~/Downloads/count_shakespeare.rb'
=> []

# At this point, looking at the Operations Center, you'll see the number of
# work units in the queue spike. The central server will immediately dispatch
# them to the node, causing workers to come online on the screen. You can
# twiddle the 'max_workers' setting and restart the node to see how it affects
# the speed with which the job is completed.

irb(main)> CloudCrowd::Job.last.display_status
=> "succeeded"

irb(main)> CloudCrowd::Job.last.time_taken
=> 5.7215

irb(main)> JSON.parse CloudCrowd::Job.last.outputs
=> [558804]
And that’s the merged result for the total word count.