I consider Fibaro HC2's web interface and smartphone application unusable. Instead of whining there and there, I decided to create my own application relying on their API.

- This project is still WIP and improvable.
- I did not specifically create this application to be flexible, configurable, etc. It fits my needs and use-case.
- I am definitely not a node.js, jquery, html, css, whatever developer. Lots of things are probably ugly and against best practices.
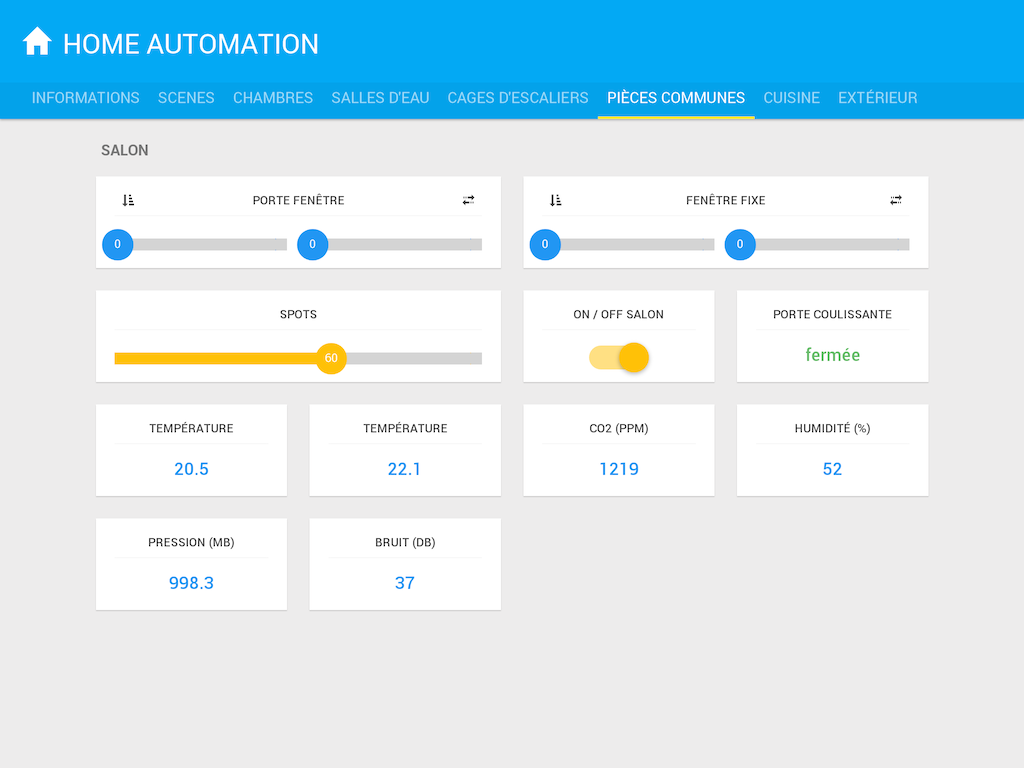
I wanted to hang a tablet on a wall in my house to display some information, have a view and control Fibaro HC2 attached devices.
It had to have a custom interface with big text, buttons, slider, etc. to be easily touched and if possible be good looking (not really my area of expertise).
My first quest was to find a cheap x86 tablet onto which I could install a Linux distro (Debian in my case): the winner is a Onda v975w.
Got it for abt. 150$ shipping fees included and it's a really impressive device for the price!
It's running Debian testing with a custom 4.3.0 kernel. Thanks to lwfinger and hadess the tablet has WiFi, otherwise it would be useless.
Now, for what regards files in this repository:
- /Dockerfile: used to generate a docker container based on debian jessie with node.js to run the backend/server part (virtual size abt. 255Mb)
- /Dockerfile.nodemon: same as above but using nodemon to restart the app every time a change happens in /src/backend/ (coding purposes)
- /src/package.json: to feed npm install during container generation
- /src/backend/: node.js application serving frontend to clients, handling incoming websocket connections and exchanges with Fibaro HC2
- /src/frontend/: the frontend part (html/css/js/fonts) served by the node.js application to clients
The backend part (server.js) needs a little bit of configuration:
credentials: HC2 username:password
host: HC2 IP address/hostname
port: HC2 port (most likely 80)
myself: IP:2080 (IP to reach docker container from HC2 scene pushing devices status changes)
sceneName: 'NODE-tification' (scene that pushes devices status changes to HTTP server)
polling: 3600 (seconds between updates)
polling_fail: 60 (seconds before next update when previous attempt failed)
Just above this part, in the file, you may want to:
- Enable/disable debug mode. It only makes the application verbose. Check logs for output.
- Change the timezone. I couldn't get dates to be displayed correctly until I specifically mentioned the timezone I was in.
When the docker container is generated from the Dockerfile, the src directory is copied at its root level and it exposes ports 2080 and 8888. The former is listening for HTTP connections to serve the frontend part while the latter is waiting for incoming websocket connections (this is the way the frontend interacts with the backend almost instantly). The container runs the node.js application /src/backend/server.js.
Of course if Dockerfile.nodemon is being used /src directory has to be shared between host and container otherwise changes won't trigger a reload of the node app.
HC2 state feedback: Upon its start, node.js creates/updates a given scene on the HC2. This scene is being triggered by any device change (value / value2) so that our app is notified when something happens on the HC2: it makes a simple GET towards port 2080 and the info is then relayed to homeautomation.js for handling.
Finally there's a very basic protocol between server and clients to do what is expected, see below.
Format: { action: "<action>", info: "<info>" }
####server -> client actions:
- schema (info = elements to build interface)
- displayNotification (info = message/notification to be displayed)
- deviceChanged (info.id = , info.value|value2 = )
- dump (info = json/message to be dumped as-is)
- reload (info = optional, delay before reloading page)
- error (info = error message to display)
####client -> server actions:
- turnOn (info = id of element to which turnOn action should be sent)
- turnOff (info = id of element to which turnOff action should be sent)
- setValue (info.id = id of element to which new value should be sent, info.value = )
- setValue2 (info.id = id of element to which new value2 should be sent, info.value = )
I haven't committed these as they can be fetched directly. As-is the project will also be missing the CSS and fonts.
- https://jquery.org
- https://getbootstrap.com
- https://github.com/mouse0270/bootstrap-growl
- https://github.com/leongersen/noUiSlider
- https://zavoloklom.github.io/material-design-iconic-font/
- http://www.chartjs.org/
Their info helped me start the project:
- http://weblogs.asp.net/dwahlin/building-an-html5-web-sockets-server-with-node-js
- http://ahoj.io/nodejs-and-websocket-simple-chat-tutorial