Raspberry Pi
We support the following platforms:
In order to emulate the Raspberry Pi on QEMU you need a patched version of the emulator that supports the RPi machine. This patched version has been developed by Torlus and can be downloaded and installed with the following commands:
    git clone -b rpi https://github.com/embox/qemu.git
    cd qemu
    git submodule update --init pixman
    ./configure --target-list=arm-softmmu --disable-werror
    make
Of course, you are free to use configure options to install QEMU wherever you want in your filesystem.
PS you can use git submodule update --init dtc for some reason
More information on the patched version of QEMU for emulating RPi can be found at the following links:
- QEMU patches for RPi emulation - Initial release
- QEMU branches - rpi (Raspberry Pi) - firebee
- Raspberry Pi Bare Bones - Testing your operating system (QEMU)
There is a special configuration template for Raspberry Pi. So first of all, preload it with:
make confload-platform/raspberry_pi/rpi1-qemu
After that build the kernel using the following command:
make
Once you have built the kernel you are ready to run it on QEMU. Just type on the command line:
<qemu-built-dir>/arm-softmmu/qemu-system-arm -kernel build/base/bin/embox -M raspi -m 256 -no-reboot -serial stdio
-
We will use a micro SD card to boot, so let's get the bootloader first.
- Download Raspbian Lite here https://downloads.raspberrypi.org/raspbian_lite_latest. It is useful because you then can choose what to boot - Linux or Embox.
- Install to SD card -
dd bs=4M if=2020-02-13-raspbian-buster-lite.img of=/dev/sdX conv=fsync. More information about how to write the image to your SD card is available here.
-
Compile Embox.
make confload-platform/raspberry_pi/rpi1-model-bAnd build the kernel using the following command:
make -
To boot Embox just copy the binary to SD card:
- Mount SD boot partition -
sudo mount /dev/sdX1 /mnt(so if your SD card is/dev/sdbthen it should besudo mount /dev/sdb1 /mnt) - Copy Embox kernel
sudo cp build/base/bin/embox.bin /mnt/kernel.img - Umount SD card
sudo umount /mnt
Or like a script:
#!/bin/sh set -xe RPI_BOOT=/dev/sdb1 sudo mount $RPI_BOOT /mnt sudo cp build/base/bin/embox.bin /mnt/kernel.img sudo umount /mnt - Mount SD boot partition -
-
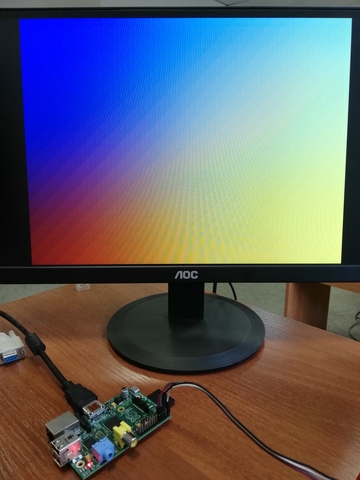
Now you can insert SD card to your board and power on. Embox will be loaded and
fb_direct_accesscommand will paint the rectangle on the screen.
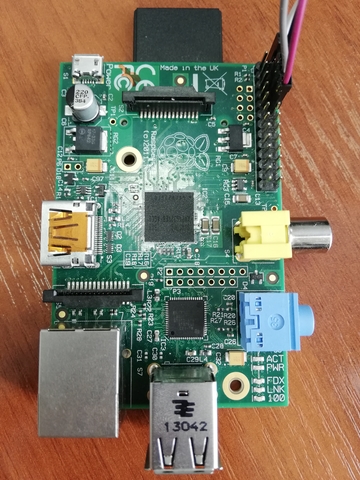
To see Embox output on the serial port you have to connect UART-to-USB adapter to the board first. We use RDC1-USB-UART adapter.
You can find pinout here - https://elinux.org/RPi_Low-level_peripherals#P1_Header. Let's power the adapter from usb, and power RaPi from the adapter then. Connect the adapter pins:
RDC1      Rapi

GND <---> GND
5V  <---> 5V
RX  <---> TXD0/GPIO14
TX  <---> RXD0/GPIO15
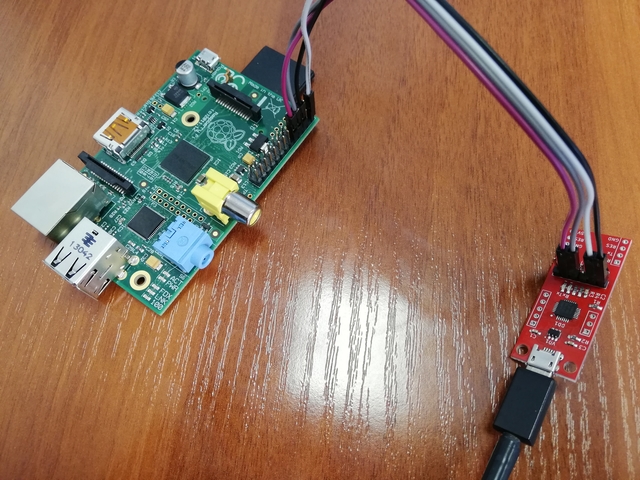
Now you can plug your USB cable into RDC1 adapter and then plug in into your PC.
Connect using minicom:
sudo minicom -d /dev/ttyUSB0
You will see Embox output:
Embox kernel start
        unit: initializing embox.kernel.task.task_resource: done
        unit: initializing embox.kernel.task.task_table: done
 ***
Default IO device[ttyS0]
>export PWD=/
>export HOME=/
>fb_direct_access
>tish
root@embox:/#
Useful information Building an Operating System for the Raspberry Pi