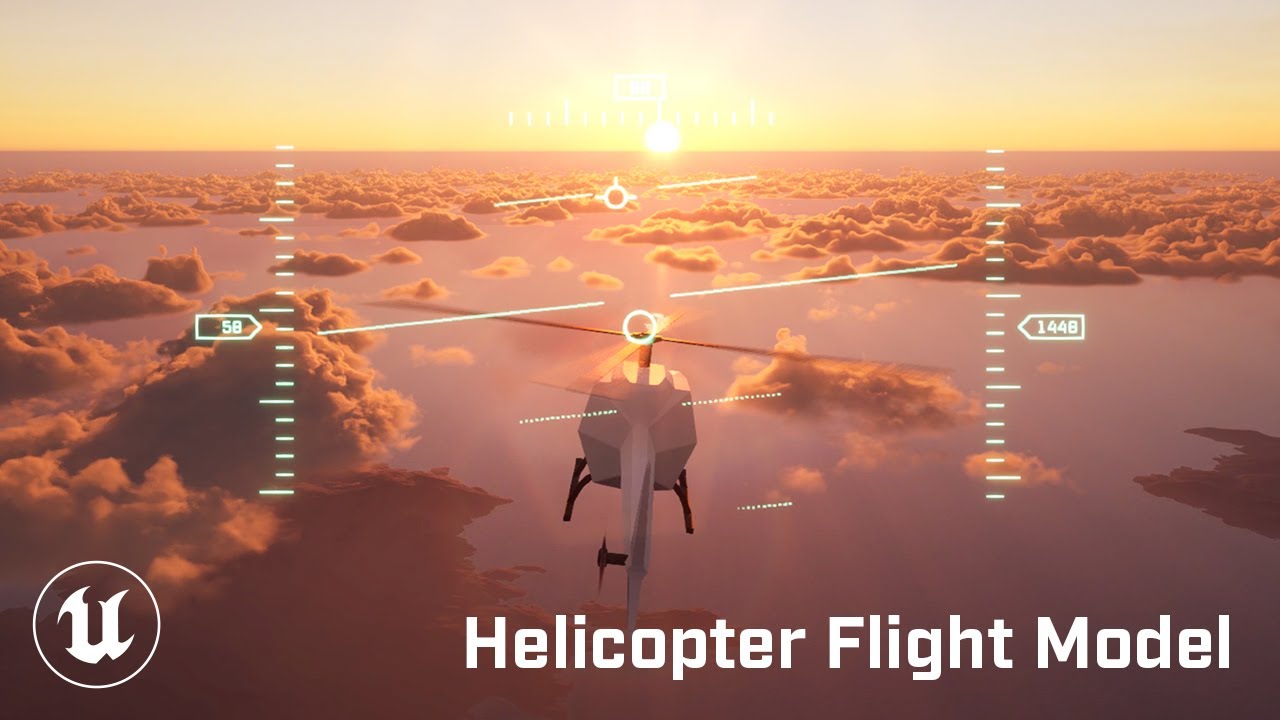
This plugin provides a Chaos-powered helicopter flight model and modular aircraft HUD for Unreal Engine 5.
The included flight model could best be described as "SimCade". It's intended to be easy to learn and controllable with basic hardware like a standard console gamepad, while still feeling plausibly realistic and providing some depth and challenge for players who want to invest the time to "master" it.
- Drag simulation with dynamic cross-sectional area measurement
- Simplistic simulation of helicopter-specific phenomena like ground effect
- Designer-tunable parameters for power, agility, and aerodynamic coefficients
- Modular architecture inspired by Epic's Chaos Vehicles plugin
The plugin also includes a modular, resolution-independent, DPI-aware aircraft HUD built from scratch with UMG and dynamic UI materials.
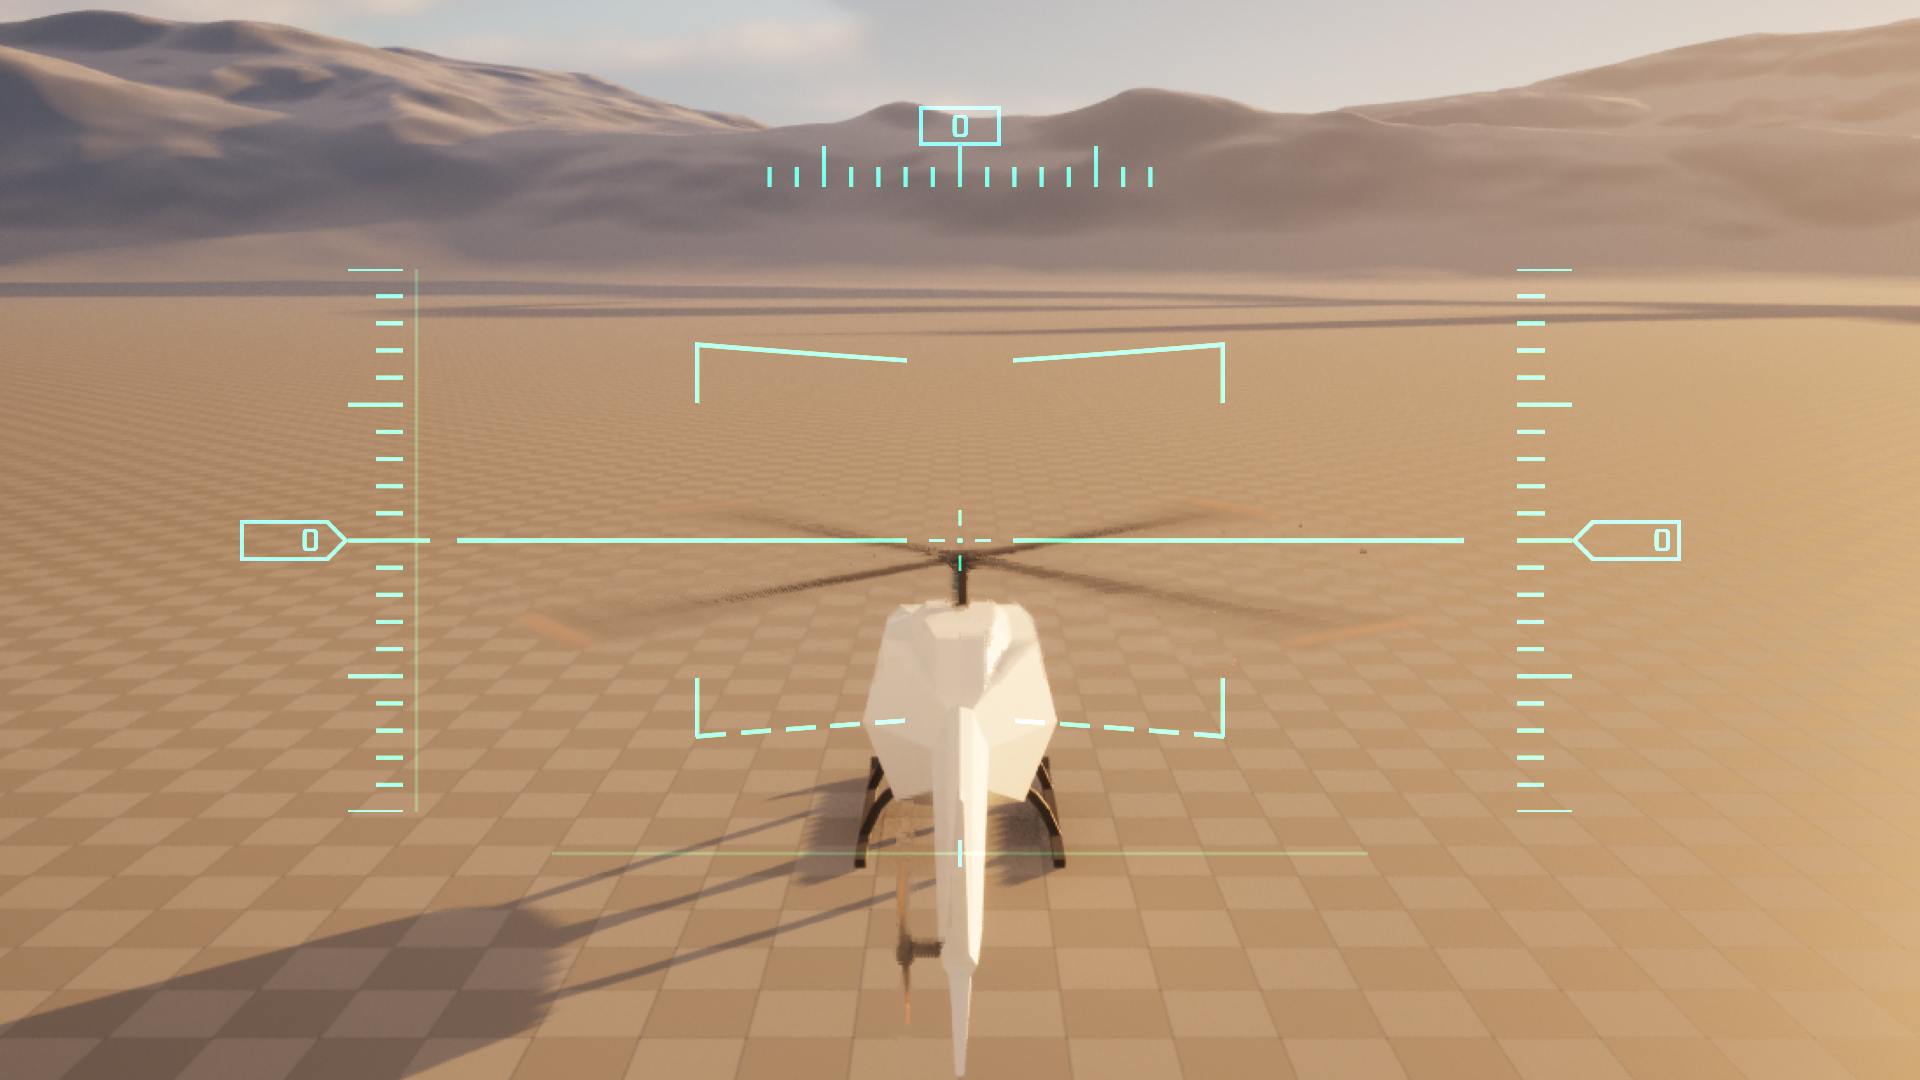
- Pitch ladder which tracks the aircraft's attitude relative to the horizon, with lateral markers at 5° intervals. (Currently this is pretty fixed, with only the line thickness being configurable, but I plan to make this much more customizable in a future update.)
- Altitude, airspeed, and heading indicators with numeric displays and sliding
"rulers". The "rulers" are built from a generic
SteppedHashMarkswidget with configuration options for line thickness, orientation, and the number of coarse and fine subdivisions. - A "flight path" indicator that displays the current velocity vector of the aircraft relative to the camera.
- Axis readouts for the Collective and Anti-Torque inputs — particularly handy when using digital inputs (like buttons or keyboard keys) to control these axes.
First, make sure that your project is configured as a C++ project. If necessary, you can convert a Blueprint project to be C++-compatible by adding a temporary C++ class to the project. In the editor, select Tools > New C++ Class... and follow the steps in the wizard. You don't need to do anything with this class — you can delete it once you're done (and you can carry on using Blueprints as usual whether you keep it or not) — this is only necessary to generate the C++ project files so you can compile the project from source.
If you're already using Git in your project, I would recommend adding this repo as a submodule. From the root directory:
git submodule add https://github.com/dannymcgee/Unreal_RotaryWingAircraft.git ./Plugins/Gameplay/RotaryWingAircraftOtherwise, you can clone it into your project in much the same way:
git clone https://github.com/dannymcgee/Unreal_RotaryWingAircraft.git ./Plugins/Gameplay/RotaryWingAircraftIMPORTANT: Downloading as a ZIP file is not recommended unless you only need the C++ source files. This repo uses Git LFS for binaries (e.g., blueprints), which will not be included in the ZIP archive.
Add the plugin to your *.uproject definition:
{
	...
	"Plugins": [
		...
		{
			"Name": "RotaryWingAircraft",
			"Enabled": true
		}
	]
}
Finally, close out the editor and compile the project in your IDE of choice. If you're planning on doing lots of C++ programming, I can highly recommend Jetbrains Rider — otherwise, refer to Epic's documentation for configuring Visual Studio or VS Code for Unreal Engine.
You can do the following to give the plugin a quick test drive before committing to use it in your project:
- Follow the instructions above to install the plugin and compile your project.
- Navigate to Project Settings > Project > Maps & Modes.
- Set Default Pawn Class to
BP_SampleHeli. - Add a default Player Start actor to your scene.
- Play in Editor
Alternatively, you can clone this barebones example project where the steps above have already been done for you.
The workflow here is very similar to Epic's Chaos Vehicles.
- Ensure that your skeletal mesh has bones for all of the rotors that you'd like to spin in sync with the flight model's engine state.
- Ensure that your mesh faces the +X axis.
- Ensure that your mesh has an assigned Physics Asset with a reasonable physics body attached to the root bone.
- You may need to manually override the Mass of your physics body to a
reasonable value. For example, the included
SK_SampleHeli_Physis set to 900 kg, which is roughly the weight of a laden MH-6 Little Bird.
- Create an animation blueprint for your skeletal mesh, and set its parent class
to
HeliAnimInstance. - Setup the following nodes in your
AnimGraph:Mesh Space Ref Pose -> Rotor Controller -> Component to Local -> Output Pose
- Create a new Blueprint Class derived from
Heli. - Assign your skeletal mesh to
VehicleMeshand set its Animation > Anim Class to the animation blueprint created in the previous step. - Under Input, assign the included
IA_Heli_Cyclic,IA_Heli_Collective, andIA_Heli_AntiTorqueactions. You can assign the includedIMC_Heli_Defaultas the Default Mapping Context, or you can create your own bindings to suit your preferences. - Add a camera to your own preferences. You can take a look at the included
BP_SampleHelifor an example. - Under Vehicle Movement > Vehicle Setup > Rotors, create a rotor setup for each of your mesh's rigged rotors. Set Bone Name to the name of the skeleton bone that controls the rotor, and Torque Normal to a normalized vector that corresponds to the axis the rotor blades should spin around (in component space).
- Create CurveFloat assets for Altitude Penalty Curve, Drag Coefficient Curve, and Aerodynamic Torque Influence. Check the tooltips for explanations and axis descriptions, and configure to taste.
Alternatively, if the included Heli pawn doesn't meet your needs for some
reason, feel free to create your own Pawn class from scratch and configure it to
use the HeliMovementComponent. The movement component class has a very
straightforward, blueprint-friendly API allowing you to set inputs and query for
information about the vehicle's state.