

Have you ever been in the middle of creating the ultimate aesthetic set up only to find that your favorite wallpaper does not vibe with your new color scheme? Well, fret not, pylettize is here for you. This is a simple piece of software allowing you to apply custom color palettes to any image you can think of. Need that classic Bliss™️ re-cast in Gruvbox colors? Look no further!
Note: This project is still in development, without a clear release date set. It is useable at the moment, but might require a bit of hacking on your end if you want it to work exactly as you want. If you want to contribute in any way shape or form, check out the contribution guidelines below!
The easiest way to get started is to simply install pylettize from pip by running pip install pylettize
Alternatively, it is possible to build from source by cloning this repository. Ideally the following steps would be done in a virtual environment with a minimum pip version of v22.2.2:
git clone https://github.com/frans-johansson/pylettize.git
cd pylettize
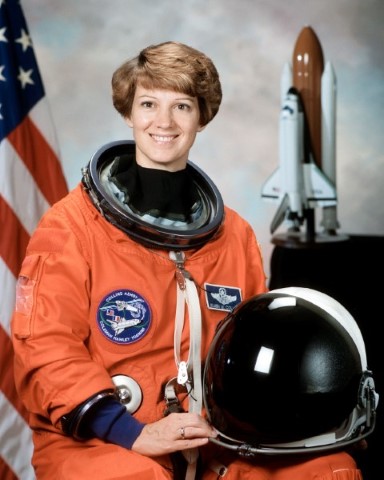
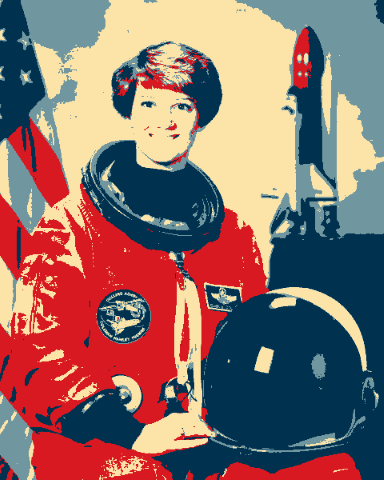
pip install -e .After installing, you should now be able to run pylettize --help and see the general usage instructions. As an example though, to apply the default gruvbox palette to cat.png (which some of you might recognize as Chelsea the cat from Scikit-Image), you would run the following command:
pylettize soft cat.png gruvbox -o aesthetic_cat.png -T 0.05which will save your output to a file called aesthetic_cat.png. The -T 0.05 option sets the temperature value for the soft blending operation. Basically, a higher value means the colors become less distinct and more "smooth", but more on this in the next section.

The pylettize utility currently supports two main blending modes: hard and soft. These can be applied with either custom palette file by supplying the -p flag before the palette name (instead pointing to your custom palette) or to one of the followoing default palettes:
gruvbox, based on the color scheme by morhetzobama, drawing from the colors of the hope postersprimaries, simply CMY and RGB in their purest forms
Though as mentioned, any text file containing hexcolors separated by newlines can be used as a palette. Here's a (spooky 🧛) example free of charge!
#44475a
#f8f8f2
#6272a4
#8be9fd
#50fa7b
#ffb86c
#ff79c6
#bd93f9
#ff5555
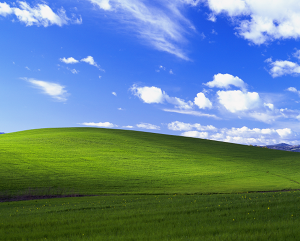
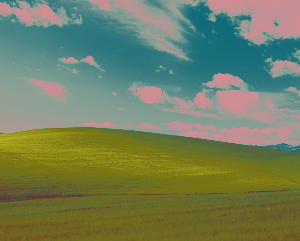
#f1fa8cThe simplest kind of blending supported currently is hard blending. This simply sets each pixel in the output image to its nearest palette color in RGB space, utilizing the euclidean distance. The effect can be kind of rough and noisy, which is certainly a look you could shoot for if you want. If, however, you'd like a more smooth look: keep reading!
The main difference when using the soft option is that each pixel in the output image becomes a linear combination of several palette colors. As with the hard blending option, the euclidean distance measure in RGB space is used. However, this value is normalized and inverted to get a similarity measure instead. Then, the distribution of these similarity values across the palette colors is passed through a temperature scaled softmax transform, which can either make the distribution more or less concentrated using the -T temperature option. Generally speaking, and as indicated below, a higher temperature value means "smoother" colors and a lower value means more distinct colors.
| Temperature value | Result |
|---|---|
| Original | |
| T=0.25 |  |
| T=0.1 | 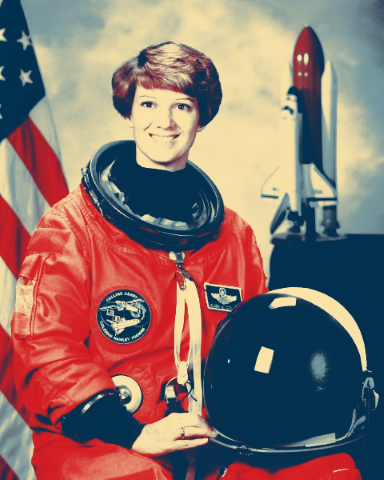 |
| T=0.05 | 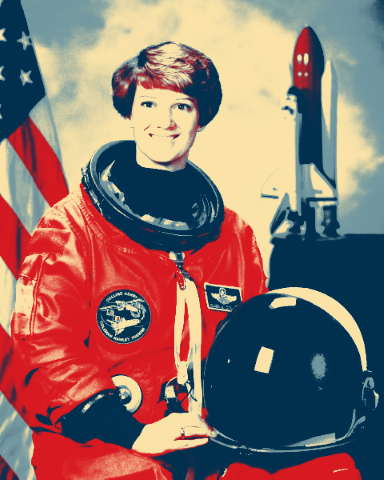 |
Care should be taken when setting the temperature to low or too high though, as indicated below.
| Temperature value | Result |
|---|---|
| T=10 |  |
| T=0.001 | 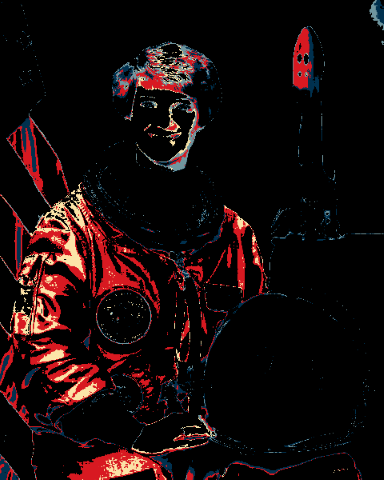 |
To round off this section, here are some planned features for the future of this little project.
- Automatic palette extraction using clustering algorithms
- 1-to-1 palette mappings using association algorithms
- A hosted, installable package on PyPI (yes, you'll be able to
pip installit!) - More default palettes!
Note that there is no clear roadmap for these features, and there is no guarantee they will in fact ever be implemented (🤷)
To get started, make sure you have the following requirements satisfied on your machine:
pip v22.2.2poetry v.1.4.1- Any
python3version, but at least 3.8 is recommended
Set up a local virtual environment by running poetry shell then poetry install in the project root directory (where the pyproject.toml is). This should end up putting you in a brand new virtual environment associated with the project, and install all of its dependencies. To check if this step worked, try running which python and verify that you get a path to some sort of "virtualenv" as output.
Optionally, but highly recommended to avoid headaches when submitting PRs, is to set up pre-commit hooks with pre-commit install in the project root (where the .pre-commit-config.yaml file is). This should ensure that your PR at least has style compliant code ✨. If you'd like to be told your code is bad before commiting, feel free to set up linting in your editor of choice. We use flake8 with a bunch of plugins (including mypy and isort) to run the style checks, so ideally you'd want to use flake8 locally for linting as well. In Visual Studio Code, adding the following to your settings file should suffice:
{
    "python.linting.enabled": true,
    "python.linting.flake8Enabled": true,
    "python.formatting.provider": "black",
}
This will also enable you to format your code with our formatter of choice black in the editor.
We use pytest as our testing framework. It should be set up such that you can simply run pytest.
Feel free to submit PRs with any additions you'd like to see made to the project! We only ask that you stick to the coding guidelines (i.e. what flake8 tells you to do), and that you associate each PR with some Issue. If there isn't an issue yet for what you want to add, create one! Don't worry too much about how to format these, or what labels to use. Simply try to convey what it is you're looking to implement, change or fix.