PagingKit provides customisable menu & content UI.

There are many libaries providing "Paging UI" which has menu and content area. They are convinience but not customizable because your app have to make compatible with the library about layout and design. When It doesn't fit the libaries, you need to fork the library or find another one.
PagingKit has more flexible layout and design than the other libraries. You can construct "Menu" and "Content" UI, and they work together. That's all features this library provides. You can fit layout and design of Pagingin UI to your apps as you like.
| changing position of Menu and Content | placing a view between Menu and Content |
|---|---|
 |
 |
| tag like menu design | text highlighted menu design |
|---|---|
 |
 |
- easy to costruct Paging UI many media Apps have
- customizable layout and design
- UIKit like API
- iOS 8.0+
- Xcode 8.1+
- Swift 3.0+
- Install Carthage from Homebrew
> ruby -e "$(curl -fsSL https://raw.githubusercontent.com/Homebrew/install/master/install)"
> brew update
> brew install carthage
- Move your project dir and create Cartfile
> touch Cartfile
- add the following line to Cartfile
github "kazuhiro4949/PagingKit"
- Create framework
> carthage update --platform iOS
- In Xcode, move to "Genera > Build Phase > Linked Frameworks and Library"
- Add the framework to your project
- Add a new run script and put the following code
/usr/local/bin/carthage copy-frameworks
- Click "+" at Input file and Add the framework path
$(SRCROOT)/Carthage/Build/iOS/PagingKit.framework
- Write Import statement on your source file
Import PagingKit
There are some sample projects in this library.
https://github.com/kazuhiro4949/PagingKit/tree/master/iOS%20Sample/iOS%20Sample
You can put PagingKit into your project as the samples do.
PagingKit has two essential classes.
- PagingMenuViewController
- PagingContentViewController
PagingMenuViewController provides interactive menu for each content. PagingContentViewController provides the contents on paging view.
If you wanna make a new view controller that contains PagingKit, refer the 4 steps.
-
- Add PagingMenuViewController & PagingContentViewController
-
- Assign them to properties
-
- Create menu UI
-
- display data
-
- Synchronize Menu and Content view controllers
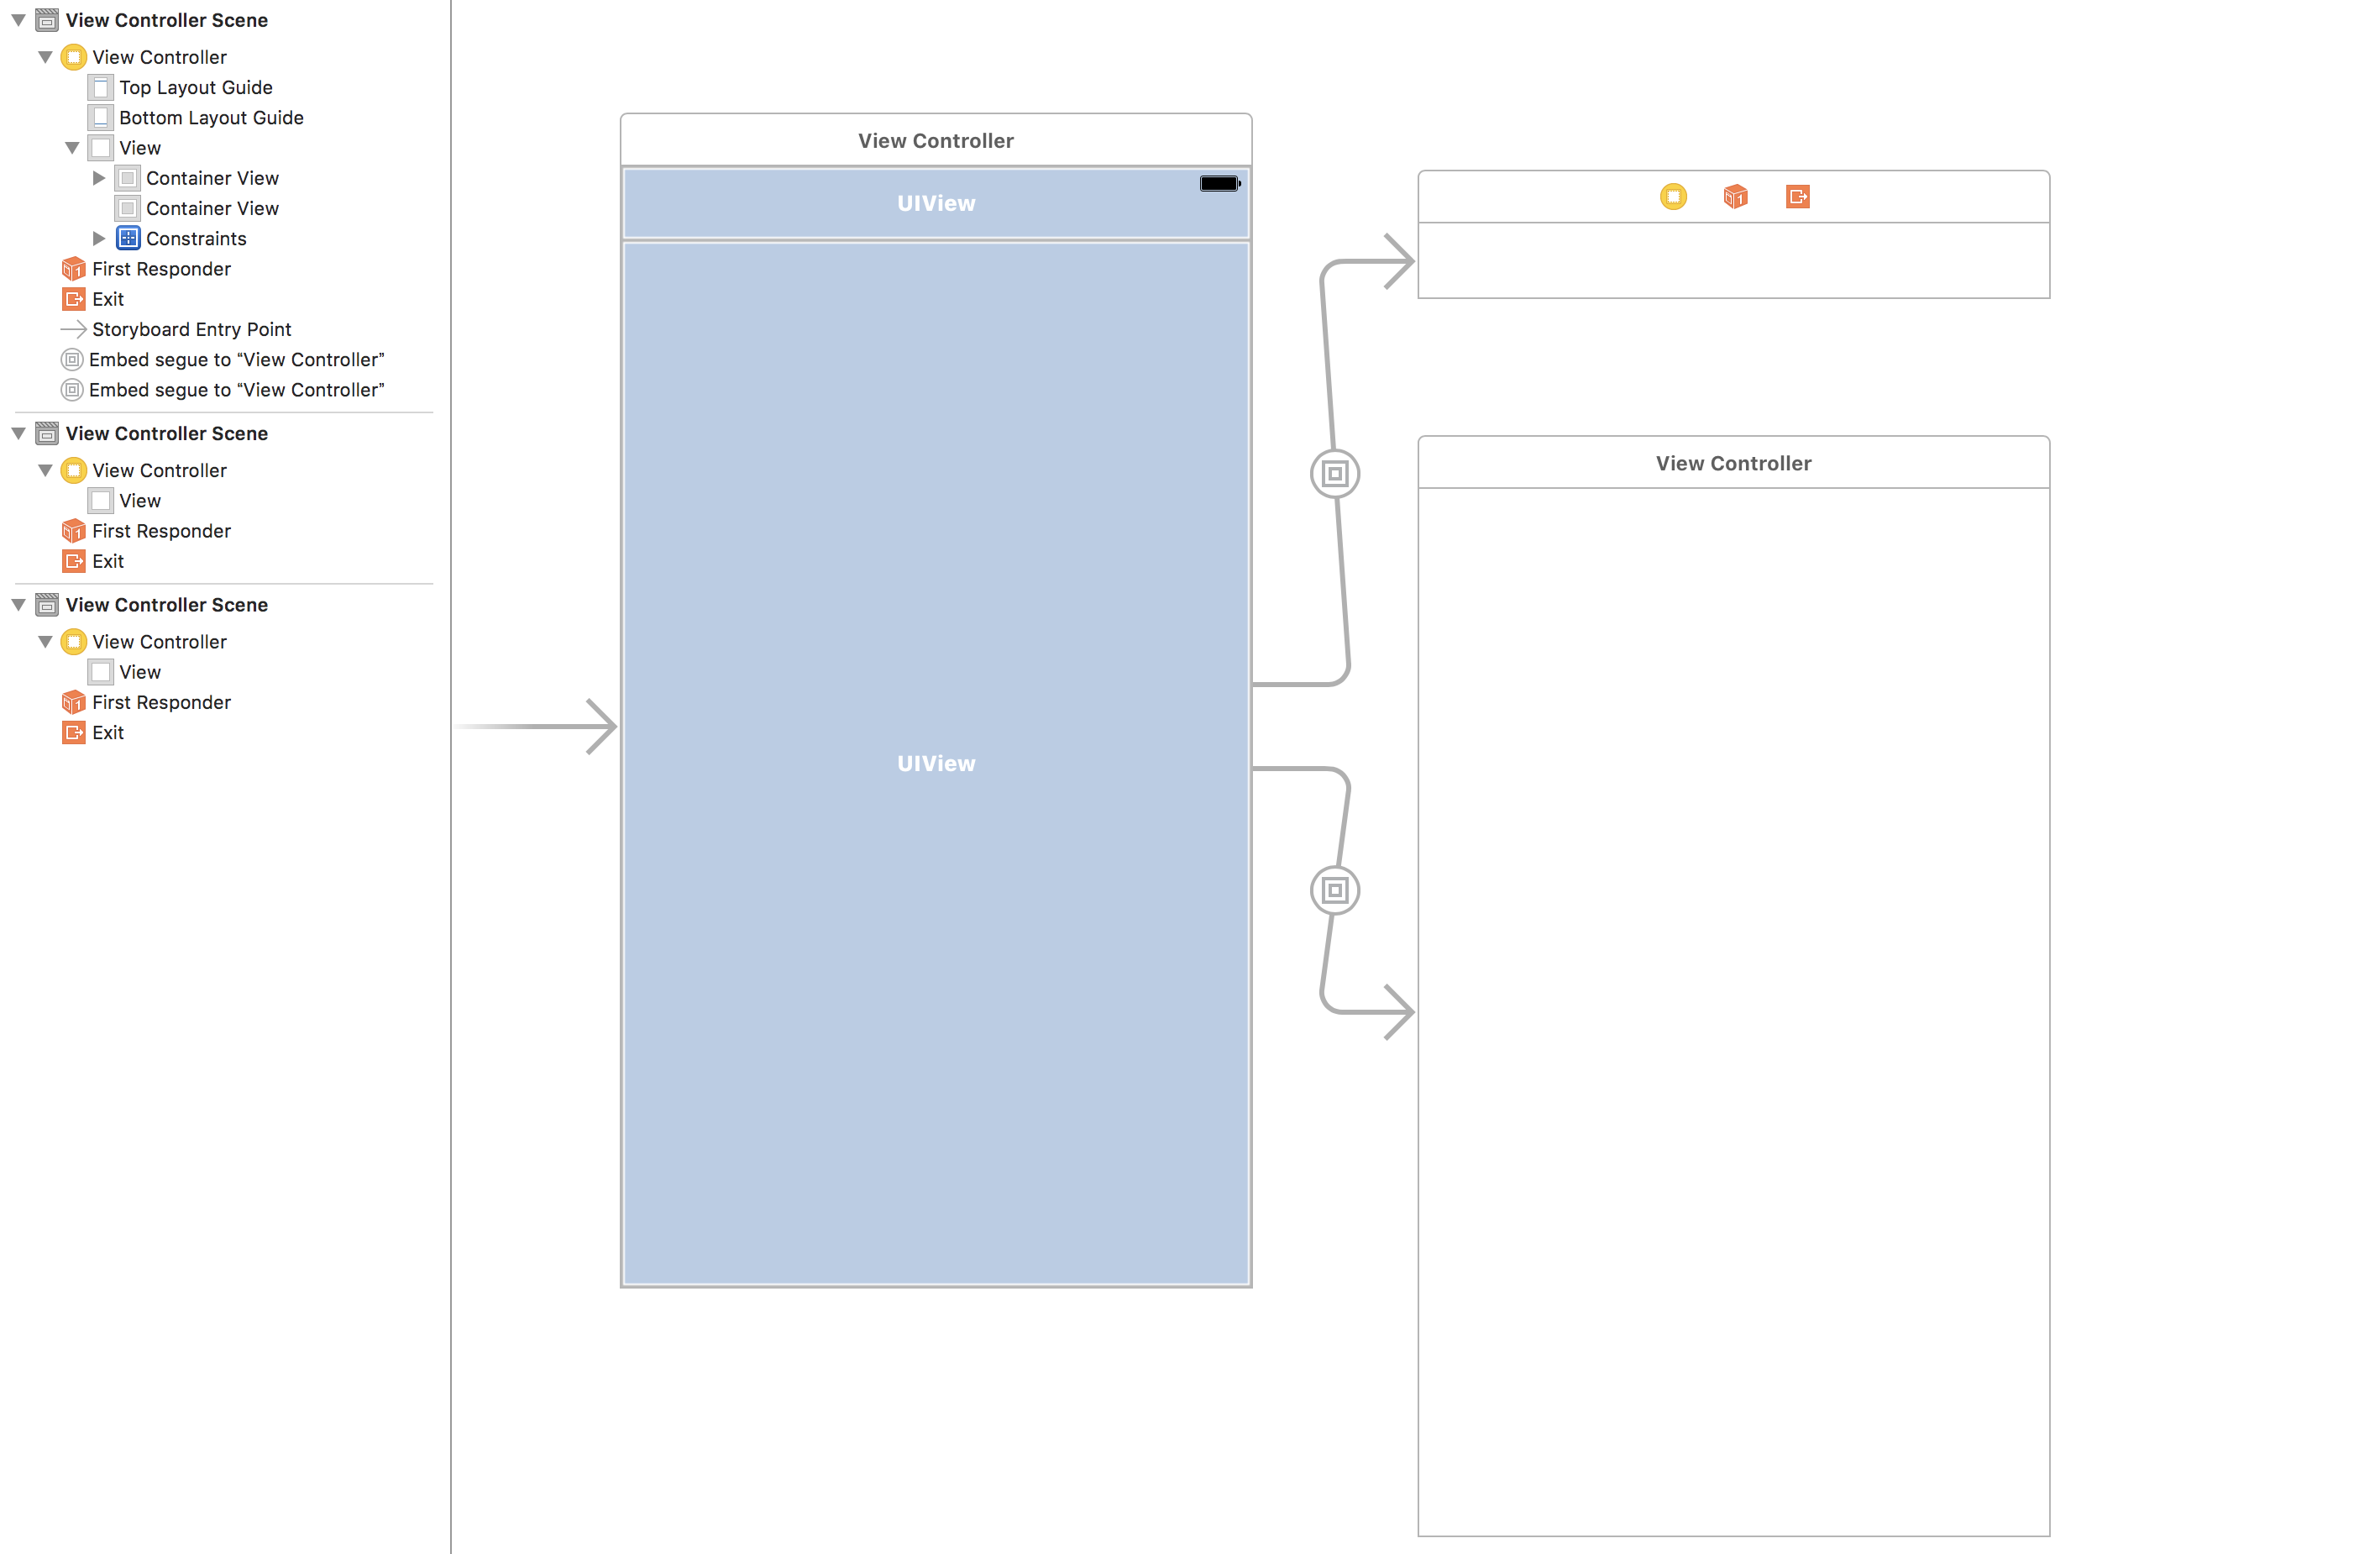
First, add PagingMenuViewController & PagingContentViewController on container view with Stroyboard.
Put container view on stroyboard for each the view controllers.
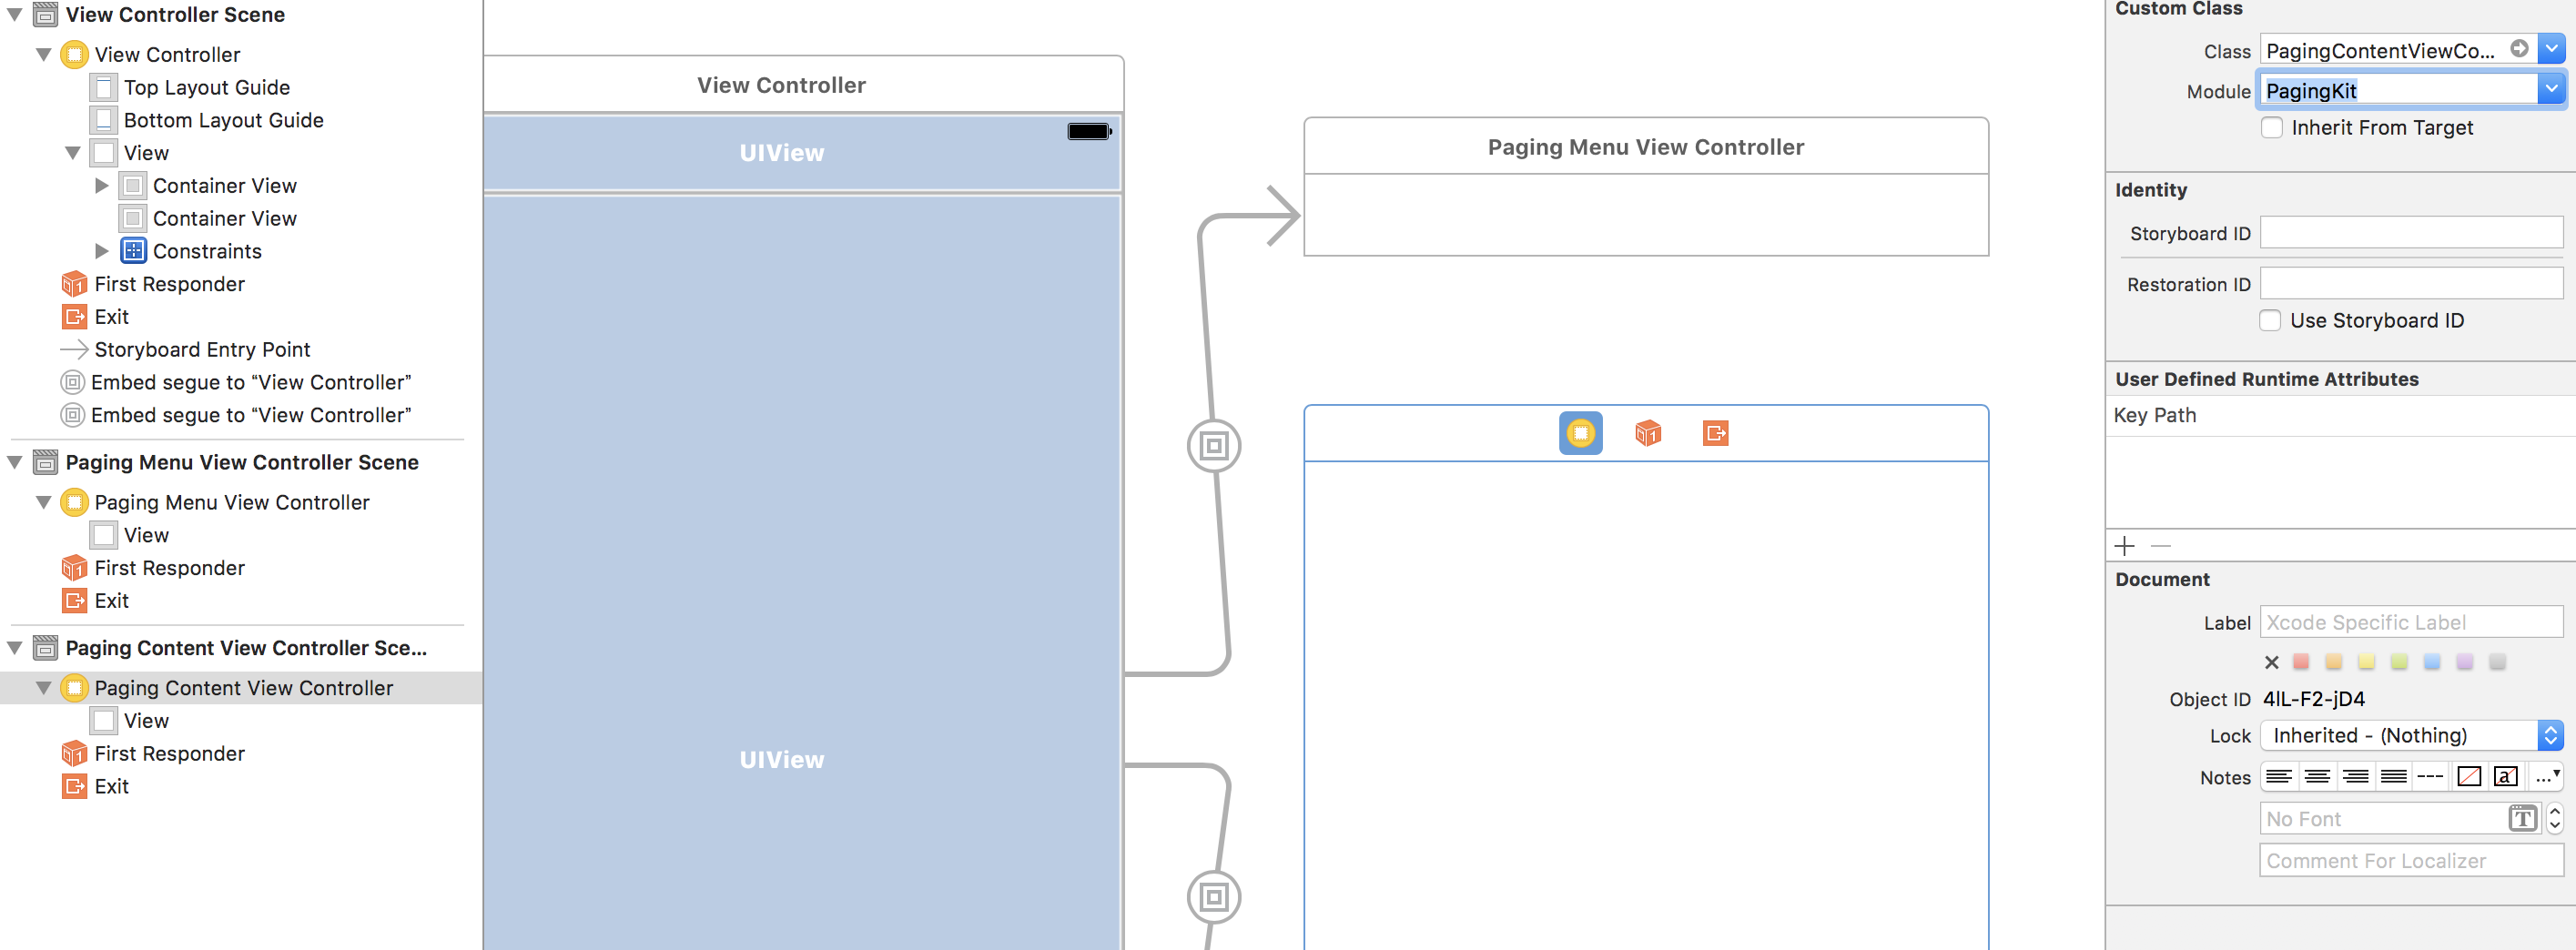
Set PagingMenuViewController to custom class setting.

Set PagingContentViewController to custom class setting.
Assign them to the container view controller on code.
Declare properties in container view controller.
class ViewController: UIViewController {

    var menuViewController: PagingMenuViewController!
    var contentViewController: PagingContentViewController!
Assigin view controllers to each the property in prepare(segue:sender:) method.
    override func prepare(for segue: UIStoryboardSegue, sender: Any?) {
        if let vc = segue.destination as? PagingMenuViewController {
            menuViewController = vc
        } else if let vc = segue.destination as? PagingContentViewController {
            contentViewController = vc
        }
}Change menu color.

Build and check current result.
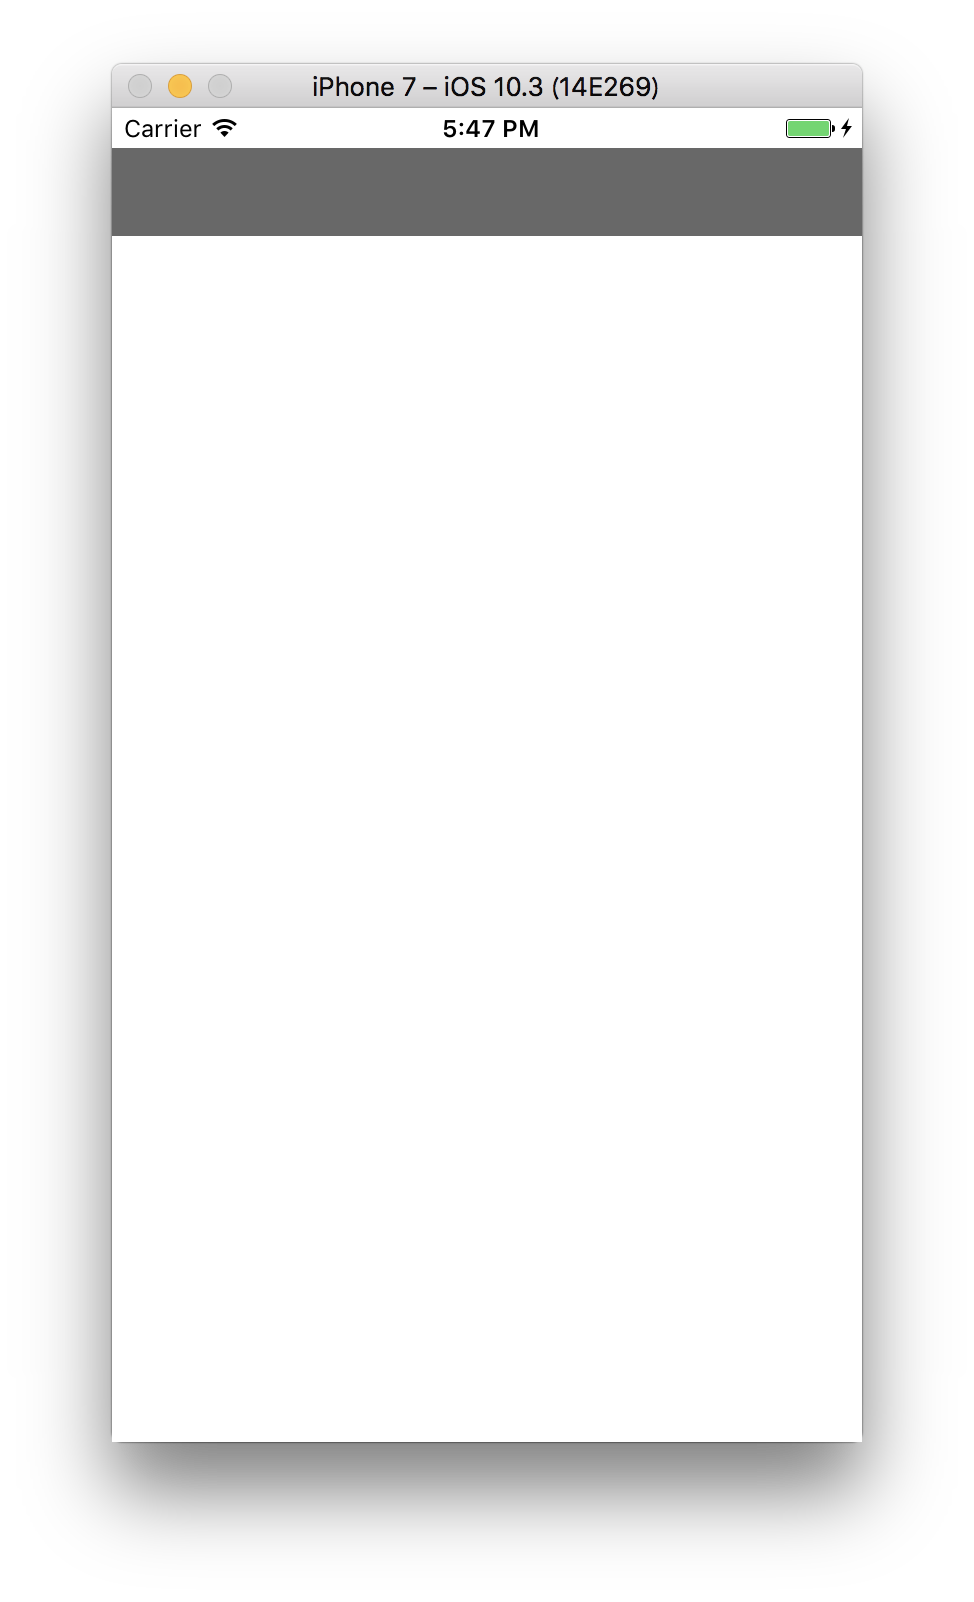
It is the container view controller that has two conten view controllers.
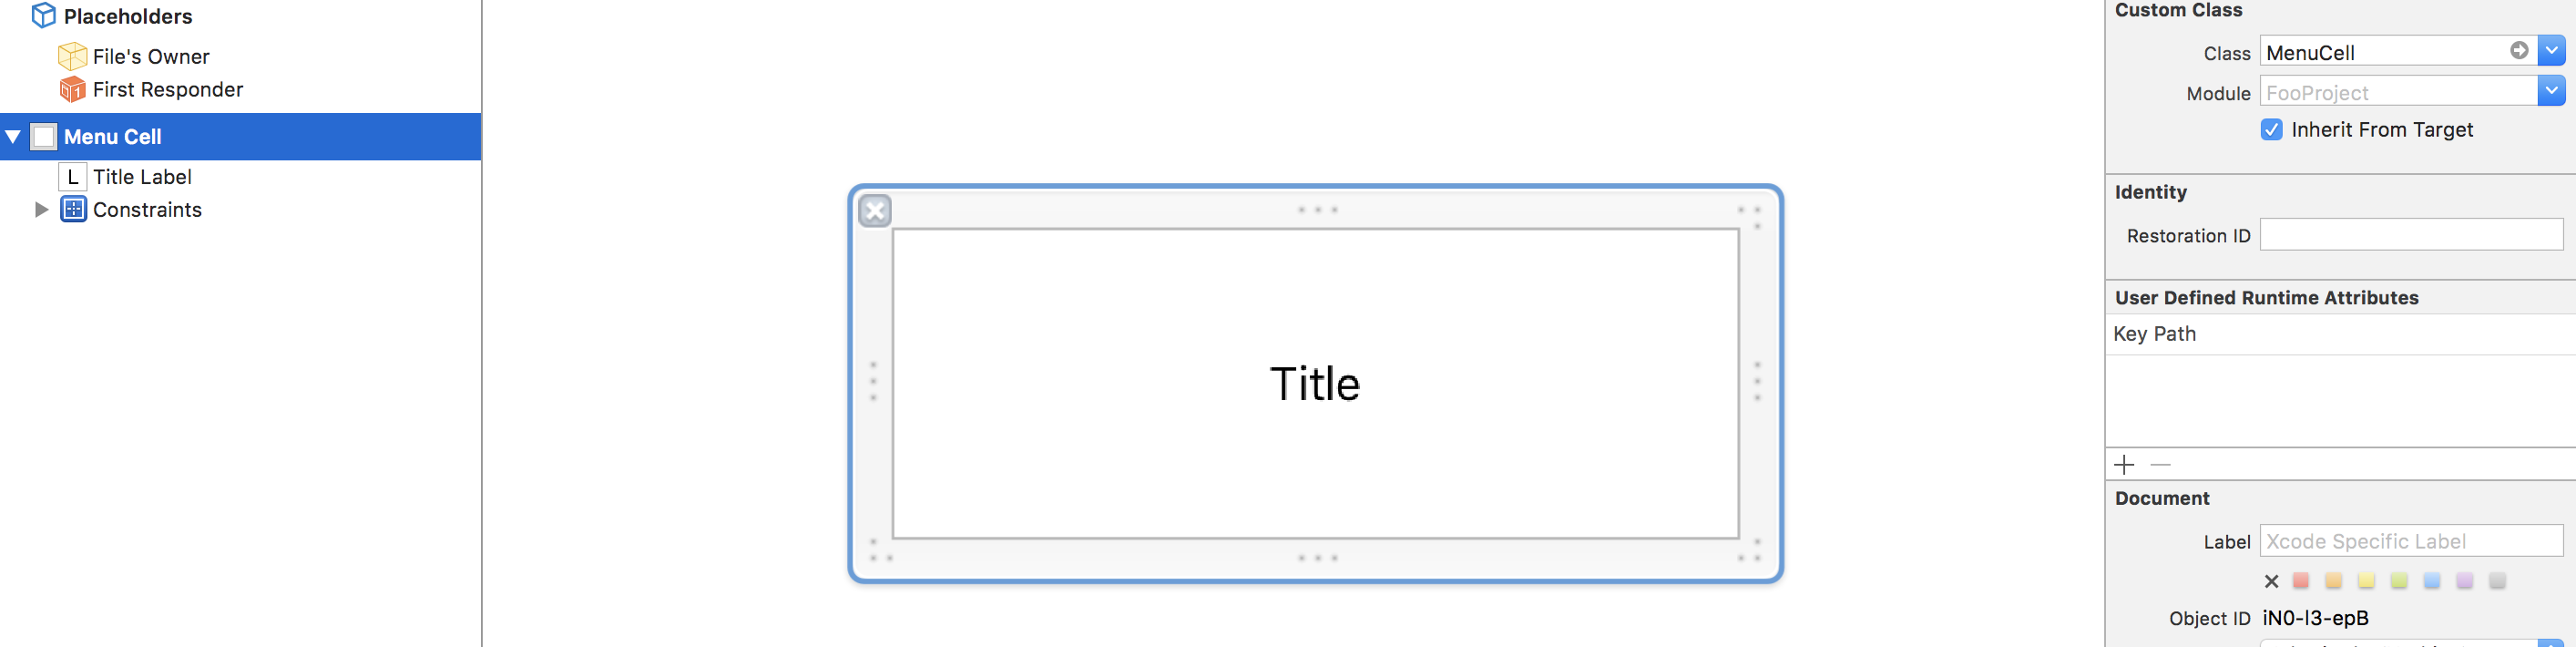
Next, you needs to prepare menu element.
PagingKit has PagingMenuViewCell. PagingMenuViewController uses it to construct menu element.
import UIKit
import PagingKit

class MenuCell: PagingMenuViewCell {
    @IBOutlet weak var titleLabel: UILabel!
}
PagingKit has PagingFocusView. PagingMenuViewController uses it to show current focusted menu.
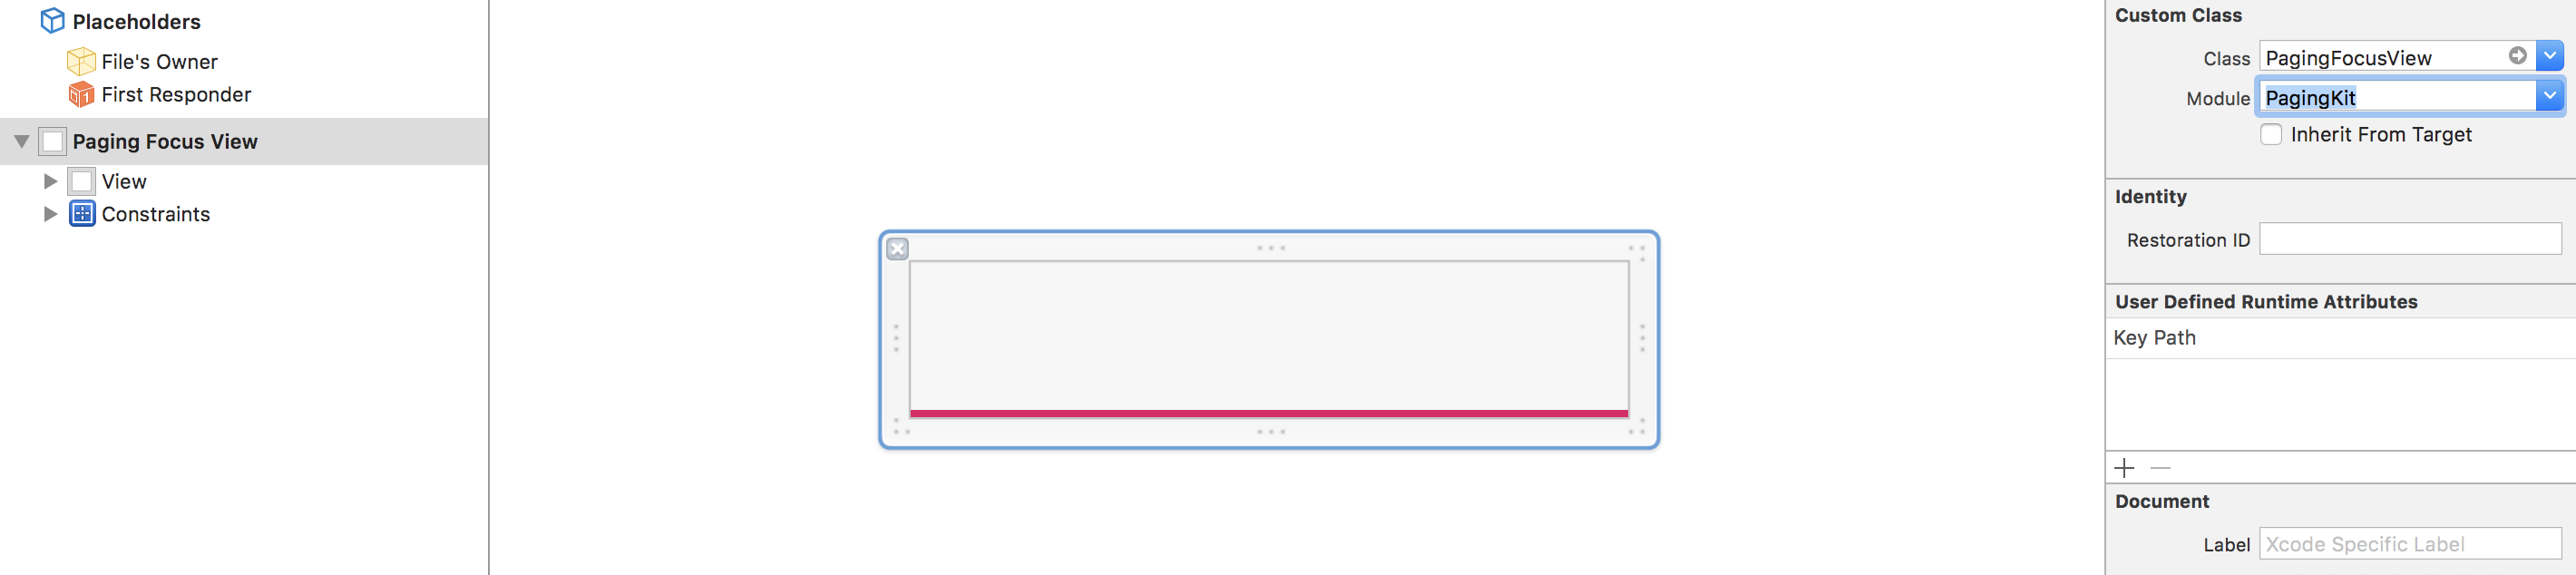
class ViewController: UIViewController {

    var menuViewController: PagingMenuViewController!
    var contentViewController: PagingContentViewController!

    override func viewDidLoad() {
        super.viewDidLoad()

        menuViewController.register(nib: UINib(nibName: "MenuCell", bundle: nil), forCellWithReuseIdentifier: "MenuCell")
        menuViewController.registerFocusView(nib: UINib(nibName: "FocusView", bundle: nil))
    }
Then, implement the data sources to display contents. They are a similar interfaces to UITableViewDataSource.
class ViewController: UIViewController {
    static var viewController: (UIColor) -> UIViewController = { (color) in
       let vc = UIViewController()
        vc.view.backgroundColor = color
        return vc
    }

    var dataSource = [(menuTitle: "test1", vc: viewController(.red)), (menuTitle: "test2", vc: viewController(.blue)), (menuTitle: "test3", vc: viewController(.yellow))]
Return number of menus, menu widthes and menu assigned cells.
    override func prepare(for segue: UIStoryboardSegue, sender: Any?) {
        if let vc = segue.destination as? PagingMenuViewController {
            menuViewController = vc
            menuViewController.dataSource = self // <- set menu data source
        } else if let vc = segue.destination as? PagingContentViewController {
            contentViewController = vc
        }
    }
}

extension ViewController: PagingMenuViewControllerDataSource {
    func numberOfItemForMenuViewController(viewController: PagingMenuViewController) -> Int {
        return dataSource.count
    }

    func menuViewController(viewController: PagingMenuViewController, widthForItemAt index: Int) -> CGFloat {
        return 100
    }

    func menuViewController(viewController: PagingMenuViewController, cellForItemAt index: Int) -> PagingMenuViewCell {
        let cell = viewController.dequeueReusableCell(withReuseIdentifier: "MenuCell", for: index) as! MenuCell
        cell.titleLabel.text = dataSource[index].menuTitle
        return cell
    }
}Return number of contents and content assigned cells.
    override func prepare(for segue: UIStoryboardSegue, sender: Any?) {
        if let vc = segue.destination as? PagingMenuViewController {
            menuViewController = vc
            menuViewController.dataSource = self
        } else if let vc = segue.destination as? PagingContentViewController {
            contentViewController = vc
            contentViewController.dataSource = self // <- set content data source
        }
    }
}

extension ViewController: PagingContentViewControllerDataSource {
    func numberOfItemForContentViewController(viewController: PagingContentViewController) -> Int {
        return dataSource.count
    }

    func contentViewController(viewController: PagingContentViewController, viewControllerAt index: Int) -> UIViewController {
        return dataSource[index].vc
    }
}Call UITableView.reloadData() methods with starting point.
override func viewDidLoad() {
super.viewDidLoad()
//...
//...
menuViewController.reloadData(startingOn: 0)
contentViewController.reloadData(with: 0)
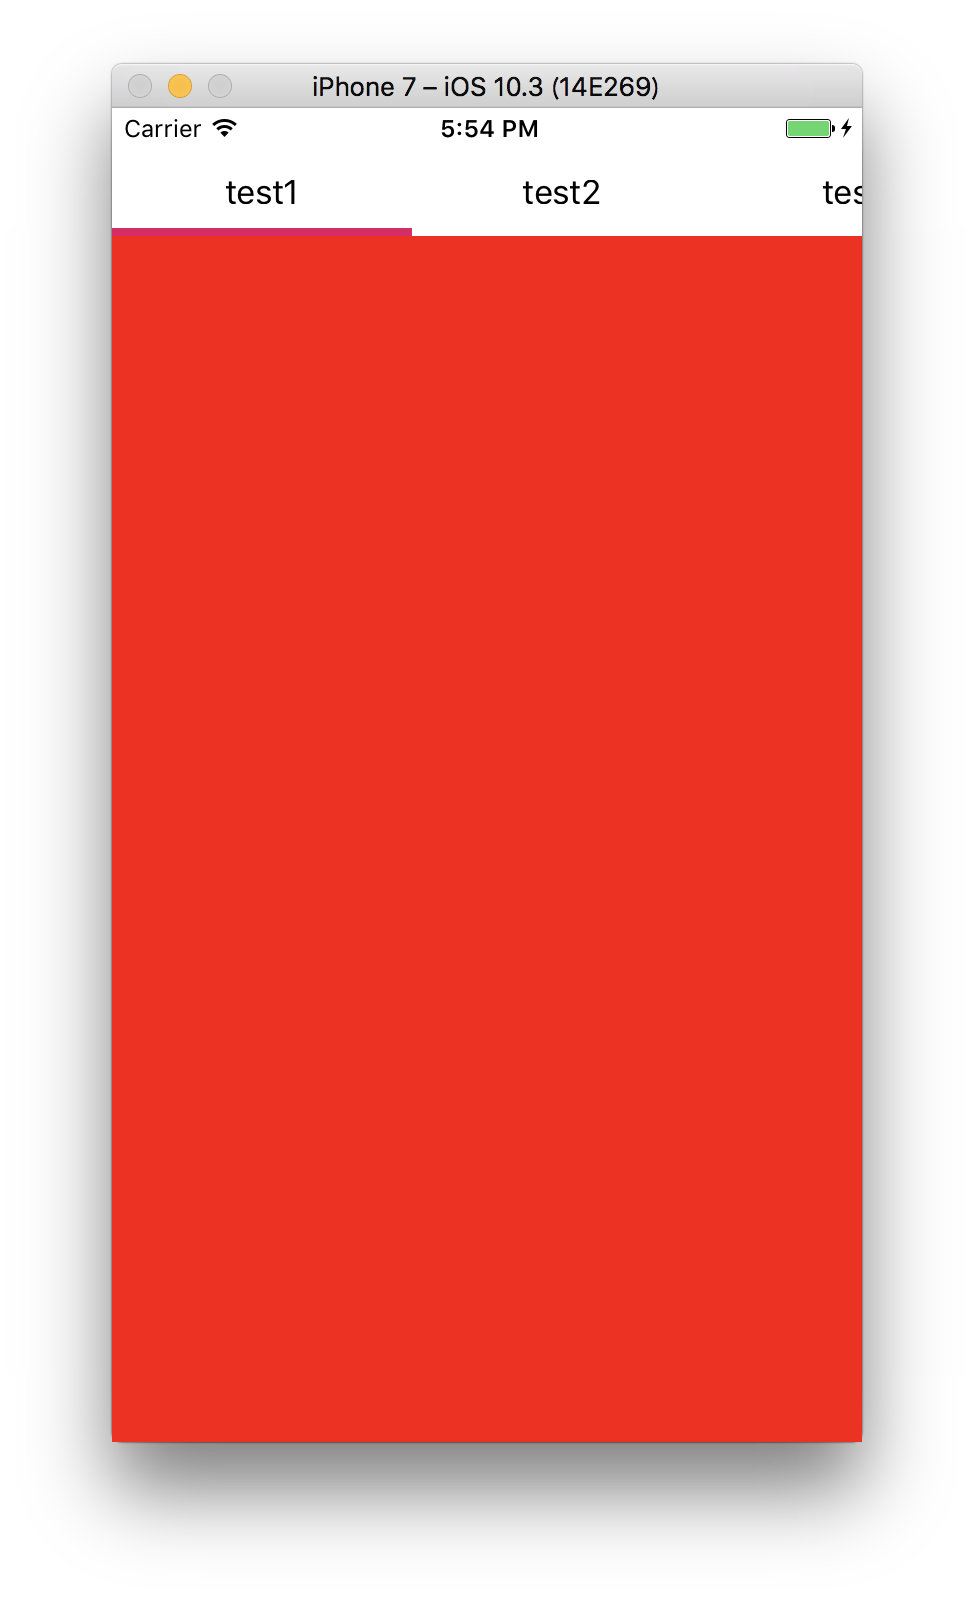
}Build and display data source.
Last, synchronize user interactions on Menu and Content.
Implement menu delegate to handle the event. It is a similar interfaces to UITableViewDelegate. You need to scroll method of content view controller on the delegate method.
    override func prepare(for segue: UIStoryboardSegue, sender: Any?) {
        if let vc = segue.destination as? PagingMenuViewController {
            menuViewController = vc
            menuViewController.dataSource = self
            menuViewController.delegate = self // <- set menu delegate
        } else if let vc = segue.destination as? PagingContentViewController {
            contentViewController = vc
            contentViewController.dataSource = self
        }
    }
}
extension ViewController: PagingMenuViewControllerDelegate {
func menuViewController(viewController: PagingMenuViewController, didSelect page: Int, previousPage: Int) {
contentViewController.scroll(to: page, animated: true)
}
}Implement content delegate to handle the event. It is a similar interfaces to UIScrollViewDelegate. You need to scroll method of content view controller on the delegate method. Percent parameter is based on the left to right distance.
    override func prepare(for segue: UIStoryboardSegue, sender: Any?) {
        if let vc = segue.destination as? PagingMenuViewController {
            menuViewController = vc
            menuViewController.dataSource = self
            menuViewController.delegate = self
        } else if let vc = segue.destination as? PagingContentViewController {
            contentViewController = vc
            contentViewController.dataSource = self
            contentViewController.delegate = self // <- set content delegate
        }
    }
}
extension ViewController: PagingContentViewControllerDelegate {
func contentViewController(viewController: PagingContentViewController, didManualScrollOn index: Int, percent: CGFloat) {
menuViewController.scroll(index: index, percent: percent, animated: false)
}
}That's it.
Copyright (c) 2017 Kazuhiro Hayashi
Permission is hereby granted, free of charge, to any person obtaining a copy of this software and associated documentation files (the "Software"), to deal in the Software without restriction, including without limitation the rights to use, copy, modify, merge, publish, distribute, sublicense, and/or sell copies of the Software, and to permit persons to whom the Software is furnished to do so, subject to the following conditions:
The above copyright notice and this permission notice shall be included in all copies or substantial portions of the Software.
THE SOFTWARE IS PROVIDED "AS IS", WITHOUT WARRANTY OF ANY KIND, EXPRESS OR IMPLIED, INCLUDING BUT NOT LIMITED TO THE WARRANTIES OF MERCHANTABILITY, FITNESS FOR A PARTICULAR PURPOSE AND NONINFRINGEMENT. IN NO EVENT SHALL THE AUTHORS OR COPYRIGHT HOLDERS BE LIABLE FOR ANY CLAIM, DAMAGES OR OTHER LIABILITY, WHETHER IN AN ACTION OF CONTRACT, TORT OR OTHERWISE, ARISING FROM, OUT OF OR IN CONNECTION WITH THE SOFTWARE OR THE USE OR OTHER DEALINGS IN THE SOFTWARE.