An original, minimal theme with a focus on self-sufficiency and decentralization. By default, Notrack does not rely on any third parties to serve your website. The only exception is Disqus comments, which are not used by default (see Adding comments below).
- Notrack
- Table of contents
- Screenshot
- Example site
config - Shortcodes
- User CSS
- Navigation bar
- How tos
- Other projects used in this theme
- Contribution
You will need the extended edition of Hugo in order to use this theme. This is the edition Hugo's developers recommend for most users. You probably already have it, but you can double check with:
$ hugo version
hugo v0.115.4+extended linux/amd64 BuildDate=unknown
Note the "+extended" after the version number. Information about the standard and extended versions may be found within Hugo's installation instructions.
If you want to try out the theme with an example page, do the following:
$ git clone https://github.com/gevhaz/hugo-theme-notrack
$ mv hugo-theme-notrack notrack
$ cd notrack/exampleSite/
$ hugo server -D --themesDir ../..
You can now see the example website in your browser and interact with it. Hugo
will print instructions for what address to use. Usually it is http://localhost:1313/.
Here is a working config.yaml:
baseURL = "http://example.org/"
languageCode = "en-us"
title = "Lawyer Hugo Grotius"
theme = "notrack"
newContentEditor = "nvim"
mainSections = ["blog"]
# disqusShortname = "example"
paginate = 4

[params]
  author = "Hugo de Groot"
  siteHeading = "Hugo Grotius" # defaults to author
  favicon = "hugo_grotius.png" # Adds a small icon next to the page title in a tab
  showBlogLatest = true
  mainSections = ["blog"]
  showTaxonomyLinks = false
  nBlogLatest = 4 # number of blog post om the home page
  blogLatestHeading = "My writing"
  footer = "This work is licensed under a Creative Commons Attribution-ShareAlike 4.0 International License."

  [params.social]
    github = "example"
    linkedin = "example"
    email = "example@example.com"
    mastodon = "example"
    medium = "example"
    keybase = "example"

[taxonomies]
  year = "year"
  month = "month"
  tags = "tags"
  categories = "categories"

[permalinks]
blog = "/blog/:year/:month/:slug"| Category | Shortcode | Description |
|---|---|---|
| Contact info | contact-box |
Displays contact info set in params.social |
social |
Displays contact info set in params.social |
|
| Photo Gallery | gallery-category |
Container for gallery-photo shortcodes |
gallery-modal |
HTML to allow for full page view of gallery photos | |
gallery-photo |
Include a photo in a gallery | |
gallery-script |
Script to allow for full page view of gallery photos | |
| General | image |
Image for use in any page. See example in How to create a blog |
video |
Similar to an ordinary <video> HTML tag but with a CSS class to make it look good in posts |
|
rawhtml |
For including raw HTML without the global unsafe option for Goldmark | |
| Resume | container |
Container for resume shortcodes |
resume-entry |
One entry in a resume (e.g. a university degree) | |
resume-section |
One section in resume (e.g. "Education") | |
resume-subcategory |
Creates a heading within a section of the resume |
Most of the shortcodes are explained in more detail in their respective sections below. I explain the other two here.
rawhtml can be used like this:
{{< rawhtml >}}<p>A paragraph</p>{{< /rawhtml >}}This allows you to use HTML to create elements that you can't create with just markdown without allowing unsafe HTML in the site configuration file. I'm not a security expert, and there might be a good reason why unsafe HTML is disabled by default. If you think this shortcode shouldn't be part of the theme, feel free to open an issue and say why.
The video shortcode basically just creates a HTML <video> tag with a
class that I've added some styling for. Use it like this:
{{< video src="your_video.mp4" type="video/mp4" preload="auto" >}}Your video needs to be in the static folder or a subdirectory of it such
as "video" (in which case you'd add the subdirectory in the src
parameter.
You can add your own CSS by creating a file assets/css/userstyles.css. The
theme will automatically pick it up.
Add it to main menu in the front matter of the page:
---
menu:
  main:
    title: "Contact"
    weight: 100
---
Don't use the site configuration file to add menus because then the highlighting of active tabs might not work (at least not if drop-down menus are involved).
Quick instruction: Set it's parent parameter to one of the menus in
main.
Instructions with example:
-
Create the top-level menu in
config.yamlor your equivalent. An example where the top-level menu doesn't correspond to a real page (urlis #) and is just there to hold the drop-down menu:menu: main: - identifier: "about-me" name: "About Me" url: "#" weight: 50
If you want to add pages to an already existing menu item, you can skip this step and just use that page as a parent in step 2.
-
In the front matter of the page you want to add, put the following:
menu:
  main:
    title: <What you want the name of the menu to be>
    parent: "about-me"
    weight: <Lower numbers will appear higher up>
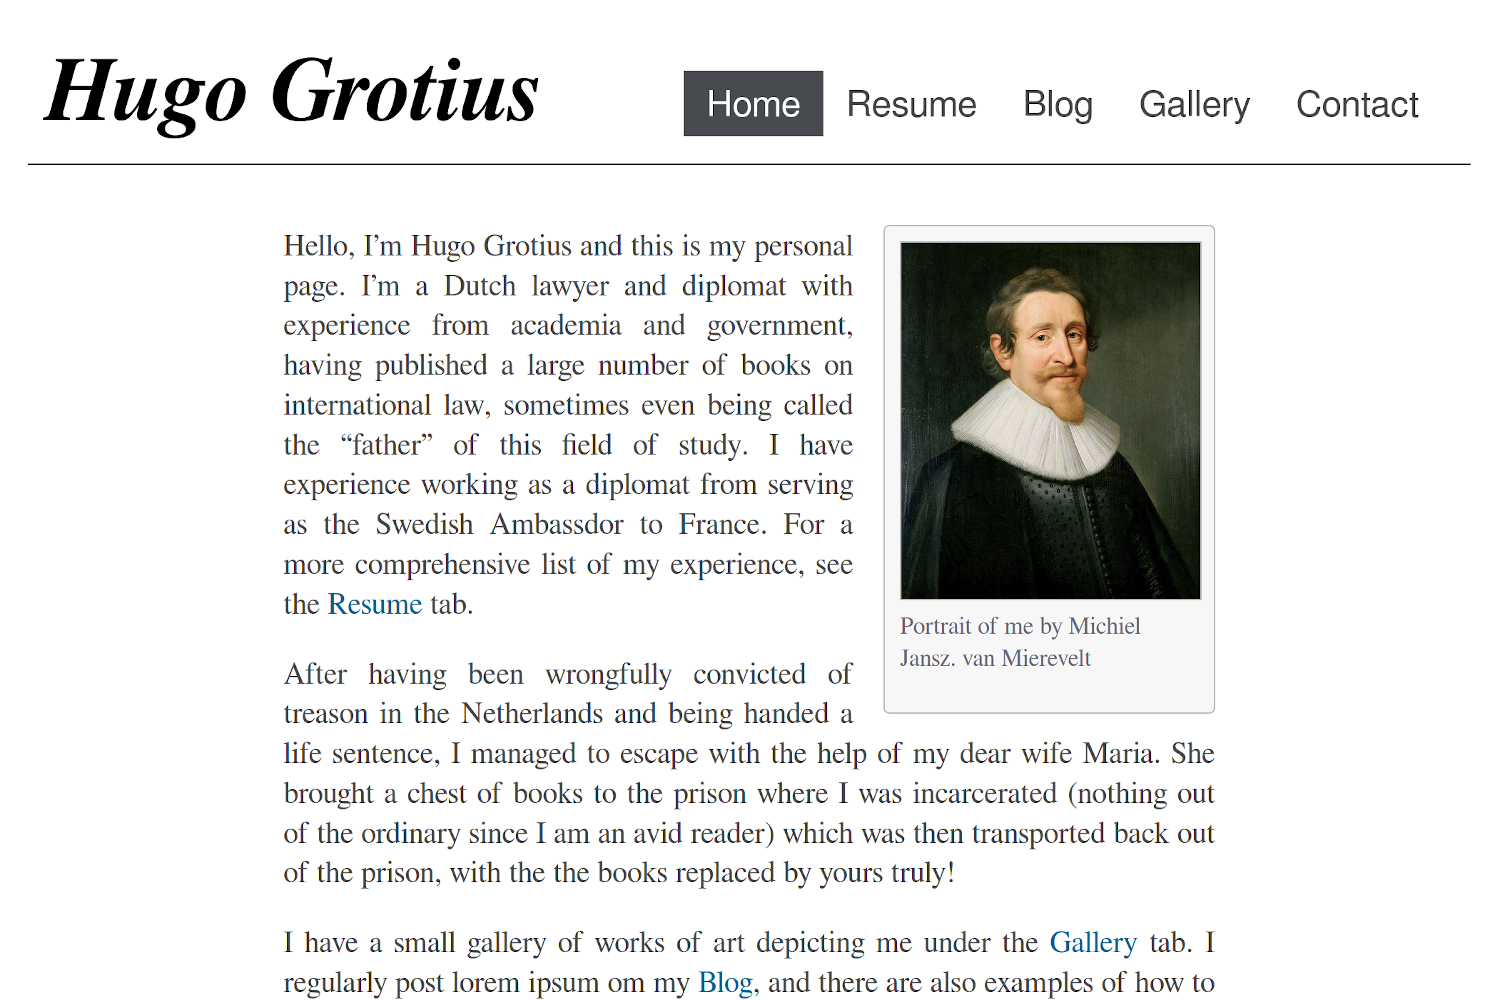
The first thing you will want to do is set up the home page of the website.
Create /content/_index.md (hugo new _index.md). This could contain a short
introduction of what is on the website or of yourself. A shortcode that can be
useful here is image, which adds an image with an optional frame. You can set
the width with the width option. Example usage:
{{< image frame="true" width="11em" src="/img/profile-picture.jpg"
alt="Picture of me" >}}
frame="true" adds a frame around the picture. You can also add a caption. See
further instructions in How to create a
blog.
At this point you should also set the title for the web site, your name
and the text in the header, if you want it to be different from your
name. Example entries in config.yaml:
title: "My New Hugo Site"
params:
  author: "John Doe"
  siteHeading: "a header title"
If you don't want to show the latest posts from your blog at the bottom
of the home page, set showBlogLatest to false in your site configuration file.
You may also want to change the number of posts shown (default: 3) and
the heading above it (default "Latest from the blog") In config.yaml, it
would look like this:
params:
  showBlogLatest: true
  blogLatestHeading: "Latests posts"
  nBlogLatest: 6
An alternative way to create the content for the homepage is to have a headless
bundle content/homepage. The content of the files in this directory will
populate the top of the homepage, like in the Hugo Basic Example.
-
Add some posts with e.g.
hugo new blog/post-1.mdetc. -
hugo new blog/_index.mdand create the blog menu item in the front matter:--- menu: main: identifier: "blog" name: "Blog" weight: <lower number than your other menus for more leftward placement> ---
-
(Optional) Create a drop-down menu with links to tags, categories and archive by creating pages in the style of
hugo new tags/_index.md. It doesn't need any content at all, just create a front matter where you add it to the main menu with theidentifierof your blog menu entry as parent:--- menu: main: name: "All Tags" parent: "blog" weight: <lower number than your other menus for more upward placement> ---
In the case of archive, you may also need to set the layout to archives in
_index.md's front matter:layout: archives.
For those of you who do the third step, there is an option available to remove the buttons with links to the archive (if you have an archives page, see step 3), tags and category pages from the top of the blog list page. Just set the following in your site configuration file:
params:
  showTaxonomyLinks: false
Menus in Hugo are a mess to program for a theme but this should work. It's the method that gives you, the user, the most freedom to choose the structure of your content folder. There are other methods for theme developers but they would force the user to put all posts in a folder with a specific name.
If you don't want a drop-down menu for listing categories or tags, just
skip step 3. You can still disable the links to the taxonomy pages. Your
readers can list all posts from a specific category or a tag by clicking
on that category or tag in any post instead, and you can link to
yourpage.com/categories from other places too.
You can add images just as for the home page. Available options are those of the
built in figure shortcode of Hugo, and additionally:
| Parameter name | Allowed Values |
|---|---|
float |
right/left |
frame |
true/false/leave out |
wide |
true/false |
width |
e.g. 10em, 50%, 70px |
height |
e.g. 10em, 50%, 70px |
A difference from the built in shortcode is that width and height are for the
outer <figure> element. This allows text to wrap around the picture if you set
the float parameter.
You can also use Hugo's built in short code
figure (an
example: {{< figure src="/img/picture.jpg" width="100%" >}})
This theme supports Disqus comments. It goes against the philosophy of the theme in some sense because it relies on external resources but you can enable it if you want.
Disqus is implemented the default Hugo way so just add your Disqus Shortname in the site configuration file and all blog posts will have a comments section.
There are four shortcodes for creating a gallery:
gallery-categorygallery-photogallery-modalgallery-script
The first two are used in combination to create the actual gallery. Do something like the following in one of your pages:
{{< gallery-category >}}
    {{< gallery-photo fn="<filename of first picture>" caption="<your caption>">}}
    {{< gallery-photo fn="<filename of second picture>" caption="<your caption>">}}
    {{< gallery-photo fn="<filename of third picture>" caption="<your caption>">}}
    {{< gallery-photo fn="<filename of fourth picture>" caption="<your caption>">}}
{{< /gallery-category >}}
The pictures should be under static/img/thumbnails in your project.
If you want a modal to pop up with a zoomed in version, add the other two shortcodes at the bottom of your page:
{{< gallery-modal >}}
{{< gallery-script >}}
And place corresponding full-size images under static/img/fullsize.
The file names need to be the same as for the thumbnails.
Thumbnails should of course be small so that your page loads fast and
full-size should be large enough that they don't look pixelated when
covering the full space of a web browser. One way to resize images is
with (graphicsmagick)[http://www.graphicsmagick.org/]: gm mogrify -resize 1920x1920 *.jpg, which will resize all images in the current
folder to a maximum width/height of 1920 pixels (while maintaining the
aspect ratio).
There are some shortcodes that can help you create a resume. These are:
containerresume-sectionresume-categoryresume-entry
Container just creates a
resume-section needs a title which will be shown to the left of it's
content (if it can fit on the screen, otherwise it's on top). Within
this, you put one or more resume-entry shortcodes. This
shortcode takes the three parameters what, where and when (see
example usage below). It also takes raw HTML within the shortcode tags.
There is styling for <p>s, links, and unordered and ordered lists.
Apart from that, site-wide CSS is used. Example usage:
{{< container >}}
    {{< resume-section title="About Me" >}}
        {{< resume-entry >}}
            <p>
            Some info about you.
            </p>
        {{< /resume-entry >}}
    {{< /resume-section >}}

    {{< resume-section title="Education" >}}
        {{< resume-entry what="Bachelor's program of Computer Science"
                         where="Sidney University"
                         when="2010–2013">}}
            <ol>
                <li> Some comment on what skills you learned</li>
                <li> Some other comment </li>
            </ol>
        {{< /resume-entry >}}
    {{< /resume-section >}}
{{< /container >}}
A tip is that you can also use the resume-entry shortcode with
markdown. Just switch use % instead of < and make sure that your
markdown doesn't have any white space in front of it (or all of it will
be interpreted as code):
        {{% resume-entry what="Bachelor's program of Computer Science"
                         where="Sidney University"
                         when="2010–2013" %}}
* Some comment on what skills you learned
* Some other comment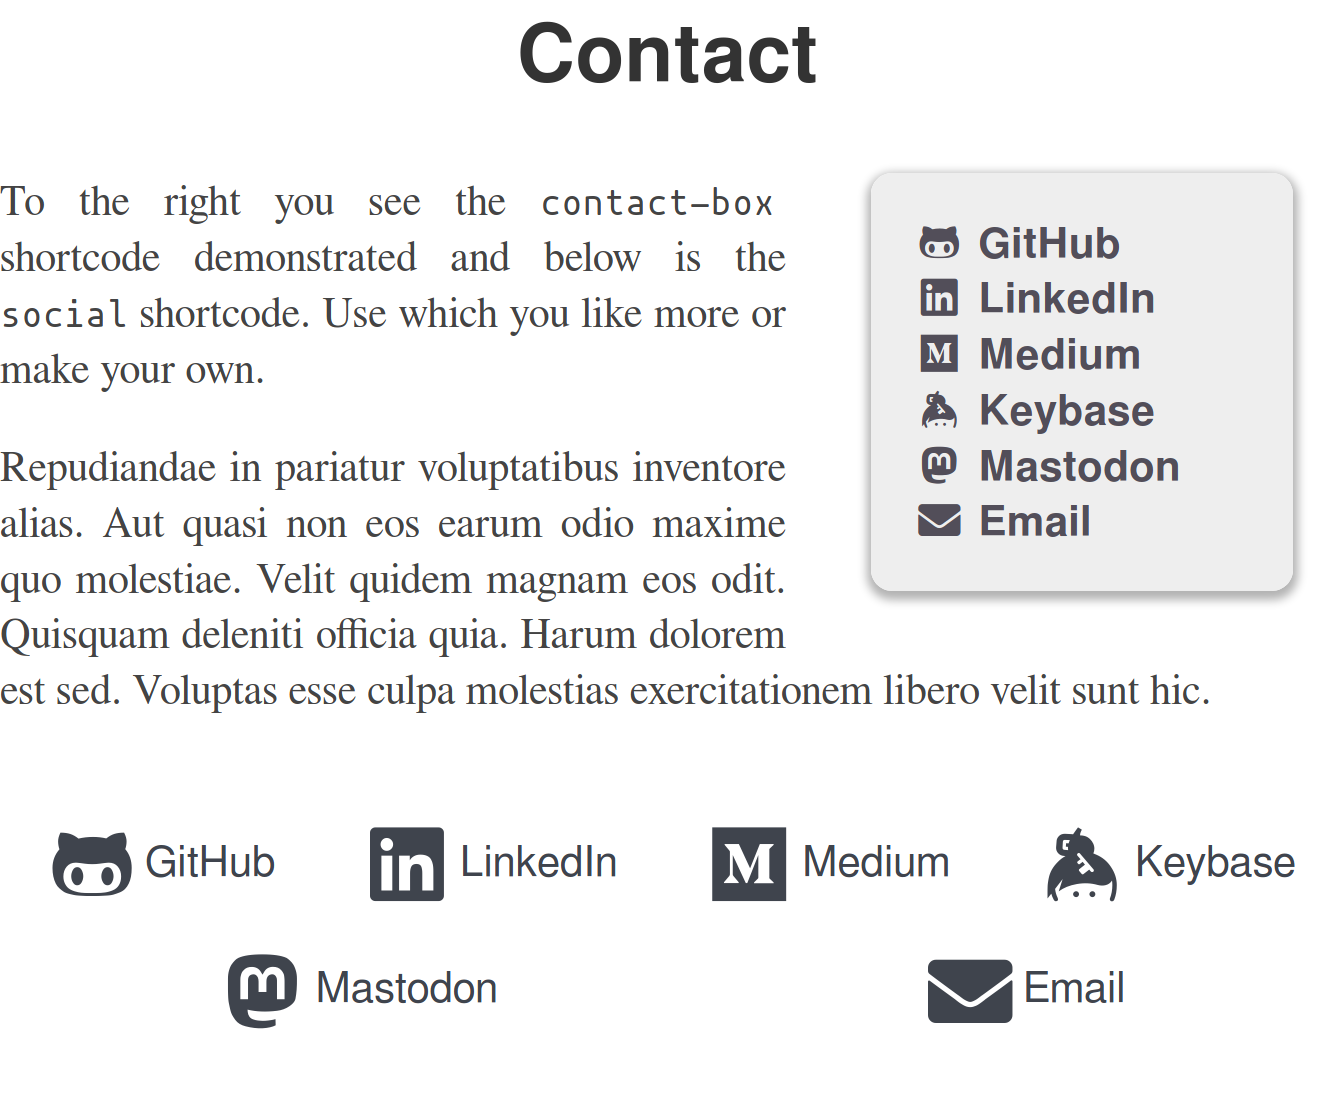
{{% /resume-entry %}}There is a shortcode for creating a framed area with links to your
profiles called contact-box. The thing it does is to put a frame with
links to your social media or other contact info on the rights side of the page, and, if you
want, some text on the left side of the box, outside the frame. Put this
text within the shortcode tags.
You decide what social media to include in your site configuration file under
social under params, like this:
params:
  social:
    github: <your github username>
    email: <email address>
For all available social icons, see the data/notrack/social.yaml file. There
are 65 of them. Then, to display the links somewhere on your page, use either
{{< contact-box >}} or, for an alternative design, use {{< social >}}.
Here is a screenshot with contact-box to the right and social
at the bottom:
For contact-box, there are three optional parameters, float, width
and height. This is similar to the image shortcode. Float makes
text wrap around the box (can be right or left), and the other two
naturally set the dimensions of the <div>, using inline CSS. The
parameters defaults to floating to the right, the width defaults to
12em, and the height defaults to auto.
If you want to add a footer to your web page, you can use the footer
key in your configuration, e.g:
params:
  footer: "This work is licensed under a Creative Commons Attribution-ShareAlike 4.0 International License."
This will add a HTML
element with a element with your text in it.The theme does not secretly download any resources from other websites or CDNs. It does, however, make use of a few other projects. These are included in the theme files, so you'll homepage will serve the resources.
Some of the fonts under static/fonts are parts of the project GNU
FreeFont. They are licensed
under "GPLv3 or later". Licenses are also supposed to be included in the
.woff files themselves. Some of the fonts are edited by me to take up
less space by including fewer characters.
The monospace font in the same directory, used for code in the theme, is Mononoki. It is licensed under SIL OFL 1.1 (https://scripts.sil.org/OFL).
The icons used for the contact-box and social shortcodes are from
Font Awesome project.
It's license is SIL OFL 1.1
(https://scripts.sil.org/OFL). A HTML
comment is included in the contact-box shortcode to show the license and
source.
For matching the icons from Font Awesome with names for various social
networking services, I use the
social.yml
file from the LoveIt theme, which
uses the MIT license. I modified it to use the Font Awesome Solid font
for the email icon, because the one in the original file was using the
Font Awesome Regular font, which it seems only Pro users of Font
Awesome can use. The solid one also
looks better.
All of the images in the example site are in the public domain.
I have tried to test the theme on mobile as well as different screen sizes. If you find a situation where fonts don't have an appropriate size or something else looks off, such as styles completely missing or a page that seems to have the wrong layout, please open an issue. It's difficult to support every possible scenario, but I will see what I can do.
If some change could be made or something could be added that is in line with the style and philosophy of the theme, and it doesn't break anything, feel free to make a pull request.