1. Setup
The goal of this lab is to get the device up and running and sending events to an Azure IoT Hub. Let's get started!
The following are required to complete this lab:
- An MXChip IoT DevKit
- A computer
- Node.js LTS Version *
- An active Microsoft Azure subscription. (Please grab an Azure Pass)
- An available WiFi connection or mobile hotspot. Note that the WiFi connection can (and should) be secure, but it must be ungated (i.e. no intermediate login page is required. Gated WiFi is common in public venues and hotels).
- Arduino IDE *
- VS Code *
Note: the asterisk means that it is included in the install zip (on the USB)
This lab includes the following exercises:
- Exercise 1: Power up the device and connect to WiFi
- Exercise 2: Prepare a development environment
- Exercise 3: MXChip Demo
Estimated time to complete this lab: 30 minutes.
You have already received a package containing an MXChip IoT DevKit and a USB cable. In this exercise, you will plug the device into your laptop allowing you to connect the device to WiFi so it can transmit events to an Azure IoT Hub.
-
Connect the micro end of the USB cable to the micro-USB port on the device (1). Then connect the other end of the cable to a USB port on your computer (2). Confirm that the green LED next to the micro-USB port on the board lights up (3), and that "No WiFi" appears on the screen of the device.

Connecting the device to your laptop
-
(If you have a MacBook you can skip this step) Wait for Windows to install the necessary drivers on your laptop. Then open a File Explorer window and confirm that it shows a new drive named "AZ3166." The drive letter that it is assigned to it may be different on your computer.

The installed device
-
Now that the device has power and your device recognizes it as a USB device, the next step is to get it connected to WiFi. That involves putting the device into access-point (AP) mode so that it acts as a WiFi access point, connecting to it with a browser, and configuring it to connect to the access point in the room. Put the device into AP mode by doing the following:
- Press and hold the B button
- With the B button held down, press and release the Reset button
- Release the B button
Verify that an SSID and an IP address appear on the device screen. The IP address is the one that you will use to connect to the device from your laptop.

Putting the device into AP mode
-
On your laptop, browse the available networks and connect to the access point whose name is shown on the device screen. If you are prompted for a password, leave the password empty. If asked whether to allow your computer to be discoverable by other PCs on the network, answer no.

Using the device as an access point
-
Open a browser window and type the IP address shown on the device in Step 3 into the address bar.
-
Select the WiFi network set up for the event and enter the password provided by the event facilitator. Then click Connect.

Connecting the device to WiFi
-
Confirm that the device successfully connects to WiFi and make note of the IP address it was assigned. If for any reason you are unable to connect to WiFi this way, try configuring it manually using the instructions provided here.

Results of a successful connection
-
Confirm that the screen says "WiFi Connected" and displays the IP address shown in the previous step. If it doesn't — or if the IP address flashes by too quickly for you to read — disconnect the board from your laptop and then plug it back in.

Connected!
-
Go to Upgrade DevKit Firmware and follow the instructions there to make sure you are running the latest version of the firmware. The firmware file is on the USB drive where you got the install zip. If you already have the
.binfile, click on the link and skip step one. The firmware is constantly being improved, and the boards don't always come with the latest version of the firmware installed. You can check the Versions and Release Notes to compare the latest firmware version with the one currently installed on your MXChip. Note that your board will only show the first three numbers of the version, and not the final revision (e.g. if the final version is 1.2.0.28, your board will only show 1.2.0).
Now that the device is connected to WiFi, it will automatically connect again if it is powered off and back on. If you later decide to connect it to another network, simply repeat Steps 3 through 8 of this exercise.
Before running this step, unplug your device.
-
Open up VSCode and make sure the Arduino extension is installed.

-
Go to https://github.com/Microsoft/devkit-sdk, and download the zip and extract it to an empty folder. (If you are comfortable with git, feel free to clone this repo)
-
In your VS Code, open a specific folder File > Open Folder... Navigate to
devkit-sdk/AZ3166/src/libraries/Sensors/examples/SensorStatus/, and open this directory. -
After this directory is open in VS Code, proceed to plug in your device.
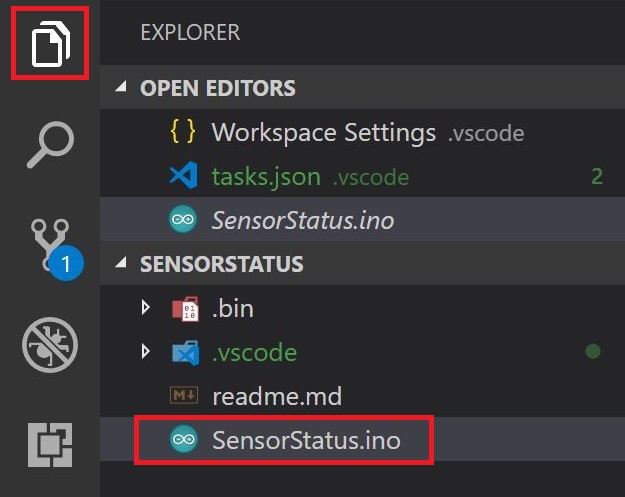
Press the files icon all the way at the top left to open up the file tree view.
You should see the files in the SensorStatus folder including the SensorStatus.ino file which defines the code we will be uploading to the device.
Lastly, we are going to run some example code so you can get an idea of how the board works, and how the Arduino program operates with the MXChip.
This example code will allow you to see how VSCode will be used with the MXChip and allow you to try different sensors on the chip.
Once the SensorStatus project opens, you can select SensorStatus.ino to preview the code.
The coaches will briefly explain this code during a break in the workshop. If the break has not occurred, feel free to move on

At the bottom right of VSCode, be sure a COM port has been chosen. The port can be chosen by pressing the COM button and selecting the correct port (most likely you will only have one option).
If you don't see the COM port option, this means your Ardiuno extension is not installed or set up correctly.

Once the port is selected, be sure your Serial Monitor is on by clicking the "Plug" icon shown below. Your Serial Monitor will display logging info coming from the board. It will come in handy for you to see information from your board.

Make sure you have Node.js LTS version installed! (not Node v10)
Lastly, you want to upload your code. Head to Tasks > Run Task and then select device-upload. This will upload the code to your board and will now be able to test the sensors!
In this lab, you setup your MXChip and played with the sensors on the chip.