Step 1 Setting up the Development Environment
This setup was tested with
- Ubuntu 16.04/18.04
- Windows 10
Note: There are some additional instructions and shortcuts for Ubuntu users on this page that are unnecessary for Windows users.
If Java is already installed on your machine, ensure that it is at least Java 8. If you need to install Java, download it here: Java 8 Download. (Ubuntu users please check the Ubuntu specific instructions for a package source alternative)
You may decide to skip everything else in the "Install Java" section and install OpenJDK. For 16.04, simply run the following in a terminal:
sudo apt-get install openjdk-8-jdk openjfxFor 18.04, we use the provided version 11:
sudo apt-get install openjdk-11-jdk openjfxThis will install OpenJDK and JavaFX on your system which will be fine for running everything in this tutorial. This option will require you to trust some additional certificates during the installation of Eclipse later.
If you would rather install the Oracle JDK from the website above do not execute the apt-get shortcut-command and follow these steps:
After downloading the tar.gz file from the website go to a terminal and execute the following commands (the commands are valid if you downloaded version jdk-8u171-linux-x64.tar.gz otherwise adjust the commands to reflect the correct version of Java):
cd /usr/
sudo mkdir java
cd java/
sudo mv ~/Downloads/jdk-8u171-linux-x64.tar.gz .
sudo tar zxf jdk-8u171-linux-x64.tar.gz
This will install Java to your system. To use it, you must execute the following commands:
sudo update-alternatives --install "/usr/bin/java" "java" "/usr/java/jdk1.8.0_171/bin/java" 1
sudo update-alternatives --install "/usr/bin/javac" "javac" "/usr/java/jdk1.8.0_171/bin/javac" 1
sudo update-alternatives --install "/usr/bin/javaws" "javaws" "/usr/java/jdk1.8.0_171/bin/javaws" 1
sudo update-alternatives --set java /usr/java/jdk1.8.0_171/bin/java
sudo update-alternatives --set javac /usr/java/jdk1.8.0_171/bin/javac
sudo update-alternatives --set javaws /usr/java/jdk1.8.0_171/bin/javaws
You can test if the setup was successful by running javac -version and java -version and making sure the commands exist and display the correct version of Java.
Depending on the version of Java installed, you might need to force a specific version of JavaFX.
-
Ubuntu 16.04
Nothing to do here
-
Ubuntu 18.04
Install version 8 by running
apt install libopenjfx-java=8u161-b12-1ubuntu2 libopenjfx-java-doc=8u161-b12-1ubuntu2 libopenjfx-jni=8u161-b12-1ubuntu2 openjfx=8u161-b12-1ubuntu2 openjfx-source=8u161-b12-1ubuntu2
Note that the JavaFX update version (8u161) does not need to perfectly match the JDK version.
You may need to purge your existing OpenJFX installation:
apt purge openjfx*
apt purge libopenjfx*
Everything in this project will require Eclipse, a free IDE that supports GUI integration. Download Eclipse here: Eclipse Download. When the eclipse installer window pops up, make sure to pick "Eclipse IDE for Java Developers".
When launching Eclipse you must select a location for your new workspace before continuing. This folder will contain all projects and imports saved in the workspace. Once that's done, close the "Welcome" tab. Feel free to close the "Task List" and the "Outline" views as well to clear some space on your monitor.
To run the installer after the download execute the following commands:
cd ~/Downloads
tar -xf eclipse-inst-linux64.tar.gz
cd eclipse-installer
./eclipse-inst
After the installation is finished and you have started Eclipse for the first time from the launcher you can right click the icon in the launcher and select Lock to Launcher to be able to easily start Eclipse again. If you skip this step you can run Eclipse from a terminal using ./eclipse/java-oxygen/eclipse/eclipse where you modify the path to the installation.
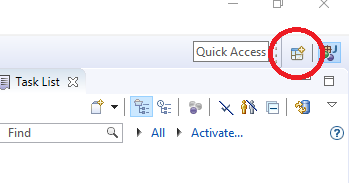
In the top right corner, click on the "Open Perspective" button:
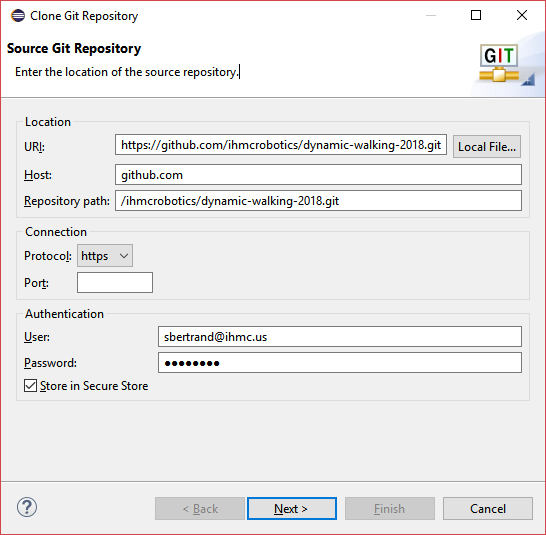
Select Git. The layout will change to include several new views, one of which is "Git Repositories". We need to clone this repository to access our tutorial materials; get the clone link and copy it: https://github.com/ihmcrobotics/dynamic-walking-2018.git
In Eclipse, select "Clone a Git repository", a pop-up window should show up with the address to the repo already populated. Note, that you can leave the Authentication block blank since the repository is public.
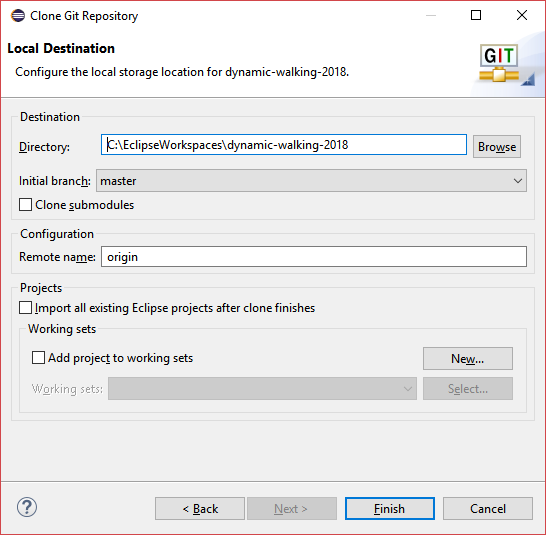
In the third step of this process, make sure the repo is cloned at the desired location. The repo can be cloned inside the eclipse workspace directory. This is the directory you selected when starting up eclipse (e.g. /home/georg/eclipse-workspace on Ubuntu or C:\Users\georg\eclipse-workspace on Windows).
Your Git Repositories view should look like this:

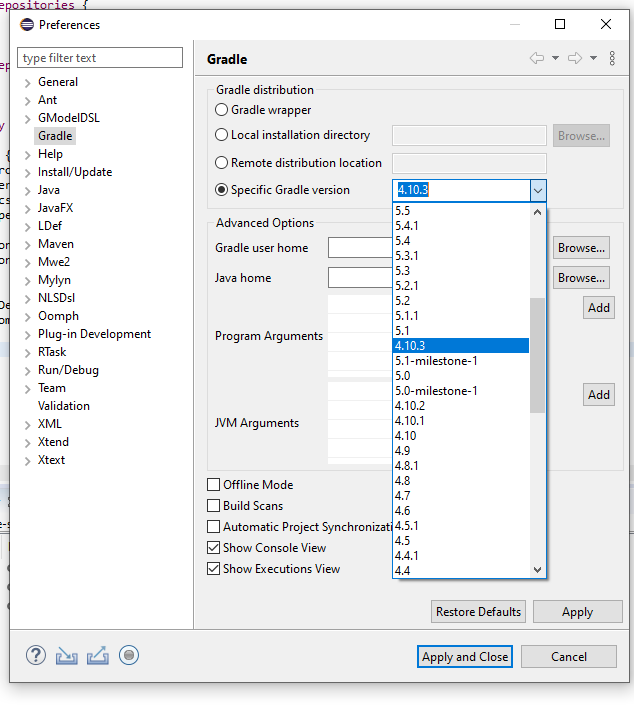
This specification is neccessary for smooth progression through this tutorial. Open the preferences dialog using the menus: Window > Preferences, then go to Gradle section and select the version 4.10.3 as shown below:
Now it's time to go back to the Java perspective. In the top right corner click on the button:  .
.
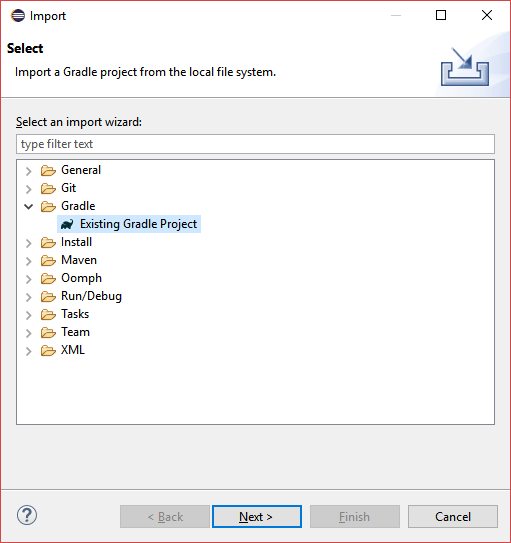
Start by importing the first simulation so we can get to know the Simulation Construction Set (SCS), our interactive GUI. Go to: File > Import... In the new window, select "existing Gradle Project":
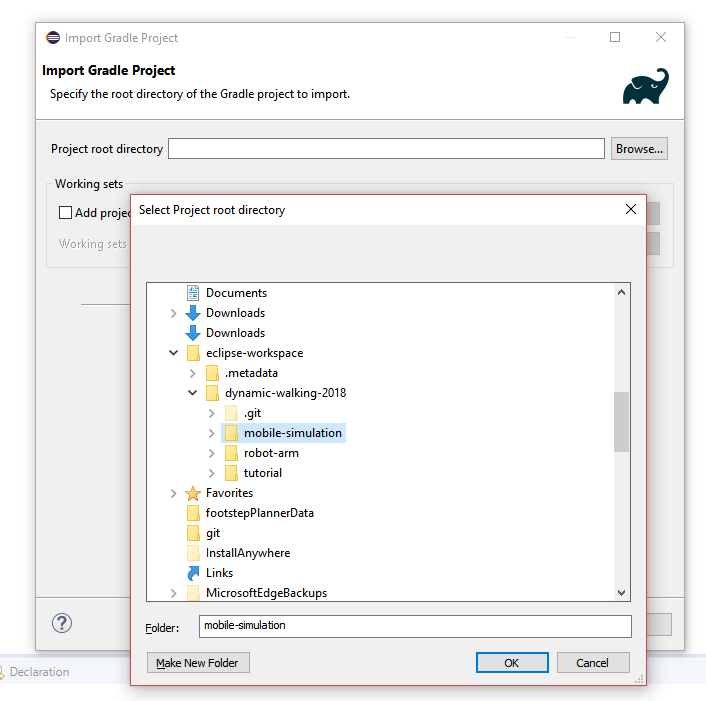
When prompted for the "Project root directory" select the Browse option. Inside your eclipse workspace folder, find and open "dynamic-walking-tutorial-2018", inside of which is the file "mobile-simulation":
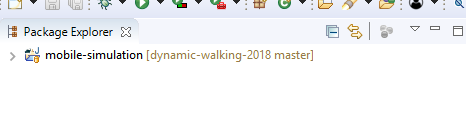
Click OK and then Finish. We use Gradle to manage our dependencies, meaning that it'll find and download the Jars (compiled Java libraries) required for the project and automatically set them up. This might take several minutes. At the bottom right corner of the IDE, you can see that Gradle is setting up the project in the background. Once the progression bar is gone, your "Package Explorer" view should look like this:
Proceed to the next step of this tutorial Step 2.