In‐app chat
Find out more about the Live chat product in the Infobip docs.
- Intro
- Requirements
- Permissions
- Quick-start guide
- Example application
- Display an In-app chat screen
- Customer's Chat History
- Customize an In-app chat
- Handle notification taps
- In-app chat events
- Sending attachments
- Attachments preview
- Advanced
- Unread chat push messages counter
- Changing localization
- Sending Contextual Data / Metadata
- Multiple chat threads
- Authenticated chat
- Troubleshooting
In-app chat is a mobile component for connecting and interacting with the Infobip's LiveChat product. In-app chat is built on top of the Mobile Messaging SDK and that's why Mobile Messaging should be included in your application and properly configured.
- Android Studio
- Supported API Levels: 21 (Android 5.0 - Lollipop) - 34 (Android 14.0 - Upside Down Cake)
- AndroidX
- In-app chat SDK source and target compatibility set to Java 8
- Infobip account
The In-app chat SDK declares the following as dangerous permissions:
Runtime check and request for all dangerous permissions is handled by library UI components. There is also one more normal permission ACCESS_NETWORK_STATE declared in library.
In-app chat requires from you a careful setup, both in your mobile app and in your Infobip account. The following steps must be prepared in order to ensure the chat communication:
-
Include and set up the Mobile Messaging SDK in your application. If you haven't already, follow its Quick start guide carefully. Only by being able to receive a
pushRegistrationIdin your device, you'll be able to successfully connect to the In-app chat, which we explain in the next steps. -
Create a LiveChat Widget and link the Mobile Messaging application profile you've created in step 1 to the widget configuration.
-
Add dependencies to your app's
build.gradlefile:
dependencies {
    ...
    implementation "com.infobip:infobip-mobile-messaging-android-chat-sdk:12.+@aar"
    implementation 'androidx.exifinterface:exifinterface:1.1.0'  // can be any 1.+ version, 1.1.0 is an example

    //since version 8.0.0 you need to add following depencies (if you do not have them already)
    implementation 'org.jetbrains.kotlin:kotlin-stdlib:+'
    implementation 'androidx.databinding:viewbinding:+'
    implementation 'androidx.lifecycle:lifecycle-runtime-ktx:+'
}
Version 4.0.0 onwards requires you to call the method that activates an in-app chat service after initializing the MobileMessaging SDK.
InAppChat.getInstance(context).activate()expand to see Java code
InAppChat.getInstance(context).activate();Now, you can start sending messages.
The Mobile Messaging In-app SDK provides a built-in chat view which you can quickly embed into your own application. You can initialize a chat view with just one line of code:
InAppChat.getInstance(context).inAppChatScreen().show()expand to see Java code
InAppChat.getInstance(context).inAppChatScreen().show();It will immediately open a chat view activity on top of a current activity.
Once your app is installed, it is assigned a set of IDs for receiving push notifications and connecting to LiveChat. Additionally, a mostly empty "person" entity is automatically created on the Infobip side as part of the installation. For more details, see another page explaining users and installations terminology.
While having an anonymous customer/person fits some use cases, most likely you'll have an authenticated customer you can/want to identify (for example, by their email, phone number, or some other unique ID). To do so, use the Personalize feature of the Mobile messaging SDK. You can link your customer to your app installation and also you'll be able to recover a chat history with that customer.
Once your app has received the push registration, personalize your customer. Next time the chat shows up, previously sent messages will be present, recovering the open conversation.
There is also an option to depersonalize a customer. This reverts the customer to its original, anonymous state emptying the chat history. This is a common/suggested practice for log-out flows.
In-app chat consists of native Android views and Livechat widget presented in WebView. Navigation toolbar and chat input are done using native Android views. Livechat widget shows messages list. You can customize native Android views and Livechat widget separately. To customize native parts of In-app chat you must provide Android theme. Read more about Livechat widget customization options in Livechat widget theme section. Using combination of both, Android theme and Livechat widget theme, you can fully customize In-app chat.
For higher integration flexibility over In-app chat, you can display In-app chat as view and avoid all not necessary native Android views and use only Livechat widget.
Version 8.0.0 onwards introduces a new approach to customize the In-app chat with new attributes. Simultaneously, we have deprecated old customization approach while there is still fallback to the old customization attributes if the new ones are not present.
Final value for every customizable attribute is resolved from multiple source-by-source priority. The source with the highest priority defines a final attribute value. If source does not define an attribute value, there is fallback to the source with lower priority.
Sources by priority:
-
InAppChatThemeprovided in runtime - New-approach
IB_AppTheme.Chatandroid theme attribute defined in xml, with itemsibChatToolbarStyle,ibChatAttachmentToolbarStyle,ibChatInputStyleandibChatStyle - Old-approach
IB_AppTheme.Chatandroid theme attribute defined in xml, with itemscolorPrimary,colorPrimaryDark,colorControlNormalandtitleTextColor - LiveChat widget theme
- In-app chat default theme
To customize the In-app chat you have to define your own custom theme. There are two ways to do that:
- In application's
styles.xmlwith nameIB_AppTheme.Chat. The In-app chat offers 4 theme attributes, each to customize separate part/view of the In-app chat screen.
<resources>
  <style name="IB_AppTheme.Chat">
    <item name="ibChatToolbarStyle">@style/InAppChat.Demo.Toolbar</item> <!-- In-app chat toolbar style -->
    <item name="ibChatAttachmentToolbarStyle">@style/InAppChat.Demo.Toolbar</item> <!-- In-app chat attachment preview toolbar style -->
    <item name="ibChatInputStyle">@style/InAppChat.Demo.Input</item> <!-- In-app chat message input style -->
    <item name="ibChatStyle">@style/InAppChat.Demo.Chat</item> <!-- In-app chat style -->
  </style>
  <style name="Demo"/>
</resources>- In code, you can pass
InAppChatThemetoInAppChat.setTheme(), which provides same customization as the xml approach.
InAppChat.getInstance(context).setTheme(
    InAppChatTheme(
        InAppChatToolbarStyle(), //chat toolbar
        InAppChatToolbarStyle(), //attachment toolbar
        InAppChatStyle(),
        InAppChatInputViewStyle()
    )
)
expand to see Java code
InAppChat.getInstance(context).setTheme(
    new InAppChatTheme(
        new InAppChatToolbarStyle(), //chat toolbar
        new InAppChatToolbarStyle(), //attachment toolbar
        new InAppChatStyle(),
        new InAppChatInputViewStyle()
    )
);Both theme attributes ibChatToolbarStyle and ibChatAttachmentToolbarStyle support same toolbar style attributes. See also a list of supported attributes for
TextAppearance.
<style name="InAppChat.Demo.Toolbar" parent="Demo">
    <item name="ibChatToolbarBackgroundColor">@android:color/black</item>
    <item name="ibChatStatusBarBackgroundColor">@android:color/black</item>
    <item name="ibChatStatusBarIconsColorMode">light</item> <!-- Values light or dark, supported only for API >= 23 -->
    <item name="ibChatNavigationIcon">@drawable/ic_chat_arrow_back</item>
    <item name="ibChatNavigationIconTint">@android:color/white</item>
    <item name="ibChatSaveAttachmentMenuItemIcon">@drawable/ic_chat_save</item> <!-- ibChatAttachmentToolbarStyle only -->
    <item name="ibChatMenuItemsIconTint">@android:color/white</item>
    <item name="ibChatTitleTextAppearance">@style/TextAppearance.MaterialComponents.Headline6</item>
    <item name="ibChatTitleTextColor">@android:color/white</item>
    <item name="ibChatTitleText">@null</item>
    <item name="ibChatTitleCentered">false</item>
    <item name="ibChatSubtitleTextAppearance">@null</item>
    <item name="ibChatSubtitleTextColor">@android:color/white</item>
    <item name="ibChatSubtitleText">@null</item>
    <item name="ibChatSubtitleCentered">false</item>
</style>
ibChatTitleTextColorvalue takes precedence overibChatTitleTextAppearance'stextColorattribute value. Same applies toibChatSubtitleTextColorandibChatSubtitleTextAppearance.
Theme attribute ibChatStyle supports the following chat style attributes. See also a list of supported attributes for TextAppearance.
<style name="InAppChat.Demo.Chat" parent="Demo">
    <item name="ibChatBackgroundColor">@android:color/white</item>
    <item name="ibChatProgressBarColor">@android:color/black</item>
    <item name="ibChatNetworkConnectionErrorText">Your custom network connection error message</item>
    <item name="ibChatNetworkConnectionErrorTextColor">@android:color/black</item>
    <item name="ibChatNetworkConnectionErrorTextAppearance">@style/TextAppearance.MaterialComponents.Subtitle1</item>
    <item name="ibChatNetworkConnectionErrorLabelBackgroundColor">@android:color/gray</item>
</style>
ibChatNetworkConnectionErrorTextColorvalue takes precedence overibChatNetworkConnectionErrorTextAppearance'stextColorattribute value.
Theme attribute ibChatInputStyle supports the following chat input style attributes. See also a list of supported attributes for TextAppearance.
<style name="InAppChat.Demo.Input" parent="Demo">
    <item name="ibChatInputTextAppearance">@style/TextAppearance.MaterialComponents.Body1</item>
    <item name="ibChatInputTextColor">@android:color/black</item>
    <item name="ibChatInputBackgroundColor">@android:color/white</item>
    <item name="ibChatInputHintText">Your custom hint</item>
    <item name="ibChatInputHintTextColor">@android:color/darker_gray</item>
    <item name="ibChatInputAttachmentBackgroundColor">@android:color/white</item>
    <item name="ibChatInputAttachmentBackgroundDrawable">@null</item>
    <item name="ibChatInputAttachmentIcon">@null</item>
    <item name="ibChatInputAttachmentIconTint">@android:color/black</item>
    <item name="ibChatInputSendBackgroundColor">@android:color/white</item>
    <item name="ibChatInputSendBackgroundDrawable">@null</item>
    <item name="ibChatInputSendIcon">@null</item>
    <item name="ibChatInputSendIconTint">@android:color/black</item>
    <item name="ibChatInputSeparatorLineColor">@android:color/darker_gray</item>
    <item name="ibChatInputSeparatorLineVisible">true</item>
    <item name="ibChatInputCursorColor">@android:color/black</item>
</style>
ibChatInputTextColorvalue takes precedense overibChatInputTextAppearance'stextColorattribute value.ibChatInputAttachmentIconTintandibChatInputSendIconTintsupport color state list resource type.
List of supported attributes for TextAppearance:
<attr name="textColor" />
<attr name="textSize" />
<attr name="textStyle" />
<attr name="typeface" />
<attr name="fontFamily" />
<attr name="textColorHighlight" />
<attr name="textColorHint" />
<attr name="textColorLink" />
<attr name="textAllCaps" format="boolean" />
<attr name="shadowColor" format="color" />
<attr name="shadowDx" format="float" />
<attr name="shadowDy" format="float" />
<attr name="shadowRadius" format="float" />
<attr name="elegantTextHeight" format="boolean" />
<attr name="letterSpacing" format="float" />
<attr name="fontFeatureSettings" format="string" />
Quick migration to a new 8.0.0 customization approach
If you want to preserve the current color setup and migrate to a new customization approach, follow the section.
Deprecated approach:
<resources>
    <style name="IB_AppTheme.Chat">
        <item name="colorPrimary">@color/colorPrimary</item> <!-- DEPRECATED | color of toolbar background and send chat button tint -->
        <item name="colorPrimaryDark">@color/colorPrimaryDark</item> <!-- DEPRECATED | color of status / notification bar -->
        <item name="colorControlNormal">@android:color/white</item> <!-- DEPRECATED | color of navigation icon in toolbar -->
        <item name="titleTextColor">@android:color/white</item> <!-- DEPRECATED | color of toolbar title text -->
    </style>
</resources><resources>
<style name="IB_AppTheme.ChatAttach">
<item name="colorPrimary">@color/colorPrimary</item> <!-- DEPRECATED | color of toolbar background -->
<item name="colorPrimaryDark">@color/colorPrimaryDark</item> <!-- DEPRECATED | color of status / notification bar -->
<item name="colorControlNormal">@android:color/white</item> <!-- DEPRECATED | color of navigation icon in toolbar -->
<item name="titleTextColor">@android:color/white</item> <!-- DEPRECATED | color of toolbar title text -->
</style>
</resources>is equals to a new approach
<resources>
    <style name="IB_AppTheme.Chat">
        <item name="ibChatToolbarStyle">@style/InAppChat.Demo.Toolbar</item> <!-- In-app chat toolbar style -->
        <item name="ibChatAttachmentToolbarStyle">@style/InAppChat.Demo.Toolbar</item> <!-- In-app chat attachment preview toolbar style -->
    </style>

    <style name="Demo"/>

    <style name="InAppChat.Demo.Toolbar" parent="Demo">
        <item name="ibChatToolbarBackgroundColor">@color/colorPrimary</item> <!-- color of toolbar background and send chat button tint -->
        <item name="ibChatStatusBarBackgroundColor">@color/colorPrimaryDark</item> <!-- color of status / notification bar -->
        <item name="ibChatNavigationIconTint">@android:color/white</item> <!-- color of navigation icon in toolbar -->
        <item name="ibChatTitleTextColor">@android:color/white</item> <!-- color of toolbar title text -->
    </style>
</resources>
Customization approach before version 8.0.0
Certain attributes of a built-in chat view are customizable through resources.
You can supply your custom title for chat activity via ib_chat_view_title string in strings.xml:
<resources>
    <string name="ib_chat_view_title">My Chat</string>
</resources>You can define your own custom theme for the chat view in styles.xml and change action bar/toolbar and notification bar colors, colorPrimary and colorPrimaryDark respectively. Use IB_AppTheme.Chat name for a chat view theme and IB_AppTheme.ChatAttach name for a chat attachments preview theme.
<resources>
    <style name="IB_AppTheme.Chat">
        <item name="colorPrimary">@color/colorPrimary</item> <!-- color of toolbar background and send chat button tint -->
        <item name="colorPrimaryDark">@color/colorPrimaryDark</item> <!-- color of status / notification bar -->
        <item name="colorControlNormal">@android:color/white</item> <!-- color of navigation icon in toolbar -->
        <item name="titleTextColor">@android:color/white</item> <!-- color of toolbar title text -->
    </style>
</resources><resources>
<style name="IB_AppTheme.ChatAttach">
<item name="colorPrimary">@color/colorPrimary</item> <!-- color of toolbar background -->
<item name="colorPrimaryDark">@color/colorPrimaryDark</item> <!-- color of status / notification bar -->
<item name="colorControlNormal">@android:color/white</item> <!-- color of navigation icon in toolbar -->
<item name="titleTextColor">@android:color/white</item> <!-- color of toolbar title text -->
</style>
</resources>Version 12.4.0 onwards introduces a new option to set Livechat widget theme. Livechat widget themes are defined on the Live chat widget setup page on Infobip Portal. You can define multiple custom themes and customize various widget attributes, read Livechat documentation to get information about all possible widget customization options.
To set Livechat theme in In-app chat you must:
- Define the name and values of your theme(s) in a JSON format, under widget section Theme -> Advance Customisation, in Infobip Portal.
- Once you know the names of your themes, you can use following function in runtime, and the customisation will automatically be applied:
InAppChat.getInstance(context).setWidgetTheme("myThemeName")expand to see Java code
InAppChat.getInstance(context).setWidgetTheme("myThemeName");Mobile Messaging SDK triggers the NOTIFICATION_TAPPED event when a user taps on a chat message notification.
Note that chat messages may be recognized by the Message.isChatMessage() attribute:
You can register broadcast receiver for this event and process the corresponding message:
val tapReceiver = object: BroadcastReceiver() {
    override fun onReceive(context:Context, intent: Intent) {
        val message = Message.createFrom(intent)
        if (message.isChatMessage()) {
            // process message
        }
    }
}
LocalBroadcastManager.getInstance(context).registerReceiver(tapReceiver, IntentFilter(Event.NOTIFICATION_TAPPED.key))
expand to see Java code
private final BroadcastReceiver tapReceiver = new BroadcastReceiver() {
    @Override
    public void onReceive(Context context, Intent intent) {
        Message message = Message.createFrom(intent);

        if (message.isChatMessage()) {
            // process message
        }
    }
};

LocalBroadcastManager.getInstance(context).registerReceiver(tapReceiver, new IntentFilter(Event.NOTIFICATION_TAPPED.getKey()));The default behavior of the Mobile Messaging SDK is to open a default launcher activity when a user taps on a chat message notification. You can also specify your own activity stack to use:
InAppChat.getInstance(context).setActivitiesToStartOnMessageTap(FirstActivity::class.java, SecondActivity::class.java)expand to see Java code
InAppChat.getInstance(context).setActivitiesToStartOnMessageTap(FirstActivity.class, SecondActivity.class);In this case, the library will create a stack of activities in the order specified in the method call: SecondActivity will be on the top and then FirstActivity. Each activity will receive an intent with a Message inside:
val message: Message = Message.createFrom(intent)expand to see Java code
Message message = Message.createFrom(intent);The In-app chat library supports all core SDK library events plus the following chat-specific events, which you can receive with intents in broadcast receivers:
| Event | Parameters | Description |
|---|---|---|
CHAT_CONFIGURATION_SYNCED |
Triggered when chat configuration is synchronized. | |
UNREAD_MESSAGES_COUNTER_UPDATED |
Unread messages count | Triggered when the number of unread messages is changed. |
CHAT_VIEW_CHANGED |
InAppChat view name | Triggered when the view in the InAppChat is changed. |
LIVECHAT_REGISTRATION_ID_UPDATED |
Livechat registration id | Triggered when livechat registration id is updated. |
CHAT_AVAILABILITY_UPDATED |
Boolean telling if chat is available | Triggered when chat availability is updated. |
You will need to register a receiver for each event of interest. In your receiver, you will be able to process parameters according to the table above, for example:
private val eventReceiver = object: BroadcastReceiver() {
    override fun onReceive(context:Context, intent: Intent) {
        // process event occurrence
    }
}
LocalBroadcastManager.getInstance(context).registerReceiver(eventReceiver, IntentFilter(InAppChatEvent.CHAT_CONFIGURATION_SYNCED.key))
expand to see Java code
private final BroadcastReceiver eventReceiver = new BroadcastReceiver() {
    @Override
    public void onReceive(Context context, Intent intent) {
        // process event occurrence
    }
};

LocalBroadcastManager.getInstance(context).registerReceiver(eventReceiver, new IntentFilter(InAppChatEvent.CHAT_CONFIGURATION_SYNCED.getKey()));Action name to subscribe to: org.infobip.mobile.messaging.chat.CHAT_CONFIGURATION_SYNCED.
Action name to subscribe to: org.infobip.mobile.messaging.chat.UNREAD_MESSAGES_COUNTER_UPDATED. Receiving event data in BroadcastReceiver:
override fun onReceive(context: Context, intent: Intent) {
    val unreadMessagesCount = intent.getIntExtra(BroadcastParameter.EXTRA_UNREAD_CHAT_MESSAGES_COUNT)
}
expand to see Java code
@Override
public void onReceive(Context context, Intent intent) {
    int unreadMessagesCount = intent.getIntExtra(BroadcastParameter.EXTRA_UNREAD_CHAT_MESSAGES_COUNT);
}Action name to subscribe to: org.infobip.mobile.messaging.chat.CHAT_VIEW_CHANGED. Receiving event data in BroadcastReceiver:
override fun onReceive(context: Context, intent: Intent) {
    val view = intent.getStringExtra(BroadcastParameter.EXTRA_CHAT_VIEW)
    val inAppChatWidgetView = InAppChatWidgetView.valueOf(view)
}
expand to see Java code
@Override
public void onReceive(Context context, Intent intent) {
    String view = intent.getStringExtra(BroadcastParameter.EXTRA_CHAT_VIEW);
    InAppChatWidgetView inAppChatWidgetView = InAppChatWidgetView.valueOf(view);
}
Supported InAppChat view values:
LOADING, THREAD_LIST, LOADING_THREAD, THREAD, CLOSED_THREAD, SINGLE_MODE_THREADAction name to subscribe to: org.infobip.mobile.messaging.chat.LIVECHAT_REGISTRATION_ID_UPDATED. Receiving event data in BroadcastReceiver:
override fun onReceive(context: Context, intent: Intent) {
    val livechatRegistrationId = intent.getStringExtra(BroadcastParameter.EXTRA_LIVECHAT_REGISTRATION_ID)
}
expand to see Java code
@Override
public void onReceive(Context context, Intent intent) {
    String livechatRegistrationId = intent.getStringExtra(BroadcastParameter.EXTRA_LIVECHAT_REGISTRATION_ID);
}Action name to subscribe to: org.infobip.mobile.messaging.chat.CHAT_AVAILABILITY_UPDATED. Receiving event data in BroadcastReceiver:
override fun onReceive(context: Context, intent: Intent) {
    val isChatAvailable = intent.getStringExtra(BroadcastParameter.EXTRA_IS_CHAT_AVAILABLE)
}
expand to see Java code
@Override
public void onReceive(Context context, Intent intent) {
    String isChatAvailable = intent.getStringExtra(BroadcastParameter.EXTRA_IS_CHAT_AVAILABLE);
}Version 3.1.0 onwards adds a feature to send attachments.
In order to capture a photo and a video you must declare permissions in Manifest.xml. Add CAMERA and WRITE_EXTERNAL_STORAGE permission inside the tag.
<manifest ...>
...
    <uses-permission android:name="android.permission.CAMERA" />
    <uses-permission android:name="android.permission.WRITE_EXTERNAL_STORAGE"/>
...
Android 13 onwards introduces new granular permissions:
READ_MEDIA_AUDIO,READ_MEDIA_IMAGESandREAD_MEDIA_VIDEO, so they must be added inside the tag:
<manifest ...>
...
  <uses-permission android:name="android.permission.READ_MEDIA_IMAGES" />
  <uses-permission android:name="android.permission.READ_MEDIA_VIDEO" />
  <uses-permission android:name="android.permission.READ_MEDIA_AUDIO" />
...
Android 14 onwards introduces another permission:
READ_MEDIA_VISUAL_USER_SELECTED, it must be added inside the tag:
<manifest ...>
...
  <uses-permission android:name="android.permission.READ_MEDIA_VISUAL_USER_SELECTED" />
...
Add
requestLegacyExternalStorage="true"toAndroidManifest.xmlto prevent issues with capturing attachments from the camera for Android 10+ devices.<manifest ... > <application android:requestLegacyExternalStorage="true" ... > ... </application> </manifest>
Images captured from the camera are saved to the
/Pictures/<Your app name>/InAppChatfolder and the following applies from 5.2.4 version onwards:
- If the size is more than 5MB, image quality will be set to 80%.
- If the size is more than 10MB, the image will be scaled down to decrease the size by 2x.
| Media type | File size | File format |
|---|---|---|
| image | 10MB | JPG, JPEG, PNG |
| video | 10MB | MP4 |
Version 3.4.0 onwards introduces a new feature, attachments preview.
In order to save an attachment you must declare permission in Manifest.xml. Add the WRITE_EXTERNAL_STORAGE permission inside the tag, if it hasn't been previously added.
<manifest ...>
...
    <uses-permission android:name="android.permission.WRITE_EXTERNAL_STORAGE" />
...
This is supported from version 4.3.0 onwards.
To display an in-app chat screen, use InAppChatActivity as described in the Display an In-app chat screen section. Alternatively, use InAppChatFragment which you can embed into your Activity.
To set up your Activity for using InAppChatFragment follow the steps below. Full code can be checked in the ChatExample).
- Create a layout in your
activity.xmlto use it as a container for the fragment. ForMainActivityfrom the ChatExample we usedFrameLayout- activity_main.xml
<android.support.design.widget.CoordinatorLayout>
...
    <FrameLayout
        android:id="@+id/fragmentContainer"
        android:layout_width="match_parent"
        android:layout_height="match_parent" />

</android.support.design.widget.CoordinatorLayout>- Use the following method to show an in-app chat as Fragment.
containerId- ID of the fragment container which was added in the previous step;fragmentManager-FragmentManageran instance to make interaction with Fragment. You can get it from activity, callinggetSupportFragmentManager();
InAppChat.getInstance(context).showInAppChatFragment(fragmentManager, containerId);- Implement the
InAppChatFragment.InAppChatActionBarProviderinterface in your Activity.
class MainActivity: AppCompatActivity(), InAppChatFragment.InAppChatActionBarProvider {

    /* InAppChatActionBarProvider */

    /**
     * Provide the original ActionBar to give the in-app chat ability to hide it and use its own ActionBar.
     * It will be hidden when an in-app Chat fragment is shown and returned back when an in-app Chat fragment hidden.
     */
    override val originalSupportActionBar: ActionBar?
        get() = supportActionBar

    /**
     * Implement a back button behaviour.
     * Call the following method with a corresponding parameter:
     * {@link InAppChat#hideInAppChatFragment(FragmentManager)}
     */
    override fun onInAppChatBackPressed() {
        InAppChat.getInstance(this).hideInAppChatFragment(supportFragmentManager)
        //you can pass "true" as second argument to disconnect chat when fragment is hidden to receive push notifications
        //InAppChat.getInstance(this).hideInAppChatFragment(supportFragmentManager, true)
    }
...
}
expand to see Java code
public class MainActivity extends AppCompatActivity implements InAppChatFragment.InAppChatActionBarProvider {

    /* InAppChatActionBarProvider */

    /**
     * Provide the original ActionBar to give the in-app chat ability to hide it and use its own ActionBar.
     * It will be hidden when an in-app Chat fragment is shown and returned back when an in-app Chat fragment hidden.
     */
    @Nullable
    @Override
    public ActionBar getOriginalSupportActionBar() {
        return getSupportActionBar();
    }

    /**
     * Implement a back button behaviour.
     * Call the following method with a corresponding parameter:
     * {@link InAppChat#hideInAppChatFragment(FragmentManager)}
     */
    @Override
    public void onInAppChatBackPressed() {
        InAppChat.getInstance(MainActivity.this).hideInAppChatFragment(getSupportFragmentManager());
        //you can pass "true" as second argument to disconnect chat when fragment is hidden to receive push notifications
        //InAppChat.getInstance(this).hideInAppChatFragment(supportFragmentManager, true);
    }
...
}Version 8.0.0 onwards introduces an InAppChatView which you can embed into your Activity or Fragment. It allows you to use the InAppChat with your custom-made toolbar, message input, and whatever you wish to have in the chat screen. To customize the InAppChatView see the chat style section. Although you have a full control over the chat screen content, there are mandatory set-up steps you have to follow:
- Add the
InAppChatViewinto your layout.
<androidx.constraintlayout.widget.ConstraintLayout>
  ...
  <org.infobip.mobile.messaging.chat.view.InAppChatView
          android:id="@+id/inAppChatView"
          android:layout_width="match_parent"
          android:layout_height="match_parent"/>
  ...
</androidx.constraintlayout.widget.ConstraintLayout>- Inject Activity/Fragment's
LifecycleintoInAppChatView.
- To get Activity's Lifecycle, call
getLifecycle()- To get Fragment's Lifecycle, call
getViewLifecycleOwner().getLifecycle()
- To support multiple chat threads feature, implement the
InAppChatView.EventsListenerinterface where you will obtain multiple useful callbacks, except anothervoid onChatViewChanged(InAppChatWidgetView widgetView)one important for handling the InAppChat internal navigation. - (Optional) Handle InAppChat's errors on your own by implementing the
InAppChatView.ErrorsHandlerinterface. TheInAppChatViewexposes its default error handler by callinginAppChatView.getDefaultErrorsHandler().
class MainActivity: AppCompatActivity() {

  override fun onCreate(savedInstanceState: Bundle?) {
    super.onCreate(savedInstanceState)
    //1. Injects activity's lifecycle
    val inAppChatView: InAppChatView = findViewById(R.id.inAppChatView)
    inAppChatView.init(lifecycle)

    //2. Sets InAppChatView.EventsListener to handle multithread internal navigation
    inAppChatView.eventsListener = object : InAppChatView.EventsListener {
      override fun onChatLoaded(controlsEnabled: Boolean) {
        //Chat was loaded, if controlsEnabled = true there was no error
      }

      override fun onChatDisconnected() {
        //Chat connection was stopped
      }

      override fun onChatReconnected() {
        //Chat connection was re-established
      }

      override fun onChatControlsVisibilityChanged(isVisible: Boolean) {
        //Handles chat controls visibility change, you can show/hide input based on isVisible value
      }

      override fun onAttachmentPreviewOpened(url: String?, type: String?, caption: String?) {
        //Handles attachment preview
      }

      override fun onChatViewChanged(widgetView: InAppChatWidgetView) {
        //Handles navigation in multithread livechat widget
        when (widgetView) {
          InAppChatWidgetView.LOADING,
          InAppChatWidgetView.THREAD_LIST,
          InAppChatWidgetView.SINGLE_MODE_THREAD -> {
            //no need to handle internal navigation
          }
          InAppChatWidgetView.LOADING_THREAD,
          InAppChatWidgetView.THREAD,
          InAppChatWidgetView.CLOSED_THREAD -> {
            //to navigate back to THREAD_LIST, use inAppChatView.showThreadList();
          }
        }
        //Handles message input in multithread livechat widget
        when (widgetView) {
          InAppChatWidgetView.LOADING,
          InAppChatWidgetView.THREAD_LIST,
          InAppChatWidgetView.LOADING_THREAD,
          InAppChatWidgetView.CLOSED_THREAD -> {
            //it is prohibited to send messages
          }
          InAppChatWidgetView.SINGLE_MODE_THREAD,
          InAppChatWidgetView.THREAD -> {
            //you can send messages
          }
        }
      }

      override fun onChatWidgetInfoUpdated(widgetInfo: WidgetInfo) {
        //Useful livechat widget information
      }

      override fun onChatWidgetThemeChanged(widgetThemeName: String) {
        //Applied widget theme name
      }

    }

    //3. Sets InAppChatView.ErrorsHandler to handle InAppChatView errors on your own
    inAppChatView.errorsHandler = object : InAppChatView.ErrorsHandler {
      override fun handlerError(error: String) {
        //Your custom handling of general error or use a default handler
        inAppChatView.defaultErrorsHandler.handlerError(error);
      }

      override fun handlerWidgetError(error: String) {
        //Your custom handling of Livechat widget error or use default handler
        inAppChatView.defaultErrorsHandler.handlerWidgetError(error);
      }

      override fun handlerNoInternetConnectionError() {
        //Your custom handling of missing network connection error or use default handler
        inAppChatView.defaultErrorsHandler.handlerNoInternetConnectionError();
      }

    }

  }

}
expand to see Java code
public class MainActivity extends AppCompatActivity {

    @Override
    protected void onCreate(@Nullable Bundle savedInstanceState) {
      super.onCreate(savedInstanceState);
      //1. Injects activity's lifecycle
      InAppChatView inAppChatView = findViewById(R.id.inAppChatView);
      inAppChatView.init(getLifecycle());

      //2. Set InAppChatView.EventsListener to handle multithread internal navigation
      inAppChatView.setEventsListener(new InAppChatView.EventsListener() {

        @Override
        public void onChatLoaded(boolean controlsEnabled) {
          //Chat was loaded, if controlsEnabled = true there was no error
        }

        @Override
        public void onChatDisconnected() {
          //Chat connection was stopped
        }

        @Override
        public void onChatReconnected() {
          //Chat connection was reestablished
        }

        @Override
        public void onChatControlsVisibilityChanged(boolean isVisible) {
          //Handles chat controls visibility change, you can show/hide input based on isVisible value
        }

        @Override
        public void onAttachmentPreviewOpened(@Nullable String url, @Nullable String type, @Nullable String caption) {
          //Handles attachment preview
        }

        @Override
        public void onChatViewChanged(@NonNull InAppChatWidgetView widgetView) {
          //Handles navigation in multithread livechat widget
          switch (widgetView) {
            case LOADING:
            case THREAD_LIST:
            case SINGLE_MODE_THREAD:
              //no need to handle internal navigation
              break;
            case LOADING_THREAD:
            case THREAD:
            case CLOSED_THREAD:
              //to navigate back to THREAD_LIST use inAppChatView.showThreadList();
              break;
          }
          //Handles message input in multithread livechat widget
          switch (widgetView) {
            case LOADING:
            case THREAD_LIST:
            case LOADING_THREAD:
            case CLOSED_THREAD:
              //it is prohibited to send messages
              break;
            case SINGLE_MODE_THREAD:
            case THREAD:
              //you can send messages
              break;
          }
        }

        @Override
        public void onChatWidgetInfoUpdated(@NonNull WidgetInfo widgetInfo) {
          //Useful livechat widget information
        }

        @Override
        public void onChatWidgetThemeChanged(@NonNull String widgetThemeName) {
            //Applied widget theme name
        }

      });

      //3. Sets your own InAppChatView.ErrorsHandler to handle InAppChatView errors
      inAppChatView.setErrorsHandler(new InAppChatView.ErrorsHandler() {
        @Override
        public void handlerError(@NonNull String error) {
          //Your custom handling of general error or use default handler
          inAppChatView.getDefaultErrorsHandler().handlerError(error);
        }

        @Override
        public void handlerWidgetError(@NonNull String error) {
          //Your custom handling of Livechat widget error or use default handler
          inAppChatView.getDefaultErrorsHandler().handlerWidgetError(error);
        }

        @Override
        public void handlerNoInternetConnectionError() {
          //Your custom handling of missing network connection error or use default handler
          inAppChatView.getDefaultErrorsHandler().handlerNoInternetConnectionError();
        }
      });
    }

}The InAppChatView provides you with options to set a language, create a message with an attachment, send a message draft, send contextual data, execute internal chat navigation in case you use multiple chat threads and much more.
class InAppChatView {

    /**
     * Returns true if a chat is synchronized and multithread feature is enabled; otherwise returns false
     */
    val isMultiThread: Boolean

    /**
     * [InAppChatView] event listener to listen to Livechat widget events.
     */
    var eventsListener: EventsListener?

    /**
     * Sets a custom [InAppChatView.ErrorsHandler] handler to process [InAppChatView] errors on your own.
     */
    var errorsHandler: ErrorsHandler
    val defaultErrorsHandler: ErrorsHandler

    /**
     * Initialize [InAppChatView] with enclosing android component [Lifecycle].
     *
     * Loads chat and establish connection to be able to receive real time updates - new messages.
     * Chat connection is established and stopped based on provided [Lifecycle].
     * Chat connection is active only when [Lifecycle.State] is at least [Lifecycle.State.STARTED].
     *
     * @param lifecycle lifecycle of android Activity or Fragment
     */
    fun init(lifecycle: Lifecycle)

    /**
     * Use it to re-establish chat connection when you previously called [stopConnection].
     *
     * It is not needed to use it in most cases as chat connection is established and stopped based on [Lifecycle] provided in [init].
     * Chat connection is active only when [Lifecycle.State] is at least [Lifecycle.State.STARTED].
     *
     * By chat connection you can control push notifications.
     * Push notifications are suppressed while the chat connection is active.
     *
     * To detect if chat connection was re-established use [EventsListener.onChatReconnected] event from [EventsListener].
     */
    fun restartConnection()

    /**
     * Stops chat connection.
     *
     * It is not needed to use it in most cases as chat connection is established and stopped based on [Lifecycle] provided in [init].
     * Chat connection is stopped when [Lifecycle.State] is below [Lifecycle.State.STARTED].
     *
     * By chat connection you can control push notifications.
     * Push notifications are active only when chat connection is not active.
     *
     * Can be used to enable chat's push notifications when [InAppChatView] is not visible.
     * Use [restartConnection] to reestablish chat connection.
     *
     * To detect if chat connection is stopped use [EventsListener.onChatDisconnected] event from [EventsListener].
     */
    fun stopConnection()

    /**
     * Sets the language of a Livechat Widget
     * @param locale locale's language is used by Livechat Widget and native parts
     */
    fun setLanguage(locale: Locale)

    /**
     * Sets contextual data of the Livechat Widget
     *
     * @param data                   contextual data in the form of JSON string
     * @param allMultiThreadStrategy multithread strategy flag, true -> ALL, false -> ACTIVE
     */
    fun sendContextualData(data: String, allMultiThreadStrategy: Boolean)

    /**
     * Navigates a Livechat widget from thread detail back to thread's list destination only in multithread widgets.
     */
    fun showThreadList()

    /**
     * Sends a draft message to be shown in a chat-to-peer chat.
     * @param draft message
     */
    fun sendInputDraft(draft: String)

    /**
     * Sends a message to the chat with optional [InAppChatMobileAttachment].
     * @param message message to be send
     * @param attachment to create an attachment, use [InAppChatMobileAttachment]'s constructor where you provide attachment's mimeType, base64, and filename
     */
    fun sendChatMessage(message: String?, attachment: InAppChatMobileAttachment? = null)

    /**
     * Set the theme of the Livechat Widget.
     * You can define widget themes in <a href="https://portal.infobip.com/apps/livechat/widgets">Live chat widget setup page</a> in Infobip Portal, section `Advanced customization`.
     * Please check widget <a href="https://www.infobip.com/docs/live-chat/widget-customization">documentation</a> for more details.
     *
     * Function allows to change widget theme while chat is shown - in runtime.
     * If you set widget theme before chat is initialized by [InAppChatView.init] the theme will be used once chat is loaded.
     *
     * @param widgetThemeName unique theme name, empty or blank value is ignored
     */
    fun setWidgetTheme(widgetThemeName: String)
}
expand to see Java code
public class InAppChatView {

    public void init(@NotNull Lifecycle lifecycle);
    public void restartConnection();
    public void stopConnection();
    public void setLanguage(@NotNull Locale locale);
    public void sendContextualData(@NotNull String data, @NotNull Boolean allMultiThreadStrategy);
    public void showThreadList();
    public void sendInputDraft(@NotNull String draft);
    public void sendChatMessage(@Nullable String message);
    public void sendChatMessage(@Nullable String message, @Nullable InAppChatMobileAttachment attachment);
    public boolean isMultiThread();
    public void setEventListener(@Nullable InAppChatView.EventListener eventListener);
    @Nullable public InAppChatView.EventListener getEventListener();
    public void setErrorsHandler(@NotNull InAppChatView.ErrorsHandler errorsHandler);
    @NotNull public InAppChatView.ErrorsHandler getErrorsHandler();
    @NotNull public InAppChatView.ErrorsHandler getDefaultErrorsHandler();
    public void setWidgetTheme(@NotNull String widgetThemeName);
}Version 5.3.0 onwards includes a new API to get and reset current unread chat push messages counter. The counter increments each time the application receives a chat push message. This usually happens when a chat screen is inactive or the application is in the background/terminated state. To get a current counter value use the following API.
val messageCounter = InAppChat.getInstance(context).messageCounter
// use the count the way that suits you
expand to see Java code
int unreadChatMessagesCount = InAppChat.getInstance(context).getMessageCounter();
// use the count the way that suits you
The MobileMessaging SDK automatically resets the counter to 0 whenever a user opens the chat screen. However, use the following API in case you need to manually reset the counter.
InAppChat.getInstance(context).resetMessageCounter()expand to see Java code
InAppChat.getInstance(context).resetMessageCounter();You can set up a broadcast receiver for InAppChatEvent.UNREAD_MESSAGES_COUNTER_UPDATED with an extra broadcast parameter BroadcastParameter.EXTRA_UNREAD_CHAT_MESSAGES_COUNT of int value, in order to get updates about the counter in runtime, for example:
<receiver android:name=".UnreadMessagesCounterReceiver" android:exported="false">
    <intent-filter>
        <action android:name="org.infobip.mobile.messaging.chat.UNREAD_MESSAGES_COUNTER_UPDATED"/>
    </intent-filter>
</receiver>
Receiver code:
override fun onReceive(context: Context?, intent: Intent) {
    val unreadChatMessagesCounter = intent.getIntExtra(BroadcastParameter.EXTRA_UNREAD_CHAT_MESSAGES_COUNT)
}
expand to see Java code
@Override
public void onReceive(Context context, Intent intent) {
    int unreadChatMessagesCounter = intent.getIntExtra(BroadcastParameter.EXTRA_UNREAD_CHAT_MESSAGES_COUNT);
}Predefined messages prompted within the In-app chat (such as status updates, button titles, input field prompts) by default are localized using the system locale setting, but can be changed by providing your locale string with the following formats: "es_ES", "es-ES", "es".
InAppChat.getInstance(context).setLanguage("es-ES");It is possible to send contextual data / metadata to Infobip’s Conversations via the In-App Chat SDK. Data can be send any time or several times with only one restriction: the chat must be already loaded and present and the communication should have started. This means that there are messages visible in the chat and the initial “Start the chat” button has been clicked. The data sent will be automatically linked to the conversationId and accountId internally.
There are two parameters:
- The mandatory data, sent as string, in a format of JavaScript objects and values (for guidance, it must be accepted by JSON.stringify())
- An optional parameter, a multithread strategy that can be omitted and will use
falseas a default value. Possible values are:-
true= metadata sent to "ALL" non-closed conversations for a widget -
false= metadata sent to "ACTIVE" only conversation for a widget
-
Usage:
InAppChat chat = InAppChat.getInstance(context)
// Present and wait till the chat is loaded and ready, then simply call
chat.sendContextualData("{name: 'Robert'}");
// or with multithread flag
chat.sendContextualData("{name: 'Robert'}", true);If you use InAppChat as View you must use
InAppChatViewfunctionpublic void sendContextualData(@NotNull String data, @NotNull Boolean allMultiThreadStrategy);to send contextual data.
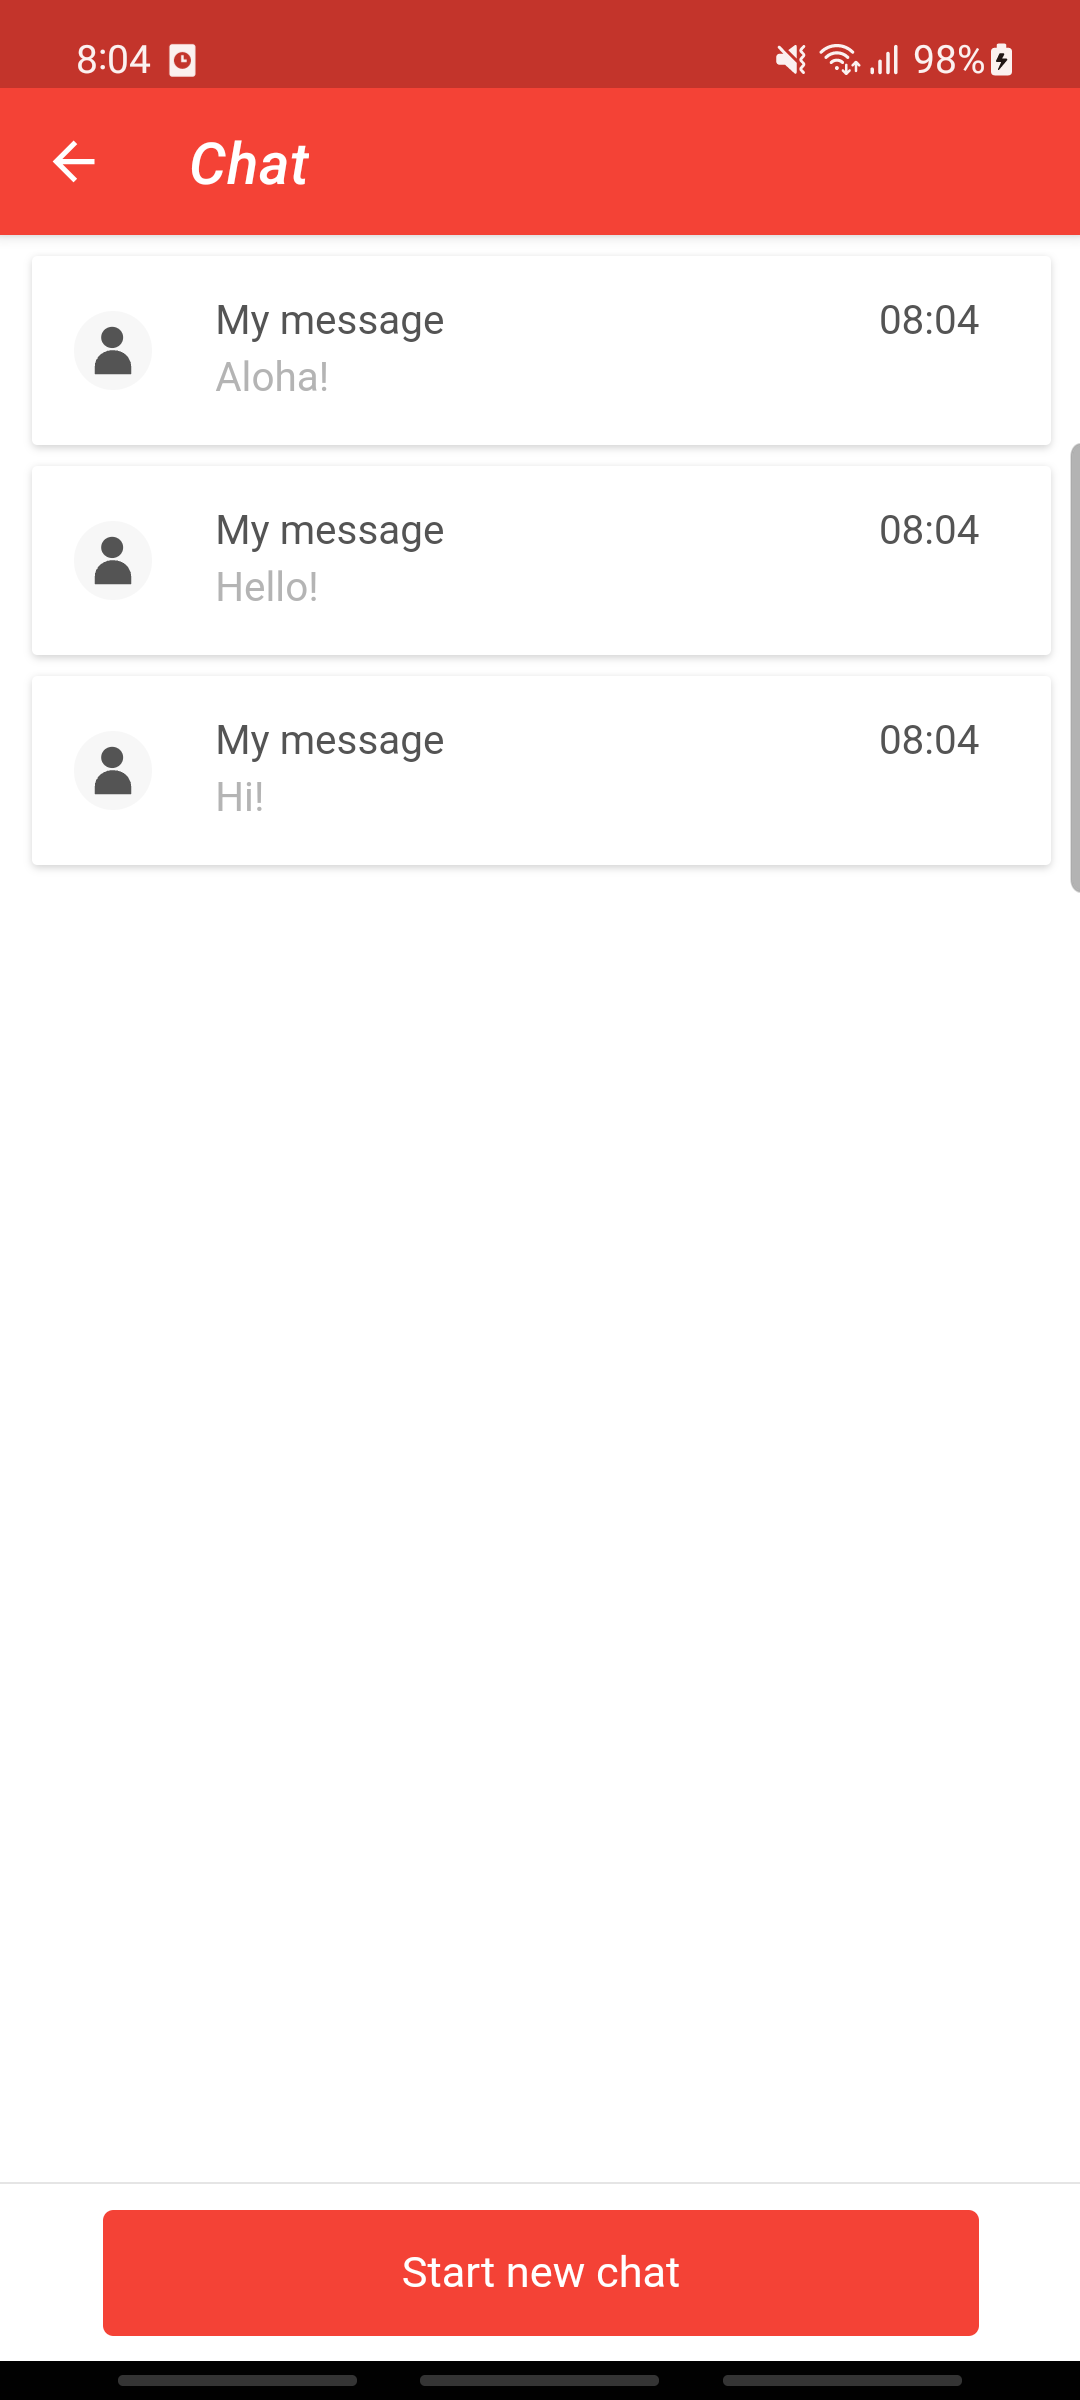
A default LiveChat widget takes the name of a channel InAppChat uses in the backend and works with single chat threads: one customer can only have one conversation opened. You can customize this behavior and configure a LiveChat widget to allow for multiple chat threads.

When the setting above is enabled, the InAppChat UI will automatically offer in mobile:
- A list (initially empty) of all unsolved conversation threads the user has opened.
- A button to "Start new chat" thread.
- Navigation to each conversation thread a user can open with a tap.
The functionality for multiple chat threads works out of the box. There is no need for extra implementation on the mobile integrator side. But there is something you may need to consider regarding navigation bar and the back button:
InAppChat, when multiple threads are in use, needs to take control over the back button to allow for a return to the threads list. In other words, InAppChat will handle the internal back navigation logic.
For this reason, if you show InAppChat as a fragment, it is mandatory to implement InAppChatFragment.InAppChatActionBarProvider in your UI component, as shown in the example below.
If you show InAppChat as an activity, ignore this setup.
class MainActivity: AppCompatActivity(), InAppChatFragment.InAppChatActionBarProvider {

  override fun onCreate(savedInstanceState: Bundle?) {
    super.onCreate(savedInstanceState)
    //Shows in-app chat as Fragment
    InAppChat.getInstance(applicationContext).showInAppChatFragment(supportFragmentManager, R.id.fragmentContainer)
  }

  override fun getOriginalSupportActionBar(): ActionBar? = supportActionBar

  override fun onInAppChatBackPressed() {
    InAppChat.getInstance(this).hideInAppChatFragment(supportFragmentManager)
    //you can pass "true" as second argument to disconnect chat when fragment is hidden to receive push notifications
    //InAppChat.getInstance(this).hideInAppChatFragment(supportFragmentManager, true)
  }

}
expand to see Java code
public class MainActivity extends AppCompatActivity implements InAppChatFragment.InAppChatActionBarProvider {

    @Override
    protected void onCreate(@Nullable Bundle savedInstanceState) {
        super.onCreate(savedInstanceState);
        //Shows in-app chat as Fragment
        InAppChat.getInstance(getApplicationContext()).showInAppChatFragment(getSupportFragmentManager(), R.id.fragmentContainer);
    }

    @Nullable
    @Override
    public ActionBar getOriginalSupportActionBar() {
        return getSupportActionBar();
    }

    @Override
    public void onInAppChatBackPressed() {
        InAppChat.getInstance(MainActivity.this).hideInAppChatFragment(getSupportFragmentManager());
        //you can pass "true" as second argument to disconnect chat when fragment is hidden to receive push notifications
        //InAppChat.getInstance(MainActivity.this).hideInAppChatFragment(getSupportFragmentManager());
    }
}It is possible to authenticate a user before accesing InAppChat. To do so, you'll need to enable the following feature in a LiveChat widget.

The authentication is accomplished by combining the Mobile Messaging SDK personalisation method with a JWT (JSON Web Token). The token needs to be generated at your end. For more details, see the instructions.
Authentication will use a unique identifier for your user, such as an email address, a phone number, or an external identifier. It is crucial that the identifier is valid and matches the identity defined in the UserIdentity you've passed in the Mobile Messaging SDK personalisation call. Otherwise, you'll end up with an authentication error.
InAppChat contains a JwtProvider interface to give InAppChat ability to authenticate. Implement the interface and pass the instance into InAppChat. The JwtProvider.provideJwt() function can be
triggered multiple times during the InAppChat's lifetime due to various events like screen orientation change, internet re-connection, etc. If you can ensure JWT expiration time is more than the
InAppChat's lifetime, you can return a cached token. Otherwise, it is important to provide a fresh new token for each invocation.
/*
1 - A user authenticates in your system and you recognize their unique identifier.
2 - You call the `personalize()` function, pass in the unique identifier, and optionally, other attributes, such as first name, second name, etc.
3 - You can now display a chat as authenticated by doing the following:
*/

InAppChat.getInstance(context).jwtProvider = InAppChat.JwtProvider {
    //every invocation creates and returns a fresh token
    "your JWT"
}
InAppChat.getInstance(context).inAppChatScreen().show()
expand to see Java code
/*
1 - A user authenticates in your system and you recognize their unique identifier.
2 - Your call is personalized with the unique identifier, and optionally, with other attributes, such as first name, second name, etc.
3 - You can now display a chat as authenticated by doing the following:
*/

InAppChat.getInstance(context).setJwtProvider(new InAppChat.JwtProvider() {
    @Override
    public String provideJwt() {
        //every invocation creates and returns a fresh token
        return "your JWT";
    }
});
InAppChat.getInstance(context).inAppChatScreen().show();
An InAppChat demo application provided within the Mobile Messaging SDK offers a functional interface for
testing the authentication use case. For it to work, you need to set your WIDGET_ID and WIDGET_SECRET_KEY_JSON values in the MainActivity.java - chat flavour.
If you face any issue using the InAppChat, specially on the first time integration, we encourage to try your Example application, as this may give you a hint of potential mistakes. An example of the most common issues our integrators face:
- The chat content appears blank, and the text input fields is disabled.
InAppChat should only be presented once it is activated using InAppChat.getInstance(context).activate() and valid pushRegistrationId is obtained. If you try to present it otherwise, the connection won't be established, and chat will be blank. There are also another reasons why InAppChat is not loaded, from incorrect/missing infobip_application_code or Firebase setup, to badly defined Livechat widget in Infobip's web portal. Usually, the logs from Logcat will give you a hint of the issue, and re-checking this guide, or comparing with our Example application, should be enough to successfully integrate InAppChat. But if the issue continues, don't hesitate to contact our support or ask for help here in our repository's Issues section.
- My InAppChat is activated and I have
pushRegistrationId, but the chat keeps appearing blank.
If your Livechat widget setup in Installation and Security tab has enabled Authenticate users on mobile using JSON Web Token, make sure you provided to InAppChat a correct JSON Web Token. If you enabled it by mistake, disable it.
- I get in the logs an error about no
pushRegistrationId.
Please re-check the quick start guide and the steps mentioned above.
- When a chat push notification is tapped, the app is invoked, and remains wherever it previously was - but I want it to display the chat related to the push notification I tapped.
InAppChat cannot present itself: if needs the parent application (your app) to present it. So, when a push notification is tapped, your app needs to recognise that event, and present the chat if you wish so. You can detect when a push notification is tapped, its nature and content, by listening to our library-events. For this case, the event you are looking for is called NOTIFICATION_TAPPED.