Installation Instructions on macOS
This document will guide you through installing the Intel Hardware Accelerated Execution Manager (Intel HAXM), a hardware-assisted virtualization engine (hypervisor) that uses Intel Virtualization Technology (VT) to speed up Android development.
Intel HAXM requires the Android SDK to be installed (version 17 or higher). For more information, refer to the Android developer website (https://developer.android.com/studio/index.html).
Hardware Requirements:
- Intel processor with support for Intel VT-x, Intel EM64T (Intel 64), and Execute Disable (XD) Bit functionality
- At least 4 GB of available RAM, 8 GB recommended
- Mac OS X 10.12 (Sierra) or higher. macOS 10.13 (High Sierra) or higher needs below steps to set up. A known issue was found in macOS 10.15 (Catalina).
sudo /Library/Extensions/intelhaxm.kext/Contents/Resources/uninstall.sh
Intel HAXM cannot be used on systems without an Intel processor, or with an Intel processor that lacks the hardware features described in the "Hardware Requirements" section above. To determine the capabilities of your Intel processor, visit http://ark.intel.com/
Additionally, Intel HAXM can be used only with Android x86 and x86_64 emulator images provided by Intel. Intel HAXM cannot be used with ARM Android emulator images or non-Intel x86 or x86_64 Android emulator images.
Overview
Intel HAXM can be installed either through the Android SDK Manager (recommended), or manually, by downloading the installer from Intel's website.
Note: Intel HAXM does not currently check for updates automatically. To get the latest version, download the Intel HAXM package using the Android SDK Manager (recommended) or from the Intel Developer Zone Android developer site.
Downloading Manually
- Go to https://github.com/intel/haxm/releases.
- Choose the Intel HAXM installer package for your platform.
- Extract the installer and follow installation instructions for your platform.
- Start the Android SDK Manager.
- Under Extras, check the box next to Intel x86 Emulator Accelerator (HAXM).

- Click the "Install package…" button.
- Review the Intel Corporation license agreement. If you accept the terms, select Accept and click Install.
- The SDK Manager will download the installer to the "extras" directory, under the main SDK directory. Even though the SDK manager says "Installed" it actually means that the Intel HAXM executable was downloaded. You will still need to run the installer from the "extras" directory to finish installation.
- Run the installer inside the <sdk install location> /extras/intel/Hardware_Accelerated_Execution_Manager/ directory and follow the installation instructions for your platform.
Warning: Intel Hardware Accelerated Execution Manager (Intel HAXM) installation will fail if your system does not meet the system requirements, including support for Intel processor features, such as Intel Virtualization Technology (Intel VT).
- Download the installer package from https://github.com/intel/haxm/releases or using the SDK Manager.
- Open the DMG file, then run the installer contained inside.
- If an older version Intel HAXM is already installed, you will see a notification dialog:
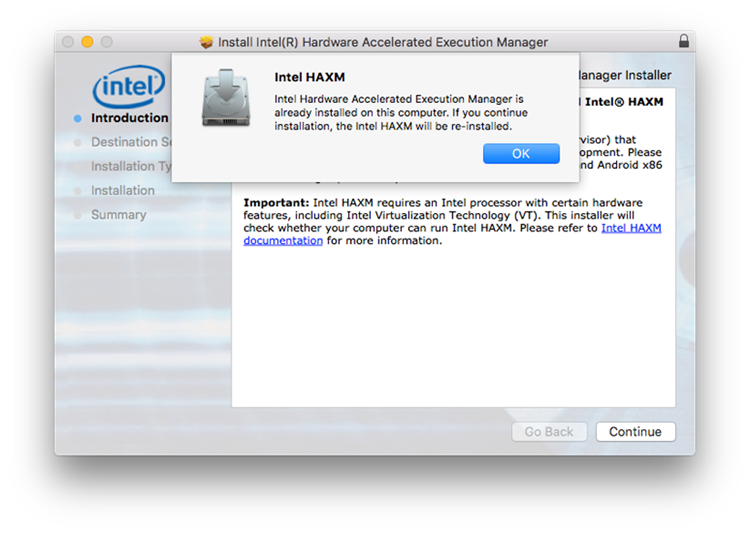
Click "OK" to dismiss the dialog. Then you can either exit the installer, to keep your current version of Intel HAXM, or continue with installation and upgrade Intel HAXM. - You will see a welcome screen:
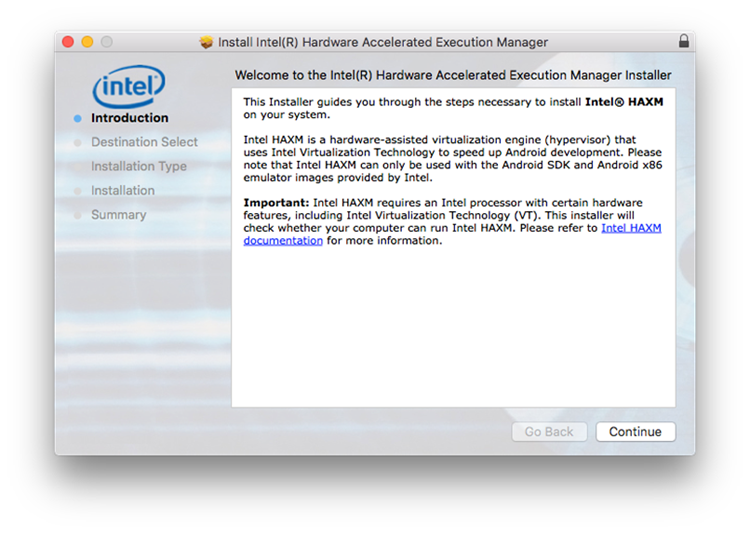
- Click "Continue"
- Select the drive where Intel HAXM will be installed, then click Continue.
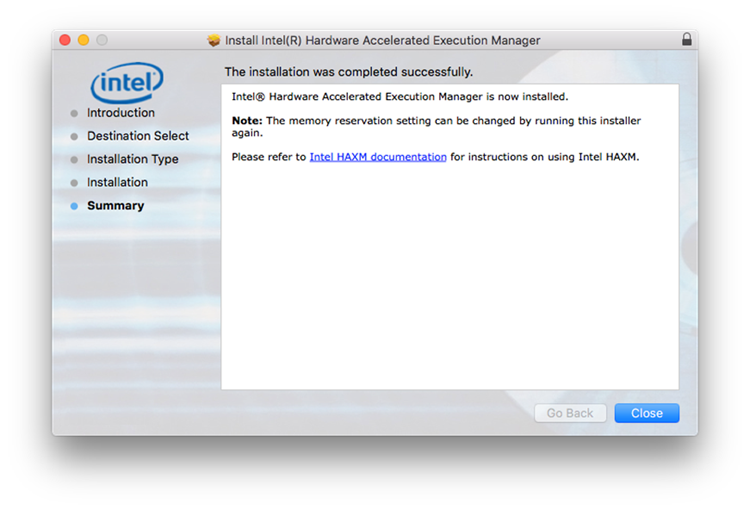
- Once Intel HAXM is installed, click Close to exit the installer.
To verify that Intel HAXM is running, open a terminal window and execute the following command:
kextstat | grep intelIf Intel HAXM is operating correctly, the command will show a status message indicating that the kernel extension named "
com.intel.kext.intelhaxm" is loaded.
To stop or start Intel HAXM, use the following commands:
Stop:
sudo kextunload –b com.intel.kext.intelhaxmStart:
sudo kextload –b com.intel.kext.intelhaxm
- Download the Android Studio installer package from http://developer.android.com/sdk/index.html.
- Run the Android Studio .dmg file.
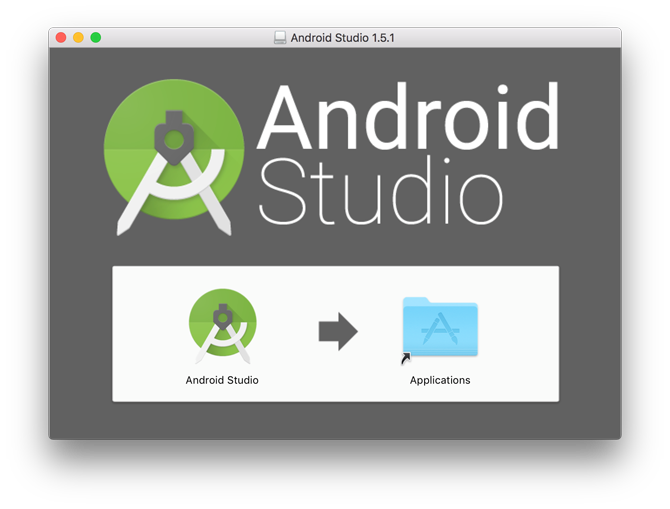
- In the installer drag and drop Android Studio icon over the Applications folder (Android Studio.app is copied to Applications folder).
- Open Finder and go to Applications.
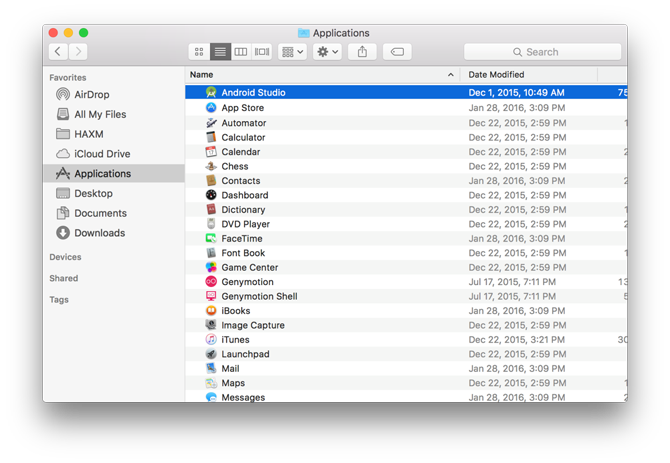
- Double click on Android Studio and confirm opening it.
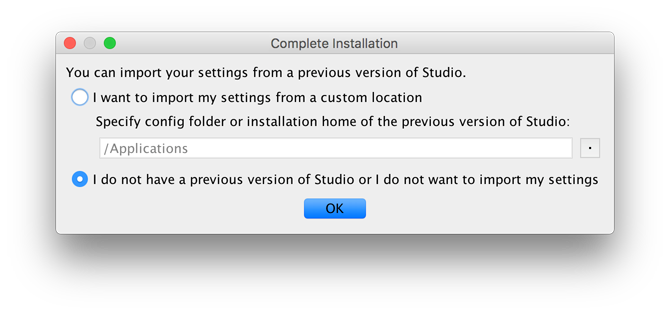
- Select “I do not have a previous version of Studio” and click OK.
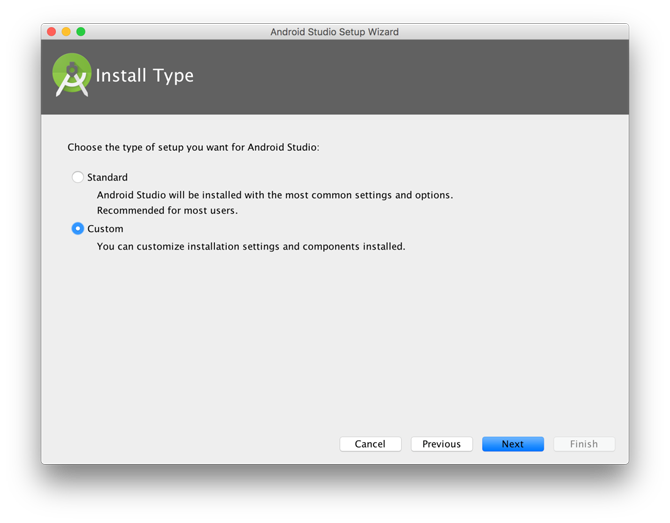
- Select Custom and click Next.
- If HAXM has not been downloaded via SDK Manager at the time of the install it will be downloaded (see image below) and then installed.
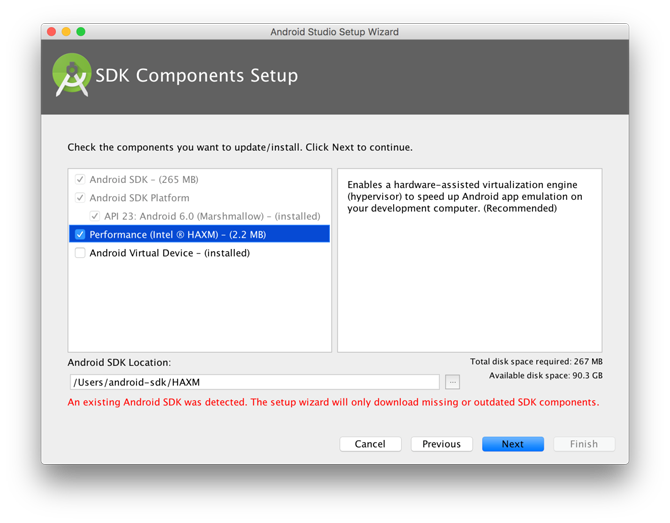
- If HAXM has been previously downloaded via SDK Manager at the time of the install (see image bellow) it will just be installed.
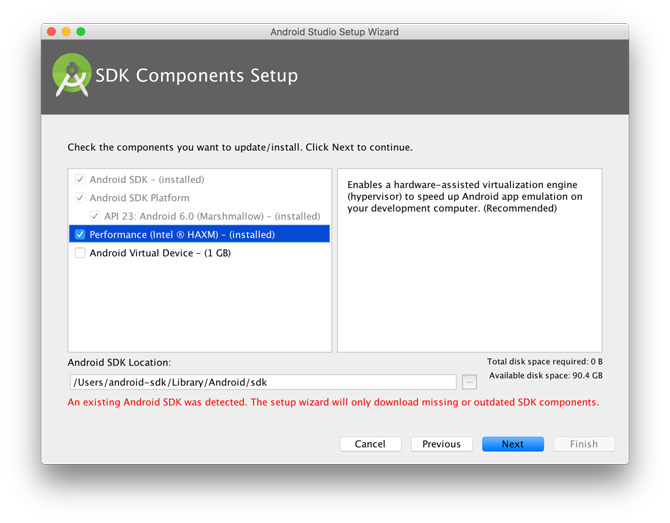
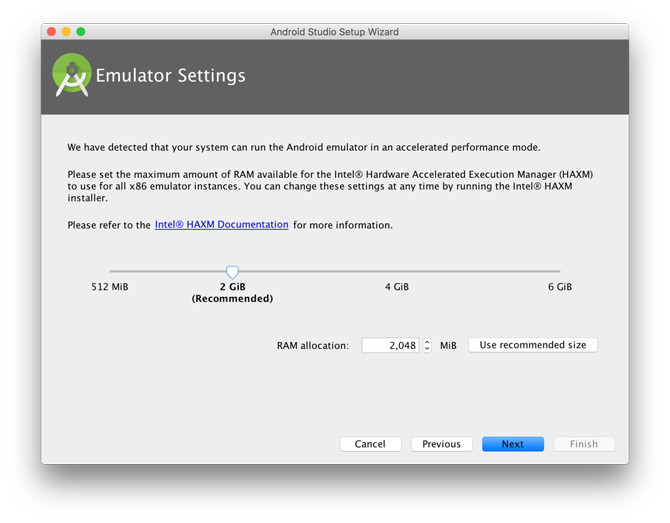
- Select the amount of RAM available for HAXM.
- Click Next and then Finish. The required components will be downloaded / updated / installed.
- After the install is finished a report is displayed. Intel HAXM is now installed and ready to use.
kextstat | grep intelIf Intel HAXM is operating correctly, the command will show a status message indicating that the kernel extension named "
com.intel.kext.intelhaxm" is loaded.
To stop or start Intel HAXM, use the following commands:
Stop:
sudo kextunload –b com.intel.kext.intelhaxmStart:
sudo kextload –b com.intel.kext.intelhaxm
Warning: Close all instances of the Android emulator before removing Intel HAXM. Intel HAXM cannot be removed while in use.
To uninstall Intel HAXM, open a terminal window and execute this command:
sudo /Library/Extensions/intelhaxm.kext/Contents/Resources/uninstall.sh
You will be prompted for your current user password. Follow the uninstaller prompts to remove Intel HAXM.
Important: Removing Intel HAXM will disable acceleration for Android emulator. Existing x86 and x86_64 Android Virtual Devices may no longer boot.
Installing Intel HAXM again will re-enable Android emulator acceleration.
Intel HAXM requires an Android x86 or x86_64 system image provided by Intel. These images can be downloaded through the Android SDK manager or manually from the Intel Developer Zone website.
Intel x86 and x86_64 Android emulator images will automatically be executed using the "emulator" binary, provided with the Android SDK. If Intel HAXM is installed and working, emulation will be accelerated by Intel HAXM (using Intel Virtualization Technology).
Intel Execute Disable (XD) Bit capability error
When installing Intel HAXM, you may encounter an error regarding Intel XD support.
This error message can be triggered by the following conditions:
- Intel XD is not supported by your computer’s processor
- Intel XD is not enabled
Intel HAXM requires an Intel processor with Execute Disable (XD) Bit functionality and cannot be used on systems lacking this hardware feature. To determine the capabilities of your Intel processor, visit http://ark.intel.com/.
Intel XD is not enabled
Note: Apple computers have Intel XD permanently enabled if supported by the processor.
If you receive an error message indicating that Intel XD is not enabled, your computer does not meet the minimum system requirements to use Intel HAXM. To determine the capabilities of your Intel processor, visit http://ark.intel.com/.
Intel Virtualization Technology (VT-x) capability
When installing Intel HAXM, you may encounter an error regarding Intel VT-x support.
This error message can be triggered by the following conditions:
- Intel VT-x is not supported by your computer’s processor
- Intel VT-x is not enabled
Intel HAXM requires an Intel processor with Intel VT-x functionality and cannot be used on systems lacking this hardware feature. To determine the capabilities of your Intel processor, visit http://ark.intel.com/.
Intel VT-x not enabled
Note: Apple computers have Intel VT-x permanently enabled if supported by the processor.
If you receive an error message indicating that Intel VT is not enabled, your computer does not meet the minimum system requirements to use Intel HAXM. To determine the capabilities of your Intel processor, visit http://ark.intel.com/.
Allowing HAXM to run on macOS High Sierra (10.13) and Mojave (10.14)
- When you install HAXM for the first time on macOS High Sierra, you will get a warning as shown in the screenshot below.
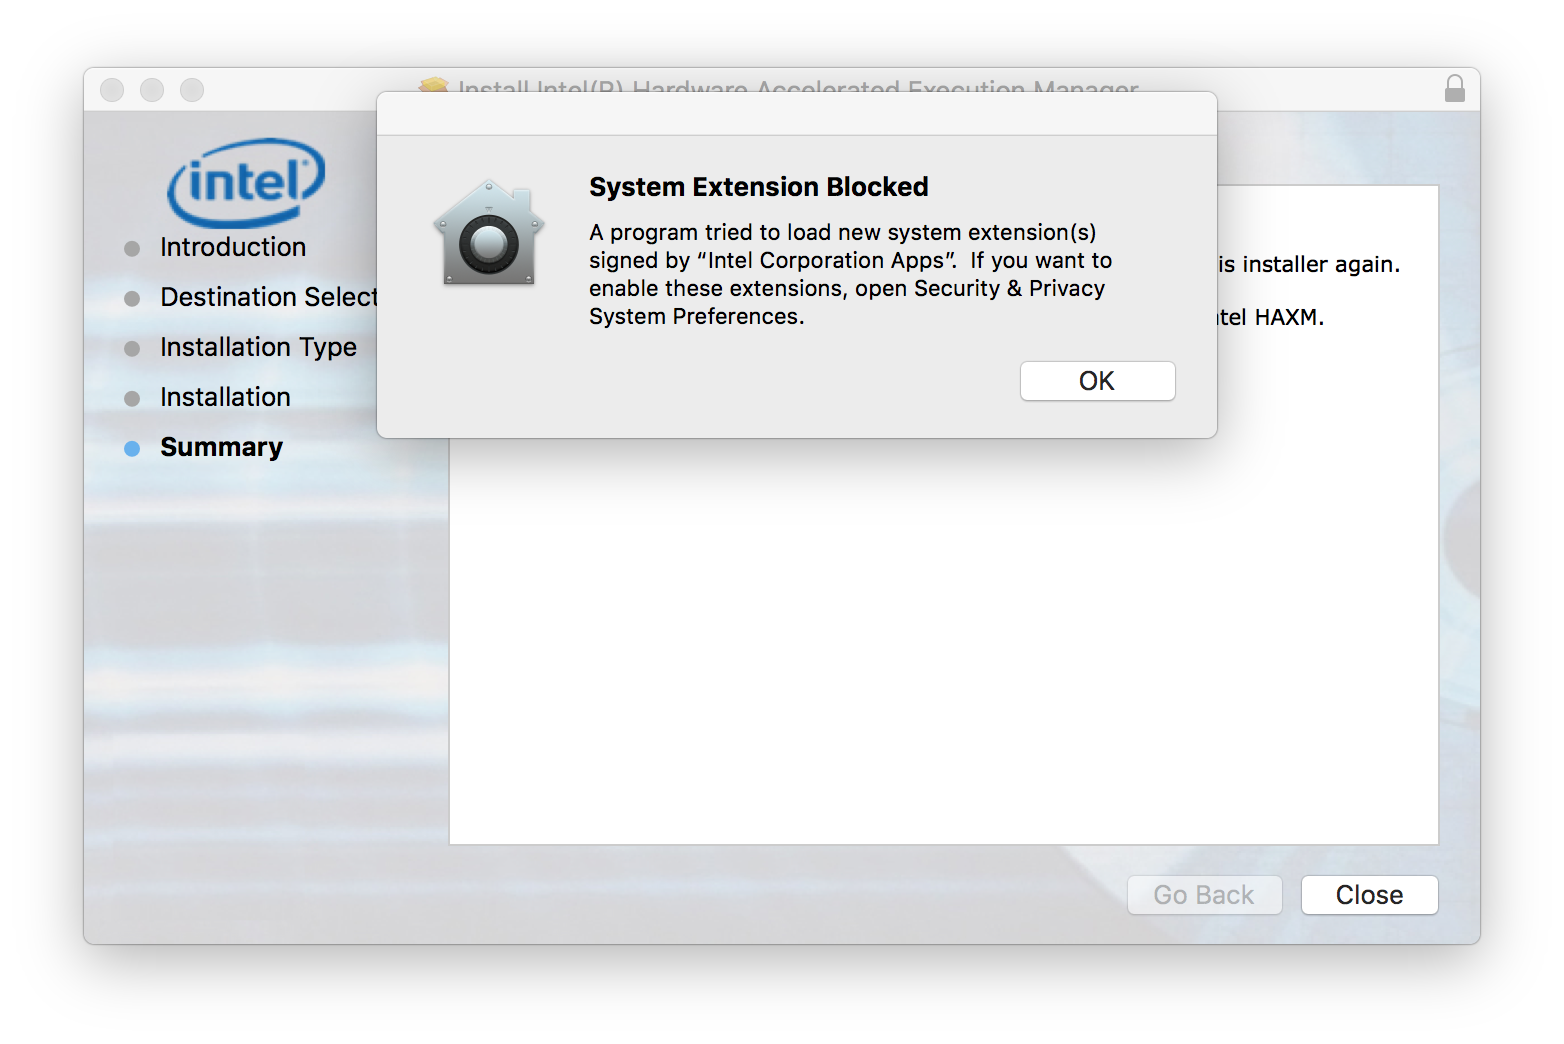
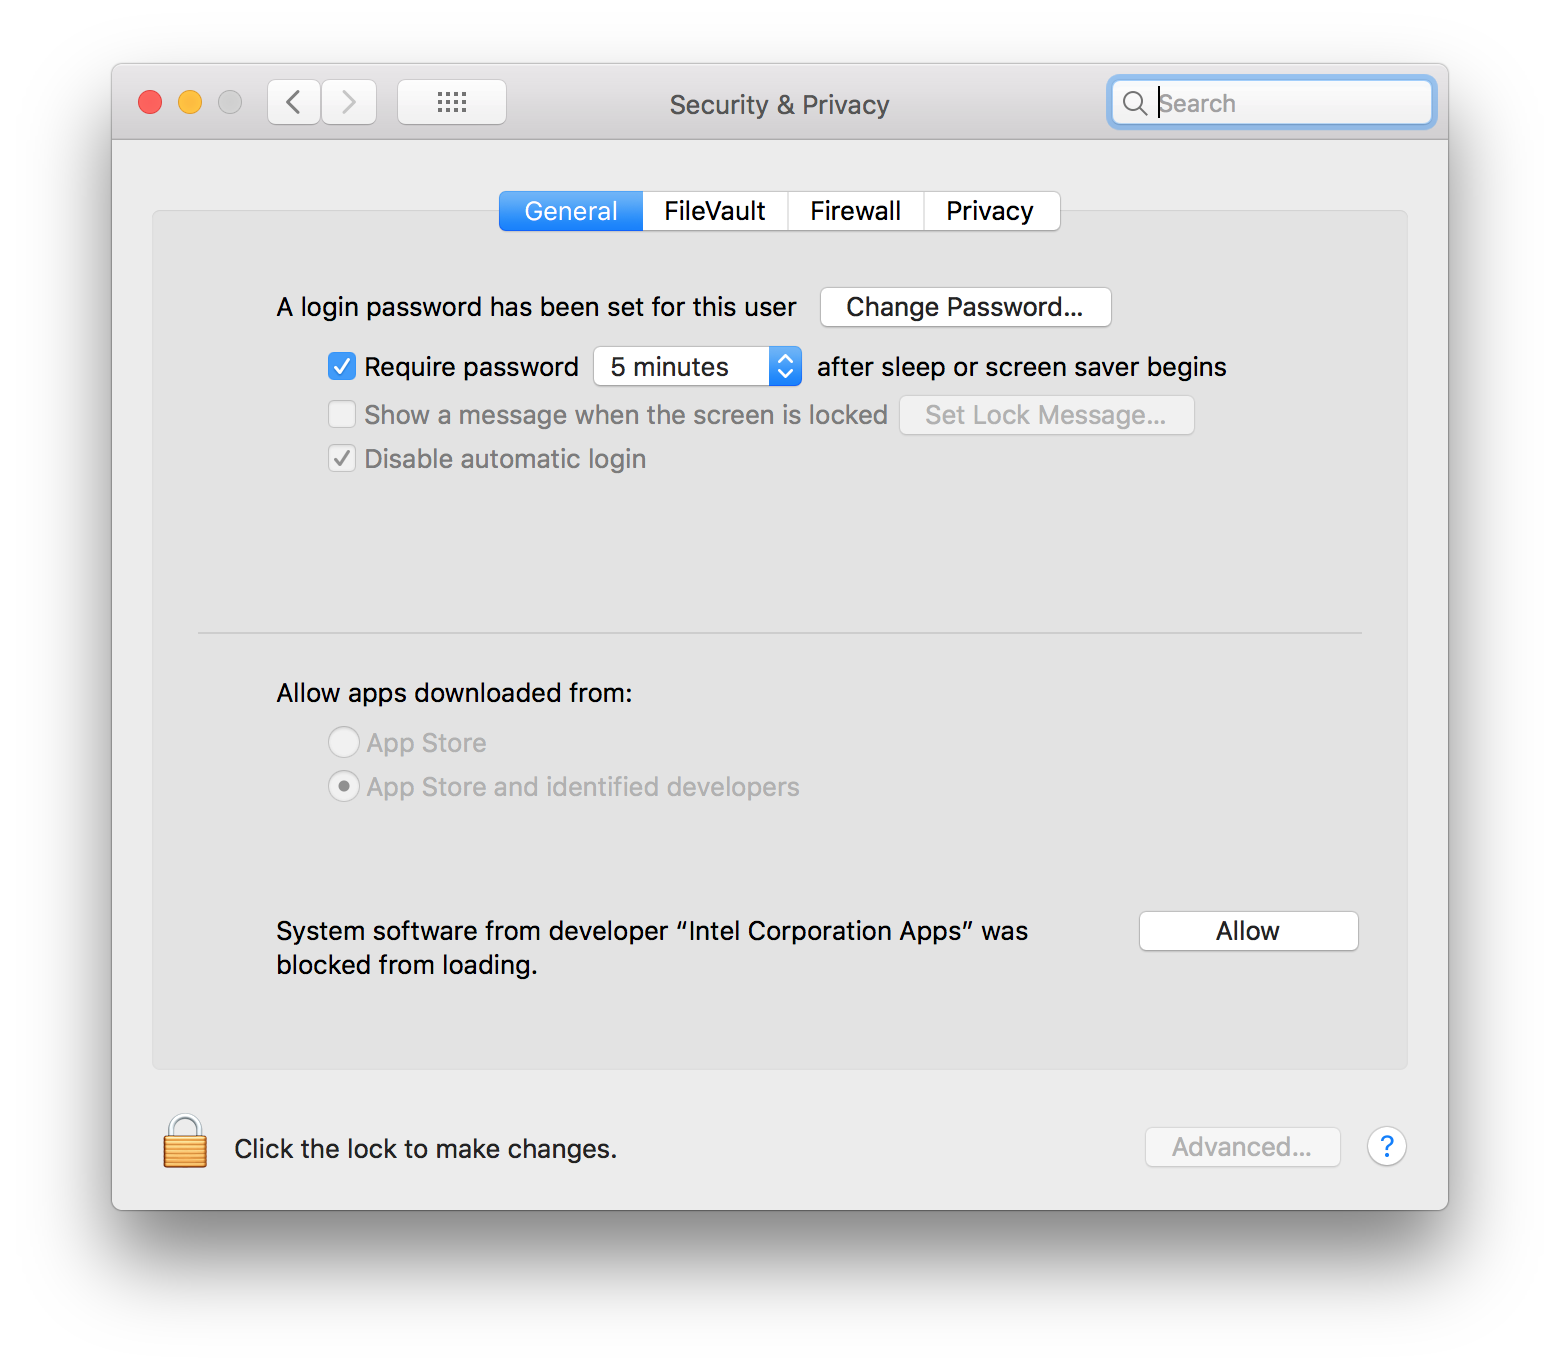
- The Allow option in Security & Privacy will be available only for 30 minutes after the “System Extension Blocked” warning is shown. If the option is already gone, you can bring it back by manually reloading the HAXM KEXT (e.g. uninstalling and then reinstalling HAXM).
Below are some recommendations to get the best experience out of the Android emulator using the Intel HAXM driver.
- Enable the GPU acceleration in the AVD Manager for your image. The Intel HAXM driver executes most CPU instructions natively through Intel Virtualization Technology in the processor and the GPU acceleration offloads the OpenGL calls to the host GPU.
- Make sure the "ANDROID_SDK_ROOT" environment variable is set correctly. The <sdk install location> below typically refers to "/Users/<your username>/Library/Android/sdk"
- export ANDROID_SDK_ROOT=<sdk install location>
- To automatically run this command whenever a new terminal is started, you can add this command to your ~/.bash_profile script.
- Launch the emulator from the command line to get more verbose output. Use the following command:
- ${ANDROID_SDK_ROOT}/tools/emulator -avd <avd_name> -verbose -show-kernel
- More command line options for booting the emulator can be found at Android developer website.