Labeling
There are some tools and features that should make it possible to easily label even complicated point clouds.
LMB = Left Mouse Button RMB = Right Mouse Button
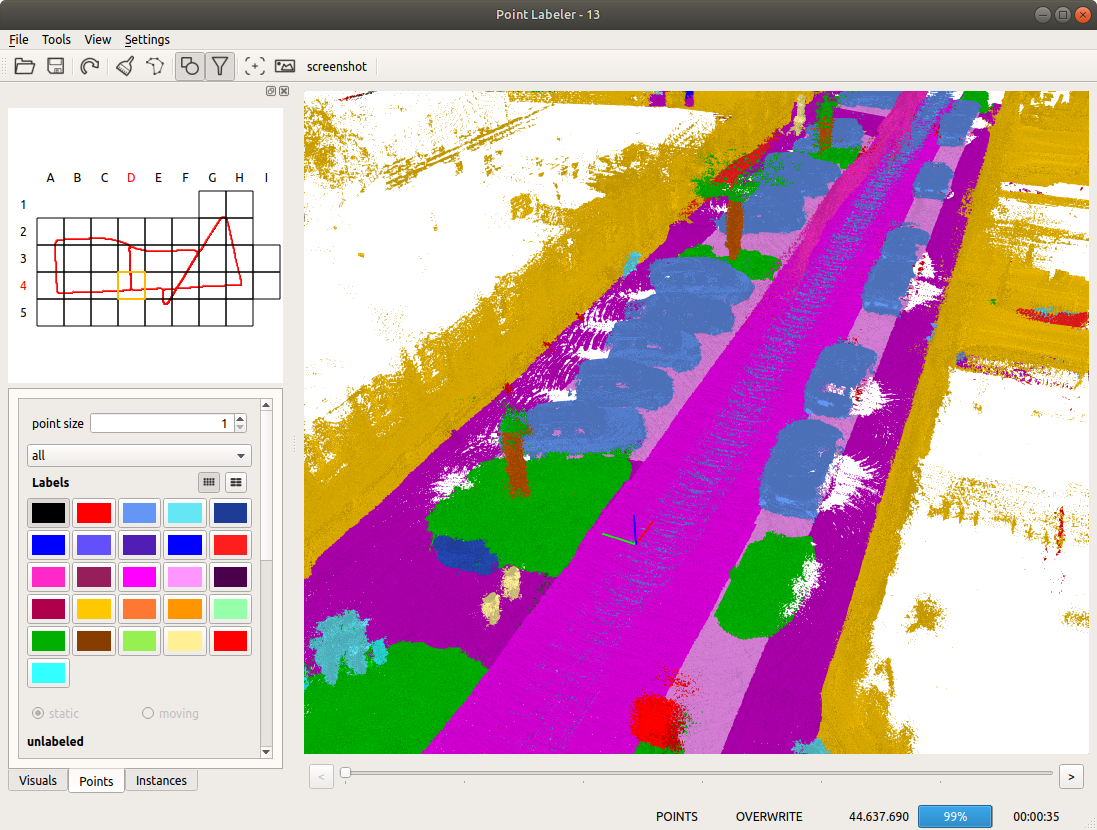
The currently active label that will be used to label points is selected from the colored label buttons in the toolbox.
The brush tool ![]() is used to "paint" the selected label onto an area around the current mouse cursor position by pressing the LMB. The size of the area that will be labeled can be selected by using the slider below the tool buttons or by selecting a specific size from the numbered buttons above.
is used to "paint" the selected label onto an area around the current mouse cursor position by pressing the LMB. The size of the area that will be labeled can be selected by using the slider below the tool buttons or by selecting a specific size from the numbered buttons above.
The polygon tool ![]() labels all points inside a given polygon. The polygon is defined by selecting corner points with the LMB. The polygon is completed by pressing the RMB.
labels all points inside a given polygon. The polygon is defined by selecting corner points with the LMB. The polygon is completed by pressing the RMB.
If the overwrite mode is active ![]() , i.e., the button is pressed/down, the aforementioned labeling tools will just overwrite or replace all labels inside the tool area. If the overwrite mode is deactivated
, i.e., the button is pressed/down, the aforementioned labeling tools will just overwrite or replace all labels inside the tool area. If the overwrite mode is deactivated ![]() the labeling tool will only replace unlabeled points, i.e., already labeled points will not be relabeled.
the labeling tool will only replace unlabeled points, i.e., already labeled points will not be relabeled.
As a general strategy, the annotator should label easily accessible objects in the beginning, then all the points belonging to a certain class can be hidden from view so that previously occluded points can be accessed.
After you activate the Filter Labels button ![]() you can Ctrl + LMB on a label to hide/show it in the window.
A dashed blue line around a label button indicates that the filtering is active and the class is hidden from the view.
you can Ctrl + LMB on a label to hide/show it in the window.
A dashed blue line around a label button indicates that the filtering is active and the class is hidden from the view.