Home
The purpose of this document is to explain the process for adding new examples to the RTI Community Examples Repository maintained in GitHub.
The Examples Repository is located in https://github.com/rticommunity. It is composed of a set of Git repositories that include examples of different features of RTI products.
The examples added to these repositories will “automatically” be posted to the examples section of the Community Portal, which can be found in http://community.rti.com/examples. The Community Portal server maintains a synchronized copy of each of these repositories, but the process of adding a new examples is not fully automated and must be done by hand on the community portal as described below.
The first thing you will need to do is create a new Github account.
- Go to http://www.github.com
- Pick a username and password and create your new user.
- Click on "sign up for free"
To manage your GitHub repositories we recommend you to use the GitHub application in your computer. You can download this application from:
- http://mac.github.com/ if you are using Mac (Mac OS X 10.7 and above).
- http://windows.github.com/ if you are using Windows.
- http://eclipse.github.com/ if you are developing with Eclipse.
If you are running on a different platform, you will have to use GitHub through the command line. To use GitHub through the command line, first install Git:
- Use the following instructions to install Git on Linux or Solaris
- Download Git for Mac from this website. Then install the DMG file.
Once you have installed Git, you can configure your settings. Open a terminal and:
-
Set the default name for Git to use when you commit (e.g., Fernando Garcia)
git config --global user.name "Your Name Here" -
Set your default email for Git to use when you commit. Use the email address you configure your GitHub account with.
git config --global user.email "your_email@example.com"Your email address for Git should be the same one associated with your GitHub account. If it is not, see this guide for help adding additional emails to your GitHub account. If you want to keep your email address hidden, this guide may be useful to you. [GitHub Installation Guide]
If you want to start collaborating adding or modifying examples of one of our GitHub repositories, you will need to "fork" the GitHub repository you want to collaborate on. Forking is not a native Git concept. It is the special name given by GitHub to server-side clones. This clone provides the user a place to push changes without affecting the original repository until the changes are ready to be merged.
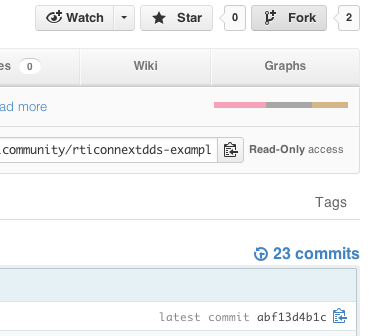
To fork a repository, log in to GitHub and look for the repository you want to fork (e.g., rticonnextdds-examples). Once you are in the repository webpage, look for the "Fork" button (see Figure) and click on it.
Wait a few seconds and you will see the forked repository in your account.
Once you have forked the repository (once it has been placed in your GitHub account) you will need to clone the repository in your computer to get a local copy you can work with.
Open the GitHub application and login with the user you created. You should see all the repositories you have in your account, including the one you just forked. If you are not able to see the forked repository, click on the refresh icon.
Once you can see the repository, click on the "Clone to Computer Button" and select the directory where you want to download it.

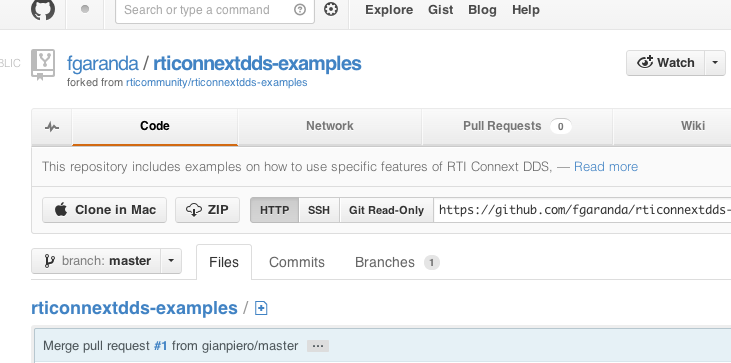
To clone the repository you just forked using the command line, go to your account on http://github.com and look for the repository you just forked. If, for instance, your account is fgaranda and the repository you forked is rticonnextdds-examples, the repository should be located in http://github.com/fgaranda/rticonnextdds-examples.
Once you are in the forked repository website, click on HTTP and copy the repository URL (see Figure). This is the URL of the Git repository located in the GitHub servers that we are going to clone.
Open a terminal and change to the directory where you want to clone the repository. For instance:
cd /home/fgarcia/github
And then clone the repository using the URL you copied.
git clone https://github.com/fgaranda/rticonnextdds-examples.git
Now that you have a clone (local copy) of the forked repository you want to contribute to, you can start editing examples. In this section we explain some conventions to follow when creating or modifying an example.
Under http://github.com/rticommunity you will find different examples repositories—they include -example in their name. Each of these repositories corresponds to an RTI product (e.g., rticonnextdds-examples corresponds to RTI Connext DDS Core). Make sure you choose the right repository before adding a new example.
In the following lines we describe the rticonnextdds-examples repository structure to give you an idea of the conventions we follow. As you can see, all the examples included in the repository are placed under the examples directory. Each example directory contains a README.txt file with some documentation on the example, and a set of subdirectories with the implementation of the example in different languages. Each implementation of the example contains extra documentation on how to build and run the example in that language.
-
rticonnextdds-examples/ — Top level directory.
- README.md — Description of the repository. This description is parsed and used in the GitHub website.
- examples/ — Directory containing all the examples in the repository.
-
content_filtered_topic/ — Example on how to use Content Filtered Topics. We use snake case (in lowercase) for our directory names. Note also that we use lowercase for languages directory names (e.g., c, c++, java).
- README.txt — Describes the concept the example illustrates and the overall architecture/approach used by the example. This description is common to all the languages.
-
c/ — C implementation of the example
- README.txt — Explains how to build and run the C example. README.txt files under each language's folder (e.g., c, c++, java, etc.). These files include specific instructions for each of language.
- USER_QOS_PROFILES.xml — QoS XML file pre generated using rtiddsgen. It should only be included in the example if it has been modified to include new QoS settings. You should illustrate, as we indicate below, how to modify these settings both via XML and programmatically.
- cft.idl — Sample IDL file. IDL files should be named after the example name. If the example name is too long you may use an acronym. The data type should be named after the example name as well.
- cft_publisher.c — Publisher application modified from the file generated using rtiddsgen. Do not include the Publisher application if the file generated does not need to be modified.
- cft_subscriber.c — Subscriber application modified from the file generated using rtiddsgen. Do not include the Subscriber application if the file generated does not need to be modified.
- c++/
- java/
- polling_read/
Choose a self-explanatory name for your example. Our goal is to make it easier for users to find something matching their use case. Remember to use snake case (in lowercase) in directory names.
When coding your example take into account the following guidelines:
-
IDL file, Data Type, and Topic names.
IDL files and Data Types should be named after the example name. If the example name you may use an acronym. For instance, in the Content Filtered Topic, we created a cft.idl IDL file with the following data type:
 struct cft {
     long x;
     long count;
 };
In simple examples—just one topic per data type—leave the topic name generated by rtiddsgen by default (e.g., "cft Example"). This will make it easier for users to create sample publisher/subscriber applications using the IDL file. In more complex examples with different topics, use self-explanatory names to make the example easier to understand for users.
-
QoS properties should be modified via XML (but we should also show how to modify them programmatically).
Many of the features that may be illustrated in our examples require tuning different QoS settings, which can be done either programmatically or via XML.
The convention in the examples repository is to modify these QoS settings via XML, making the code more readable. However, you should also include in the publisher and subscriber applications—in comments—how to modify these QoS settings programmatically, so users can modify them uncommenting the code.
-
Leave the generation of makefiles and Visual Studio projects to rtiddsgen.
Ideally, you should only check in an IDL file, and the Publisher or Subscriber code and QoS XML file generated by rtiddsgen. For instance, in the Content Filtered Topic C example we checked in the following files:
- README.txt
- USER_QOS_PROFILES.xml
- cft.idl
- cft_publisher.c
- cft_subscriber.c
This way, users only need to run rtiddsgen -example <architecture_name> to generate a makefile or Visual Studio project they can use to compile the code, which makes it easier to support more platforms than with custom makefiles.
-
Document the compilation of the example for every single language.
Example subfolders for every language include a README.txt (see Content Filtered Topic C example directory structure above). These files include instructions on how to build and run examples on that language. You can follow the structure of the following existing documents:
- Waitsets Example README.txt — C
- Waitsets Example README.txt — C++
- Waitsets Example README.txt — Java
In some cases, the makefiles or Visual Studio projects generated by rtiddsgen will need to be modified to include more files or special flags. Make sure to document these changes in the README.txt.
-
Other considerations
5.1. Keep things as simple as possible.
It is important to keep the focus on the feature that you are trying to illustrate.
5.2. Focus on one single language first.
It is better to implement a great example in one language than implementing a good example in ten languages. You can always iterate and translate the example afterwards. Other people can contribute on this later as well.
Every example must include a README.txt in the example's top directory describing the example and the concept it illustrates. This document must provide enough information for users to know whether the example meets their needs without looking at the code. We will use the contents of this file later to include the example in the RTI Community Portal examples section.
Your README.txt should follow this structure (you can take Time Based Filter example README.txt file as an example)
-
Example Code -- Name of Example
-
Concept
Explain the concept the example illustrates. For instance, if your example describes the use of Time Based Filters, describe what Time Based Filters are.
-
Example Description
Explain how the code applies the concepts explained above.
Comment your code when coding the example—do not be shy. Please, take into account that the example may be browsed by many kinds of users, including people that know nothing about our product. Use following tips to decide when and how to add a comment:
-
Explain what you want to achieve with your code instead of just explaining what the does does. That is:
  /* send_period sleep of 0.25 seconds, i.e., the loop where we write
   * new samples will sleep for 0.25 seconds every iteration.*/
  struct DDS_Duration_t send_period = {0,250000000};
as opposed to:
/* Send period */ struct DDS_Duration_t send_period = {0,250000000}; -
Do not use C++-style comments in C.
-
Comment out the code to change QoS settings programmatically.
Once you have cloned your forked repository from GitHub you can start adding new examples or editing existing examples. For instance, let's assume you want to add a new example to the repository called Custom Transport to the rticonnextdds-examples repository, which we are only going to implement in C.
First, you will need to create a new directory for the example.
cd /path/to/rticonnextdds-examples/examples
mkdir custom_transport
Now, create a README.txt file that describing the example and the concept it illustrates following the guidelines mentioned above.
Create a directory for each language in which the example is implemented—in this case just C. Remember we use lowercase for directory names.
mkdir c
Now, change to the c directory and add the C files of your example includes. Add also the README.txt file describing how to build and run the C example (see the guidelines mentioned in the "Coding Your Example" section in this document).
This is what your example directory structure should look like:
-
/path/to/rticonnextdds-examples/examples/custom_transport/
- README.txt
-
c/
- README.txt
- custom_transport.c
- custom_transport.h
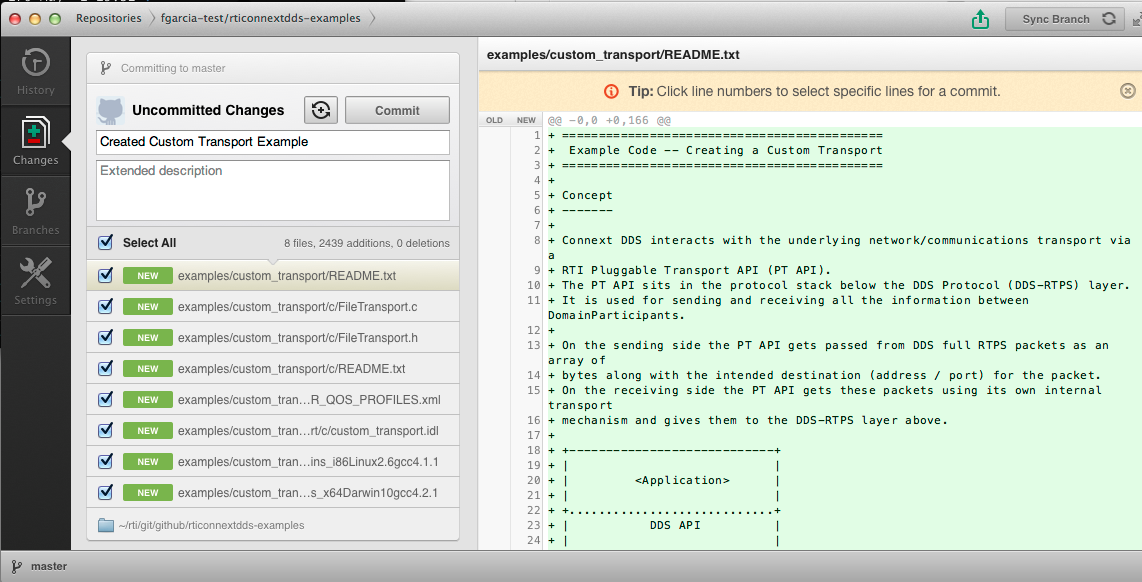
Open your GitHub application and click on the repository you are modifying—in this case rticonnextdds-examples. Once in the repository view, if you click on Changes, you will see all the repositories that have neither been committed to your local repository nor synchronized with the remote forked repository.
Select the files you may have added or modified you want to commit to your local repository. Add a comment describing your changes and click on Commit. Do not click on Sync as well, as that will synchronize the changes with the remote forked repository. We will do that later.
Change to the directory where you added the example within the local repository. Run the the git "status" command to see the list of files you have added or modified and are either untracked by the local repository or different to the current version in the repository.
git status
Now, using the git "add" command, let the Git repository now the files you have added or modified you want commit. Note that even modified files must be added using this command—git add is basically used to specify the files that need staged for the next commit. Git add works both with files and directories. When adding directory, everything under the directory specified will be recursively added. For instance:
git add custom_transport
# Adds everything under the custom_transport directory

git add README.txt c
# Adds both the README.txt file and everything under the c directory.
Git is a distributed revision control system. It takes a peer-to-peer approach to version control. When you commit your changes—as you would do in a centralized revision control system like CVS—you do not commit your changes to any central repository—you commit them locally to the repository you cloned in your computer. This means you can keep track of all the changes you make, with all the advantages of the use of revision control systems, without compromising the integrity of the GitHub repository from which we ship our examples.
In Git you can configure remote repositories, so you can synchronize your changes with different repositories. To push your changes to a remote repository use the git “push” command:
git push <repository_name>
Likewise, to pull changes from a remote repository use the git “pull” command:
git pull <repository_name>
You can list the remote repositories in your repository using
git remote
By default, when you clone a Git repository from a bare repository—like you do when you clone a repository that is in GitHub—the cloned repository automatically includes the bare repository in the list of remote repositories and it calls it origin. If you do not specify the repository you want to push or pull your changes from in the command, Git will assume you want to synchronize with the origin repository.
Note that when you clone a repository previously forked from http://github.com/rticommunity, you will be able to synchronize only with the the forked repository (i.e., the repository in your GitHub account). To synchronize your changes with our official (rticommunity) repository you will have to use a different mechanism called Pull Request.
You may add the http://github.com/rticommunity repository you forked from to the list of remote repositories. This would work to pull changes from the original repository. However to be able to push to the original repository, you will need to be in its contributors list. Pull Request easies the merging process, as you will see later in the document.
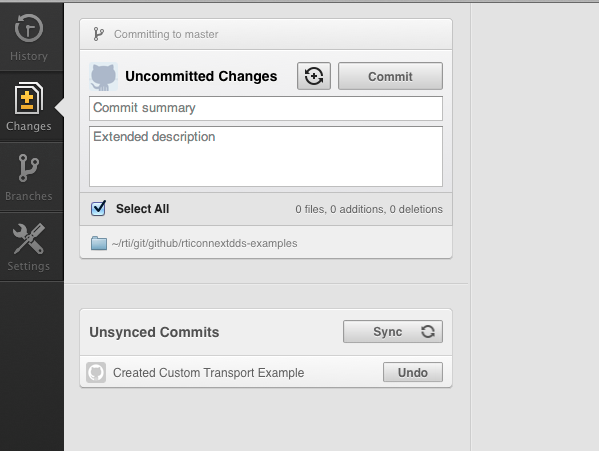
Once you have done a commit on the files you wanted to add to your local repository. You will see a box with the list of Unsynced Commits. There you can choose either to undo your commits or to synchronize your changes with the remote forked repository.
Click on the "Sync" button and if there are no conflicts you should be able to see the changes pushed in the forked repository in your user's web page on Github.
Once you have done a commit on the files you wanted to add to your local repository you may push your changes to the forked repository. Most probably, you are the only user pushing to your fork of the repository, but it is always good to check if there are changes in the remote repository before pushing. Use the Git "pull" command for that.
git pull
Now that you have checked there are no conflicts with the code you are going to push and the remote forked repository, you can push the changes you did in your local commit using the Git "push" command.
git push
You should be now able to see the changes pushed in the forked repository in your user's web page on GitHub—in our example http://github.com/fgarcia/rticonnextdds-examples.
To synchronize your changes with the RTI Community Example Repository in GitHub you will have to use a mechanism called Pull Request. That is, requesting the repository collaborators to review the changes you made in your forked repository and merge them onto the original repository.
Once we have reviewed your pull request, we will add your new example to the examples section in the RTI Community Portal. We will base the example description on the README.txt fIle you added .