This repository is an up-to-date summarized example of creating a build and release pipeline (CI/CD) for Analysis Services Tabular models. The approach is centered around the .bim file and the use of Tabular Editor from the command line. The example has a few specific steps for Azure Analysis Services, but the same approach can be used for a self-installed SQL Server hosting Analysis Services.
Prior working knowledge is assumed for:
- SQL Server Data Tools (SSDT) projects for Analysis Services Tabular models.
- Azure DevOps projects and using Git repositories.
- Creating build and release pipelines in Azure DevOps.
Table of Contents
- A running instance of Azure Analysis Services.
- An Analysis Services Tabular model project in SQL Server Data Tools (SSDT).
- An Azure DevOps project with repository for SSDT project.
- Create a Service Principal (SPN), see here.
- Add SPN as an Analysis Services Administrator using SQL Server Management Studio (SSMS), see here.
- Use Manual Entry with the following format,
app:<ApplicationID>@<TenantID>
- Use Manual Entry with the following format,
- ReleasePipelineDataSourceUpdate.cs: Script that is used during deployment to replace the server property value based on an release pipeline variable with the same name as the Data Source in the Tabular Model.
- BuldPipeline.yml: Yaml file for build pipeline that ensure the .bim file and the deployment scripts are available as artifacts for the release pipeline.
Step 1: Commit and Push to Source Control
Commit and Push the Tabular model project to the Git repository of your Azure DevOps project. Ensure that the ReleasePipelineDataSourceUpdate.cs script is also present in the repository.
Step 2: Create build artifact containing Bim file
Create a new build pipeline. Use the tasks from the steps section of the BuildPipeline.yml file. You should not have to modify either of the steps. The two steps copy the project files in the repository to a staging area on the build agent, and then publishes the project files as an artifact. This positions the project files, including the Bim file, for consumption in the later release pipeline. It also ensures that the Bim file is always present for the release pipeline.
Step 3: Create release pipeline
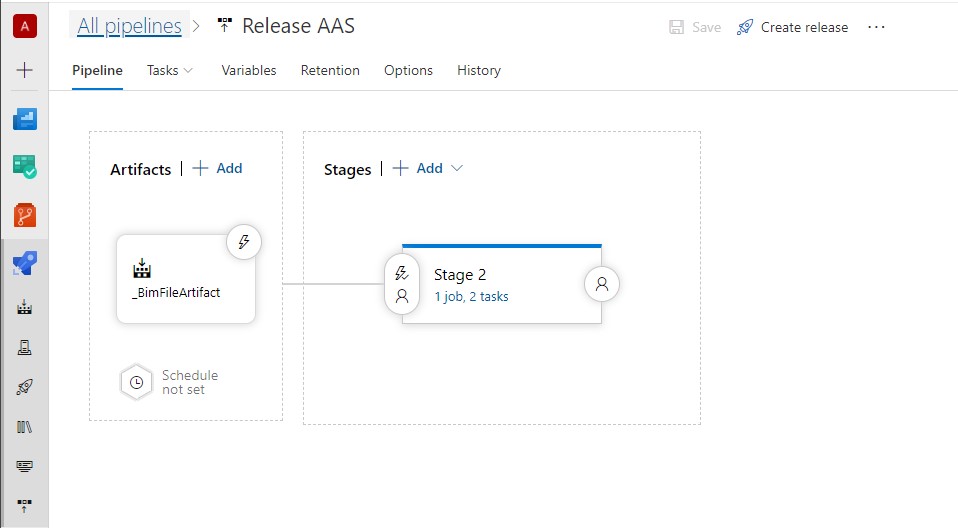
Create a new release pipeline, adding the artifact from the build pipeline created in Step 2. Add a Stage to the pipeline and follow the steps below to add tasks.
1) Add a PowerShell task with the following inline command to download and install Tabular Editor on the release agent.
# Download URL for Tabular Editor portable:
$TabularEditorUrl = "https://github.com/otykier/TabularEditor/releases/download/2.9.2/TabularEditor.Portable.zip"

# Download destination (root of PowerShell script execution path):
$DownloadDestination = join-path (get-location) "TabularEditor.zip"

# Download from GitHub:
Invoke-WebRequest -Uri $TabularEditorUrl -OutFile $DownloadDestination

# Unzip Tabular Editor portable, and then delete the zip file:
Expand-Archive -Path $DownloadDestination -DestinationPath (get-location).Path
Remove-Item $DownloadDestination
2) Add a pipeline variable named ASConnectionString for the connection string to connect to the Azure Analysis Services server. Using the following format for the connection string. Lock the variable to hide the value since a set of SPN credentials are contained in it.
Provider=MSOLAP;Data Source=<aas-server>;User ID=app:<ApplicationID>@<TenantID>;Password=<Secret>
3) Add a variable named ASModelName for the name of your tabular model.
4) Add variables for each data source in the model. The name of the variable should be the exact name of the data source in the tabular model. The value will be the server name of the data source in the higher environment (i.e. Test, QA, Prod).
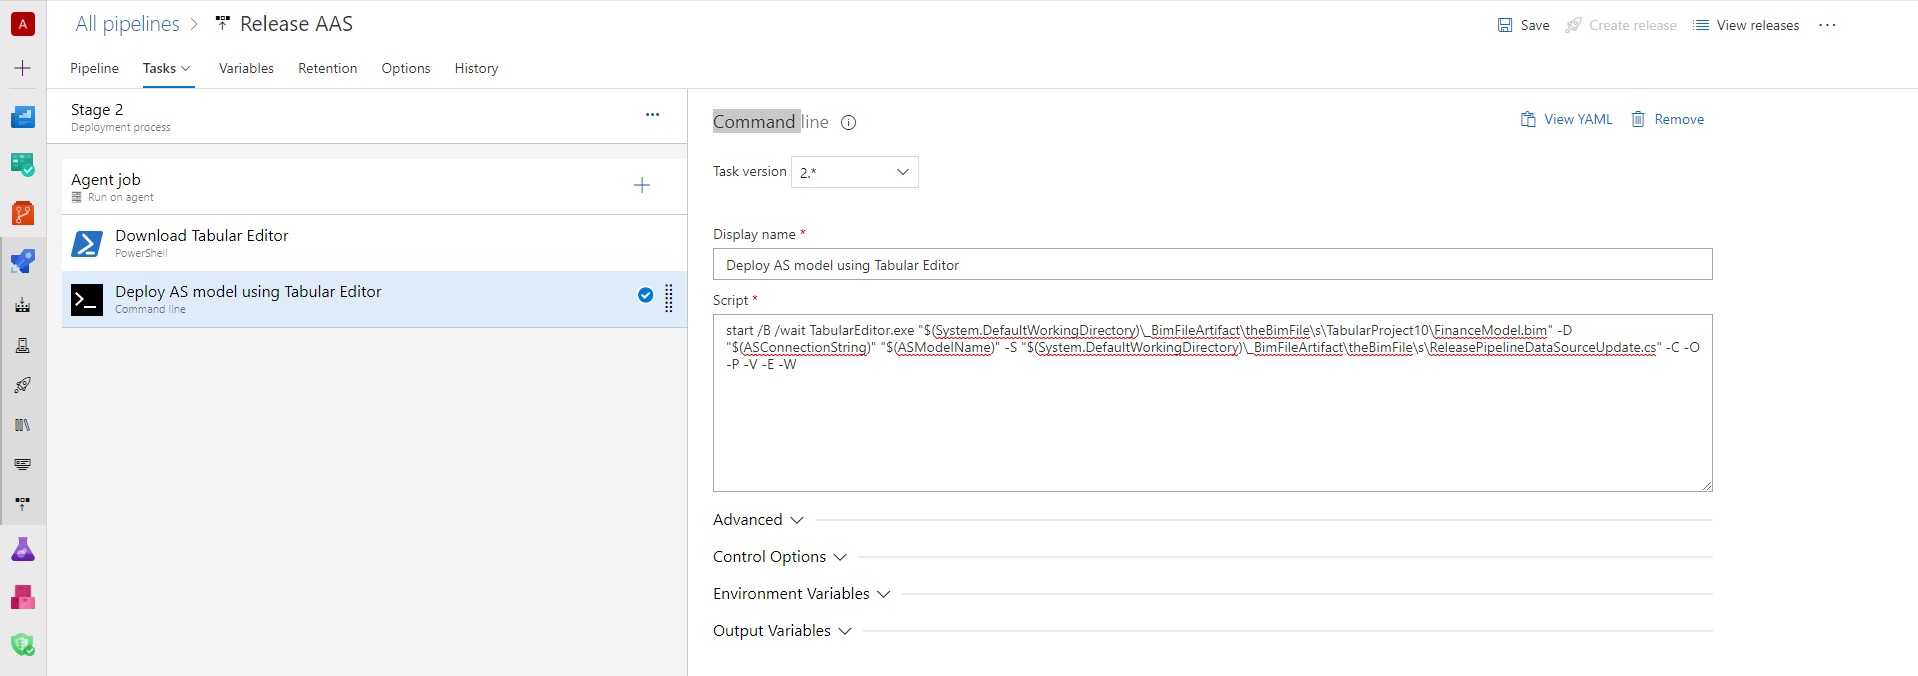
5) Add a command line task to the release agent after the PowerShell task. Use the script below to execute a deployment with Tabular Editor.
Note: Please reference the Tabular Editor Command line Options for a better understanding of the options present in the sample command.
start /B /wait TabularEditor.exe "$(System.DefaultWorkingDirectory)\_BimFileArtifact\theBimFile\s\<your-project-name>\<your-bim-file>.bim" -D "$(ASConnectionString)" "$(ASModelName)" -S "$(System.DefaultWorkingDirectory)\_BimFileArtifact\theBimFile\s\ReleasePipelineDataSourceUpdate.cs" -C -O -P -V -E -W
Note: If roles and members are mainted in the tabular model project and are deployed with the release pipeline, then the following script needs to be added to ReleasePipelineDataSourceUpdate.cs to remove an unsupported metadata tag related to role members.
foreach(var role in Model.Roles)
{
    // Find all Azure AD role members where MemberID is assigned:
    var orgMembers = role.Members.OfType<ExternalModelRoleMember>()
        .Where(m => m.IdentityProvider == "AzureAD" && !string.IsNullOrEmpty(m.MemberID)).ToList();

    // Delete the member and recreate it without assigning MemberID:
    foreach(var orgMember in orgMembers)
    {
        orgMember.Delete();
        role.AddExternalMember(orgMember.MemberName);
    }
}
Your final pipeline should resemble the images below:
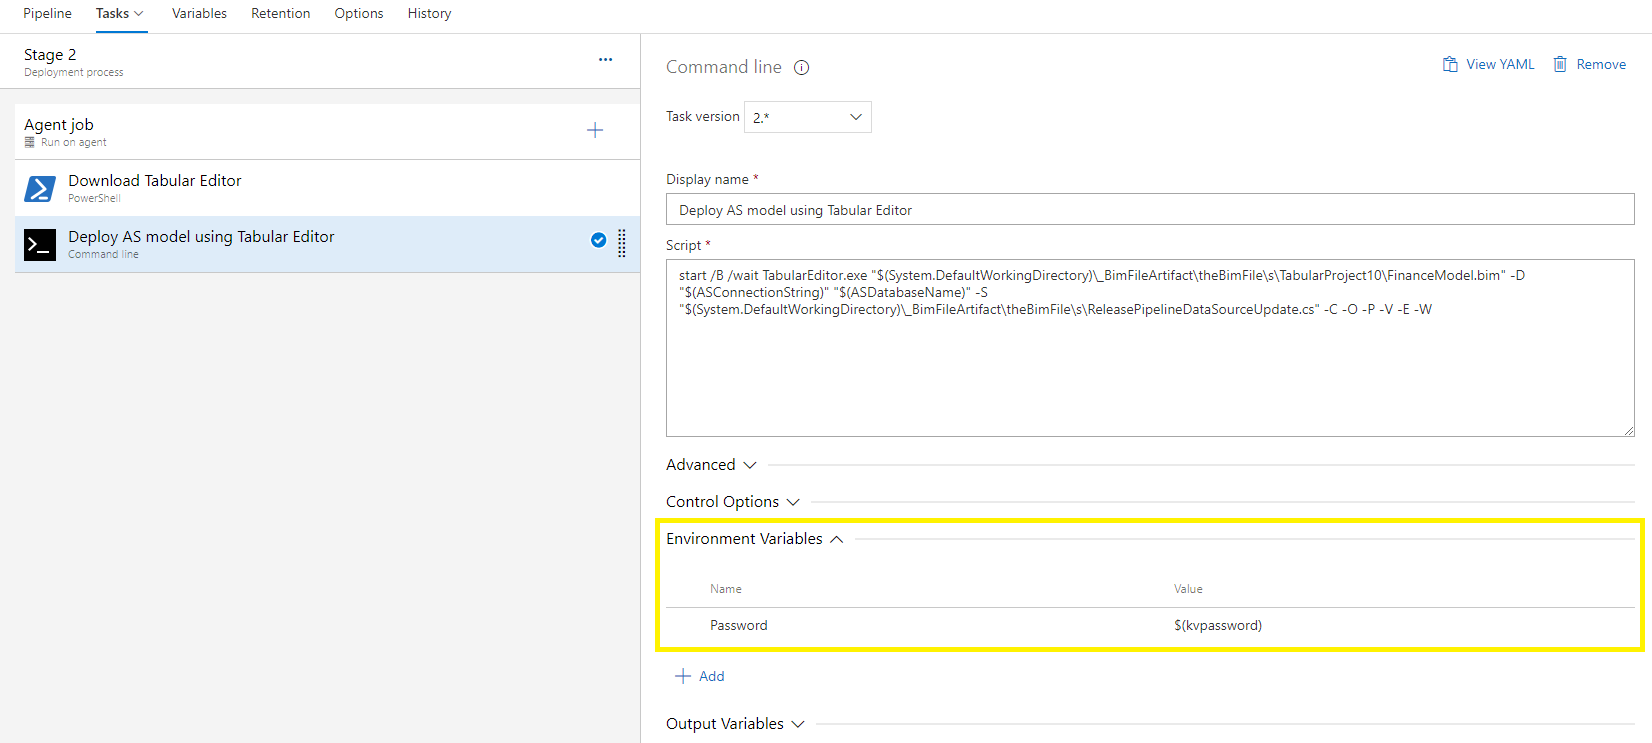
If you're updating the credentials used in a datasource (i.e. username, password) then follow the additional step below to make the secret values available to the ReleasePipelineDataSourceUpdate.cs script that will be excuted by the Tabular Editor command line task (Deployment - Step 5).
The command line task in the release pipeline has a section for Environment Variables. Use this section if you're handling secret values coming from either pipeline tasks or Azure Key Vault. In the screenshot below you can see an example of a task variable named Password being mapped to a pipeline variable that securely stores the password.
- This is a basic example that does not include other DevOps best practices (i.e. Unit testing, Quality control checks).
- The build pipeline copies all project files when only the Bim files is required. This was intentional for making the settings of the Copy Files task generic to increase reusability.