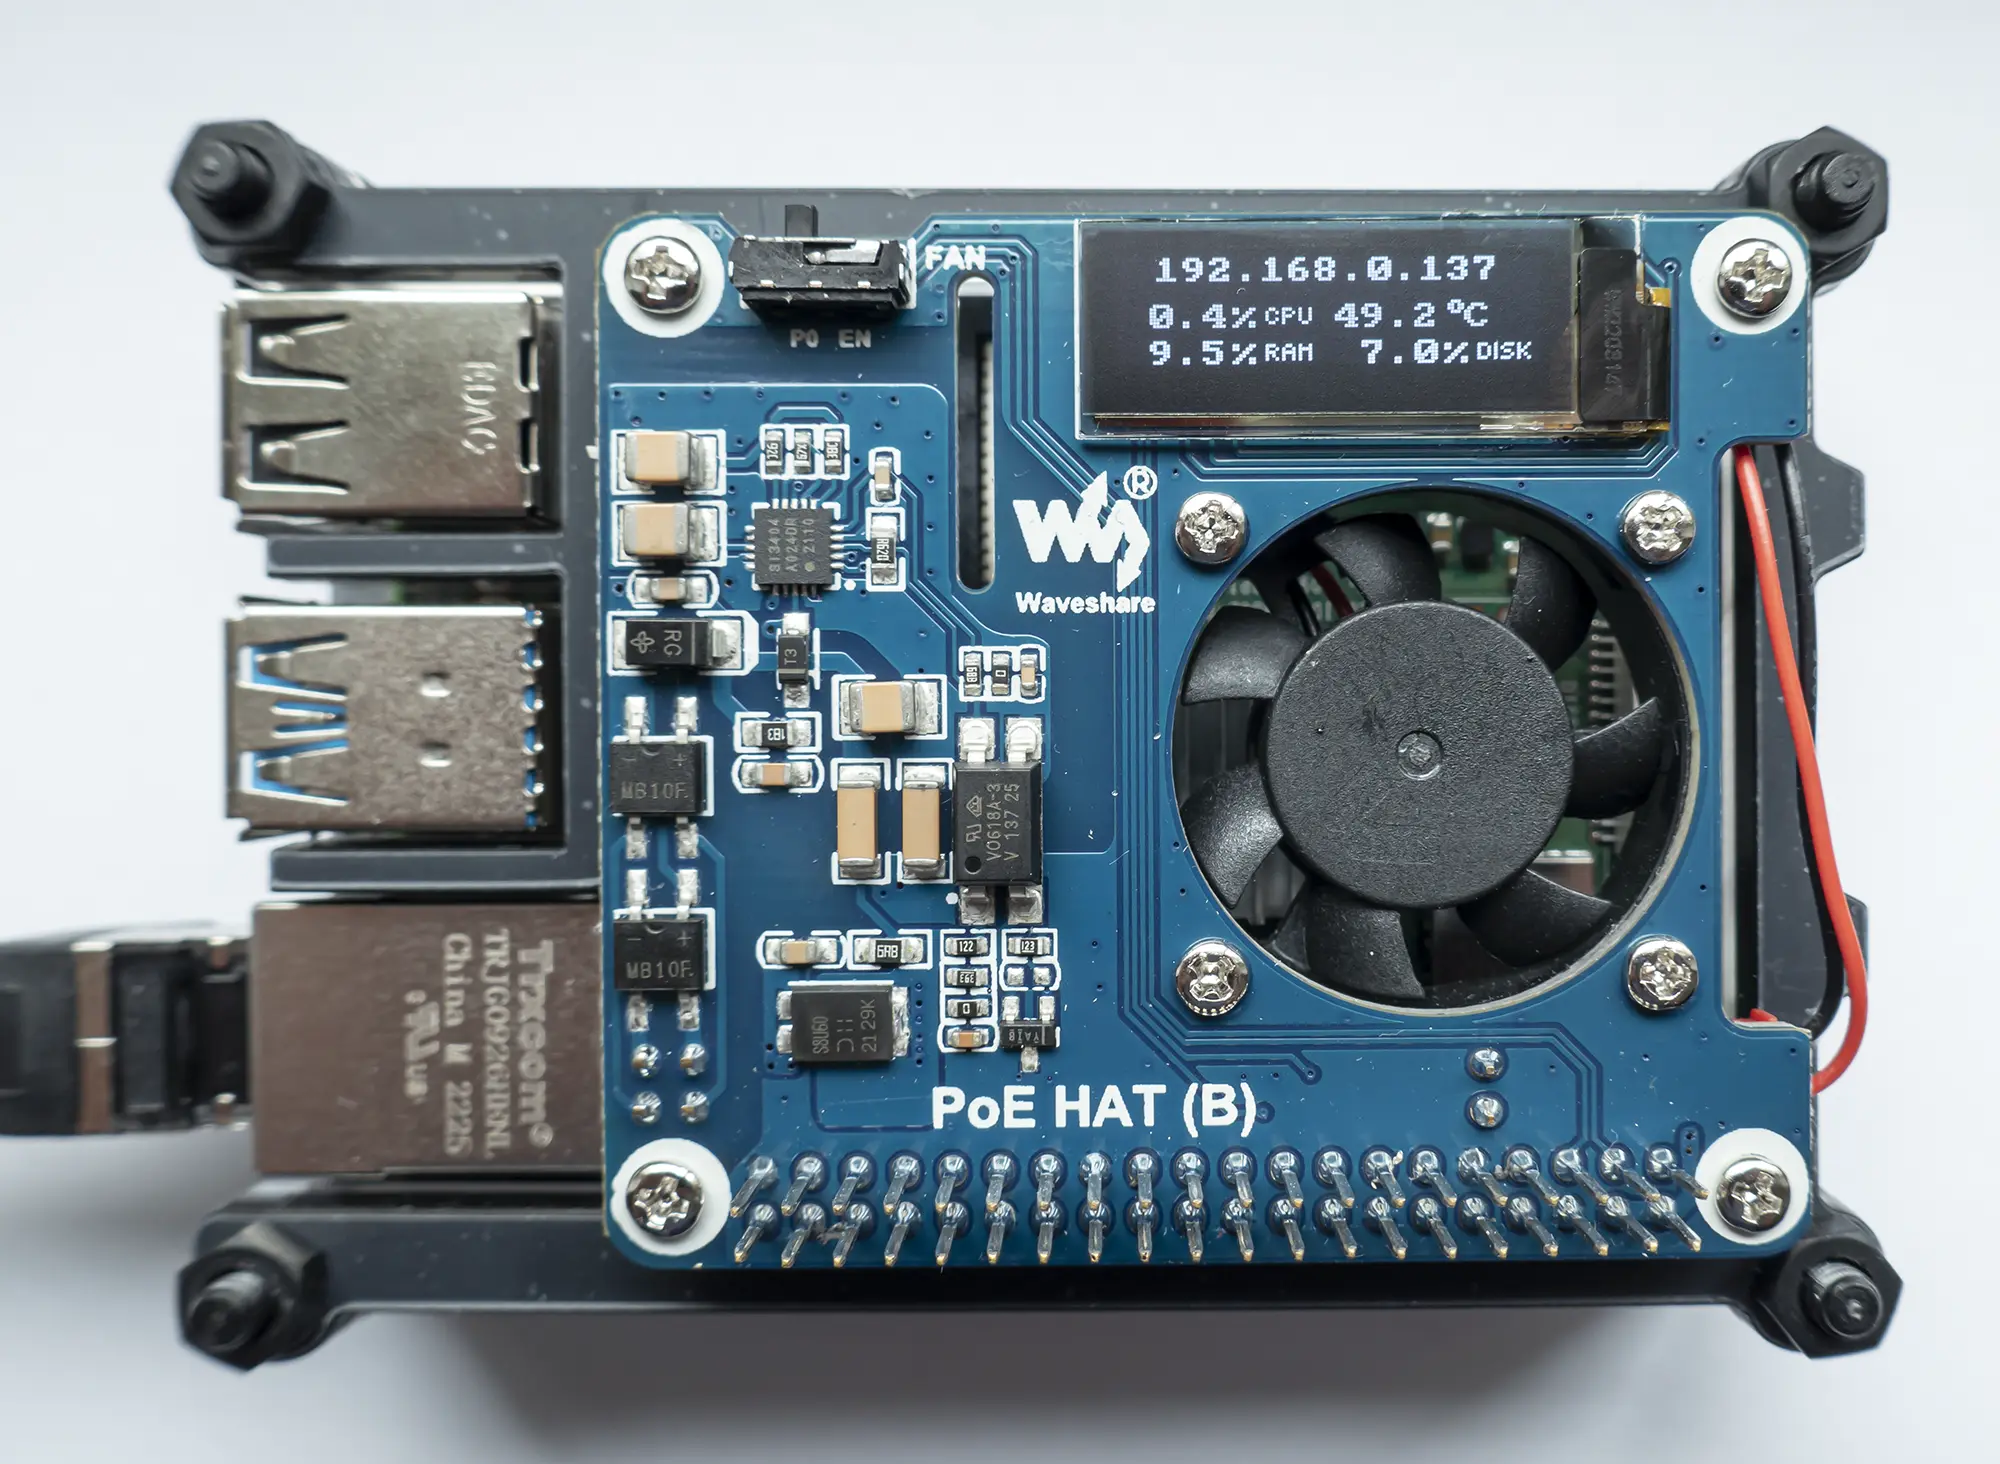
A controller for the display and fan of the Raspberry Pi Power Over Ethernet HAT (Type B), compatible with Raspberry Pi 3B+/4B.
The PoE HAT (Waveshare SKU 18014) allows you to deliver gigabit ethernet connectivity and power supply to your Raspi using a single connection (if you have a PoE capable switch/router). While PoE works without additional drivers, there is also a fan and a 128x32 pixel monochrome display on the HAT, both of which can be controlled with this software.
- automatic fan control to reach your desired temperature target
- show status information on the display: IP address, CPU usage, CPU temperature, RAM usage, disk usage.
- manual fan control via CLI
- show custom text via CLI (wip)
If you are running the latest Raspberry Pi OS, everything should already be set up the way we need it and you can run
pip install raspi-poe-mon --break-system-packages
The scary --break-system-packages flag just tells Python that you want to install this package globally rather than in a virtualenv. I don't really agree with the framing here, I think it's really fine to install Python packages globally on your Raspi.
After installation finished, you can call
raspi-poe-mon run
and the OLED disply should show you some info. Learn more about the available options with raspi-poe-mon --help. Each command has its own help section, e.g. raspi-poe-mon run --help.
If you want to install raspi-poe-mon on older Raspberry Pi OS or on a different OS, this section is for you.
The OLED display and fan controls of the PoE HAT are accessed through the I²C interface, which may be deactivated by default on your Raspi. To activate it on Raspberry Pi OS, run
sudo raspi-config nonint do_i2c 0
or call raspi-config without params and use the menu (Interface Options -> I2C -> Yes). You may need to reboot your Raspi to apply the change.
Next we install required packages: Python and pip are needed; the remaining packages are dependencies of the Pillow graphics library.
sudo apt install python3 python3-pip libjpeg-dev zlib1g-dev libfreetype6-dev liblcms2-dev libopenjp2-7 libtiff5 libsdl2-image-2.0-0
Now we are ready to install raspi-poe-mon from PyPI:
pip install raspi-poe-mon
If you are using Python 3.11 or higher, you may be greeted by error: externally-managed-environment. You can install raspi-poe-mon in a virtual environment to avoid this message, but then you can only use the raspi-poe-mon CLI when you enable this virtualenv first. If you want to ignore this annoyance, you can just add the --break-system-packages flag and go on with your day.
- the
raspi-poe-moncommand is not available after installation? Make sure that$HOME/.local/binis on yourPATH! On Raspi OS, this is already the case, but when this folder was just created, you might have to open a new terminal session first. - If you try to install Python packages via pip on Raspberry Pi OS, you may get stuck due to issues with gnome-keyring. If this is the case, please
export PYTHON_KEYRING_BACKEND=keyring.backends.null.Keyringand try again. You may want to add this to your.profileif the issue persists. pip install raspi-poe-monis still hangig or really slow? I can confirm that sometimes, downloading packages from PyPI on Raspi OS can take quite a while and I have no idea why... Trypip install raspi-poe-mon -vvvto get some status info and let it do it's thing for a couple of minutes.- the
pipcommand is not available, even after installingpython3-pip? trypip3instead.
After installation, the raspi-poe-mon command should be available on your terminal. Get usage instructions with
raspi-poe-mon --help
To activate the display and fan controller, use
raspi-poe-mon run
This will show live system information and control the fan on the PoE HAT based on chip temperature. Each command has its own help section that lists all avilable options, e.g. raspi-poe-mon run --help. This will tell you how to change the fan controller settings
raspi-poe-mon run --fan-off-temp 50 --fan-on-temp 60
With this setting, the fan will turn on when the CPU reaches 60°C and turn off after it has cooled down to 50°C.
The display and fan controller will only stay active as long as the process is running. To have it start automatically on boot and keep it running in the background, we can create a system service. On Raspi OS, create a new file /etc/systemd/system/raspi-poe-mon.service with this content:
[Unit]
Description=Raspi PoE HAT Monitor
After=network.target

[Service]
ExecStart=/home/raspi/.local/bin/raspi-poe-mon run --fan-off-temp 50 --fan-on-temp 60
User=raspi
Restart=always
RestartSec=30

[Install]
WantedBy=multi-user.target
You may have to change User= and adjust the path to the executable in ExecStart= (find it with which raspi-poe-mon). Here you can also change the fan control settings to your liking. Now you can activate the service with
sudo systemctl daemon-reload
sudo systemctl enable raspi-poe-mon
sudo service raspi-poe-mon start
Enjoy!
To set up your local development environment, please make sure that poetry is installed and updated. Then clone this repo and install the package with
poetry install
This will create a new virtualenv in the .venv folder, install all dependencies and then the raspi-poe-mon package. You should now be able to access the CLI with poetry run raspi-poe-mon.
We use pytest as test framework:
poetry run pytest
To build a distribution package (wheel), please use
poetry build
Before contributing code, please set up the pre-commit hooks to reduce errors and ensure consistency
pre-commit install
- You can increase the I2C baudrate from the default 100KHz to 400KHz by adding
dtparam=i2c_arm=on,i2c_baudrate=400000to/boot/config.txtand then rebooting. This will allow you to run animations at a higher framerate, but it is not required for the default status display.
- raspi-poe-mon (this project) on GitHub
- RustBerry-PoE-Monitor, another implementation in Rust
- Waveshare: PoE HAT (B)
- luma.oled
- pillow (PIL) dependencies
- Increase I2C baudrate from the default of 100KHz to 400KHz
- Font: CG pixel 4x5
This project is available under the terms of the MIT License.


