How to create a multi project template
I’m going to show you how to create a multi-project template. For my template I want to have a class library (let’s further call it Specification) and a test library (Tests). To do this we will have to create a solution then add these two projects.
First create a VSIX project.

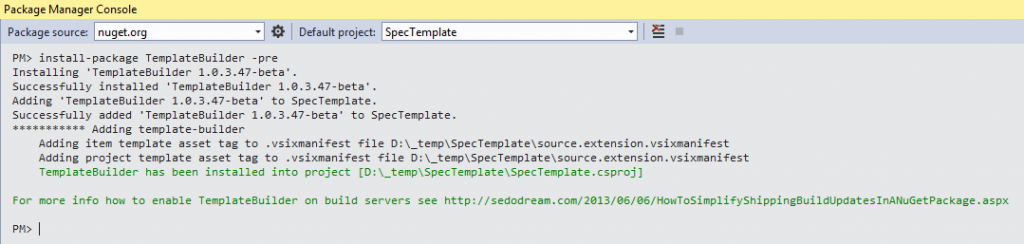
Then run Install-Package TemplateBuilder -pre command in Package Manager Console (Tools\NuGet Package Manager\Package Manager Console). You should see following lines in the Manager console:
Add the following entry to the Assets section of the file source.extension.vsixmanifest to ensure the TemplateBuilder assembly is included in our VSIX:
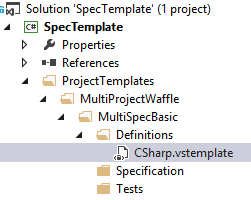
<Asset Type="Microsoft.VisualStudio.Assembly" d:Source="File" Path="TemplateBuilder.dll" AssemblyName="TemplateBuilder, Version=1.0.0.0, Culture=neutral, PublicKeyToken=null" />Next step is following TemplateBuilder naming convention and creating a folder structure that will be visible in the Visual Studio "Add New Project" dialog. Let’s say we want our template to appear under MultiProjectWaffle section. To do so we need to have following hierarchy.
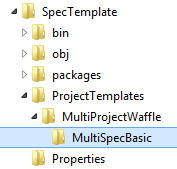
Here MultiSpecBasic folder is used to keep all the files and projects related to one multi-project template in a separated folder. In other words it will not show up in the Create New project window.
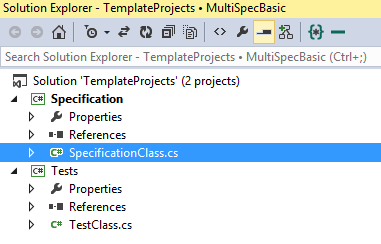
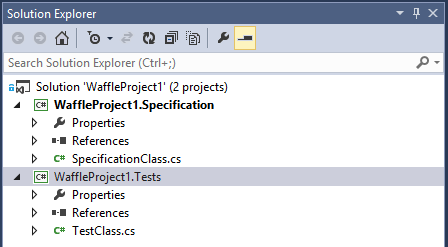
At this step we should create our multi-project solution in the aforementioned MulitSpecBasic folder. To do it just open a new instance of VS and create a new solution with 2 class libraries named Specification and Test. Now we should have a new sub-solution:
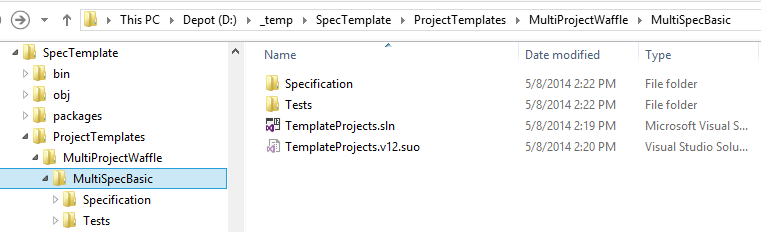
And following folder structure:
Now we can add the template folder hierarchy to our SpecTemplate project. To do so we need to enable “Show All files” option in the Solution explorer.
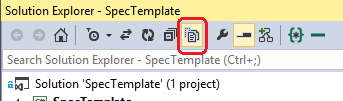
And then include MultiSpecBasic to the project:
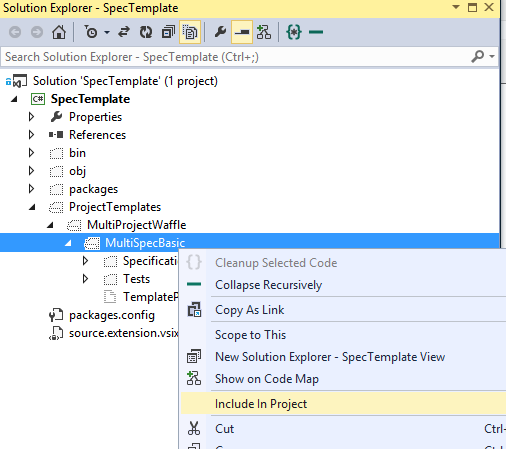
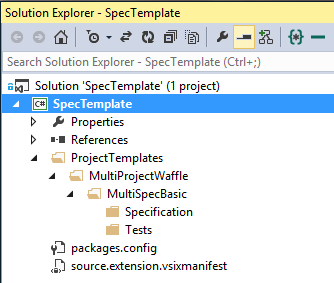
Note: Visual Studio will include all the files and subfolder under MultiSpecBasic folder, but we do not need them here. So we will just remove everything below Specification and Tests by choosing “Exclude from project” menu item and will have following structure:
Now we need to create MyTemplate.vstemplate for each of our template projects. To do so we will go to File Explorer and create a file with that name in the Specification and Tests folders.
In our example we will have Specification\MyTemplate.vstemplate file:
<VSTemplate Version="3.0.0" xmlns="http://schemas.microsoft.com/developer/vstemplate/2005" Type="Project">
  <TemplateData>
    <Name>Your name here</Name>
    <Description>Project description here</Description>
    <DefaultName>$saferootprojectname$.Specification</DefaultName>

    <ProjectType>CSharp</ProjectType>
    <ProjectSubType></ProjectSubType>
    <SortOrder>1000</SortOrder>
    <CreateNewFolder>true</CreateNewFolder>
    <ProvideDefaultName>true</ProvideDefaultName>
    <LocationField>Enabled</LocationField>
    <EnableLocationBrowseButton>true</EnableLocationBrowseButton>

    <!-- Indicates how many parent folders this item template should appear in -->
    <NumberOfParentCategoriesToRollUp>1</NumberOfParentCategoriesToRollUp>
  </TemplateData>
  <TemplateContent>
    <Project TargetFileName="$saferootprojectname$.Specification.csproj" File="Specification.csproj" ReplaceParameters="true">
    </Project>
  </TemplateContent>
  <WizardExtension>
    <Assembly>TemplateBuilder, Version=1.0.0.0, Culture=neutral, PublicKeyToken=null</Assembly>
    <FullClassName>TemplateBuilder.ChildWizard</FullClassName>
  </WizardExtension>
</VSTemplate>
And Tests\MyTemplate.vstemplate file:
<VSTemplate Version="3.0.0" xmlns="http://schemas.microsoft.com/developer/vstemplate/2005" Type="Project">
<TemplateData>
<Name>Your name here</Name>
<Description>Project description here</Description>
<DefaultName>$saferootprojectname$.Tests</DefaultName>
<ProjectType>CSharp</ProjectType>
<ProjectSubType></ProjectSubType>
<SortOrder>1000</SortOrder>
<CreateNewFolder>true</CreateNewFolder>
<ProvideDefaultName>true</ProvideDefaultName>
<LocationField>Enabled</LocationField>
<EnableLocationBrowseButton>true</EnableLocationBrowseButton>
<!-- Indicates how many parent folders this item template should appear in -->
<NumberOfParentCategoriesToRollUp>1</NumberOfParentCategoriesToRollUp>
</TemplateData>
<TemplateContent>
<Project TargetFileName="$saferootprojectname$.Tests.csproj" File="Tests.csproj" ReplaceParameters="true">
</Project>
</TemplateContent>
<WizardExtension>
<Assembly>TemplateBuilder, Version=1.0.0.0, Culture=neutral, PublicKeyToken=null</Assembly>
<FullClassName>TemplateBuilder.ChildWizard</FullClassName>
</WizardExtension>
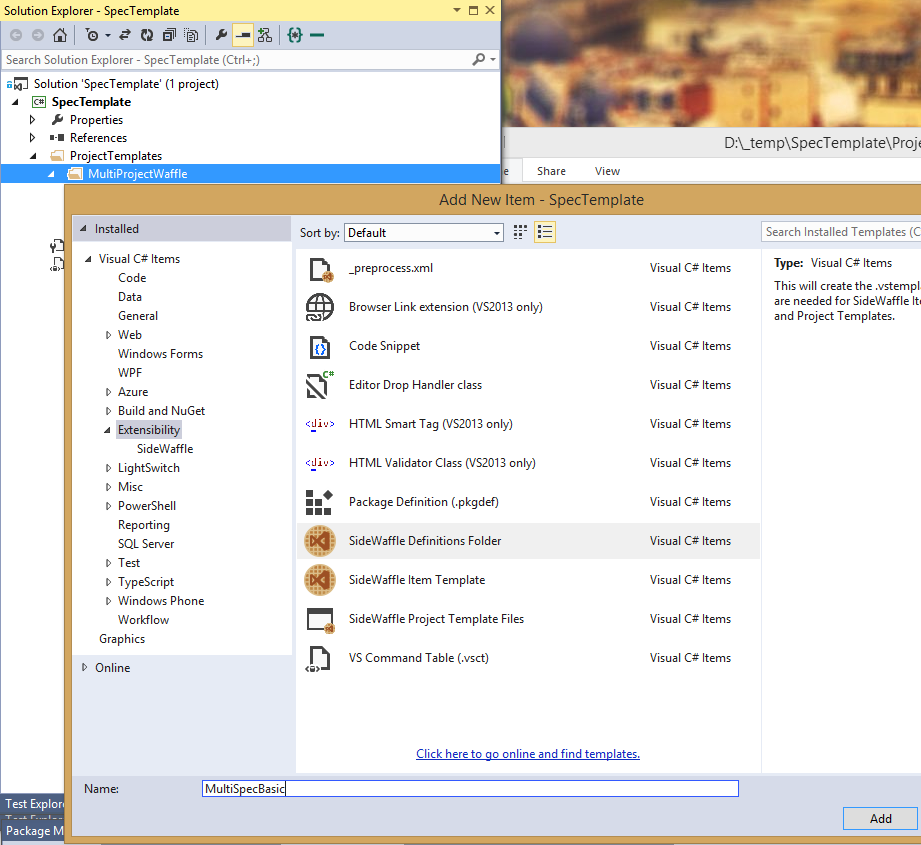
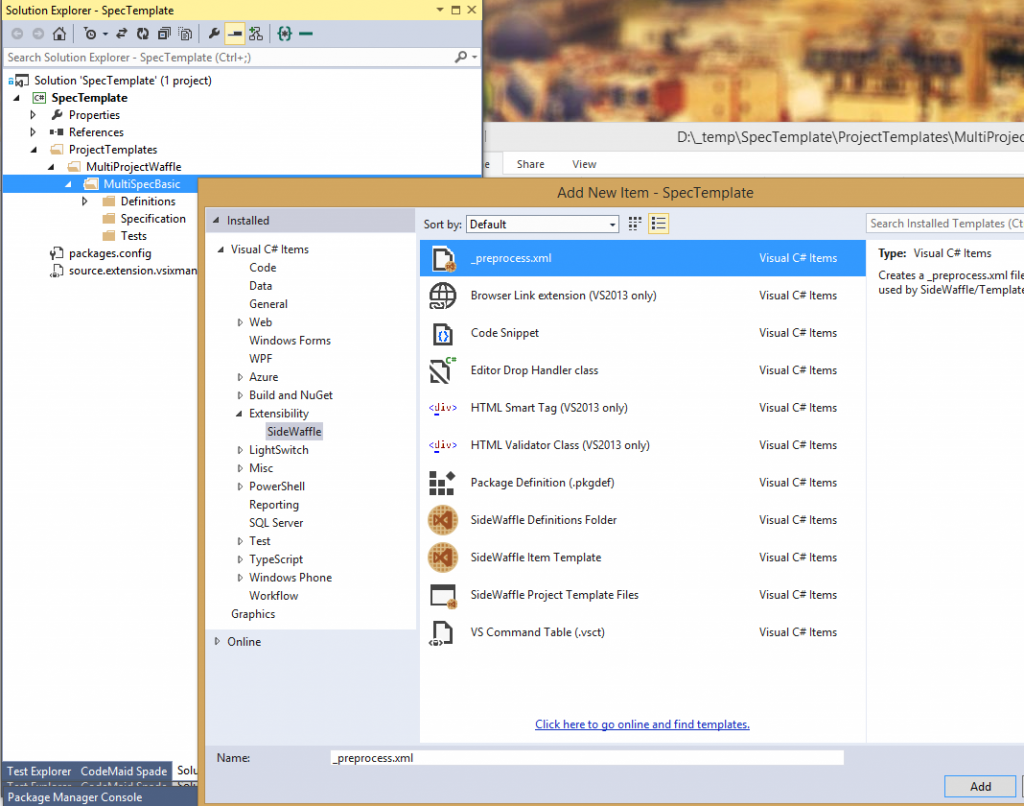
</VSTemplate>Now we can create C# vs template. Right-click on MultiProjectWaffle folder and add new item – SideWaffle definitions folder (under Extensibility templates). We will just name it MultiSpecBasic so visual studio will not create any subfolder.
Now there will be several vstemplat- files added. In our sample we are going to integrate our new template under C# items. So we will just delete all the other templates except CSharp.vstemplat- and rename it to CSharp.vstemplate.
Now edit CSharp.vstemplate to look like following snippet:
<VSTemplate Version="2.0.0" Type="ProjectGroup"
    xmlns="http://schemas.microsoft.com/developer/vstemplate/2005">

  <!-- Fore more info on multi project templates visit: http://msdn.microsoft.com/en-us/library/ms185308(v=vs.90).aspx -->

  <TemplateData>
    <Name>MultiProject Waffle project</Name>
    <Description>Creates multiple Waffles</Description>
    <ProjectType>CSharp</ProjectType>
    <DefaultName>WaffleProject</DefaultName>
    <SortOrder>5000</SortOrder>
  </TemplateData>
  <TemplateContent>
    <ProjectCollection>
      <ProjectTemplateLink ProjectName="$safeprojectname$.Specification">Specification\MyTemplate.vstemplate</ProjectTemplateLink>
      <ProjectTemplateLink ProjectName="$safeprojectname$.Tests">Tests\MyTemplate.vstemplate</ProjectTemplateLink>
    </ProjectCollection>
  </TemplateContent>
  <WizardExtension>
    <Assembly>TemplateBuilder, Version=1.0.0.0, Culture=neutral, PublicKeyToken=null</Assembly>
    <FullClassName>TemplateBuilder.RootWizard</FullClassName>
  </WizardExtension>
</VSTemplate>
Pay attention to ProjectTemplateLink tags – these are actual links to the project to our new template.
WizardExtension is a special tag that will be used by template builder during template generation process. It should reference RootWizard in the solution template and ChildWizard in the project templates (shown in the previous section).
Note: This step is only needed when contributing to the SideWaffle project. It should not be used when creating your own template pack.
In your _project.vstemplate.xml file you will want to add some telemetry values. These values will allow us to know how popular a template is and will give us an idea how we want to handle maintenance of the template in the future.
When looking at your _project.vstemplate.xml file you should see a TemplateContent element. Inside this element you will want to add the following elements.
<TemplateContent>
  <CustomParameters>
    <CustomParameter Name="$TemplateName$" Value="Name" />
    <CustomParameter Name="$TemplateID$" Value="GUID" />
    <CustomParameter Name="$TemplateType$" Value="Project" />
  </CustomParameters>
</TemplateContent>
You should replace the values for each parameter with the correct values for your template. The value for $TemplateName$ should match the same name that you have in the Name element at the top of the file. The $TemplateID$ value should be a randomly generated GUID. You can generate this using the "Create GUID" feature found under the Tools menu. Finally the $TemplateType$ value should be set to Project since this is a project template. Below is an example taken from the Durandal451 project template. It should give you an idea what this section should look like.
<CustomParameters>
  <CustomParameter Name="$TemplateName$" Value="Durandal451" />
  <CustomParameter Name="$TemplateID$" Value="f6a0116c-79a9-44f8-aa2b-f37239c1b4fe" />
  <CustomParameter Name="$TemplateType$" Value="Project" />
</CustomParameters>
Finally, we'll add the following to the _project.vstemplate.xml file. It should go after the closing tag for the TemplateContent element.
<WizardExtension>
  <Assembly>LigerShark.Templates, Version=1.0.0.0, Culture=neutral, PublicKeyToken=null</Assembly>
  <FullClassName>LigerShark.Templates.GoogleAnalyticsWizard</FullClassName>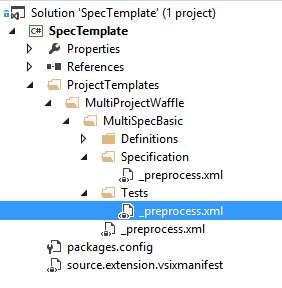
</WizardExtension>So we are almost done. The last step is to add _preprocess.xml to each of the project folders. We will need them under MultiSpecBasic, Specification and Tests folders. Simply right-click each of that folders and add a new item - _preprocess.xml
We will end up with this:
Now we will need to edit those xmls in the following order.
MultiSpecBasic_preprocess.xml
<?xml version="1.0" encoding="utf-8" ?>
<Preprocess>
  <!--
  You can specify the path where this should show up in the
  Add New Project / Add New Item dialog by setting the value below
  -->
  <TemplateInfo Path="CSharp\MultiWaffle"/>
  <Replacements Include="*.*" Exclude="*.vstemplate;*.csproj;*.fsproj;*.vbproj;*.jpg;*.png;*.ico;_preprocess.xml;_project.vstemplate.xml">
  </Replacements>
</Preprocess>
MultiSpecBasic\Specification_preprocess.xml
<?xml version="1.0" encoding="utf-8" ?>
<Preprocess>
  <!--
  You can specify the path where this should show up in the
  Add New Project / Add New Item dialog by setting the value below
  -->
  <TemplateInfo Path="CSharp\MultiWaffle\Spec"/>
  <Replacements Include="*.*" Exclude="*.vstemplate;*.csproj;*.fsproj;*.vbproj;*.jpg;*.png;*.ico;_preprocess.xml;_project.vstemplate.xml">
    <add key="ProjectName" value="$saferootprojectname$"/>
  </Replacements>
</Preprocess>
And MultiSpecBasic\Tests_preprocess.xml
<?xml version="1.0" encoding="utf-8" ?>
<Preprocess>
  <!--
  You can specify the path where this should show up in the
  Add New Project / Add New Item dialog by setting the value below
  -->
  <TemplateInfo Path="CSharp\MultiWaffle\Test"/>
  <Replacements Include="*.*" Exclude="*.vstemplate;*.csproj;*.fsproj;*.vbproj;*.jpg;*.png;*.ico;_preprocess.xml;_project.vstemplate.xml">
    <add key="ProjectName" value="$saferootprojectname$"/>
  </Replacements>
</Preprocess>And that is it. Simply build your SpecTemplate project (make sure you put correct template publisher in source.extension.vsixmanifest file – you can do it by double-clicking that file in the solution explorer and putting correct name under Author edit box) and hit Ctrl+F5 to run experimental VS instance. And here is the magic view you should see:
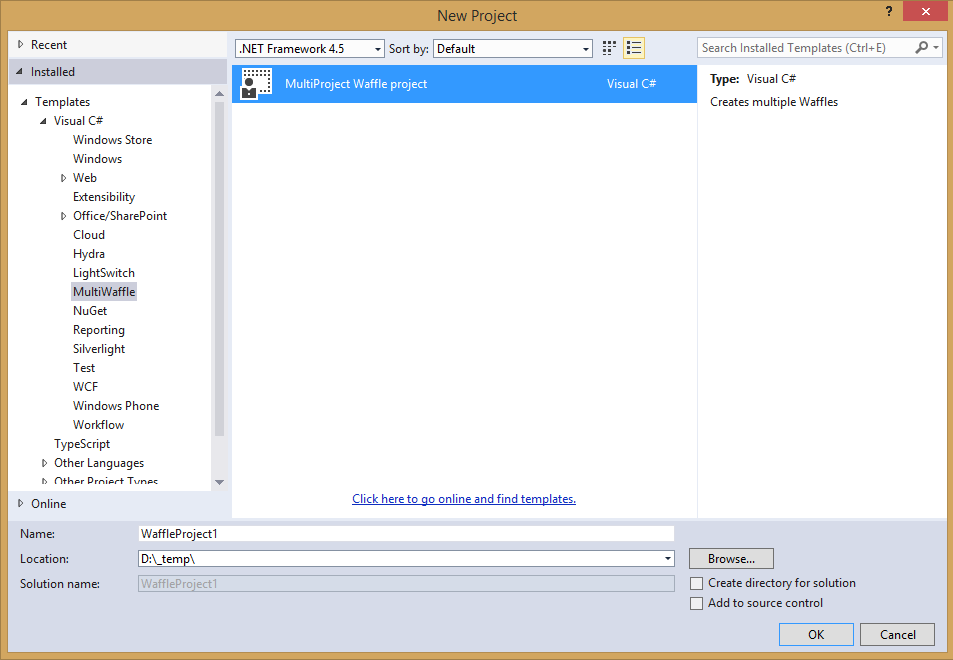
And ok button will create our brand new project:
Now you can go to the TemplateProjects.sln in your SpecTemplate\ProjectTemplates\MultiProjectWaffle\MultiSpecBasic folder and modify it to be something more useful – adding new classes, configurations and so on. You do not have to think about updating template files anymore – Template builder will pick up all your changes automatically. You will just need to open SpecTemplate.sln file and rebuild the project to have a new version of SpecTemplate.vsix file.
Note: You can find a working multi project template example by checking out this project.
If you continue to have trouble, please log a new issue and we will be happy to help.