How to create a project template
In this article, I will show you how to create a project template. This article assumes that you have BOTH Visual Studio and the Visual Studio SDK already installed.
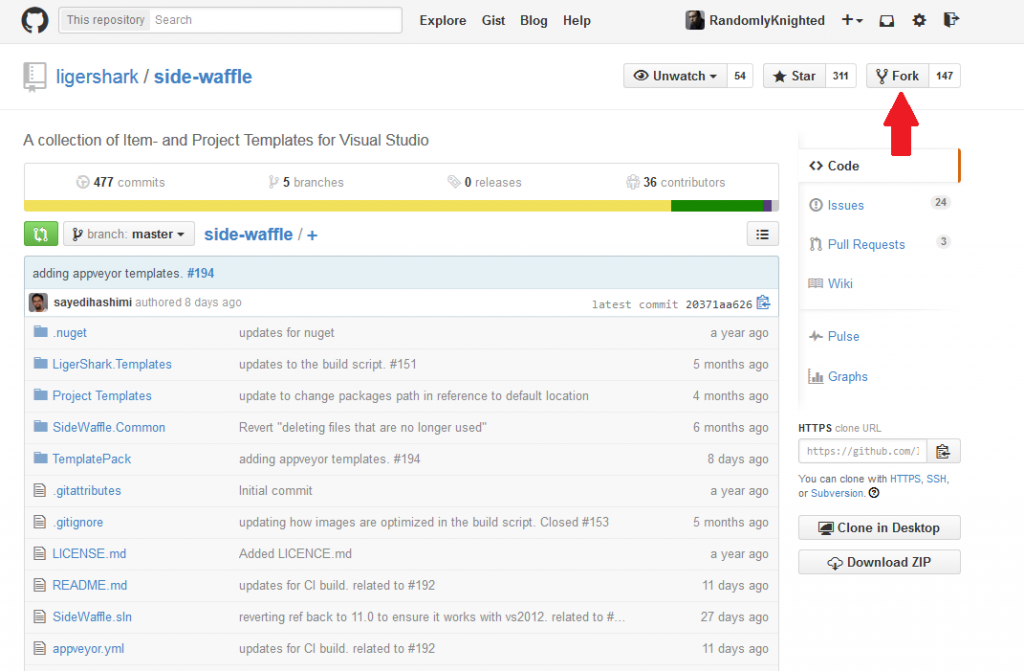
First, fork SideWaffle if you haven't already
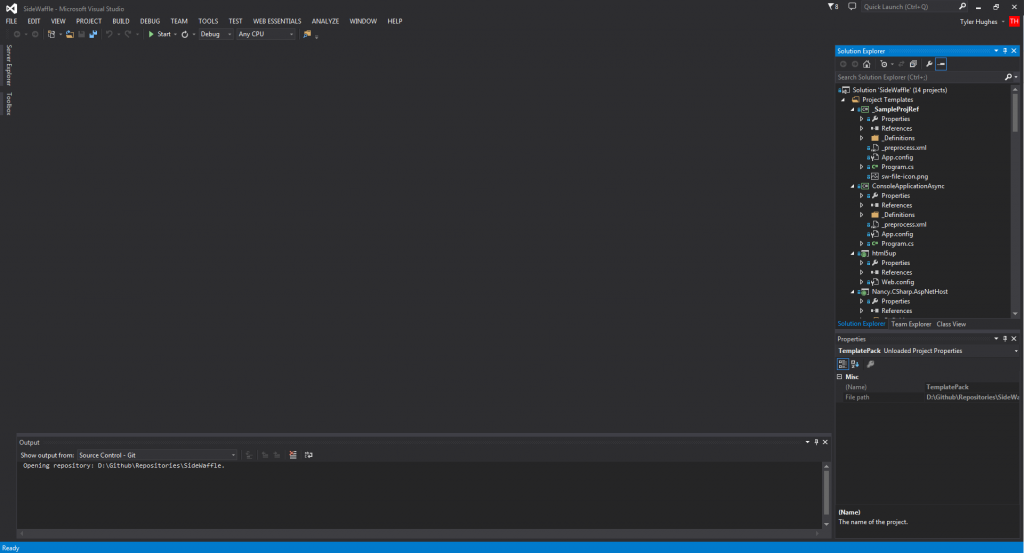
Now that we have our own copy of SideWaffle, open SideWaffle.sln in Visual Studio
We are going to create a new VSIX project, which is found by going to Extensibility->VSIX Project in the Add New Project window.

Then run install-package TemplateBuilder –pre command in Package Manager Console (Tools\NuGet Package Manager\Package Manager Console). You should see following lines in the Manager console:

After you see the notification that Template Builder was installed successfully, you will receive a prompt letting you know that the VSIX project had been modified by Nuget. Select Reload All from the options listed.
Now that we have our VSIX project, we want to add our project to the solution. In this article, I will be adding a project using the HTML5 Boiler Plate template.

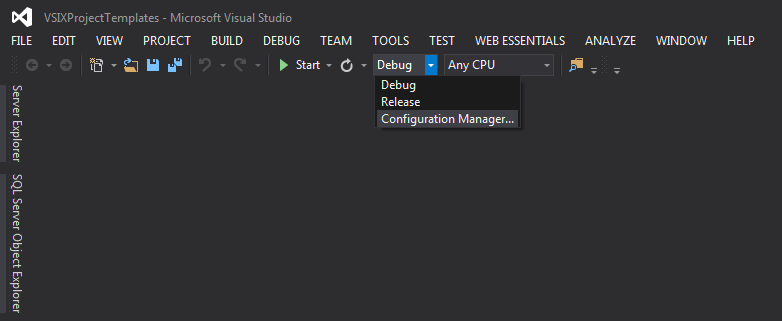
Now before we continue any further we want to keep Visual Studio from building any of the projects that we just added. As shown in the image below select Configuration Manager from the drop down menu at the top of the window
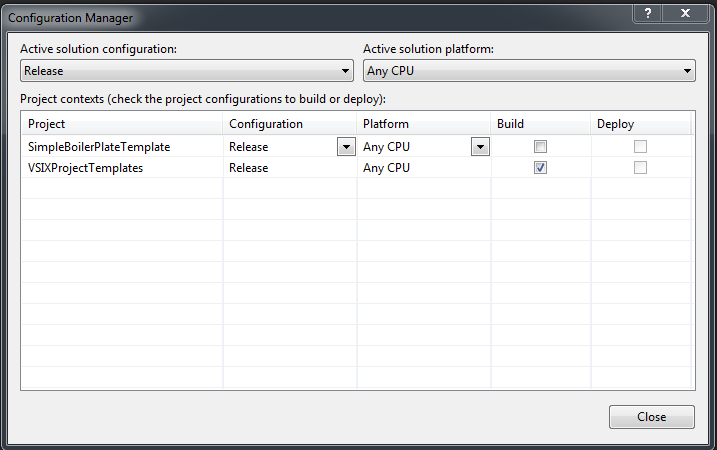
In the Build column uncheck any projects that you added in the last step. Do this for both the Debug and Release configurations.
Right click on your VSIX project and select Add->Add Template Reference (SideWaffle project)
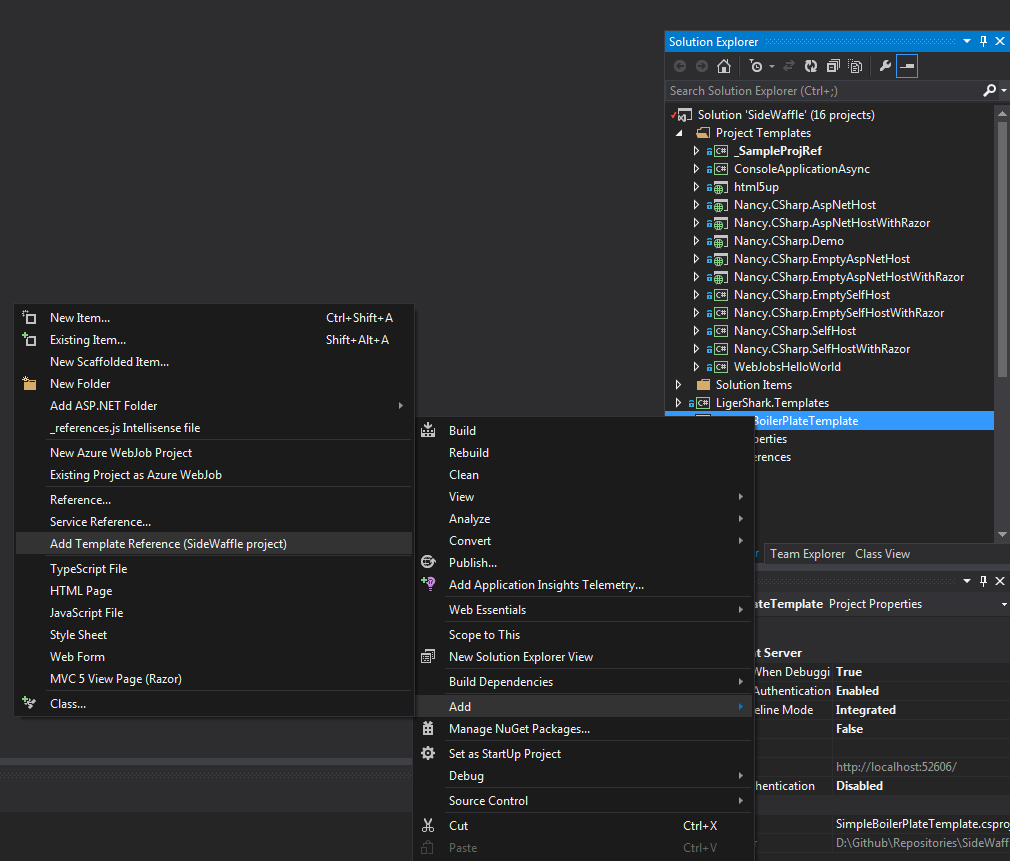
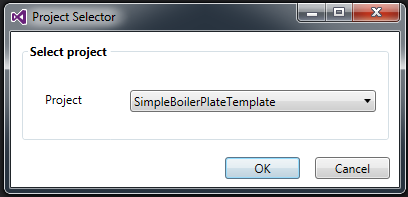
In the dialog that appears select the project you added in Step 3
After this has completed you will get another dialog box letting you know that the VSIX project has been modified. Once again select Reload All from the options listed
Right click your source project and select Add New Item->Extensibility\SideWaffle Project Template Files as shown in the image below. You should always add the item to the root directory of your project in order for SideWaffle to create the files in the correct location. This item adds the following files to the target project to turn it into a template:
-
_preprocess.xml- This file is used to perform file replacements during the template packing process and to override the path where the template is shown in the New Project/Item dialog; This file Must be in the root folder, and must define thePathattribute onTemplateInfo -
_Definitions\_project.vstemplate.xml- This file contains metadata regarding your template. For example the name, description, logo, etc are all found in this file. This file also has a pointer to the project file that you are creating a template out of.

You'll need to update _preprocess.xml so that it replaces your namespace values to use $safeprojectname$ when the template is created and so that you define where the template should be shown in the New Project dialog. The XML below is an example of a very common and simple replacement of the _preprocess.xml file.
<?xml version="1.0" encoding="utf-8" ?>
<Preprocess>
  <TemplateInfo Path="CSharp\Web\Custom\Subcategory"/>
  <Replacements Include="*.*" Exclude="*.vstemplate;*.csproj*.jpg;*.png;*.ico;_preprocess.xml">
    <add key="_SampleProjRef" value="$safeprojectname$"/>
  </Replacements>
</Preprocess>
Below is another example of the _preprocess.xml file using a more complex replacement.
<?xml version="1.0" encoding="utf-8" ?>
<Preprocess>
<!--
You can specify the path where this should show up in the
Add New Project / Add New Item dialog by setting the value below
-->
<TemplateInfo Path="CSharp\Web\SideWaffle"/>
<Replacements Include="*.*" Exclude="*.vstemplate;*.fsproj;*.vbproj;*.jpg;*.png;*.ico;_preprocess.xml;_project.vstemplate.xml">
<add key="Nancy.CSharp.AspNetHost" value="$safeprojectname$"/>
<!--targetFramework="4.0"-->
<add key="targetFramework="4.0"" value="targetFramework="$targetframeworkversion$""/>
<!--<TargetFrameworkVersion>v4.0</TargetFrameworkVersion>-->
<add key="<TargetFrameworkVersion>v4.0</TargetFrameworkVersion>"
value="<TargetFrameworkVersion>v$targetframeworkversion$</TargetFrameworkVersion>"/>
</Replacements>
</Preprocess>You'll need to update the _Definitions\_project.vstemplate.xml file and ensure that the correct content for the File attribute on the Project element was generated. Below is an example of a complete file.
Note: Make sure to set the Path attribute on TemplateInfo here otherwise the template will never be shown
<VSTemplate Version="3.0.0" xmlns="http://schemas.microsoft.com/developer/vstemplate/2005" Type="Project">
  <TemplateData>
    <Name>Sample proj from ref</Name>
    <Description>Sample proj from ref</Description>
    <DefaultName>MyProjApp</DefaultName>

    <ProjectType>CSharp</ProjectType>
    <ProjectSubType></ProjectSubType>
    <SortOrder>1000</SortOrder>
    <CreateNewFolder>true</CreateNewFolder>
    <ProvideDefaultName>true</ProvideDefaultName>
    <LocationField>Enabled</LocationField>
    <EnableLocationBrowseButton>true</EnableLocationBrowseButton>
    <Icon>icon.png</Icon>

    <!-- Indicates how many parent folders this item template should appear in -->
    <NumberOfParentCategoriesToRollUp>1</NumberOfParentCategoriesToRollUp>
  </TemplateData>
  <TemplateContent>
    <Project TargetFileName="$projectname$.csproj" File="_SampleProjRef.csproj" ReplaceParameters="true">
    </Project>
  </TemplateContent>
</VSTemplate>
After you have made these changes you can party on your project and then when you build the TemplatePack project the project template will be included automatically.
You can find a sample of this in the SideWaffle repo as the _SampleProjRef project.
If you have any trouble following the instructions found in this article or are unsure about something in your project please create an issue and we will be happy to assist you with your project.
Below is a 5 minute video demonstrating how to create a new project template with SideWaffle.