Setting Up a VS Code IDE
So far you have successfully built and installed MEL, perhaps run some of its examples, or even created your own CMake project and built it from the command line. You may be wondering now how you will actually write code. For MEL based projects, we recommend using a lightweight text editor over full blown IDEs like Visual Studio or Eclipse. While these IDEs provide a number of features which are undoubtedly useful, it's is unlikely that you will benefit from the added complexity. Furthermore, it is very easy for your projects to become tightly integrated with the IDE itself, making future migrations difficult.
We recommend using Visual Studio Code (not to be confused with Visual Studio proper). VS Code is similar to text editors like Sublime and Atom, but provides a number of features and extensions which make it well suited for small scale CMake based C++ development.
Start by downloading VS Code:
> choco install vscodeGo ahead and download the Ninja too if you don't already have it. This will make the integrated CMake experience better later on when we install the CMake Tools extension.
> choco install ninjaNow open VS Code! We recommended watching these introductory videos before continuing.
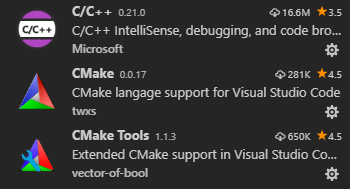
There are three extensions you will need:
- C/C++ - Extension from Microsoft offering code completion, IntelliSense, debuging, etc. (documentation)
- CMake Tools - Extension which integrates CMake with VS Code and C/C++ extension (documentation)
- CMake - A simple syntax highlighter for CMake files
You may also choose to install a new theme. Good options include Dracula Official, One Dark Pro, and Material Theme.
The MEL template is already configured to work with VS Code and the installed extensions. Make a local copy of the template anywhere you like and open the folder in VS Code. The main areas of interest are:
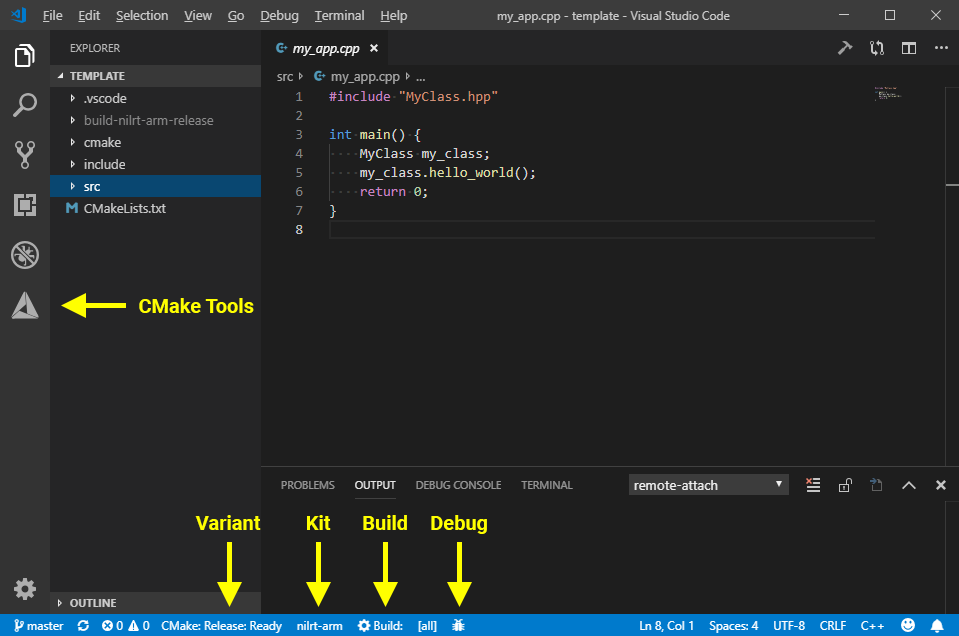
- CMake Tools - A sidebar badge for the extension from which you can Configure, Build, Clean, etc. your project.
-
Variant - The CMake Tools Variant currently selected. Controls what configuration options are passed to CMake. Click to choose other options. The template defines two variants by default:
- Release - the binaries are optimized for size and speed
- Debug - the binaries are not optimized and include embedded Debugging information
-
Kit - The CMake Tools Kit currently selected. Controls which compiler or toolchain CMake is told to generate files for. Click to choose other options. The template defines four kits:
- msvc-x86 - uses MSVC 32-bit compiler
- msvc-x64 - uses MSVC 64-bit compiler
- nilrt-arm - uses NI LRT ARM cross compiler (for myRIO users)
- nilrt-x64 - uses NI LRT x64 cross compiler (for cRIO users)
- Build - Builds a selected target ([all] by default, but could be a single lib/exe if your project defines multiple targets)
- Debug - Debugs a selected target displaying pertinent info in the Debug sidebar on the left (Bug Icon). You'll want to have the Debug Variant selected when debugging.
The template Variants and Kits are defined in two files in the .vscode folder: cmake-kits.json and cmake-variants.yaml. We don't recommend you change the Kits, but feel free to expand the Variants as your CMake project options grow.
You're now ready to start developing MEL based apps! From VS Code you have everything at your fingertips, and should no longer have to execute CMake commands from the terminal. Finally note that a handful of useful CMake Tools commands can be accessed via the command palette with Ctrl+Shift+P and by typing "cmake".
Cross-comping for NI LRT with VS Code is pretty good, but not quite as good as when compiling naively for Windows. For one, you will not be able to debug the app since it's running remotely (though it may actually be possible with some determination). Second, CMake Tools does not yet provide the Microsoft C/C++ extension with information about our toolchain, particularly where the STL headers are located, and you may notice green squigglies under some of your includes. Hopefully this will be fixed soon. That said, VS Code still does a pretty good job providing auto-completions, and errors will still be highlighted after an unsuccessful compilation.
NI LRT users will be happy to know that VS Code has a built in terminal (which uses PowerShell under the hood), so you can use SSH/SFTP to interact with your myRIO or cRIO directly from the IDE. You can even have a split side-by-side view, one for SSH and one for SFTP:
