Using DeviceResources
| Getting Started |
|---|
In the basic game loop lesson, we made use of the Direct3D Game Visual Studio template which has all the relevant Direct3D code in the Game class including creating the device and swap chain. This makes it easy to see how to create the device & swapchain. This, however, results in a lot of 'boiler-plate' code in the main Game class which is distracting for the remainder of our tutorial lessons.
There is therefore a "DR" variant of each of the Direct3D Game VS templates in the VS 2019/2022 VSIX package which adds DeviceResources.
The standard Universal Windows Platform app
DirectXAppVS templates make use of a similarDeviceResourcesabstraction.
classDiagram
direction LR
class IDeviceNotify{
   <<Interface>>
   +OnDeviceLost()
   +OnDeviceRestored()
}
class Game{
   +Initialize()
   +Tick()
   -Update()
   -Render()
}
IDeviceNotify <|-- Game
class StepTimer{
   +GetElapsedSeconds() double
   +GetTotalSeconds() double
   +GetFrameCount() uint32_t
   +Tick()
}
Game --o StepTimer : m_timer
class DeviceResources{
    +GetD3DDevice() ID3D11Device
    +GetD3DDeviceContext() ID3D11DeviceContext
    +CreateDeviceResources()
    +CreateWindowSizeDependentResources()
    +Present()
}
Game --o DeviceResources : m_deviceResources
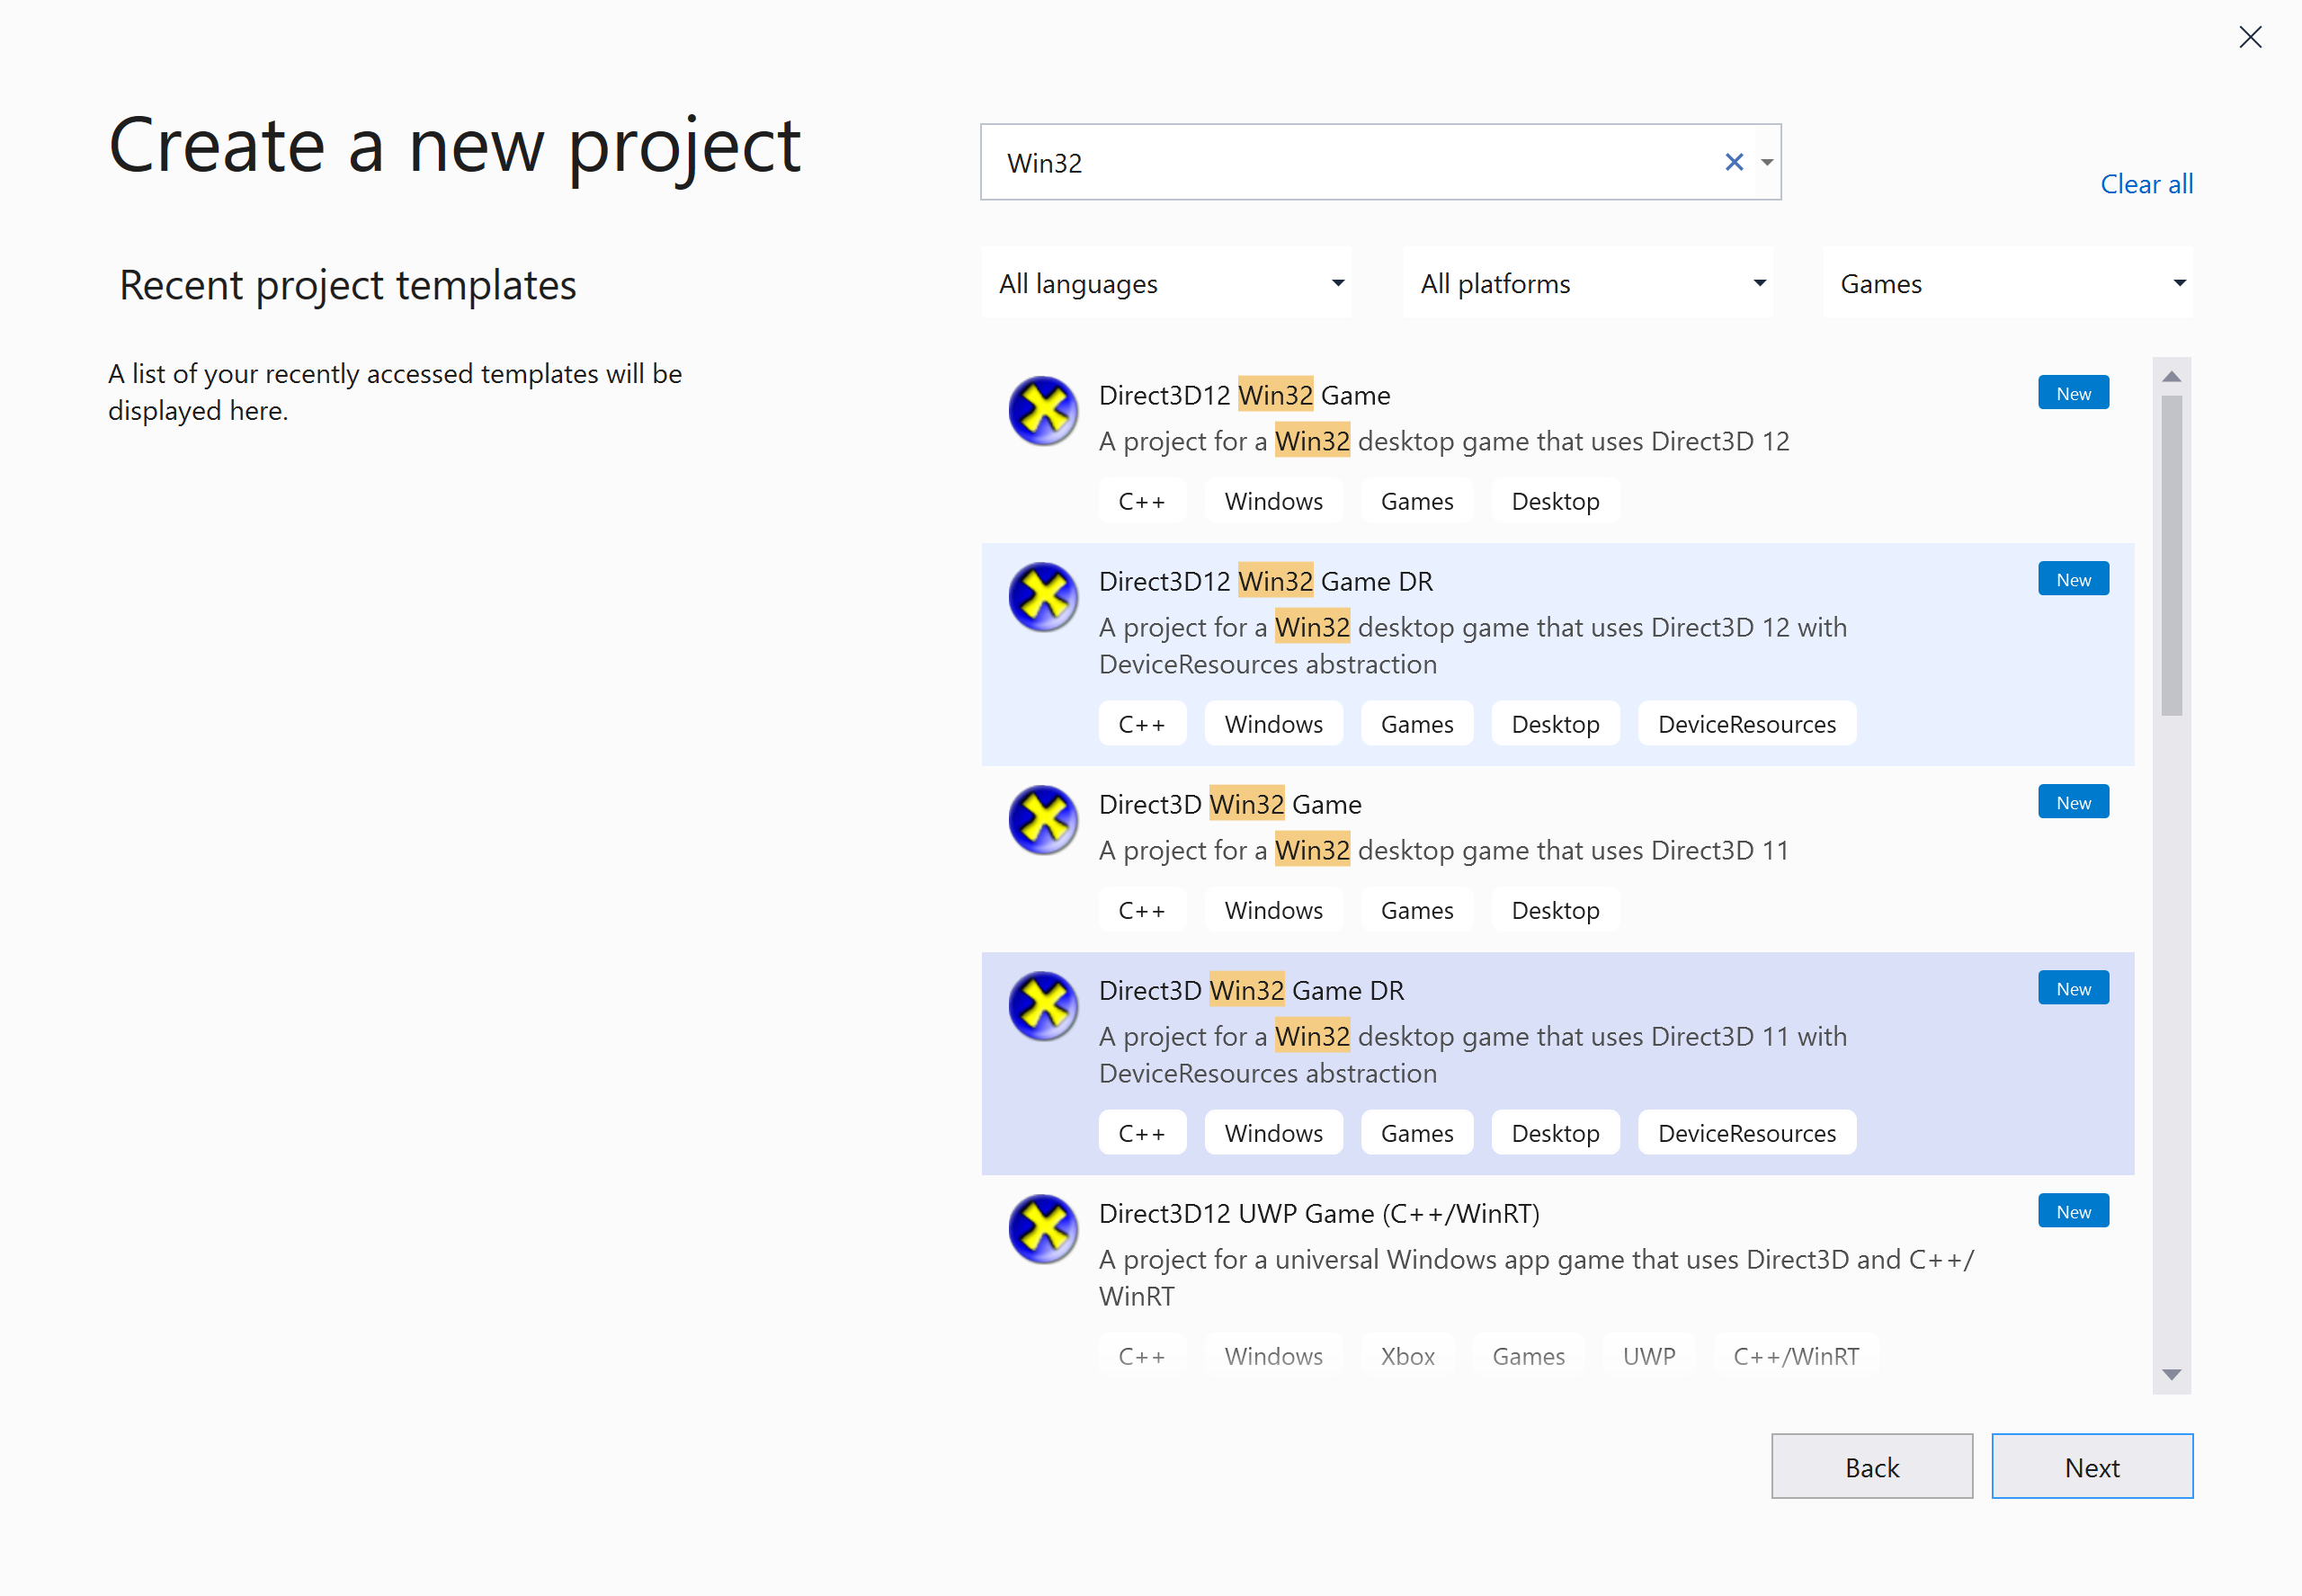
- From the drop-down menu, select File and then New -> Project... or on the startup dialog select Create a new project
- Select "Games" on the project types filter. You can optionally type "Win32" or "UWP" in the search box as well.
- Select "Direct3D Win32 Game DR" or "Direct3D UWP Game DR".
- Select "Next"
- Fill in the "Project name" and "Location" fields as desired.
- Optional: Check "Place solution and project in the same directory" to keep the directory structure as bit flatter.
- Select "Create".
The UWP templates use the Windows SDK, so the project wizard will trigger this dialog to select the Windows SDK version to use.

For Win32 projects, the default is to use the latest installed Windows SDK.
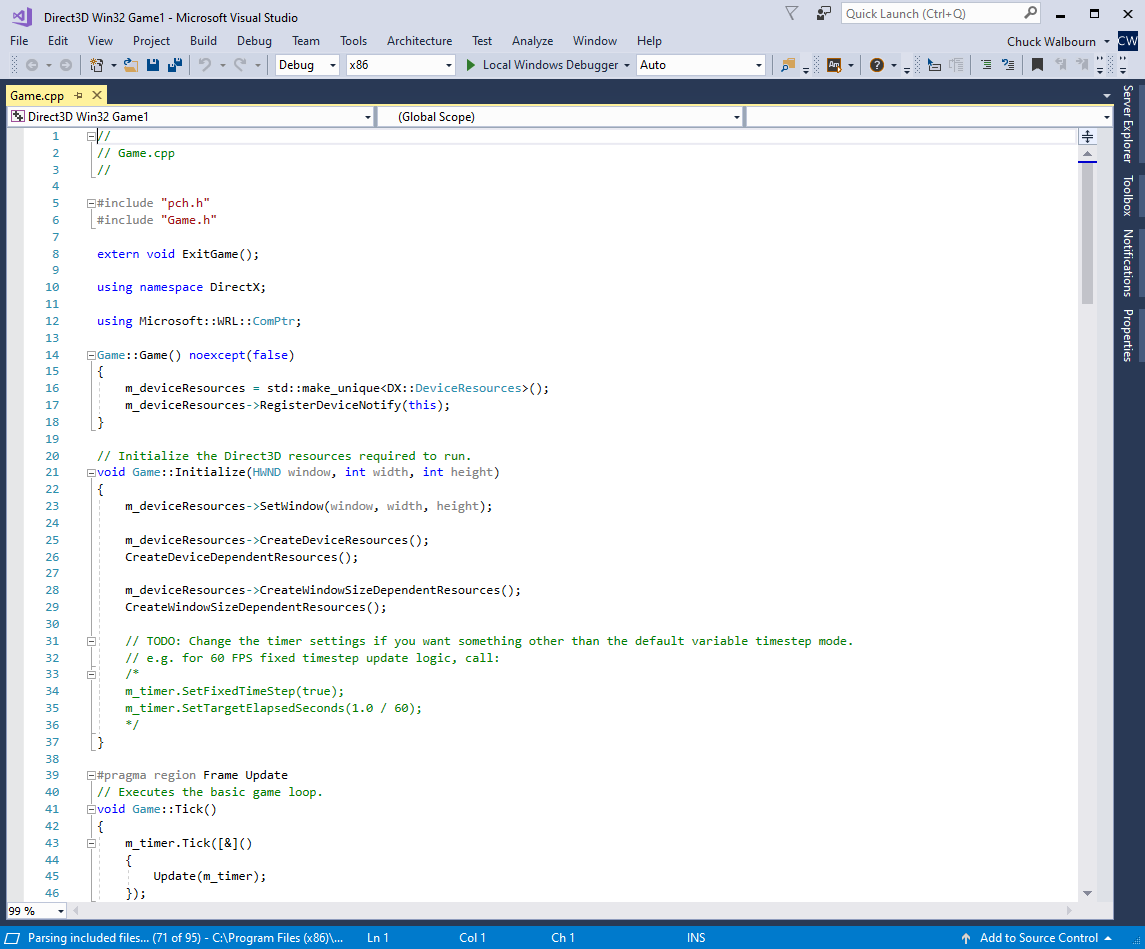
The newly created project contains the following files:
- Precompiled header files
- pch.h
- pch.cpp
- Main application entry-point and classic Windows procedure function or CoreWindow class
- Main.cpp
- Device resources abstraction
- DeviceResources.h
- DeviceResources.cpp
-
Timer helper class
- StepTimer.h
- The Game class
- Game.h
- Game.cpp
The Win32 version will have the following files as well:
- Resources
- directx.ico
- resource.rc
- settings.manifest
While the UWP version will have:
- Package.appxmanifest
- Name_TemporaryKey.pfx
- Assets
- logo PNG files
If you prefer to make use of Visual Studio's integrated CMake support or a standalone install of CMake, there are CMakeLists.txt and CMakePresets.json files available for download on directx-vs-templates.
The simplest way to use these is to clone directx-vs-templates, open up PowerShell, change to the directx-vs-templates/VSIX directory, and run the following script which will create a fresh instance of the template set up for CMake development:
.\createcmake.ps1 d3d11game_win32_dr Direct3DGameDR $Env:USERPROFILE\source
The Win32 and UWP templates ensure that the COM library is initialized. This is required for DirectX Tool Kit when using Windows Imaging Component (WIC) functionality. The UWP template also initialize the Windows Runtime, which is required to use Windows.Gaming.Input.
Visual Studio will default to the x64 platform / Debug configuration which builds an x64 (64-bit) application with debugging enabled. The template contains both Debug and Release configurations for both x86 (32-bit) and x64 (x64 native 64-bit) platforms, with UWP also including the ARM platforms.
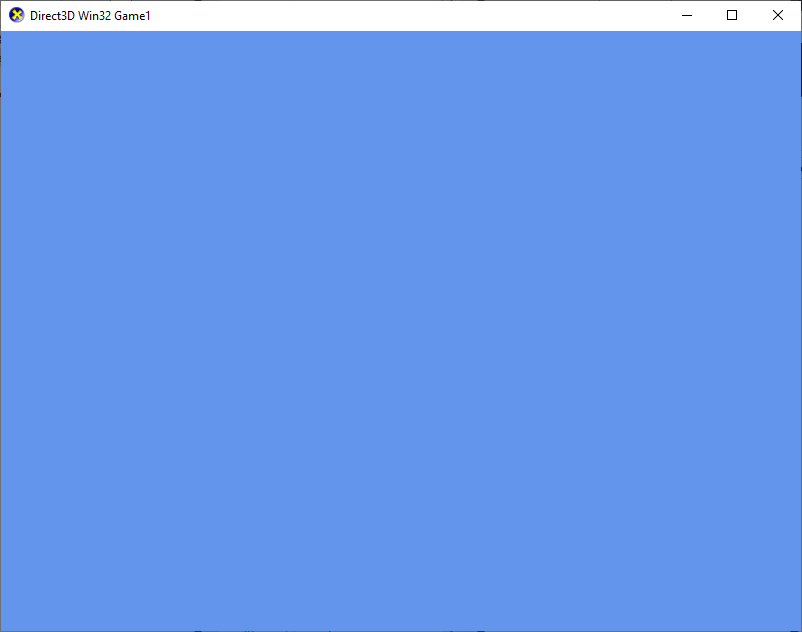
Press F5 to build and run the application It displays the following window:
Click here for troubleshooting advice
If the base template fails to start, there are a few possibilities:
- First, if your system doesn't have any Direct3D capable device of any feature level, it will fail. This is pretty unlikely on modern versions of Windows.
- Second if it runs fine in Release but fails in Debug, then you likely do not have the proper DirectX Debug Device installed for your operating system.
- Finally, if you are on Windows 7 Service Pack 1, you need to have KB2670838 installed for DirectX 11.1 support.
ARM64: With the ARM64 compiler installed targeting a Windows on ARM64 device such as a Microsoft Surface X, you can build using the ARM64 platform for desktop as well.
The Game class constructor is where you can do first initialization of member variables, as well as where we create the DeviceResources instance.
Game::Game() noexcept(false)
{
    m_deviceResources = std::make_unique<DX::DeviceResources>();
    m_deviceResources->RegisterDeviceNotify(this);
}
The DeviceResources constructor takes a number of defaulted parameters to control backBufferFormat, depthBufferFormat, backBufferCount, minFeatureLevel, and option flags. You can provide specific values to change them as needed.
If doing gamma-correct rendering, you should use DXGI_FORMAT_*_UNORM_SRGB or a supported HDR format for the backBufferFormat. Be sure to update Clear below accordingly to use a linear clear color.
// Use gamma-correct rendering.
m_deviceResources = std::make_unique<DX::DeviceResources>(DXGI_FORMAT_B8G8R8A8_UNORM_SRGB);
If you do not want DeviceResources to create a depth/stencil buffer, you can use DXGI_FORMAT_UNKNOWN for depthBufferFormat. This is useful for 2D only rendering or when doing MSAA on Universal Windows Platform (UWP) apps which requires handling your own render target and depth buffer with Sample.Count > 1. Be sure to update Clear below to avoid referencing a null depth/stencil buffer object.
// Renders only 2D, so no need for a depth buffer.
m_deviceResources = std::make_unique<DX::DeviceResources>(DXGI_FORMAT_B8G8R8A8_UNORM,
    DXGI_FORMAT_UNKNOWN);
The minFeatureLevel defaults to 10 for PC and 9.3 for UWP. See Microsoft Docs for the definitions of Direct3D hardware feature levels. You can specify a higher hardware level if you want to take a hard dependency on additional capabilities.
If you want to make use of DebugEffect, DGSLEffect, NormalMapEffect, PBREffect, PostProcess, or dual-parabolic environment maps then you need D3D_FEATURE_LEVEL_10_0 or higher:
m_deviceResources = std::make_unique<DX::DeviceResources>(DXGI_FORMAT_B8G8R8A8_UNORM,
    DXGI_FORMAT_D32_FLOAT, 2, D3D_FEATURE_LEVEL_10_0);
Finally, remember that the choice of minFeatureLevel also impacts which backBufferFormat and depthBufferFormat values you can rely on being supported per Microsoft Docs. For example, to use 9.x feature levels, you must use DXGI_FORMAT_D24_UNORM_S8_UINT or DXGI_FORMAT_D16_UNORM for the depth/stencil format instead of the default value of DXGI_FORMAT_D32_FLOAT.
m_deviceResources = std::make_unique<DX::DeviceResources>(DXGI_FORMAT_B8G8R8A8_UNORM,
    DXGI_FORMAT_D24_UNORM_S8_UINT, 2, D3D_FEATURE_LEVEL_9_1);
There is one more defaulted parameter for enabling additional features such as such as variable refresh rate or HDR10 output. See DeviceResources for details and usage.
When the application first starts, execution is passed to the Initialize method. The TODO here by default leaves the applications StepTimer in the 'variable length' mode. You uncomment the code if you want StepTimer in the 'fixed-step' mode. We'll explain this more once we get to Update.
void Game::Initialize(HWND window, int width, int height)
{
    m_deviceResources->SetWindow(window, width, height);

    m_deviceResources->CreateDeviceResources();
    CreateDeviceDependentResources();

    m_deviceResources->CreateWindowSizeDependentResources();
    CreateWindowSizeDependentResources();

    // TODO: Change the timer settings if you want something other than the default variable timestep mode.
    // e.g. for 60 FPS fixed timestep update logic, call:
    /*
    m_timer.SetFixedTimeStep(true);
    m_timer.SetTargetElapsedSeconds(1.0 / 60);
    */
}
The first Game method Initialize calls is CreateDeviceDependentResources for the creation of objects that depend on the device or context, but do not care about the size of the rendering window.
void Game::CreateDeviceDependentResources()
{
    auto device = m_deviceResources->GetD3DDevice();

    // TODO: Initialize device dependent objects here (independent of window size).
    device; // This is only here to avoid a warning. You can remove it once you make use of device!
}
The second Game method Initialize calls is CreateWindowSizeDependentResources for creation of objects that depend on the size of the rendering window. Note that this function could be creating these objects for the first time, it could be re-creating already existing objects due to a window-size change, or could be creating 'fresh' objects after a Direct3D device-removed or device-reset case.
void Game::CreateWindowSizeDependentResources()
{
    // TODO: Initialize windows-size dependent objects here.
}The Update method is intended to handle game-world state modification which is typically driven by time passing, simulation, and/or user-input. By default, Update is called once per 'frame' and can have an arbitrary delta-time. This is called a 'variable-step' mode.
If in the Initialize method above you uncomment the TODO code, then each Update will be for a fixed time-step (1/60th of a second), with Update called as many time in a single 'frame' as needed to keep it up-to-date. This is called a 'fixed-step' mode and potentially be more stable for many kinds of simulations.
// Updates the world
void Game::Update(DX::StepTimer const& timer)
{
    float elapsedTime = float(timer.GetElapsedSeconds());

    // TODO: Add your game logic here
    elapsedTime;
}The Render function which should render a single 'frame' of the scene, which starts by a Clear of the render targetg and setting the rendering viewport. It ends with a call to DeviceResources::Present to show the rendered frame.
void Game::Render()
{
    // Don't try to render anything before the first Update.
    if (m_timer.GetFrameCount() == 0)
    {
        return;
    }

    Clear();

    auto context = m_deviceResources->GetD3DDeviceContext();

    // TODO: Add your rendering code here.
    context; // This is only here to avoid a warning. You can remove it once you make use of context!

    m_deviceResources->Present();
}The Clear method defaults to a background color of the classic "Cornflower blue".
void Game::Clear()
{
    // Clear the views
    auto context = m_deviceResources->GetD3DDeviceContext();
    auto renderTarget = m_deviceResources->GetRenderTargetView();
    auto depthStencil = m_deviceResources->GetDepthStencilView();

    context->ClearRenderTargetView(renderTarget, Colors::CornflowerBlue);
    context->ClearDepthStencilView(depthStencil, D3D11_CLEAR_DEPTH | D3D11_CLEAR_STENCIL, 1.0f, 0);
    context->OMSetRenderTargets(1, &renderTarget, depthStencil);

    // Set the viewport.
    auto viewport = m_deviceResources->GetScreenViewport();
    context->RSSetViewports(1, &viewport);
}
If you are using gamma-correct rendering with a sRGB or HDR backbuffer format, you need to ensure you are using a linear RGB clear color. DirectXMath colors are defined in sRGB colorspace since they are .NET color constants, so you need to replace ClearRenderTargetView in Clear with:
// Use linear clear color for gamma-correct rendering.
XMVECTORF32 color;
color.v = XMColorSRGBToRGB(Colors::CornflowerBlue);
context->ClearRenderTargetView(renderTarget, color);
If you chose to not have DeviceResources create a depth/stencil buffer (see the Constructor section), you need to update Clear to avoid reference to a null depth/stencil buffer object.
void Game::Clear()
{
    // Clear the views
    auto context = m_deviceResources->GetD3DDeviceContext();
    auto renderTarget = m_deviceResources->GetRenderTargetView();

    context->ClearRenderTargetView(renderTarget, Colors::CornflowerBlue);
    context->OMSetRenderTargets(1, &renderTarget, nullptr);

    // Set the viewport.
    auto viewport = m_deviceResources->GetScreenViewport();
    context->RSSetViewports(1, &viewport);
}The DeviceResources::Present method presents the swapchain and checks for "device removed" scenarios.
The template includes a number of message handlers that are called for process state changes: OnActivated, OnDeactivated, OnSuspending, OnResuming, and OnWindowSizeChanged. The UWP version also includes ValidateDevice, and display orientation is provided long with the window size.
For Win32 desktop, the OnSuspending / OnResuming messages are triggered when (a) the window is minimized/unminimized or (b) in reaction to the
WM_POWERBROADCASTmessage. On other platforms, this is driven by Process Lifecycle Management (PLM).
Since we are using ComPtr, most cleanup is automatic when the Game class is destroyed. If Present encounters a device-removed or device-reset, then the application needs to release all Direct3D objects and recreate the device, swapchain, and all Direct3D objects again. Therefore, the TODO in OnDeviceLost should be updated to release your application's Direct3D objects.
void Game::OnDeviceLost()
{
    // TODO: Add Direct3D resource cleanup here

...
}
You will not get "device lost" all that often. In legacy Direct3D 9, you would routinely get a 'device lost' if you just Alt+TAB away from the application because the GPU used to be an 'exclusive' rather than 'shared' resource. The situation where you'd get
DXGI_ERROR_DEVICE_RESETis if the driver crashes or the video hardware hangs. You getDXGI_ERROR_DEVICE_REMOVEDif a new driver is installed while your application is running, or if you are running on a 'GPU is in the dock' style laptop and the laptop is undocked. You can test this case by opening the Developer Command Prompt for Visual Studio as an administrator, and typingdxcap -forcetdrwhich will immediately cause all currently running Direct3D apps to get aDXGI_ERROR_DEVICE_REMOVEDevent.
We make use of the Microsoft::WRL::ComPtr smart-pointer for managing the lifetime of the Direct3D 11 COM objects, which is why we make use of .Get() in the code above. See ComPtr and Microsoft Docs for more information and usage.
Many Direct3D functions return an HRESULT which is the standard for COM APIs. For robustness and easier debugging, it is important that you always check the result of every function that return an HRESULT. If you really can safely assume there is no error condition for a particular function, the function itself will return void instead of HRESULT.
The Win32 game template makes use of the helper function ThrowIfFailed in the DX C++ namespace declared in pch.h. This is the same helper that is used by the Windows Store and Windows phone VS templates. This helper throws a C++ exception if the standard FAILED macro returns true for a given HRESULT. This is used for fail fast error handling.
DX::ThrowIfFailed(device->CreateTexture2D(&depthStencilDesc,
    nullptr, &depthStencil));
Do not use
hr == S_OKto check for success. UseSUCCEEDED(hr)instead.
The DR VS template variants include the enhanced version of ThrowIfFailed.
The DeviceResources implementation supports using DXGI_FORMAT_*_SRGB formats for the backbuffer using the method compatible with modern and legacy swap effects. See The Care and Feeding of Modern Swap Chains for more details.
The Win32 desktop and UWP templates implement immersive fullscreen. You can toggle this using the traditional hotkey Alt+Enter. If you want to default to full-screen at startup, see the TODO comments in Main.cpp.
For the Win32 desktop versions of the template, the Main.cpp source file contains the WndProc and the basic loop:
MSG msg = {};
while (WM_QUIT != msg.message)
{
    if (PeekMessage(&msg, nullptr, 0, 0, PM_REMOVE))
    {
        TranslateMessage(&msg);
        DispatchMessage(&msg);
    }
    else
    {
        g_game->Tick();
    }
}
This ensures that all pending Win32 messages are consumed before updating/rendering the next frame. This is critical for maintaining responsiveness.
For UWP, the equivalent thing is done inside the ViewProvider Run method.
Next lesson: Adding the DirectX Tool Kit
Direct3D Win32 Game Visual Studio template
Direct3D Game Visual Studio templates (Redux)
Anatomy of Direct3D 11 Create Device
Manifest Madness
64-bit programming for Game Developers