Quickstart Node.js
IoT Hub is an Azure service that enables you to ingest high volumes of telemetry from your IoT devices into the cloud and manage your devices from the cloud. In this quickstart, you will use Visual Studio IoT Hub Toolkit to create a simulated device connected to your IoT hub and control it with a direct method. You can use direct methods to remotely change the behavior of a device connected to your IoT hub.
-
Install the Visual Studio Code extension Azure Account and sign in. If you don’t have an Azure subscription, create a free account before you begin.
-
Install the Visual Studio Code extension Azure IoT Hub Toolkit.
The quickstart also uses a pre-written Node.js applications as a simulated device application that responds to direct methods called from a back-end application. To receive the direct method calls, this application connects to a device-specific endpoint on your IoT hub. For other supported programming languages, you can refer to IoT Hub Documentations.
- The application is written using Node.js. You need Node.js v4.x.x or later on your development machine. You can download Node.js for multiple platforms from nodejs.org.
You can verify the current version of Node.js on your development machine using the following command:
node --version
- Download the sample Node.js project from https://github.com/Azure-Samples/azure-iot-samples-node/archive/master.zip and extract the ZIP archive.
The first step is to create an IoT hub in your subscription from VS Code. The IoT hub enables you to ingest high volumes of telemetry into the cloud from many devices. The hub then enables one or more back-end services running in the cloud to read and process that telemetry.
- Click ... > Create IoT Hub at AZURE IOT HUB DEVICES tab, or type Azure IoT Hub: Create IoT Hub in Command Palette.
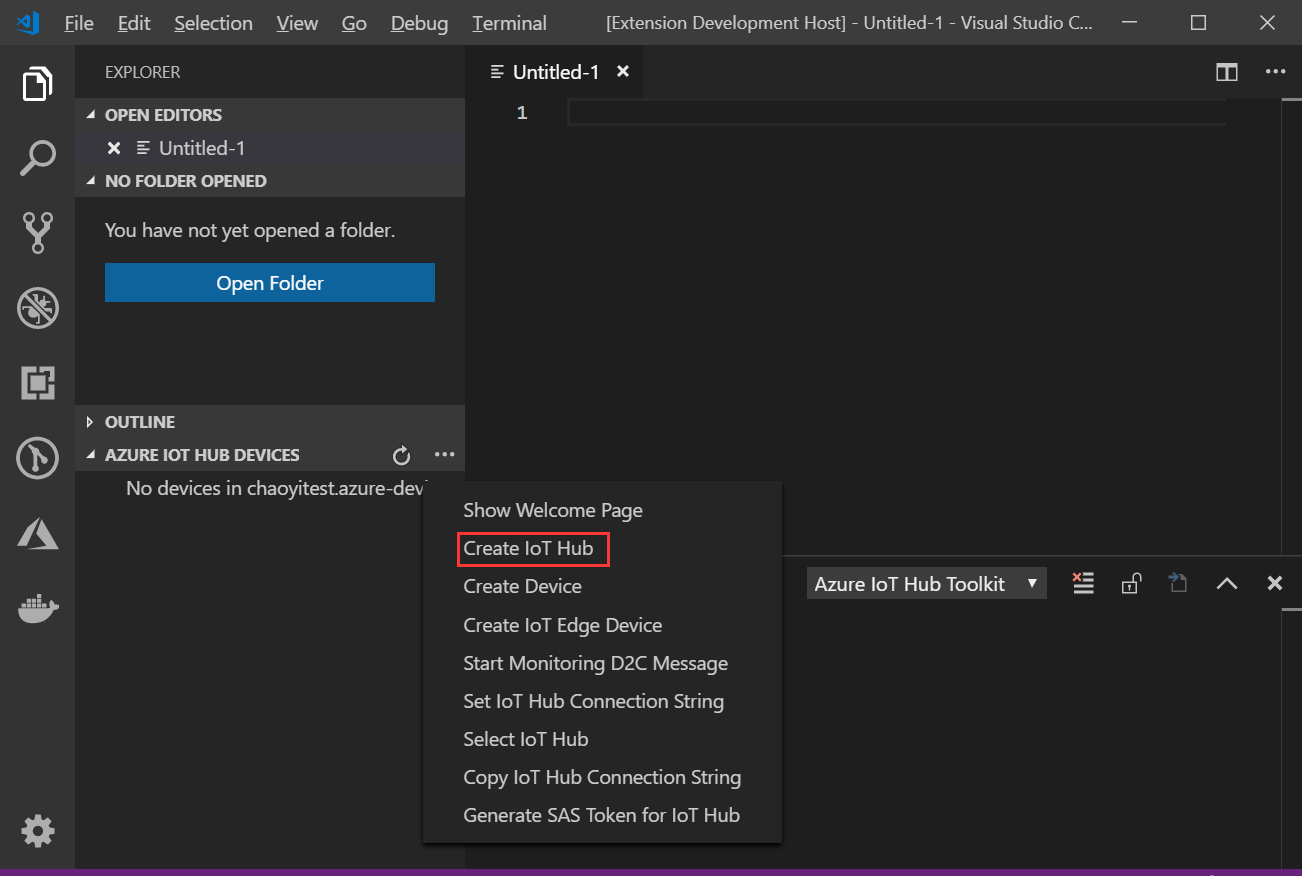
- Choose your subscription, resource group, and the closest deploy location to you.
- For Pricing and scale tier, select the F1 - Free tier if it's still available on your subscription.
- Enter the name of your IoT Hub.
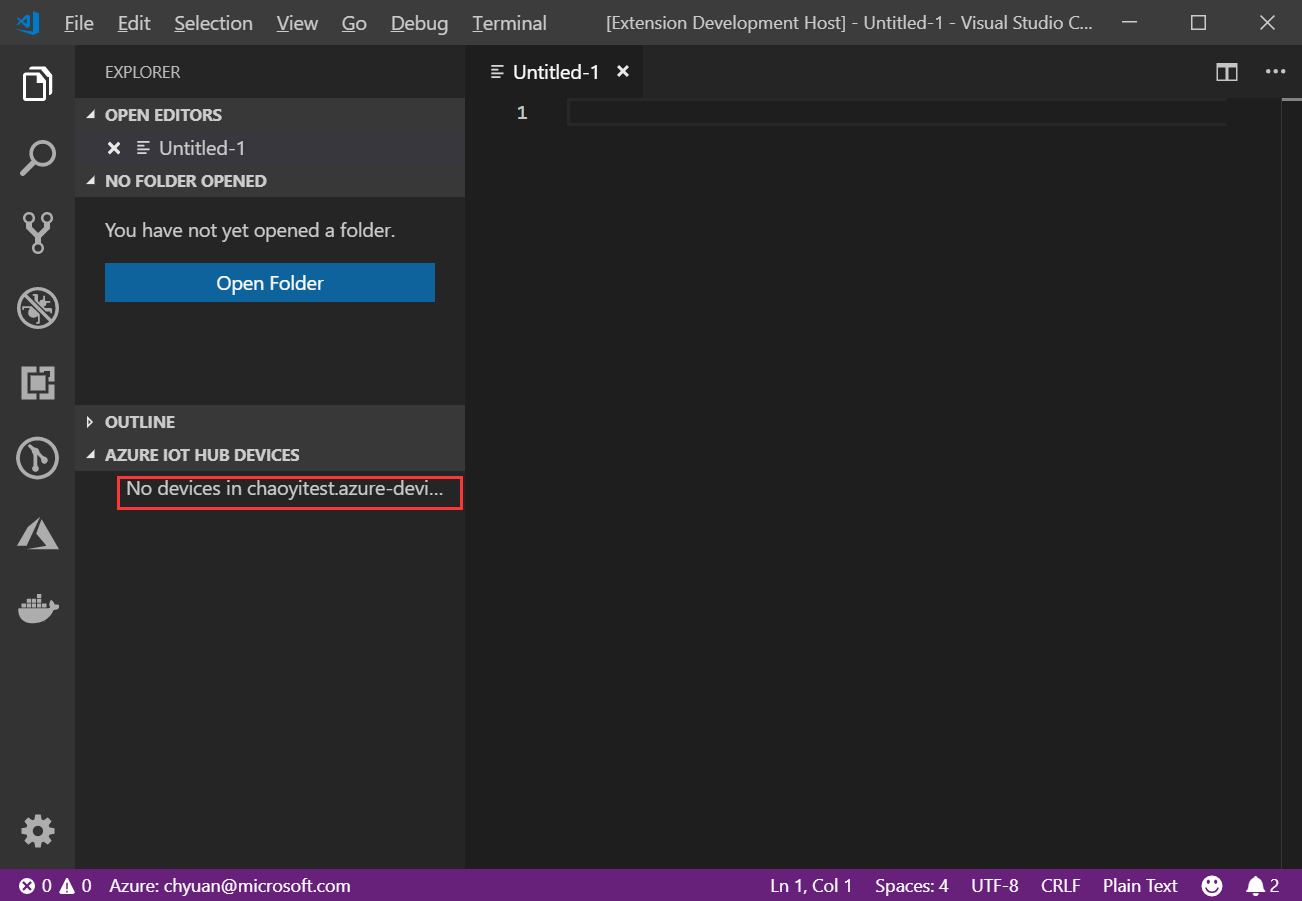
- Wait a few minutes until the IoT Hub is created. you can see that your devices status become No device in ....
A device must be registered with your IoT hub before it can connect. You will also need to make a note of its connection string.
- Click ... > Create Device at AZURE IOT HUB DEVICES tab, or type Azure IoT Hub: Create Device in Command Palette.
- Enter device ID as
MyDeviceand press Enter. - Wait a few seconds until the new device is created.
- Right-click your device and select Copy Device Connection String, the connection string of the selected device will be copy to your clipboard, which looks like
Hostname=...=. You will use this Device Connection String later in the quickstart.

The simulated device application connects to a device-specific endpoint on your IoT hub, sends simulated telemetry, and listens for direct method calls from your hub. In this quickstart, the direct method call from the hub tells the device to change the interval at which it sends telemetry. The simulated device sends an acknowledgement back to your hub after it executes the direct method.
-
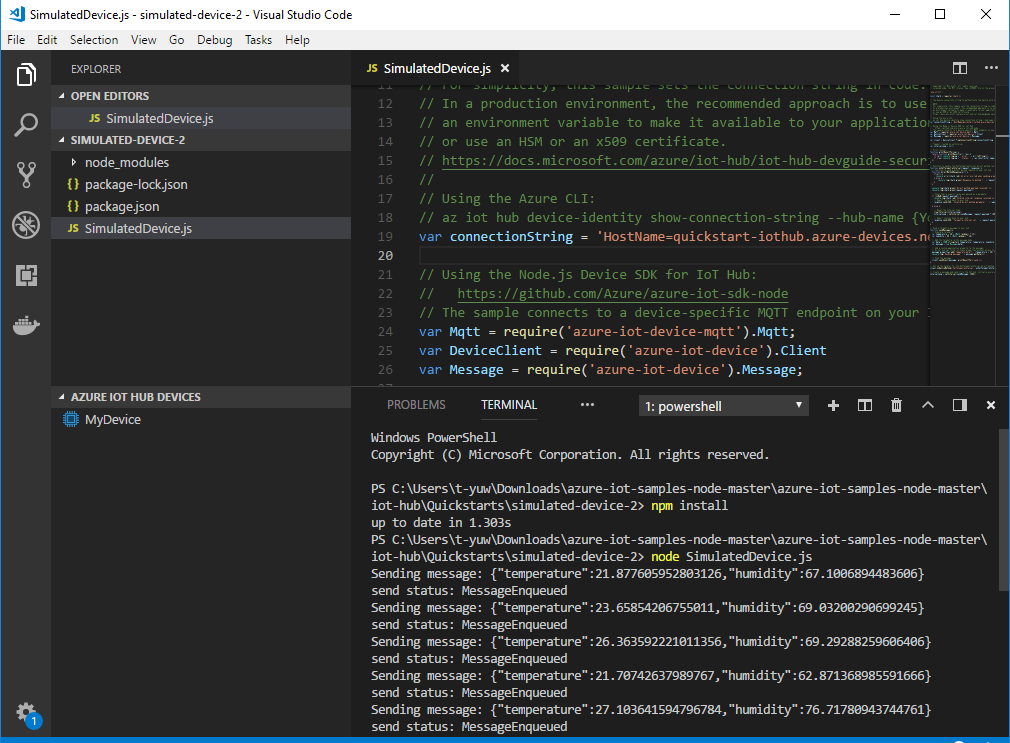
In VS Code integrated terminal window, navigate to the root folder of the sample Node.js project. Then navigate to the iot-hub\Quickstarts\simulated-device-2 folder.
-
Open the SimulatedDevice.js file and replace the value of the
connectionStringvariable in SimulatedDevice.js with the Device Connection String you made a note of previously. Then save your changes to SimulatedDevice.js file. -
In the terminal window, run the following commands to install the required libraries and run the simulated device application:
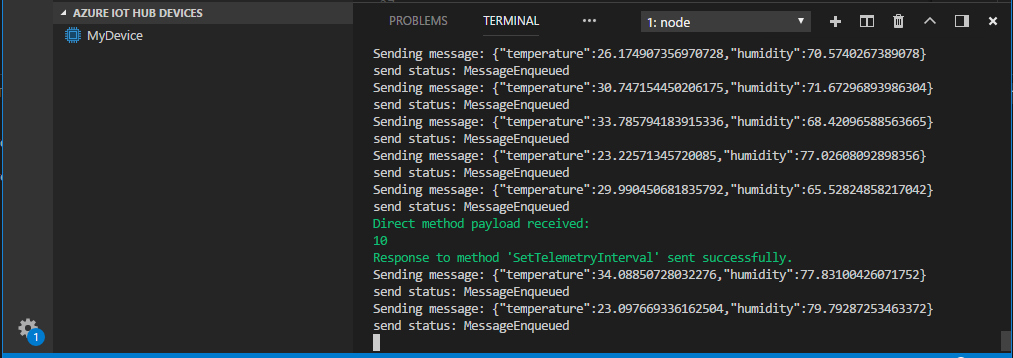
npm install
node SimulatedDevice.js
The following screenshot shows the output as the simulated device application sends telemetry to your IoT hub:
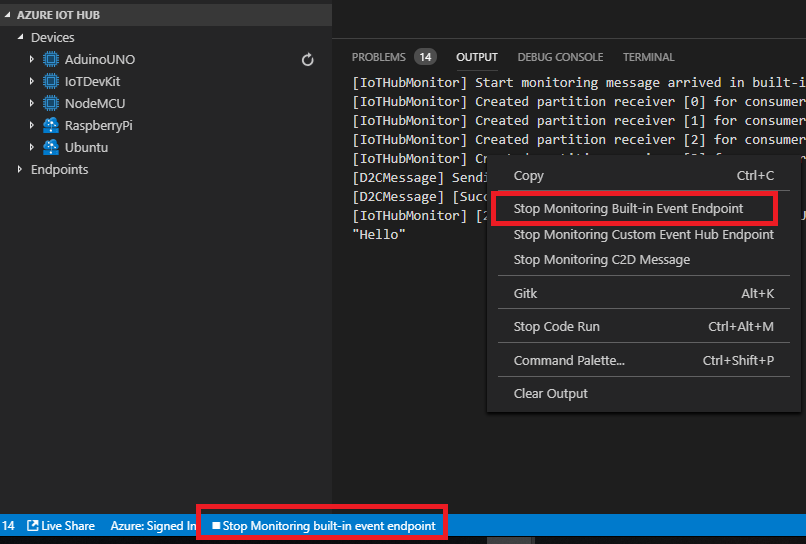
While the device sending telemetry to your IoT hub, it is also possible to monitor those message in VS Code.
- Right-click your device and select Start Monitoring D2C Message.
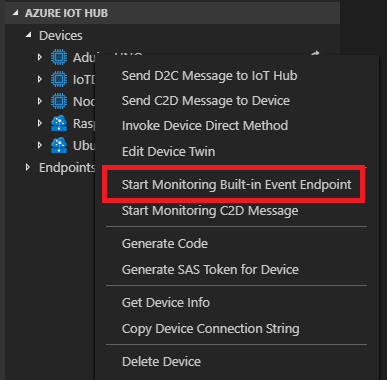
- The monitored messages will be shown in OUTPUT > Azure IoT Hub Toolkit view.
- To stop monitoring, right-click the OUTPUT view and select Stop Monitoring D2C Message.
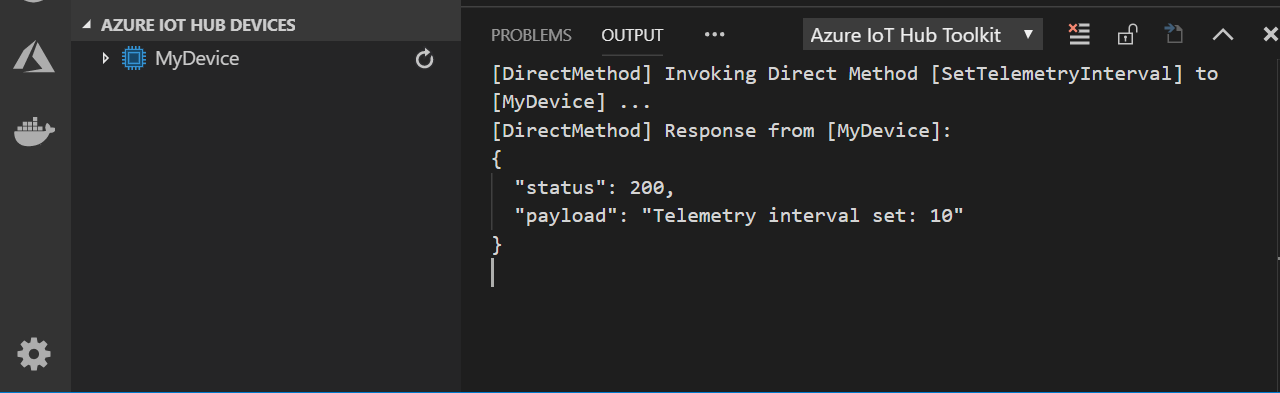
The VS Code IoT Hub Toolkit extension can also connects to the service-side endpoint on your IoT Hub and makes direct method calls to a device through it.
- Right-click your device and select Invoke Direct Method.
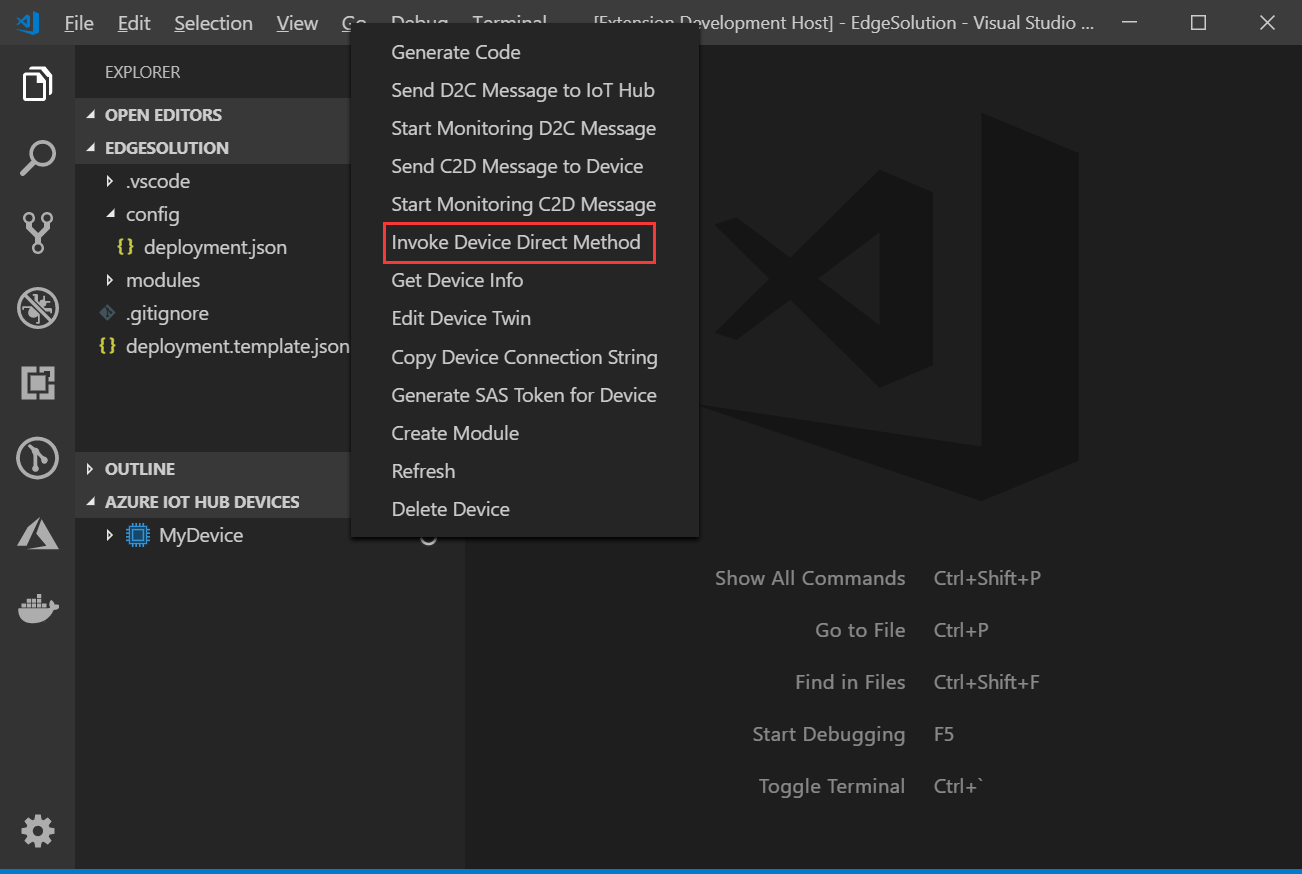
- Enter the method name
SetTelemetryInterval. - Enter the payload
10as the number of seconds between each telemetry sent. - Results will be shown in OUTPUT > Azure IoT Hub Toolkit view, if success, you will see that the D2C message interval have changed.