Verilog is one of most popular HDL (Hardware Description Language) in the world for IC designer. The purpose of this project is teach you how to use your Mac OS X and VSCode to develope Verilog. If you are a software developer, this project is good for your to get started.
The function of half adder is add two bit. together. For the half adder design, you will have
(1) Input: A, B
(2) Output: S (Sum) + C (Carry)
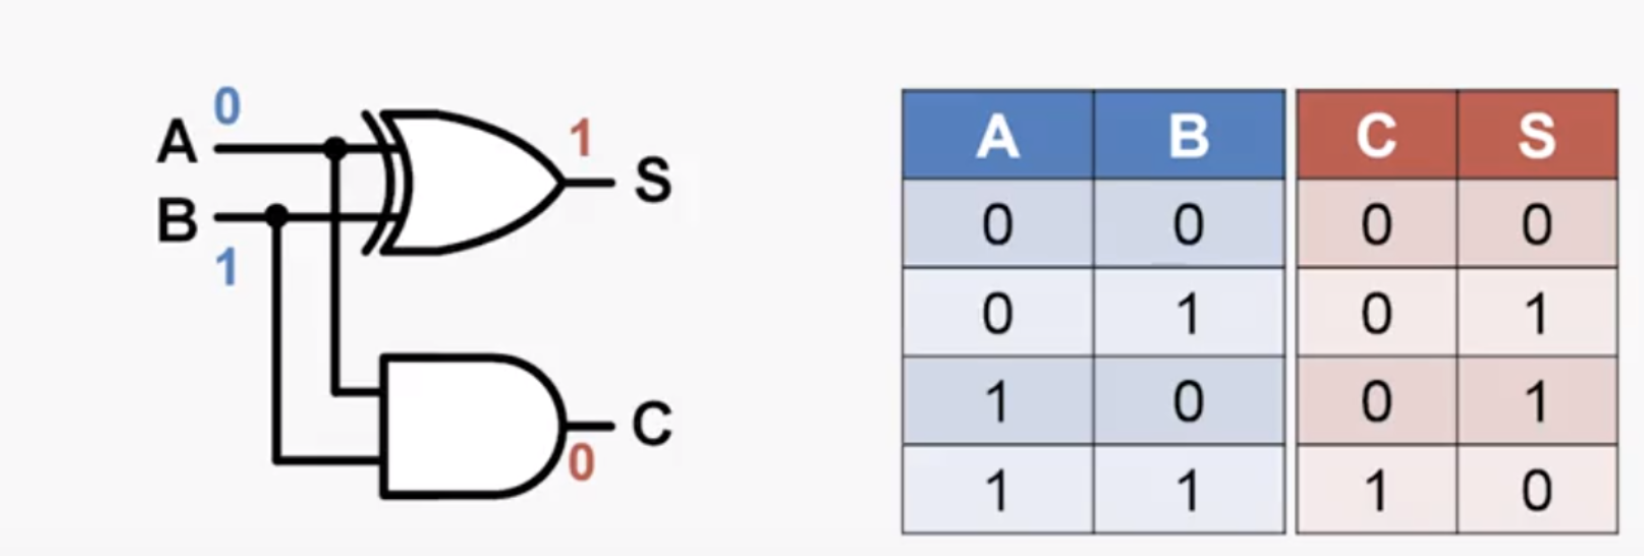
So we can use logic gates to implement half adder. And the HDL is a langauge to describe what circuit it is. The abvoe picture show the two popular HDL to describe half adder.
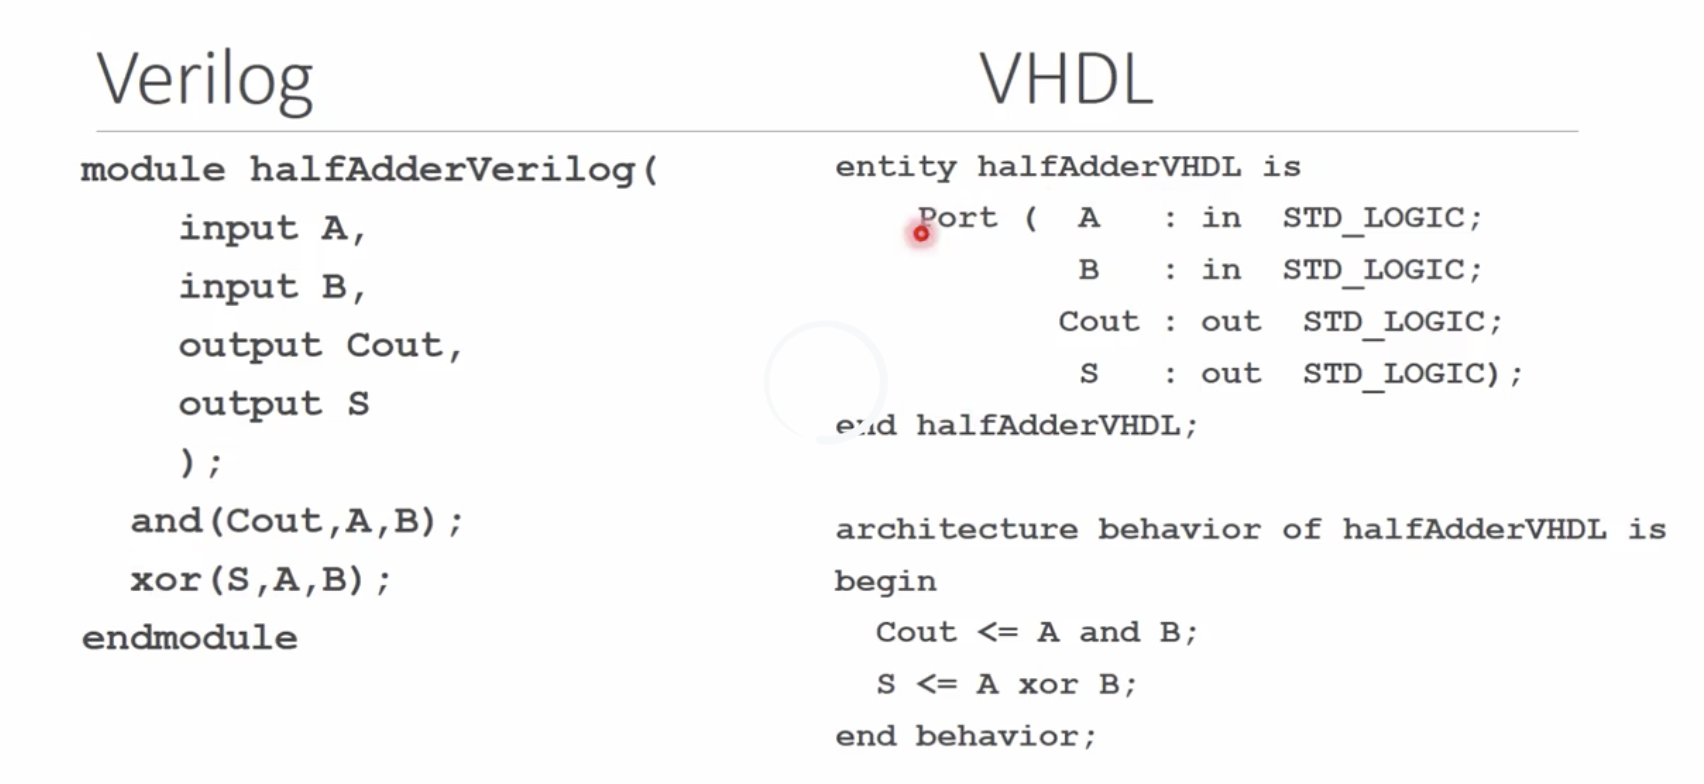
Verilog is more like C programming language style and VHDL is more like Ada programming language style. In this hello project, I decide to use Verilog.
$ brew install icarus-verilog
If you don't have brew, then do the following command to install HomeBrew to have it.
$ /usr/bin/ruby -e "$(curl -fsSL https://raw.githubusercontent.com/Homebrew/install/master/install)"
At the first, install VSCode extension Verilog-HDL/SystemVerilog... made by mshr-h
Then you can see correct color in VSCode.
$ code hello.v
module main;
  initial
    begin
      $display("Hello, World");
      $finish ;
    end
endmodule$ iverilog -o ./out/hello hello.v
$ vvp ./out/hello
Hello, World
$ code Simple_Circuit.v
module	Simple_Circuit(A, B, C, D, E);
    output D, E;
    input  A, B, C;
    wire   w1;
    and    G1(w1, A, B);
    not    G2(E, C);
    or     G3(D, w1, E);
endmodule
$ code t_Simple_Circuit.v
module	t_Simple_Circuit;
  wire	D, E;
  reg		A, B, C;

  //instantiate device under test
  Simple_Circuit	M1(A, B, C, D, E);

  //apply inputs one at a time
  initial	begin
    $dumpfile("./out/mytest.vcd");
    $dumpvars;
    A=1'b0; B=1'b0; C=1'b0;
    #100 A=1'b1; B=1'b1; C=1'b1;
  end

  initial #200 $finish;
endmodule
$ iverilog -o ./out/mycircuit t_Simple_Circuit.v Simple_Circuit.v
$ vvp ./out/mycircuit
$ brew install gtkwave
- Open GTKWave from your Mac Desktop GUI
- In the GTKWave application, TopMenu -> File -> Open New Tab -> (Choice your ./out/mytest.vcd)
- Then you can see something has been import and you can click it.

BTW, when I create this project, I refer
https://www.twblogs.net/a/5d21a78bbd9eee1e5c83bd9b
https://www.edaplayground.com/
https://blog.fkynjyq.com/write-verilog-with-vscode
https://formulae.brew.sh/formula/icarus-verilog
https://www.easonchang.com/2016/03/18/verilog-on-macosx/
https://ithelp.ithome.com.tw/articles/10196424
After understand how to use Mac OS X and VSCode to develop Verilog, there are more basic examples for you to study here.
https://github.com/milochen0418/hello-verilog/tree/master/examples/xor
https://github.com/milochen0418/hello-verilog/tree/master/examples/4bits_adder