Basic Operation
- Console and Logging
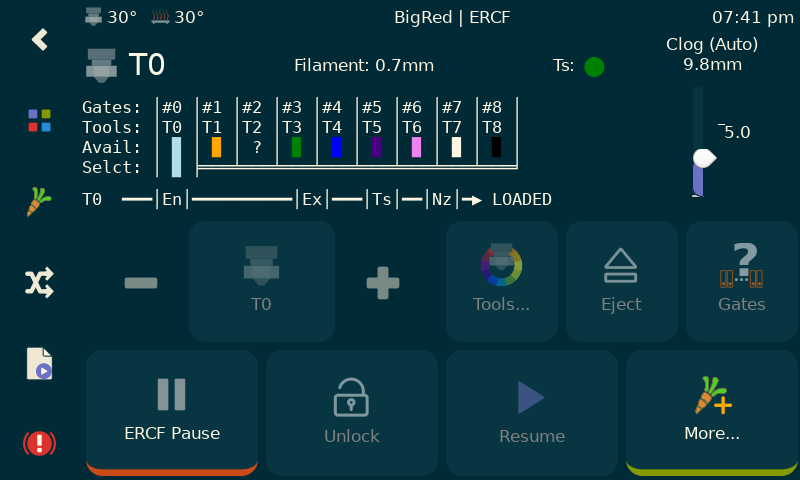
- KlipperScreen
- Useful Pre-Print Operations
- Filament Loading and Unloading
- Debugging Problems


 Console and Logging
Happy Hare controls the MMU mainly through Klipper command extensions but a few are implemented as macros. You can manage these commands buy typing then directly into a console like Mainsail or Fluidd or you can create macro buttons for easier operation. For the easiest control take a look at the KlippeScreen Happy Hare Edition - it really does make operation a pleasure.
Note
A Mainsail module is also under development!
The result of operations is written to both the console and a custom Klipper log file called mmu.log. The verbosity of messages to these channels can be independently controlled. The verbosity levels in increasing order are:
- Essential messages only
- Information messages
- Debug messages
- Code trace messages
- Developer message including detailed stepper movement
The default config will display up to informational messages to the console and up to debug level to the log file. This is a good compormise of verbosity and information although you may wish to increase the verbosity while setting up your MMU. Remember you can also look at the log file to get more information than is displayed in the console.
The mmu.log logfile will be placed in the same directory as other Klipper log files. It will rotate and keep the last 5 versions (just like Klipper). Oh, and if you don't want the logfile, no problem, just set logfile_level: -1 in mmu_parameters.cfg (anything on the console will end up in klipper.log anyway)
Even if not a KlipperScreen user yet you might be interested in my fork of KlipperScreen Github link simply to control your MMU. It makes using your MMU the way it should be. Dare I say as easy at Bambu Labs ;-) I run mine with a standalone Raspberry Pi attached to my buffer array and can control multiple MMU's with it.
Be sure to follow the install directions carefully and read the panel-by-panel documentation 🎉
There are a couple of commands (MMU_PRELOAD and MMU_CHECK_GATE) that are useful to ensure MMU readiness prior to printing.
The MMU_PRELOAD is an aid to loading filament into the MMU. The command works a bit like the Prusa's functionality and spins gear with servo depressed until filament is fed in. It then parks the filament at the perfect postion in the gate. This is the recommended way to load filament into your MMU and ensures that filament is not under/over inserted potentially preventing pickup or blocking the gate.
Tip
If you have pre-gate sensors installed they will automatically run this command when triggered outside of a print. This really helps with loading up your MMU. Note that if new filament is inserted while in a print it's presence will be noted but it will not be loaded.
Similarly the MMU_CHECK_GATE command will check the current gate (no options) or run through all the gates (ALL=1) or the one specified (GATE=) and checks that filament is available, correctly parks and updates the Gate Map including the "gate status" so the MMU knows which gates have filament available.
Note
The MMU_CHECK_GATE command has a special option that is designed to be called from your PRINT_START macro. When called as in this example: MMU_CHECK_GATE TOOLS=0,3,5. Happy Hare will validate that tools 0, 3 & 5 are ready to go else generate an error prior to starting the print. This is a really useful pre-print check! See Slicer Setup for more details.
TODO - Update this section it is dated. MMU_STATUS will now describe the sequence based on configuration
Happy Hare provides built-in loading and unloading sequences that have many options controlled by settings in mmu_parameters.cfg. These are grouped into "modular phases" that control each step of the process and vary slightly based on the capabilities of your particular MMU. Normally this provides sufficient flexibility of control. However, for advanced situations, you are able to elect to control the sequences via gcode macros. This capability is discussed later in the gcode guide.
Loading filament...
1.  MMU [T2] >.. [En] ....... [Ex] .. [Ts] .. [Nz] UNLOADED (@0.0 mm)
2.  MMU [T2] >>> [En] >...... [Ex] .. [Ts] .. [Nz] (@43.8 mm)
3.  MMU [T2] >>> [En] >>>>>>> [Ex] .. [Ts] .. [Nz] (@710.1 mm)
4a. MMU [T2] >>> [En] >>>>>>| [Ex] .. [Ts] .. [Nz] (@720.0 mm)
4b. MMU [T2] >>> [En] >>>>>>> [Ex] >| [Ts] .. [Nz] (@720.0 mm)
5.  MMU [T2] >>> [En] >>>>>>> [Ex] >> [Ts] >> [Nz] LOADED (@783.6 mm)
MMU load successful
Loaded 780.3mm of filament (encoder measured 783.6mm)
The "visual log" (set at level 2) above shows individual steps of a typical loading process for MMU with optional toolhead sensor. Here is an explanation of steps with mmu_parameter.cfg options:
1. Starting with filament unloaded and sitting in the gate for tool 2
2. Loading the Gate: Firstly MMU clamps the servo down and pulls a short length of filament from the gate to the start of the bowden tube.
- ERCF: This is achieved using the encoder by advancing filament until if is measured. It it doesn't see filament it will try 'encoder_load_retries' times (default 2). If still no filament it will report the error. The speed of this initial movement is controlled by 'gear_short_move_speed', the acceleration is as defined on the gear stepper motor config in 'mmu_hardware.cfg'. Note that the encoder sensor is considered "point 0" and any movement beyond into the bowden will automatically be handled by the next bowden move.
- Tradrack: This is achieved by homing to specific point. Note that the homing point is considered "point 0".
3. Bowden Tube Loading: The MMU will then load the filament through the bowden in a fast movement. The speed is controlled by gear_from_spool_speed and gear_from_buffer_speed depending on whether Happy Hare believes it is pulling filament from the spool or from the buffer. It is advantageous to pull more slowly from the spool to overcome the higher friction. Once a full unload has occurred and deposited filament in the buffer the higher speed 'gear_speed_from_buffer' can be used to reduce loading times. The length of the bowden move is determined by the calibrated value mmu_calibration_bowden_length that is persisted in mmu_vars.cfg
- ERCF (with encoder): Sometimes when loading from spool a sudden jerk can occur causing the gear stepper to loose steps. There is an advanced option to allow for correction if this occurs (or other slippage) if an encoder is fitted. If `bowden_apply_correction` is enabled and the encoder measures a difference greater than `bowden_allowable_load_delta', additional moves will be made correct the error (see comments in `mmu_parameters.cfg` for more details)
4. Toolhead Homing: Before loading to the nozzle it is usually necessary to establish a known home position close or in the toolhead. For this point is then a known distance to the nozzle. There are three main methods of achieving this:
- 4a. Extruder Homing: (without endstop sensor (e.g. toolhead sensor this is a necessary method). Extruder filament homing which is automatic when necessary but can be also be forced by setting `extruder_force_homing`. Here the MMU will now creep towards your extruder gears to detect when it hits (its homing position). This can either be setup to be detected through "touch" homing (using TMC stallguard) or, if an encoder is fitted to the MMU, by "collision" detection and is controlled by `extruder_homing_endstop`. In both cases the filament will be advanced up to a maximum distance of `extruder_homing_max`. Because the collision method works best with a softer movement to prevent grinding the current of the gear stepper can be reduced with `extruder_homing_current` for the duration of the movement.
- 4a. Endstop Homing: Similar to Extruder Homing, the third option is to home to a endstop sensor fitted just prior to the extruder entrance. This is setup using the same parameters as for Extruder Homing except `extruder_homing_endstop` is set to the name of the endstop you configured in `mmu_hardware.cfg`. Note that gear current reduction is not available for this method.
- 4b. Toolhead Homing: MMU will home the end of the filament to the toolhead sensor up to a maximum distance of 'toolhead_homing_max'. Note that the endstop name "toolhead" is automatically created by Happy Hare if a toolhead sensor is present. Since the toolhead sensor is inside the extruder the transition moves detailed below will be employed.
Important
Of the three methods, and for reasons discussed later in transition move, a toolhead sensor positioned past the extruder gears is the most accurate and reliable.
4-5. Transition Move: Depending on the toolhead homing option employed the transition move can occur during the homing (toolhead sensor) or in the subsequent move, but in both cases it aims to reliably get the filament through the extruder gears given the options selected by the user on whether synchronized gear and extruder movement is permitted or whether they should be independent.
- Synchronised Motors: (recommended) If `toolhead_sync_load` is enabled, both the gear and extruder motors will pull together up to the maximum sensible distance of `toolhead_extruder_to_nozzle` (if homing point is extruder entrance or endstop) or `toolhead_sensor_to_nozzle` (if homing point is toolhead sensor).
- Independent Motors: Here just the extruder motor is used to start to pull the filament through the transition zone, but as a further aid to reliability and aid the grabbing of filament, Happy Hare will use the "spring" in the filament to keep pressure on the gear by delaying the servo release by 'toolhead_delay_servo_release' mm. Even with independent motors it is possible to define a short transition zone where, after the servo assisted move, both the gear and extruder will move together. This is set with `toolhead_transition_length`. This option is provided because it may be quieter but generally the synced load is preferred.
5. Final Move to Nozzle: Filament is moved the remaining distance to the meltzone. This distance is defined by toolhead_extruder_to_nozzle (extruder homing) or toolhead_sensor_to_nozzle (toolhead sensor homing). The extruder-only or synchronized gear and extruder movement is controlled with the toolhead_sync_load parameter.
Note
- If an encoder is available (ERCF) sanity checks checking for movement will monitor the loading process and issue errors (and lock the MMU) if things aren't copacetic. The final check which verifies that filament has reached the nozzle has been known to fail on some toolhead designs with short final movement. This error can be turned into a non-fatal warning by setting
toolhead_ignore_load_error - It is expected that Encoder readings will differ slightly from the actual stepper movement. This is due to a number of valid reasons including calibration accuracy and slippage. It should not be a cause for concern unless the difference is excessive (>5% of movement)
Filament movement speeds for all operations are detailed in the mmu_parameters.cfg file. Note that gear motor acceleration is defined on the gear_stepper motor in mmu_hardware.cfg and used for all user controlled moves (internal gear buzz moves have internally controlled acceleration).
Unloading filament...
1.  MMU [T6] <<< [En] <<<<<<< [Ex] << [Ts] << [Nz] LOADED (@0.0 mm)
2.  Forming tip...
    Run Current: 0.67A Hold Current: 0.40A
    pressure_advance: 0.000000
    pressure_advance_smooth_time: 0.040000
    pressure_advance: 0.035000
    pressure_advance_smooth_time: 0.040000
    Run Current: 0.55A Hold Current: 0.40A
3.  MMU [T6] <<< [En] <<<<<<< [Ex] << [Ts] <. [Nz] (@40.5 mm)
4.  MMU [T6] <<< [En] <<<<<<< [Ex] <| [Ts] .. [Nz] (@61.4 mm)
5.  MMU [T6] <<< [En] <<<<<<< [Ex] .. [Ts] .. [Nz] (@70.1 mm)
6.  MMU [T6] <<< [En] <...... [Ex] .. [Ts] .. [Nz] (@746.3 mm)
7.  MMU [T6] <.. [En] ....... [Ex] .. [Ts] .. [Nz] UNLOADED (@784.7 mm)
Unloaded 781.8mm of filament (encoder measured 784.7mm)
The "visual log" (set at level 2) above shows individual steps of a typical unloading process for MMU with optional toolhead sensor. Here is an explanation of steps with `mmu_parameter.cfg` options:
1. Starting with filament loaded and sitting in the gate for tool 6
2. Tip Forming: Firstly MMU clamps the servo down and pulls a short length of filament from the gate to the start of the bowden tube.
- Standalone: Happy Hare contains a tip forming routine that mimics that found in PrusaSlicer / SuperSlicer. If you every unload out of a print or by explicitly configuring Happy Hare, the standalone routine will be called. The pressure advance is turned off and reset after the tip forming move automatically. In addition you can increase the extruder stepper motor current for often-fast set of movements to avoid skipping steps. Motor current % increase is controlled with `extruder_form_tip_current`. For even more force you can also elect to synchronize the gear motor with the extruder for this step by setting `sync_form_tip`.
- Slicer: In a print tip forming may be done but your slicer (in fact that is assumed unless you explicitly configure otherwise) and you will not see this step. If you are astute you may wonder how Happy Hare knows where the filament is left in the toolhead by the slicer. The simple answer is that it doesn't and, although it can handle an unknown starting position, the unload process can be streamlined by setting `slicer_tip_park_pos` parameter to the distance from the nozzle to match your slicer. Note that if you are printing with synchronized gear and extruder steppers the slicer ('sync_to_extruder' and 'sync_gear_current') will also perform the tip forming move with synchronized steppers.
3 & 5. Unloading Toolhead: If there is no toolhead sensor the filament will be moved from the park position in the toolhead to the extruder exit. The process differs depending on the setting of toolhead_sync_unload
- Extruder only: (recommended) `toolhead_sync_unload` is disabled. Here just the extruder motor is used to start to pull the filament clear of the extruder. The maximum distance moved will be slightly more than `toolhead_extruder_to_nozzle` - park_positon. If an encoder is available, the move will terminate early if no movement is seen (meaning that the filament has existed the extruder gears. In the absence of an Encoder the full move will be performed. Note that because only the extruder stepper is moving, the filament will end at the "homed to extruder" position, but excessive movement can make an audible noise.
- Synchronised Motors: If `toolhead_sync_unload` is enabled, both the gear and extruder motors will pull together in a similar fashion to that described for the extruder stepper only. The downside of this option is that the starting park_position (e.g. `slicer_tip_park_pos`) must be accurate. If not, the filament can move further into the bowden than expected. Whilst this eventuality doesn't usually lead to problems, it could result in the fast bowden move moving filament too far and missing the parking position in the gate
4 & 5. Reverse Homing and Exit: If a toolhead sensor is fitted the exiting process can be more accurate. In this option the filament is simply homed to the toolhead sensor in reverse. Either using just the extruder stepper (toolhead_sync_unload: 0) or safely using synchronized gear and extruder steppers (toolhead_sync_unload: 1). Once the toolhead sensor is reached the final move is slighly more than toolhead_extruder_to_nozzle - toolhead_sensor_to_nozzle to free filament from the extruder.
6. Bowden tube Unloading: The filament is now extracted quickly through the bowden by the calibrated length. Generally the speed is controlled by gear_from_buffer_speed but can be reduced to incremental moves of gear_short_move_speed in cases of recovery or if Happy Hare is unsure of filament position after manual intervention.
7. Parking in Gate: The final move prior to instructing the servo to release grip on the filament is to park the filament in the correct position in the gate so it does not restrict further selector movement. The filament is now unloaded.
- ERCF: This is achieved using the encoder by pulling filament until no more movement is detected and then a final parking move to locate the filament correctly at "point 0"
- Tradrack: This is achieved by a homing move to the gate endtop and then final parking move to locate the filament correctly at "point 0"
Note
When the state of the MMU is unknown, Happy Hare will perform other movements and look at its sensors to try to ascertain filament location. This may modify the above sequence and result in the omission of the fast bowden move for unloads.
See comments in mmu_parameters.cfg for parameters that effect unload speeds.
Note
Happy Hare allows for easy change of loading/unloading sequence even during a print! If you have a toolhead sensor, it can interesting, for example, to switch between extruder homing and toolhead sensor homing. Each you intend to do this make sure you set both toolhead_extruder_to_nozzle and toolhead_sensor_to_nozzle distances. As an example, in my setup of Revo & Clockwork 2, the distances are 72mm or 62mm respectively. The difference in these two distances is also used in the logic for exiting the extruder to make exit fast and noise free.
There is a lot that can go wrong with an MMU and initial setup can be frustrating. It is really important to tackle one problem at a time. Never move on and think the problem will go away - that is very unlikely. You have all the tools you need to diagnose issues:
- This wiki. Read it all. I recommend a first pass all the way through to understand the scope and then methodically as you setup your MMU. Make sure you understand conceptually what Happy Hare is trying to do.
- 'mmu.log'. This, by default, will log at the TRACE (3) level which will provide quite detailed description of what the firmware is doing. Review it when strange things happen.
- 'MMU_TEST_CONFIG log_level=2'. This can be a useful tool. Running this on startup will temporarily turn the console verbosity level to `DEBUG`. This will provide a richer running commentary of issues you might encounter.
- Check slicer settings. Happy Hare has only limited visibility into what the slicer is doing - if it, for example, ejects filament from the extruder when Happy Hare expects the filament to still be in the extruder, it will result in an error. Understand this interaction.
Good luck!