USR W610
NOTE: This page is linked to from the setup wizard. Do not remove or rename!
The USR-W610 is an RS485 to ModbusTCP converter which supports Ethernet and WiFi. Although widely recommended it has severe limitations (some of which can be mitigating by configuring it to use UDP, see below) and is more expensive than alternatives.
We do not recommend purchasing this device.

Connect the device to your inverter, see this guide.
Connect the "485A" connection in the inverter's connector to the "A" terminal on the W610's RS485 connector, and the "485B" connection to the "B" terminal.
(Thanks to @StealthChesnut for figuring this out!)
-
Plug the USR-W610 into power wait 10-15 secs to for it to boot
-
Using a computer (or phone) with WiFi access search for and connect to the device's WiFi name. Normally USR-XXXX
-
Open a browser and navigate to http://10.10.100.254 (normally printed on the back of the device)
-
Enter Admin / Admin for the Username and Password
-
Click "English" in the top right to change to English
-
You now have the choice of whether you configure the device to connect to your WiFi network, or connect over Ethernet:
a. To connect to your WiFi network:
- Under STA Interface settings, click Search and select your WiFi network
- Enter your WiFi password in the Pass Phase box and hit apply
- Under Mode Selection, select "STA Mode" and set "Data Transfer Mode" to "Modbus TCP<=>Modbus RTU" and click Apply
- Under STA Interface Setting, change "AP+STA" to "on" and click Apply
- Under Quick Configure, change "Wifi Mode" to "STA Mode". Make sure the WiFi network below correct and click Apply
- Under Device Management, click Restart
- Connect your computer / phone back to your home network
b. To connect using an Ethernet cable:
- Connect an Ethernet cable to the Ethernet socket, and to your home network
- Under Ethernet Setting, change "Set the Ethernet work mode" to "WAN port" and click Apply
- Under Mode Selection, select "AP Mode" and set "Data Transfer Mode" to "Modbus TCP<=>Modbus RTU" and click Apply
- Under STA Interface Setting, change "AP+STA" to "off" and click Apply
- Under Device Management, click Restart
- Connect your computer / phone back to your home network
-
Using your router's device list or local ip scanner, find the ip address of the USR, which should now be on your home network
-
In your web browser, nagivate to http://<W610's IP address>
-
Enter Admin / Admin for the Username and Password
-
Under AP Interface Setting, change "Security Mode" from "Disable" to "WPA2-PSK", and set a Pass Phase in the box. This let the W610 host its own secured WiFi network, which you can connect to for troubleshooting
-
Under Application Setting, match the settings in the screenshot below. Click Apply after each section, then return by clicking Application Setting again (you don't need to restart the device until all parts are complete)
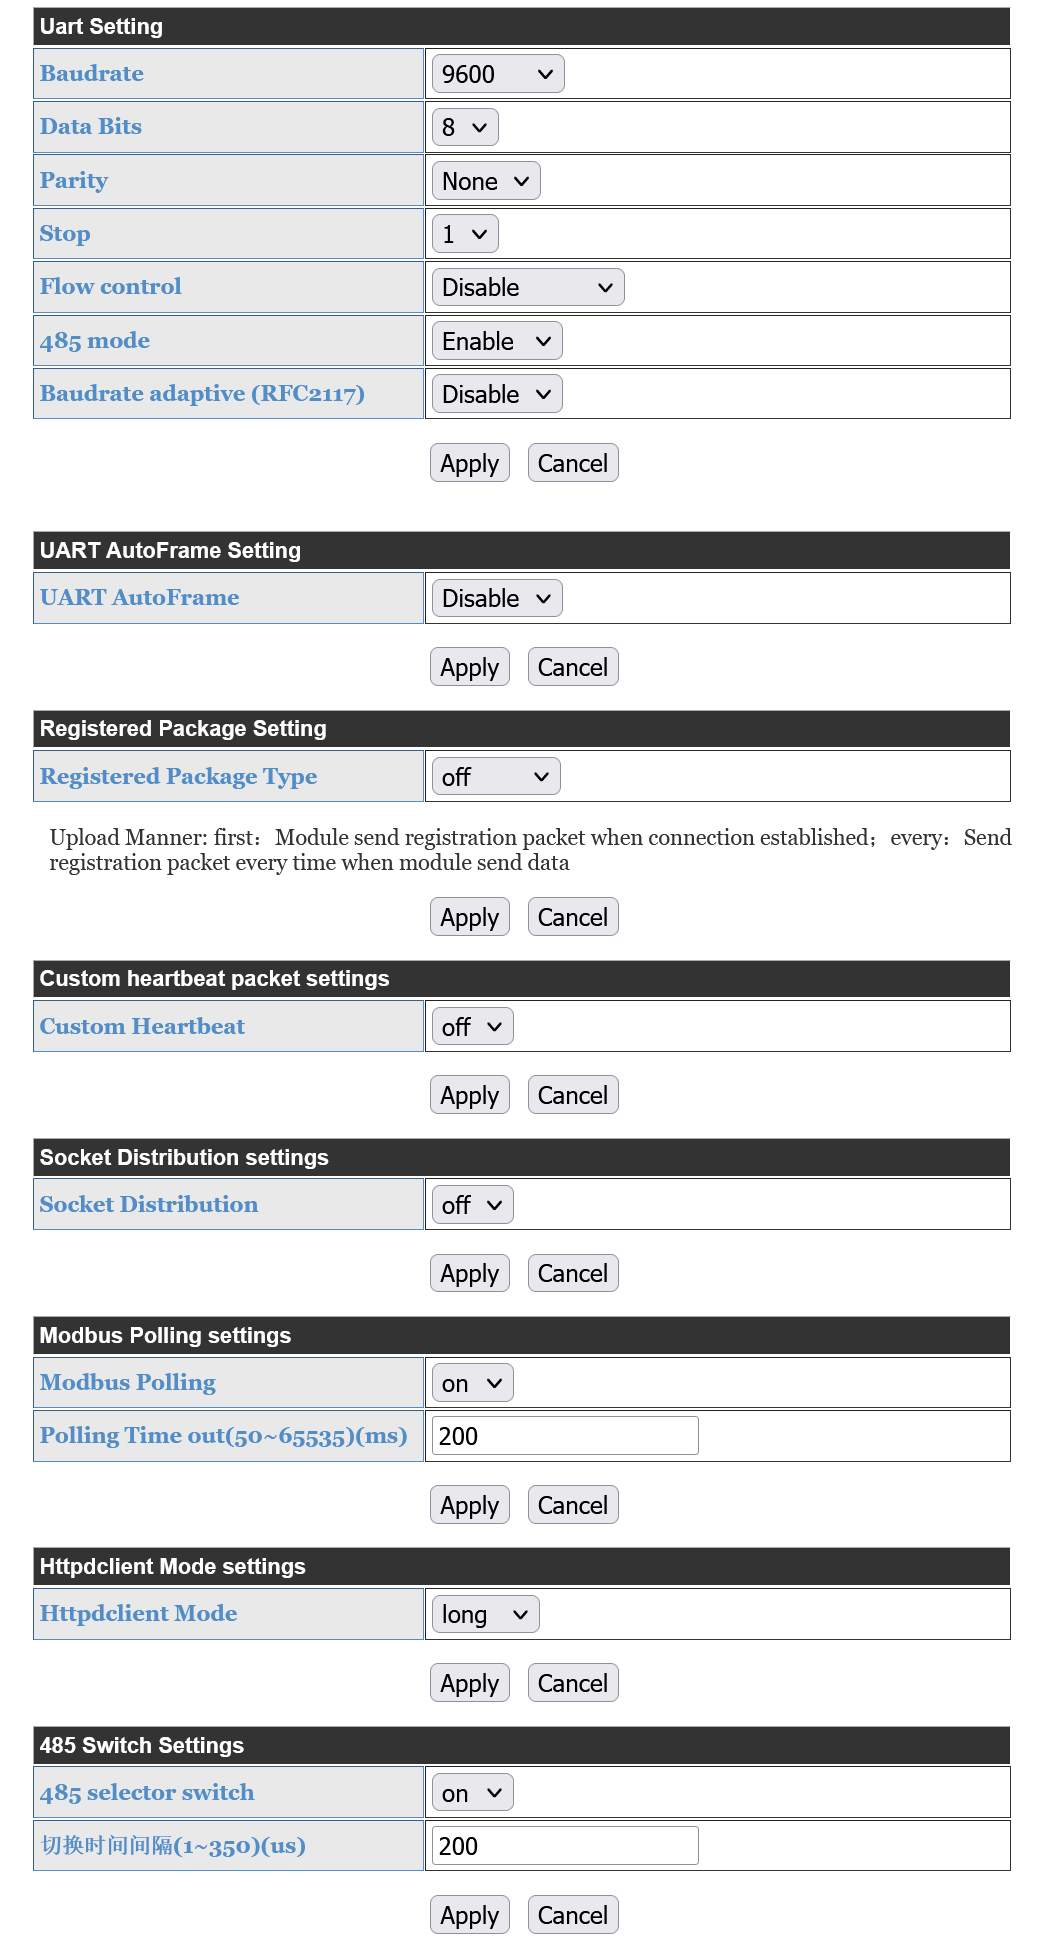
You now have the choice of whether to connect over TCP or UDP. We strongly recommend using UDP. The W610 is very slow to respond to queries when using TCP, but is reasonably fast with UDP. However, with UDP it sometimes struggles if multiple things try and query it at the same time, so you may need to use TCP in this case.
Whichever you choose, select the same option when setting up the device in Home Assistant.
If you have a firewall between your Home Assistant computer and the W610 you may need to specifically allow UDP packets through.
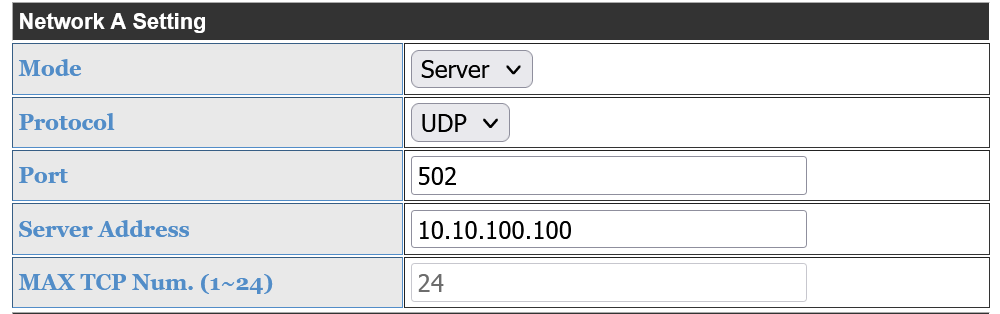
To use UDP:
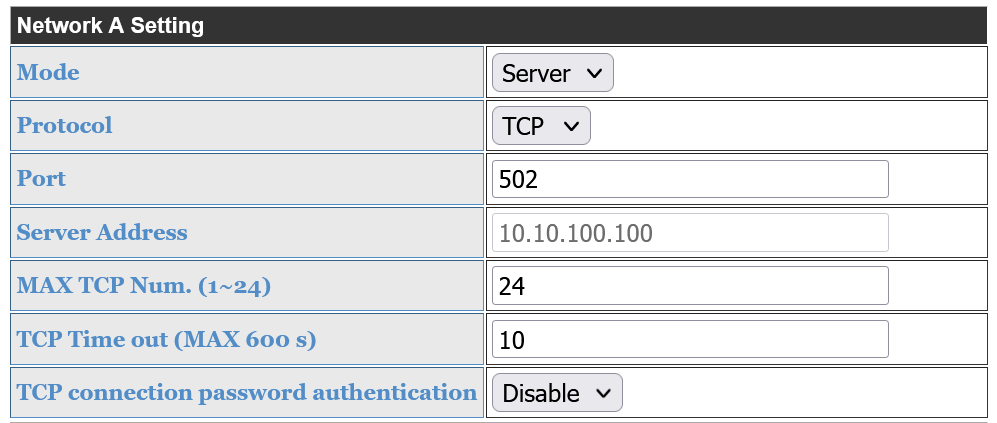
To use TCP:
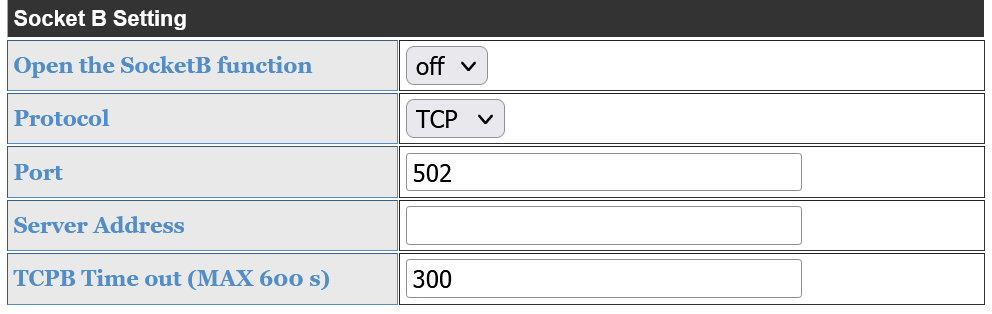
Finally, disable "Socket B".
In Device Management, click Reset.