Howto: Creating and using OpenStack SSH keypairs on Linux and OSX
On standard cloud images of Linux operating systems like Ubuntu and Fedora SSH access is restricted to public key authentication. Instead of authenticating with a password you authenticate with a private key that corresponds to a public key that is installed on the instance.
This HOWTO explains how to use keypairs in OpenStack and how to log in with Putty, a SSH client that runs on Windows. Most steps have to be completed once to get you going.
Note
This HOWTO assumes you have an OpenStack account and the OpenSSH client installed.
If you haven’t created a key before, start with creating a Keypair in OpenStack:
- Go to ‘Access & Security’
- Open the ‘Keypairs’ tab
-
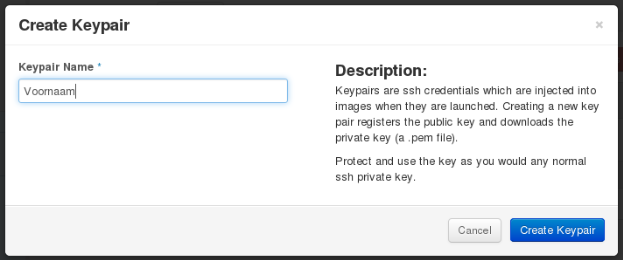
Click on the Create Keypair button:

-
Choose a Keypair Name:
- You will now be asked to save a .pem file. Save the file on a convenient location. You won’t be able to download it again.
- Open a terminal
-
Correct the file permissions of the .pem file
For example:
In order to be able to use the key, you need to insert it in a new instance in OpenStack:
- Open the Instances menu on the left
-
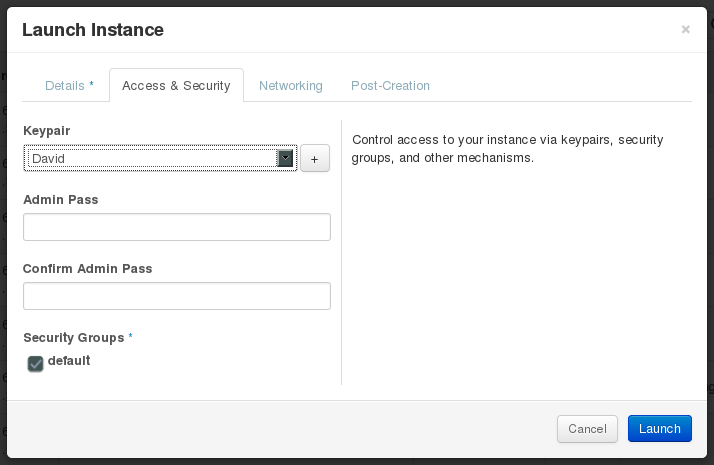
Click on Launch Instance

- Choose the relevant options in the Details tab
-
Select the keypair that you just created:
- Complete the rest of the wizard
To be able to access an instance remotely, a floating IP address needs to be associated to the instance.
-
Associate a Floating IP address to the instance, by clicking the 'Associate Floating IP' option in the menu on the right:

-
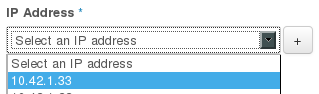
Pick a Floating IP address from the drop down menu. If no address is available, add one by clicking the + button:
Now we've prepared a key, started an instance and associated a floating IP we can use the key to login the instance with SSH:
- Open a terminal
-
Start a SSH connection with a command like the one below (default username depends on the image, on Ubuntu the username is simply 'ubuntu'):
For example:
-
Optionally, you can use the SSH configuration file. Add the following to ~/.ssh/config:
After that you can simply login with:
-
If you have connected to a server with the same IP address before, you'll receive a message like the one below.
@@@@@@@@@@@@@@@@@@@@@@@@@@@@@@@@@@@@@@@@@@@@@@@@@@@@@@@@@@@
@    WARNING: REMOTE HOST IDENTIFICATION HAS CHANGED!     @
@@@@@@@@@@@@@@@@@@@@@@@@@@@@@@@@@@@@@@@@@@@@@@@@@@@@@@@@@@@
IT IS POSSIBLE THAT SOMEONE IS DOING SOMETHING NASTY!
Someone could be eavesdropping on you right now (man-in-the-middle attack)!
It is also possible that a host key has just been changed.
The fingerprint for the RSA key sent by the remote host is
f3:76:dc:b5:cf:87:fc:f0:d9:1d:98:72:65:7f:82:3e.
Please contact your system administrator.
Add correct host key in /home/user/.ssh/known_hosts to get rid of this message.
Offending RSA key in /home/user/.ssh/known_hosts:17
RSA host key for 10.42.1.28 has changed and you have requested strict checking.
Host key verification failed.
When you're connecting to a new instance you can delete the offending key with this command (change the line number to the one in the warning message):
-
When connecting for the first time you'll be asked the following question. Type 'yes' to continue:
- If everything works alright you’re now logged in.