Start Stop local MongoDB server with Eclipse
MongoDB IDE gives you the capability to start/stop a local MongoDB server and display server logs in the Eclipse Console :
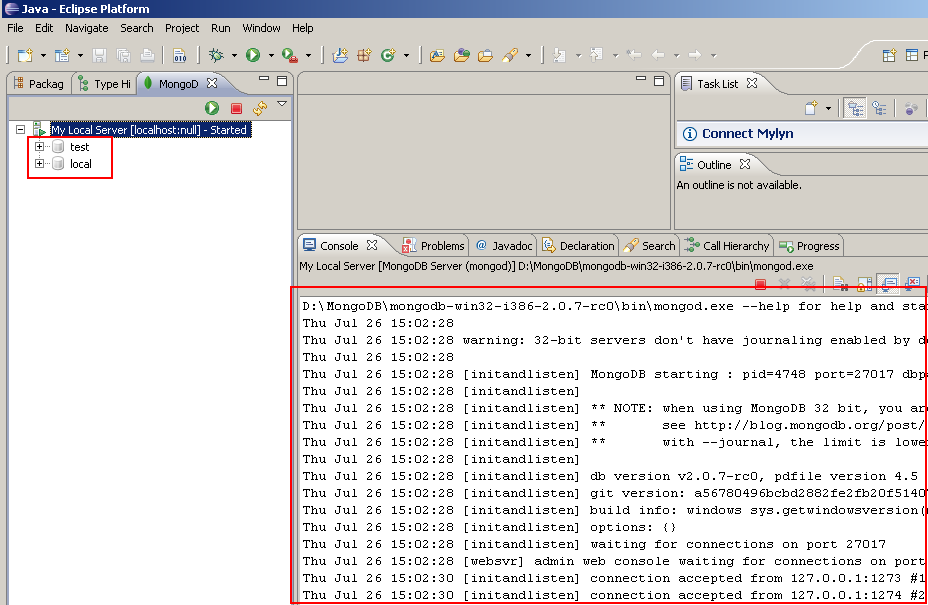
On other words, you can define a MongoDB server as Mongo runtime and start it by calling the /bin/mongod.exe (or mongod.sh) process file with an Eclipse Launch (start button generate an Eclipse Launch which do that).
Install MongoDB Server is very easy. To do that :
- Download MongoDB MongoDB Server by choosing the well distribution according your OS.
- Unzip the distribution on your hard disk.
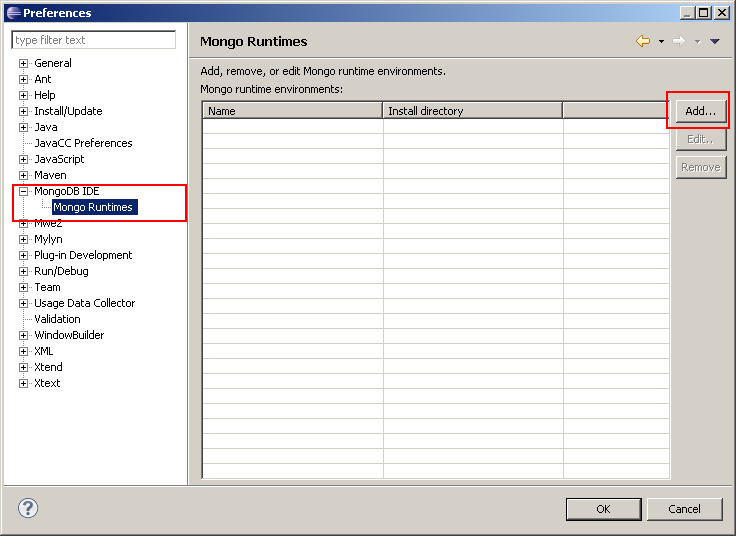
After installing a MongoDB server, you can reference this server in the Mongo Runtimes preferences. To do that, go to the Window/Preferences menu and click on MongoDB IDE/Mongo Runtimes node :
Click on Add... button to open the New MongoDB Runtime Environnment dialog:
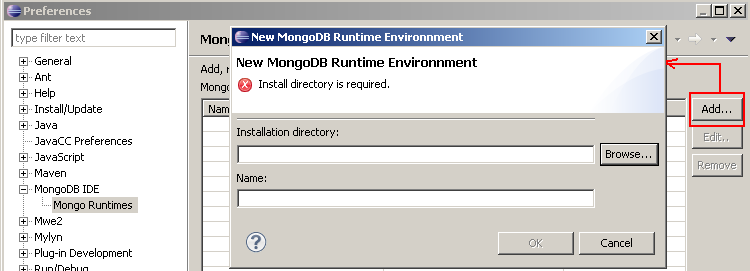
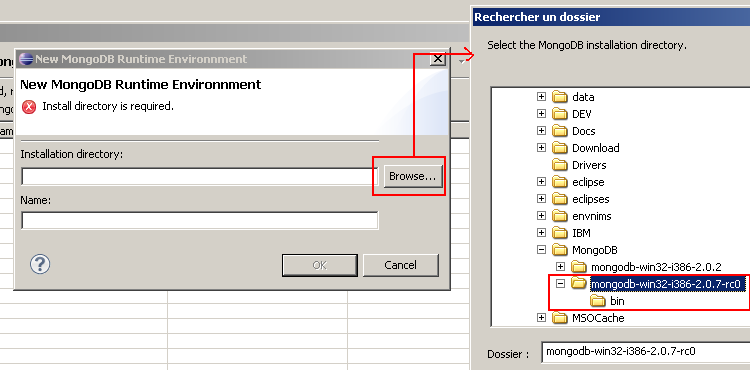
Click on Browse... button of the dialog to select the well home directory (this home directory must contains a /bin folder which contains mongo.exe (or mongo.sh) and mongod.exe (or mongod.sh) process files.) on your local MongoDB server:
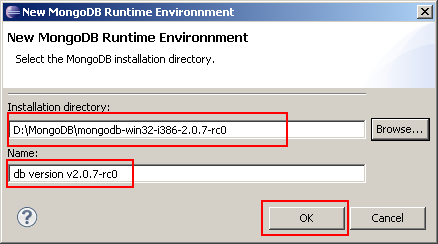
After selecting the well home directory, the name field should be fill automaticly with the version of the MongoDB server (the /bin/mongo.exe is called with -version parameter to get the version of the server) :
Click on OK button to close the dialog and display in the Mongo Runtimes list the new runtime :
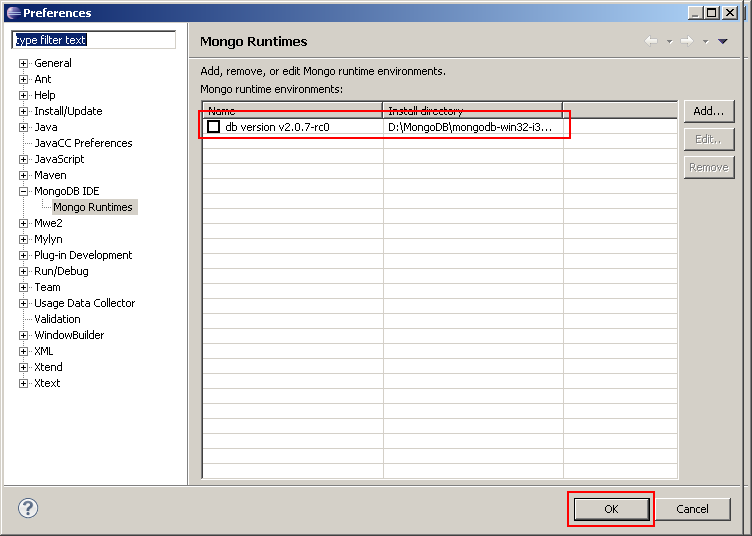
Click on OK button of the Preferences page to save the runtime.
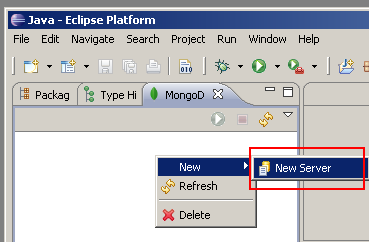
After opening the MongoDB Explorer View:
, you can create the local MongoDB server with the New Server wizard. To open this wizard you can click on right mouse button of the view and select New/New Server menu item :
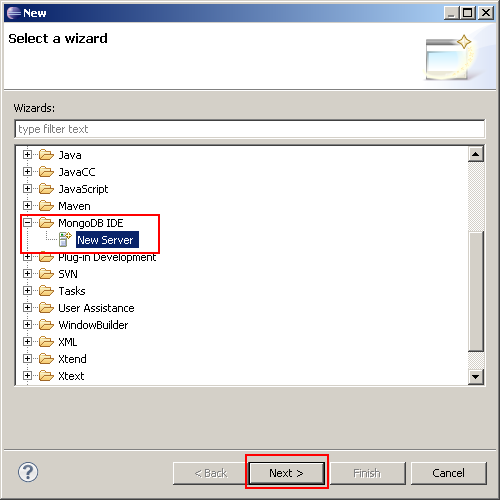
or by going to the File/New/Other... menu item and select MongoDB IDE/New Server menu item :