Create Report Control Blocks
Open create wizard
To access the Report Control Block, follow these steps:
Option 1:
- Navigate to the Substation editor.
- Click on the R icon button located in the upper left corner.
- Select Report+.
- Choose the desired
IEDyou wish to store the Report in.
Option 2:
- Navigate to the Substation editor.
- Click on one of the IEDs in the editor.
- Click on the R action icon.
- Click on Report+.
NOTE: The
ReportControlelement, along with its child elements and the referencedDataSetelement, are saved to the firstLN0element within the selectedIED.
This creation wizard comprises four pages. All pages must be completed accurately to add the Report Control Block and its DataSet to the SCL. You can move between the pages using the buttons in the footer.
NOTE: The Save button, which adds the Report Control Block to the SCL, is located on the last page.
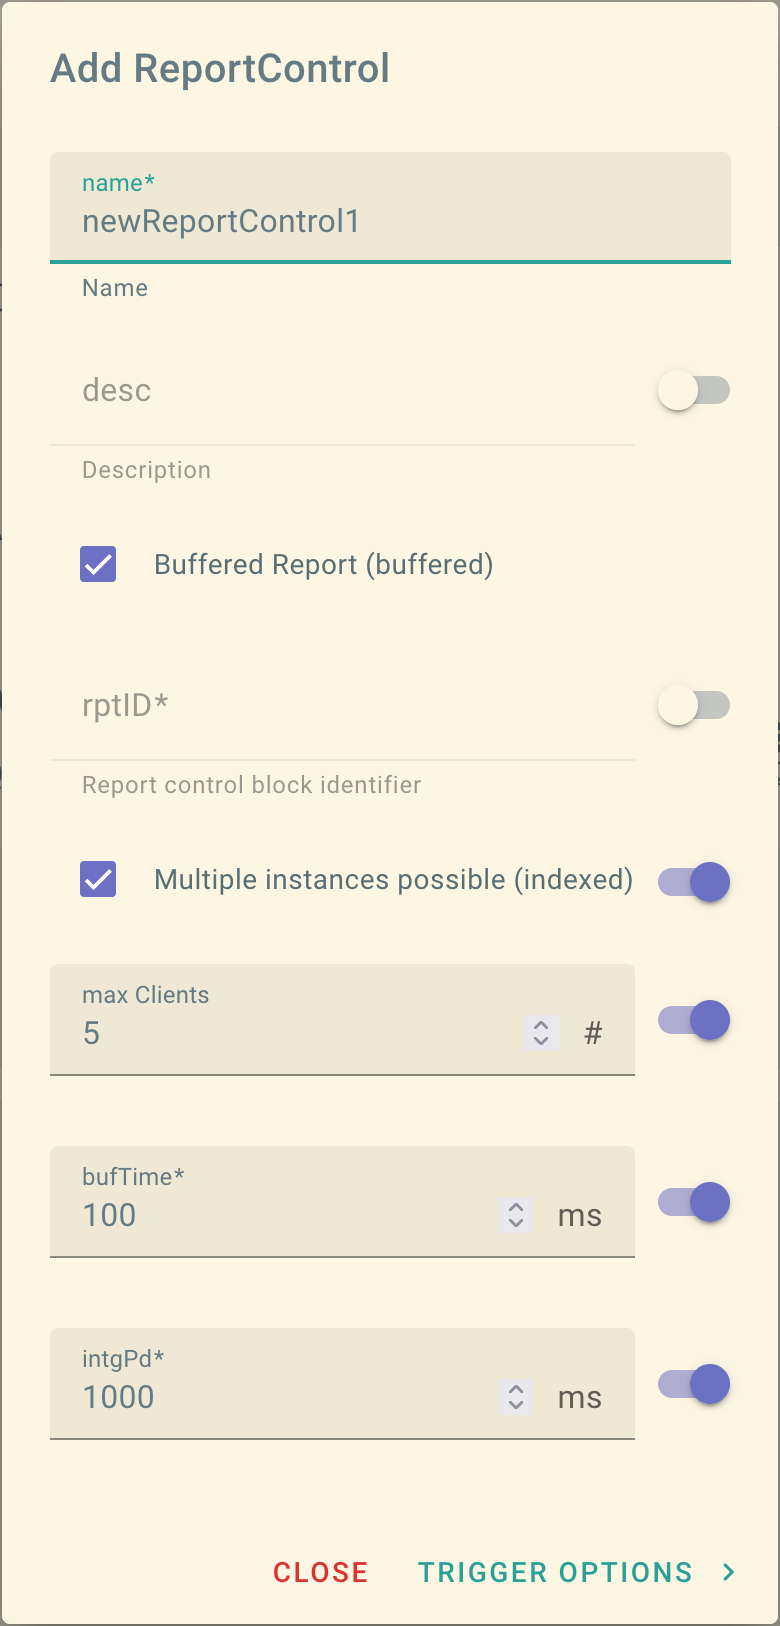
ReportControl page
This page contains a set of settings required by the server to generate a Report:
-
name: The primary identifier for the Report within the SCL. It must be unique for allReportControlelements within the same parent element and influences the Report Control Block reference. -
desc: An optional string describing theReportControlelement. -
buffered: Indicates whether the report control is buffered or not. -
rptID: A unique identifier for the Report. If left empty, the ID will be set to the Report Control Block reference (the path to the report control block in the data model). -
indexed: Specifies whether there can be multiple instances of the Report online. Due to the TCP/IP connection type, only one client can work with the Report at a time when connected to it. Therefore, multiple instances of the same Report are needed if more than one client wants to use the same Report. -
max Clients: Reflects the maximum number of instances the IED has to instantiate at power-up. This field corresponds to themaxattribute in the child elementRptEnabled. -
bufTime: The minimum time in milliseconds [ms] between two Report messages online. -
intgPd: The time in milliseconds [ms] between two Report messages triggered periodically.
Trigger Options page
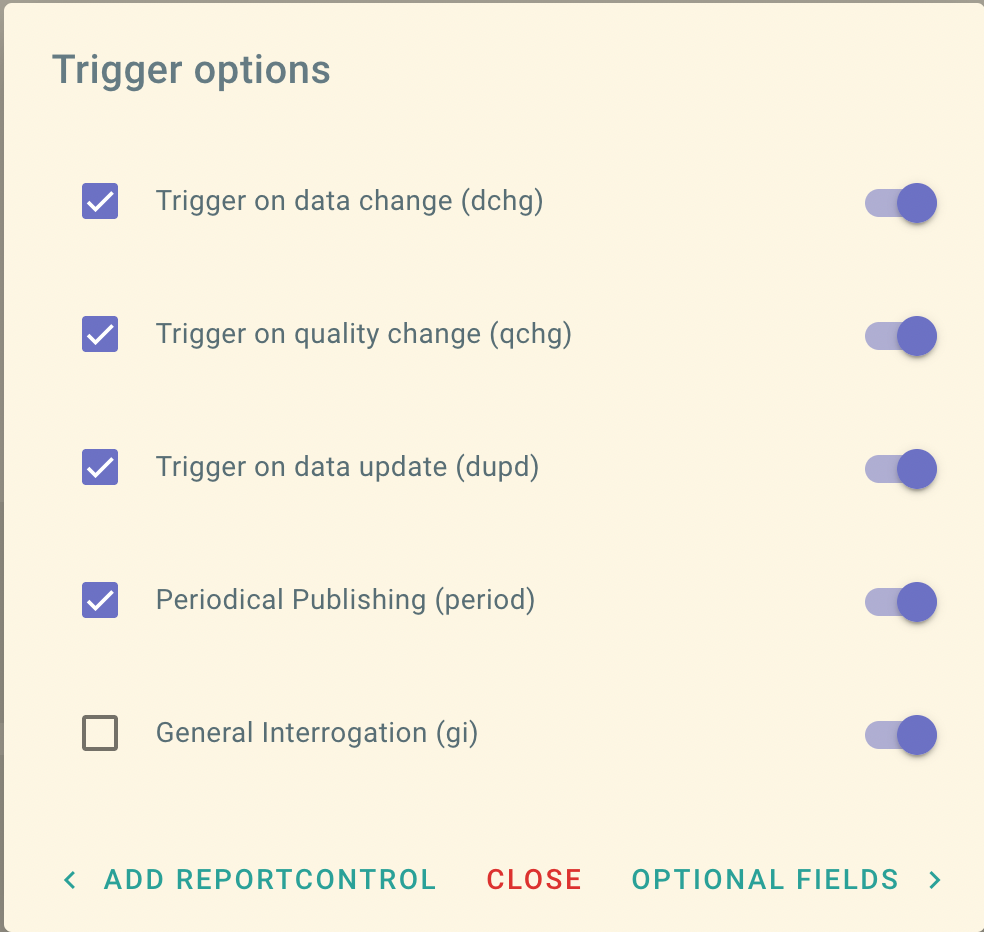 This page allows do define how a Report is triggered once activated.
-
dchg: A report is sent if any data in the dataset changes in the data model. For example, if the trip signal of a protection function changes from false to true. -
qchg: A report is sent if the quality of any data changes. Quality is a bit string that allows specifying the current quality of information and also allows having indicators on the quality reason. The quality information must be part of the dataset; otherwise, this setting has no effect. -
dupd: Some data can be triggered on data update in addition to data change. This is often the case for measurement information. For instance, if you want to track a secondary voltage measurement that is nominally 100 V, you may not see any changes in the tracked secondary voltage, but you may still want to receive updates from time to time. This trigger is active whenever the value is updated in the data model, regardless of whether the value itself has changed. -
period: If set to true, it triggers the report periodically depending on theintgPdattribute in the parentReportControl.NOTE: If
periodis set to true butintgPdis set to 0, the trigger condition is disabled. -
gi: Stands for general interrogation and allows actively triggering report generation only. It simulates a master-slave behavior, which the Report services try to avoid.
Optional Fields page
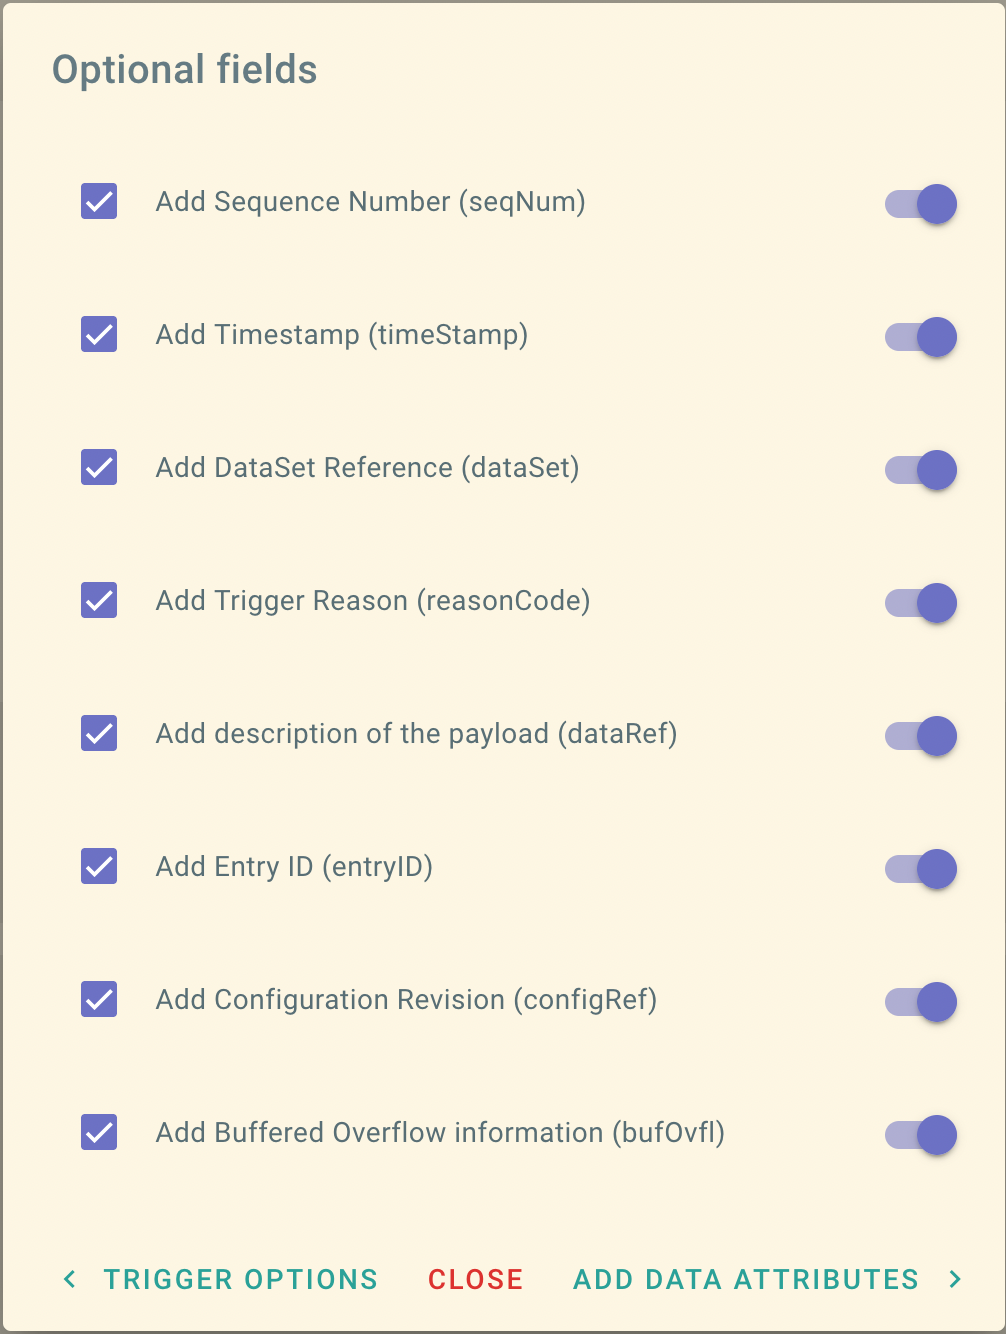
This page allows you to define additional information included in the Report message, beyond the data itself:
-
seqNum: Represents the sequence number of the Report message. Each time a new Report is generated, the sequence number is incremented. -
timeStamp: Indicates the timestamp when the Report message has been generated.NOTE: This timestamp doesn't reflect the time of the data change in the Report but rather the time of Report generation. The encoding of this specific time may differ from that in the dataset of the report and may not be as precise.
-
dataSet: References theDataSetassociated with this Report. This allows double-checking if the correct data is sent with the Report. -
reasonCode: Identifies the trigger option that initiated the generation of the Report, such as data change, quality change, etc. -
dataRef: Lists references to all data in the dataset of the Report. This enables the client to decode a Report without knowing the structure of the dataset. -
entryID: Represents the ID in the buffer for the Report. It's used for buffered Reports to retrieve only Reports from the buffer that have not been sent before. -
configRev: Reflects theconfRevattribute of the Report. It allows checking if the Report has been re-configured. -
bufOvfl: Indicates whether there has been an overflow of the buffer.
Data Picker
A multi-select data picker is utilized on the final page of the creation wizard to define the dataset. This enables selecting multiple data attributes simultaneously. In the example below, the data attributes stVal, q, and t are selected from the data object Pos, the logical node DC CSWI 1, and the logical device CTRL.

NOTE: If no data is selected, the
DataSetis still created, but it will be empty. You can add data using the edit wizard at a later stage.