Accessibility A11y Guide
- Overview
- How to test the app for a11y users?
- Setting up Accessibility Scanner and Talkback
- Using AccessibilityTestRule in Espresso Tests
- Auditing the app
- General Tips to make app Accessible
- Exceptional Cases
- Android 12 Warnings around TextViews in Fixed Layouts
Accessibility is an important part of Oppia to ensure that the app is accessible by everyone. Some common conditions that affect a person's use of an Android device are:
- blindness / low vision
- deafness / impaired hearing
- cognitive disabilities
- confined motor skills
- color blindness, etc.
Making sure that the Oppia app is accessible by all resonates with overall Oppia's mission: to help anyone learn anything they want in an effective and enjoyable way.
Note: In short we can write Accessibility as A11Y.
There are various manual and automated tests to check if app is accessible by all or not. All of the below mentioned tests are required to make sure that app is accessible in most cases.
Accessibility Scanner : Using Accessibility Scanner we can take screenshots of each and every screen in the Oppia-app manually and the Accessibility Scanner app will give the output for the individual screenshot mentioning all the errors.
Here is a video tutorial on how to set up and use the Accessibility Scanner.
Screen Reader: Screen readers like Talkback can be used to test the app manually. Talkback app is used by blind people to navigate to different items in the screen and get audio based output. This app will not give any error like Accessibility Scanner.
AccessibilityChecks: Developers can activate the AccessibilityChecks in all Espresso test cases which will give errors related to accessibility.
- Create a new emulator device which contains Google Play Store in it. Example: Nexus 5, Nexus 5A, Pixel, Pixel 2, Pixel 3, Pixel 3a, Pixel 4.
- Open "Play Store" app and sign-in.
By default tablet emulators do not contain Play Store app and therefore you will need to make some changes to make it available.
- Follow the steps mentioned here.
- Once the above steps are done, start the emulator.
- Open the "Play Store" app and sign-in.
Accessibility Scanner scans your screen and provides suggestions to improve the accessibility of your app, based on:
- Content labels
- Touch target size
- Clickable items
- Text and image contrast
- Open Google Play Store
- Download/Install Accessibility Scanner app
- After installation, open Settings
- Search Accessibility Scanner, click on it.
- Turn on Use Accessibility Scanner -> Allow
- You will notice a blue colored floating button with tick/check icon.
- Open Oppia app.
- Now on any screen inside app click on the floating button and either record or take snapshot.
Result: You will notice that the scanner analyses the screen and give errors if there are any or else it will show that no errors were found.
TalkBack is the Google screen reader included on Android devices. TalkBack gives you spoken feedback so that you can use your device without looking at the screen.
- Open Google Play Store
- Download/Install Android Accessibility Suite app
- After installation, open Settings
- Search Talkback, click on it.
- Read all the instructions written on the screen as using Talkback requires specific steps.
- Turn on Use Service -> Allow
Here is a video tutorial on "How to use Talkback and what does its output mean?".
- Android A11Y Overview
- Using A11Y Menu
- Getting started with Talkback
- Display speech output as Text: Talkback
- How to use Accessibility Scanner? - Tutorial
- How to use Talkback and what does its output mean? - Tutorial
AccessibilityTestRule is a JUnit rule to enable AccessibilityChecks in all Espresso Tests. This rule covers all errors shown by Accessibility Scanner and more but only for all those UI elements which are getting used in the test case.
(Note: If this file is not available then it has been merged with OppiaTestRule as per #3351)
Simply use the AccessibilityTestRule in Espresso Test file like this:
@get: Rule
val accessiblityTestRule = AccessibilityTestRule()
This will enable the AccessibilityChecks on all Espresso tests inside this file.
To disable AccessibilityChecks on any individual test case use DisableAccessibilityChecks as annotation with the test.
In case of test failure there are two options to fix it:
- Solve the test case by updating the UI as per the error details.
- If by solving the error the user experience will become worse than we should actually suppress that error instead of changing the UI. This can be done in AccessibilityTestRule
The app should be audited by covering different use cases across 23 different manual tests mentioned here.
This sheet has been divided based on primary and secondary use cases and basic and advanced test cases.
- Level 1 =
Primary + Basic, which means that all primary use cases passes allBasictests. - Level 2 =
Secondary + Basic, which means that all secondary use cases passes allBasictests. - Level 3 =
Primary + Advanced, which means that all primary use cases passes allAdvancedtests. - Level 4 =
Secondary + Advanced, which means that all secondary use cases passes allAdvancedtests.
This entire sheet should be filled with each release as a part of audit process.
- All Clickable items should have a minimum size of
48x48dp. - Buttons should use
android:enabledinstead ofandroid:clickableto disable/enable it. - All views should have a
foreground:backgroundcontrast ratio of4.5:1and above. - Texts should have a minimum
12sptext size. - Images/icons should have a meaningful content description.
- Generally we use
sponly for text-size/font-size of text and at all attributes related to width/height we usedp. But we can use width inspif we have text inside a fixed width container. This will increase the size of container whenever we increase the font size, so the scaled text get enough size to fit inside a container. If this case is applied anywhere in UI, please get confirmation from @BenHenning or @rt4914 .
If we have scalable text inside a fixed width container then accessibility scanner is suggesting to improve text scaling, as if the text scales it won’t get enough space to expand inside a fixed width container.
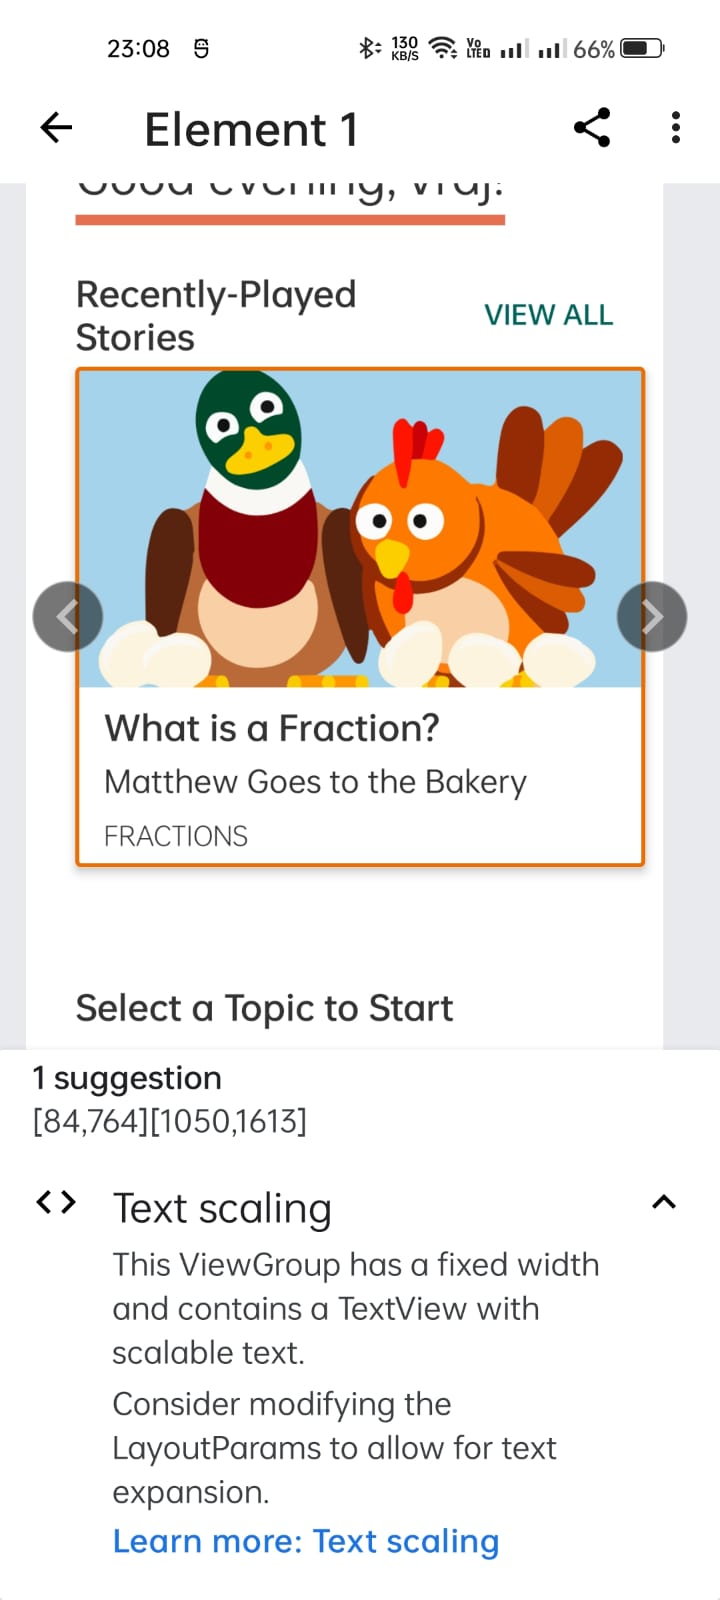
- Change the fixed width to wrap_content and set minWidth. In this case, we can’t directly change the width into a wrap_content as all thumbnail images won’t have consistent width which leads to a problem as mentioned in issue #4684. You can see the below screenshot for reference.
-
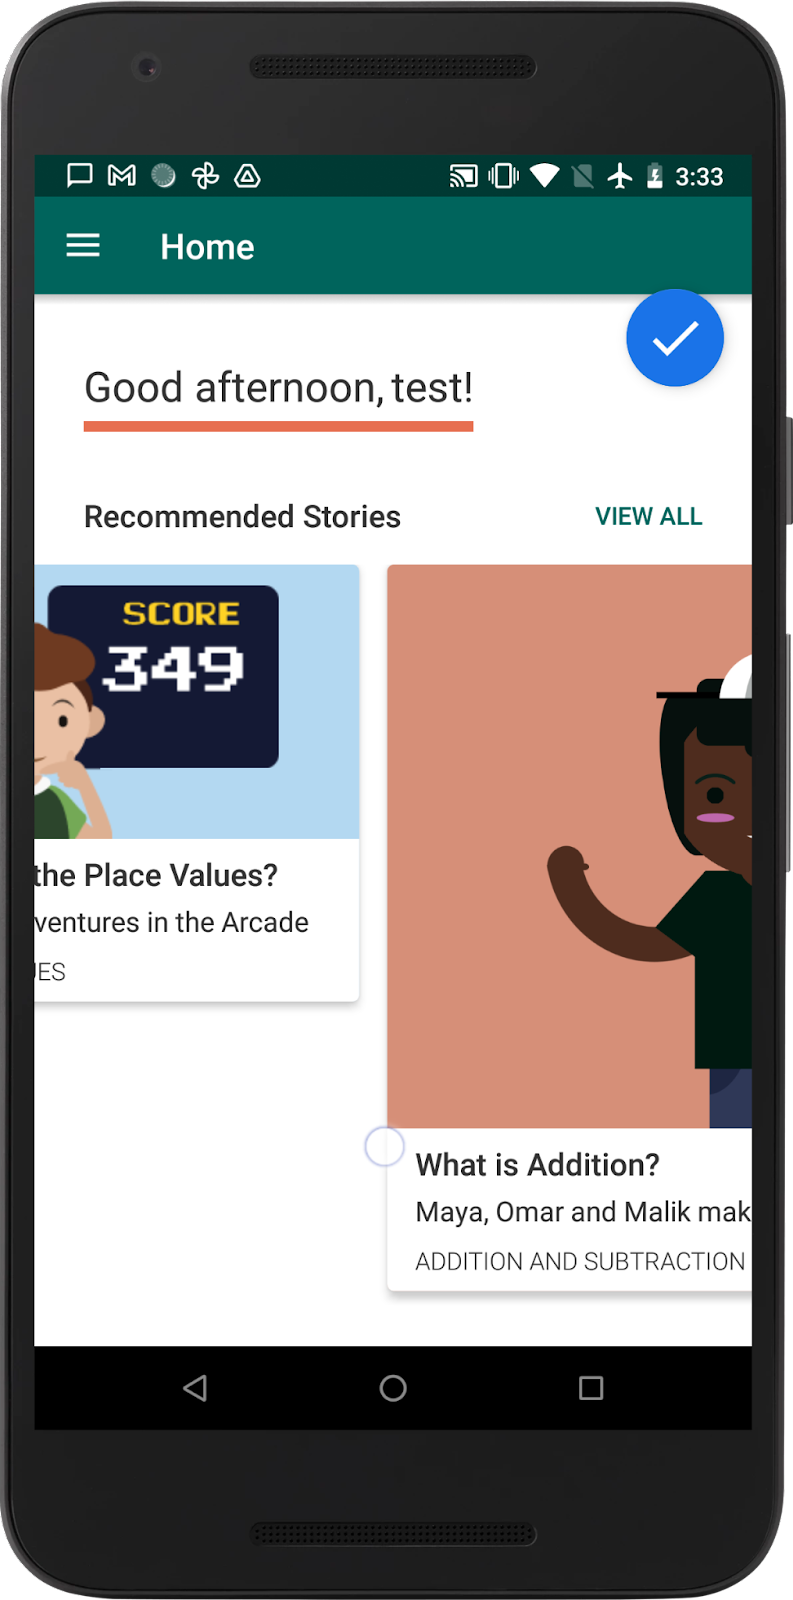
As directly we can’t use wrap_content for width, another possible solution is to use scalable width i.e. instead of setting fixed width in dp we can set the width in sp. This will increase the container size every time we increase the font size, so the scaled text can fit inside the container. In this approach, accessibility scanner will still show suggestion to improve text scaling but from a UI perspective this approach works. For reference you can look at PR #4695
-
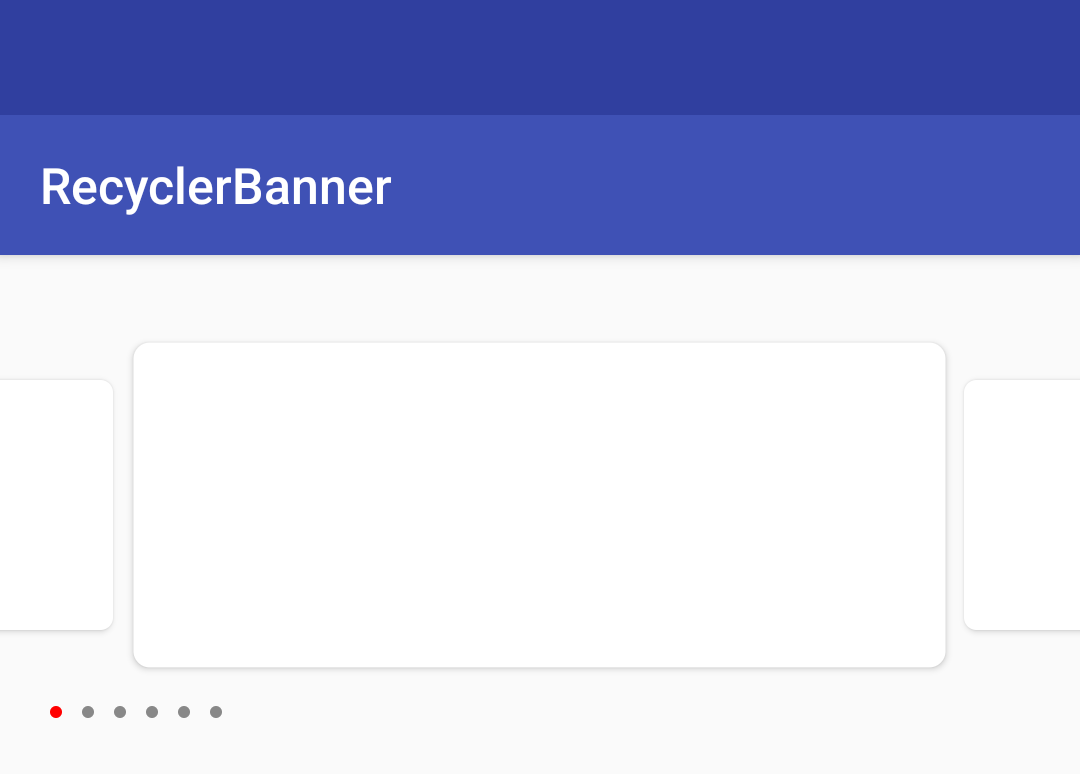
Another approach would be to design such that we don’t have to fit a text inside a fixed width container as shown below in the reference image.

We can set the full width to the cards i.e. match_parent (with appropriate margins) which will remove the issue of accessibility. We can also show the dots at bottom which represent the number + position of items.
For sighted users
- The banners will be cyclic i.e. item-0, item1, item2, item0 and repeat.
For talkback users
- The cyclic nature will stop.
- The screen reader will start from item-0, item-1, item-2, and next it will go out of list.