This quickstart template deploys FFMPEG transcoder on Oracle Kubernetes Engine (OKE) for transcoding to adaptive bitrate streaming. It supports both HLS and DASH streaming protocols with the following codecs:
- H.264/AVC
- H.265/HEVC
- VP9
- AV1
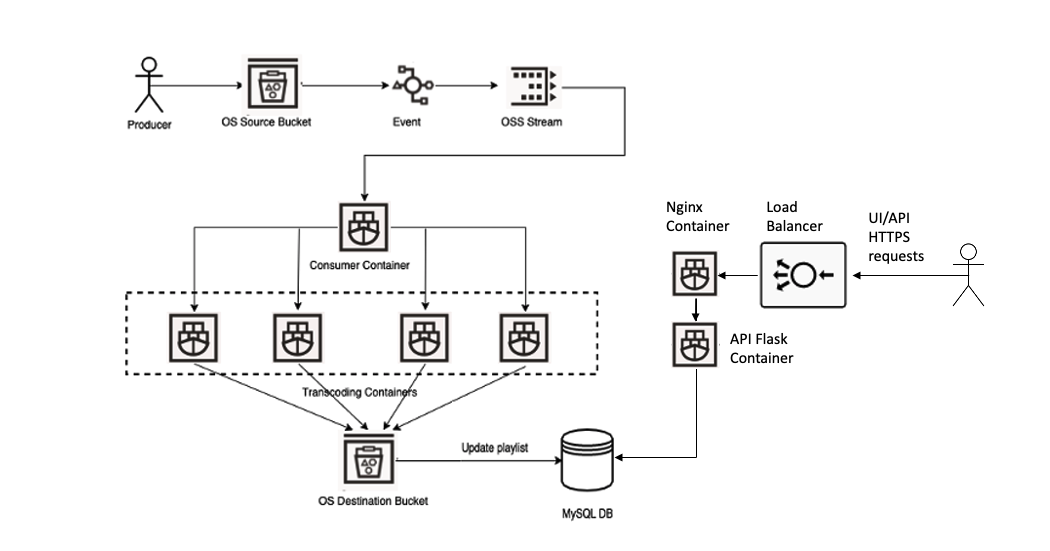
A media file is uploaded to the source object storage bucket. It emits an event that creates a transcoding request in OSS streaming queue. Job scheduler container running on OKE is monitoring the queue and when a new request arrives it starts a new transcoding job running as a container on OKE. The transcoding job uses ffmpeg open source software to transcode to multiple resolutions and different bitrates. It combines the video and audio for every HLS stream, packages each combination, and create individual TS segments and the playlists. On completion it creates a master manifest file, uploads all the files to the destination bucket and updates MySQL database with the playlist. Users can configure and monitor the status of transcoding jobs and view transcoded files in a web-based User Interface or by using REST API.
Transcoder on OKE depends on use of Instance Principals for container execution. You should create a dynamic group for the compartment where you are deploying your OKE cluster. When creating a dynamic group to match all compute instances in the compartment you can use the following matching rule:
instance.compartment.id = 'compartment-id'
where compartment-id is ID of your compartment. You can get compartment OCID in OCI console from Identity & Security. Under Identity, click Compartments. A compartment hierarchy in your tenancy is displayed. Find your compartment and copy its OCID.
After creating the dynamic group, you should set specific IAM policies for OCI services that can be used by the Dynamic Group.
Due to enforcement of OSMS for compute resources created using an manage all-resources policy, you need to specify each service in a separate policy syntax
At a minimum, the following policies are required:
Allow dynamic-group <dynamic group name> to manage cluster-family in compartment id <compartment OCID>
Allow dynamic-group <dynamic group name> to manage secret-family in compartment id <compartment OCID>
Allow dynamic-group <dynamic group name> to manage vaults in compartment id <compartment OCID>
Allow dynamic-group <dynamic-group-name> to manage streams in compartment id <compartment OCID>
Allow dynamic-group <dynamic-group-name> to manage repos in compartment id <compartment OCID>
Allow dynamic-group <dynamic-group-name> to manage object-family in compartment id <compartment OCID>
Allow dynamic-group <dynamic-group-name> to manage instance-family in compartment id <compartment OCID>
Allow dynamic-group <dynamic-group-name> to manage virtual-network-family in compartment id <compartment OCID>
Allow dynamic-group <dynamic-group-name> to manage cluster-node-pools in compartment id <compartment OCID>
Allow dynamic-group <dynamic-group-name> to manage vnics in compartment id <compartment OCID>
Allow dynamic-group <dynamic-group-name> to manage mysql-family in compartment id <compartment OCID>
Allow dynamic-group <dynamic-group-name> to inspect compartments in compartment id <compartment OCID>
Allow dynamic-group <dynamic-group-name> to manage cloudevents-rules in compartment id <compartment OCID>
Also required prior to deployment are an OCI Registry, OCI Vault, Auth Token, and a Vault Secret which contains the Auth Token.
The OCI registry must be in the tenanacy root and the user account associated with the auth token will need relevant privileges for the repo
You will need to gather the repo name, and user login to access the registry. You will also need to configure the registry field to the region where your registry is deployed.
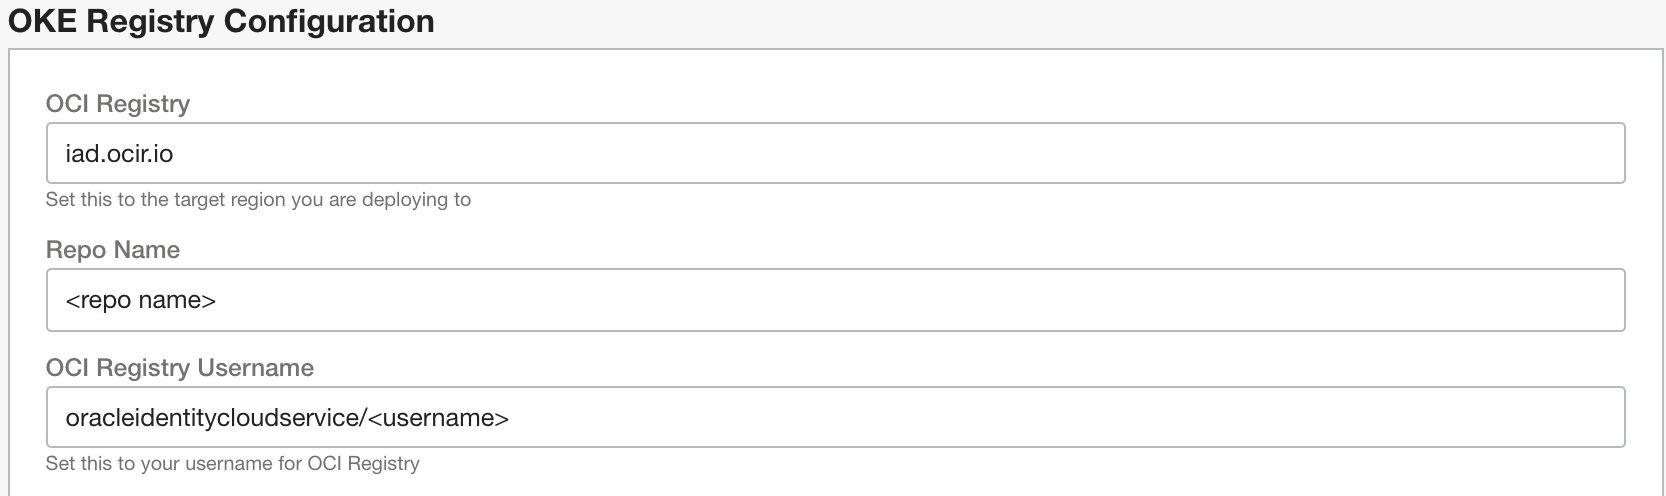
Note that in this example the registry username uses Oracle Cloud Identity Service Federation. If you are not using IDCS and using a local account, simply use the local account login (email address).
The auth token is fetched from OCI Vault Secrets - you will need to capture the secret OCID prior to deployment.

When configuring networking you can use an existing VCN with a private & subnets or create a new VCN and configure CIDR blocks for private & public subnets.

If you select not to use an existing VCN the deployment template will create a new VCN with all required networking configuration. If you select to use an existing VCN you must insure that it has a private and a public subnet, Internet Gateway, NAT Gateway, Service Gateway with the associated routing rules in the route table. When using an existing VCN enable in the secuity list of the private subnet all traffic to all ports inside the subnet, open MySQL TCP port 3306 for the traffic from the public (edge) subnet. In addition, insure that all ports required by OKE cluster are open (see https://docs.oracle.com/en-us/iaas/Content/ContEng/Concepts/contengnetworkconfig.htm#securitylistconfig).
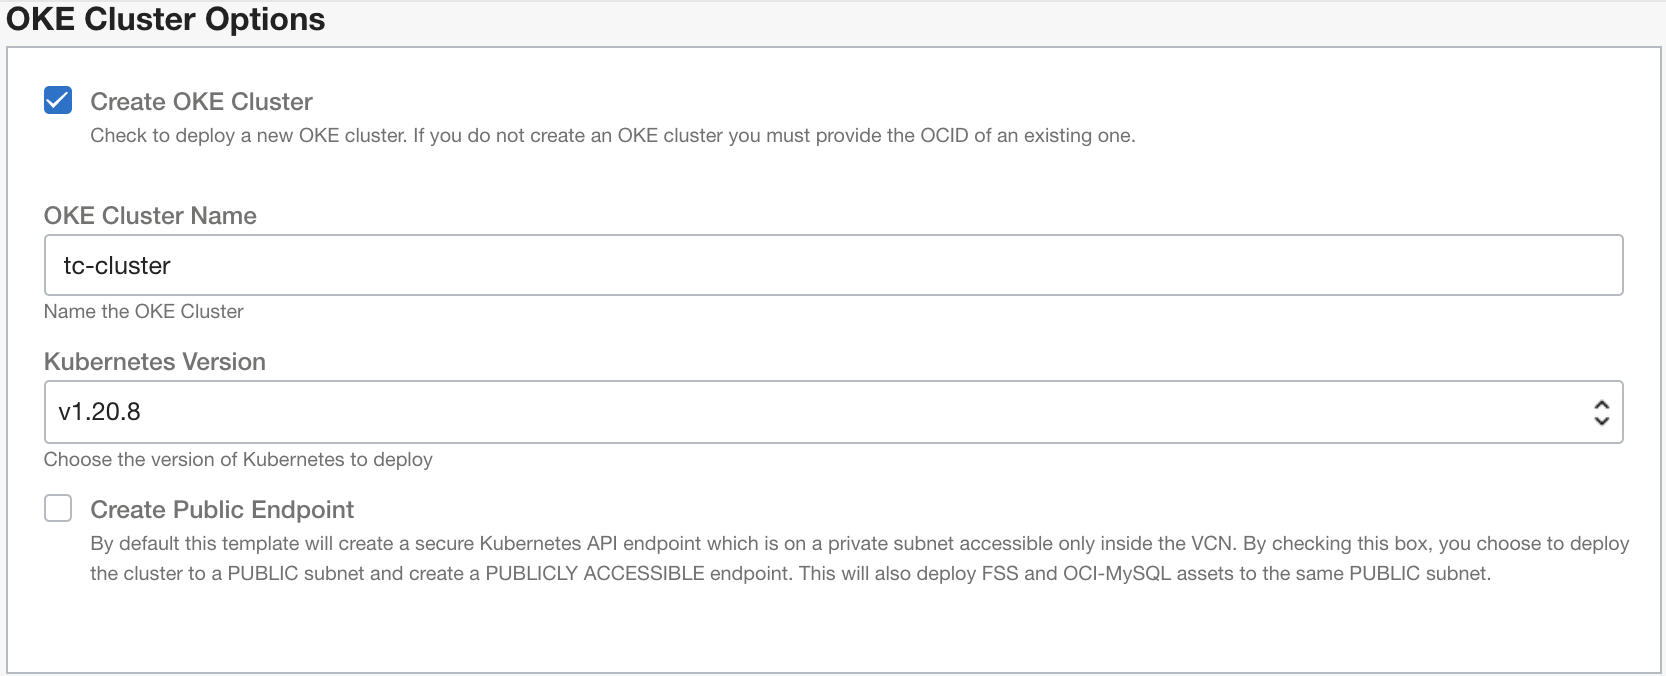
When configuring OKE cluster you need to define the cluster name and select the Kubernetes version
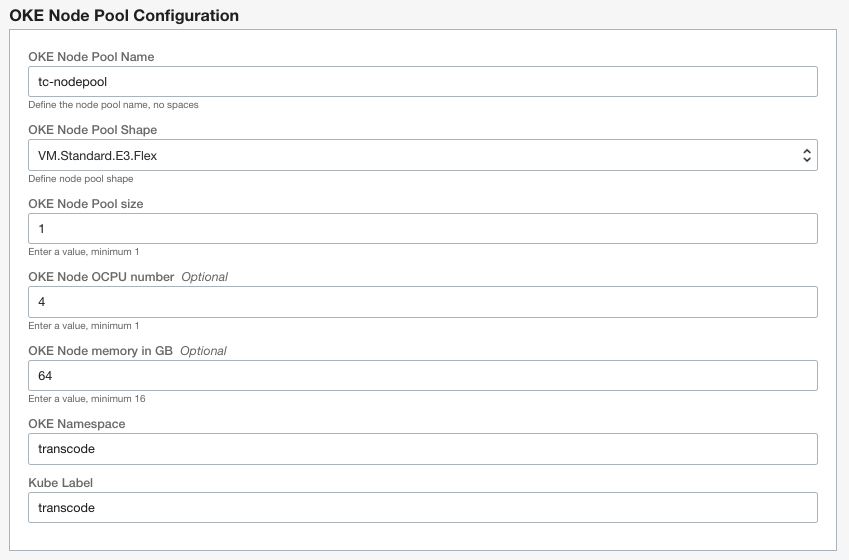
In OKE nodepool configuration you need to specify the nodepool name, the shape and the number of OKE nodes in the nodepool. By default it uses Kubernertes namespace 'transcode' and kube label 'transcode'. It is recommended to keep the default values for the namespace and the kube label. The following OKE nodepool shapes are supported:
VM.Standard.E3.Flex (AMD)
VM.Standard.E4.Flex (AMD)
VM.Optimized3.Flex (Intel)
VM.Standard3.Flex (Intel)
VM.Standard.A1.Flex (ARM Ampere)
Enabling OKE Cluster Autoscaler is a part of the deployment. You need to define the autoscaler image, minimum and maxiumum number of nodes and the number of vCPU requested per a single transcoding job.
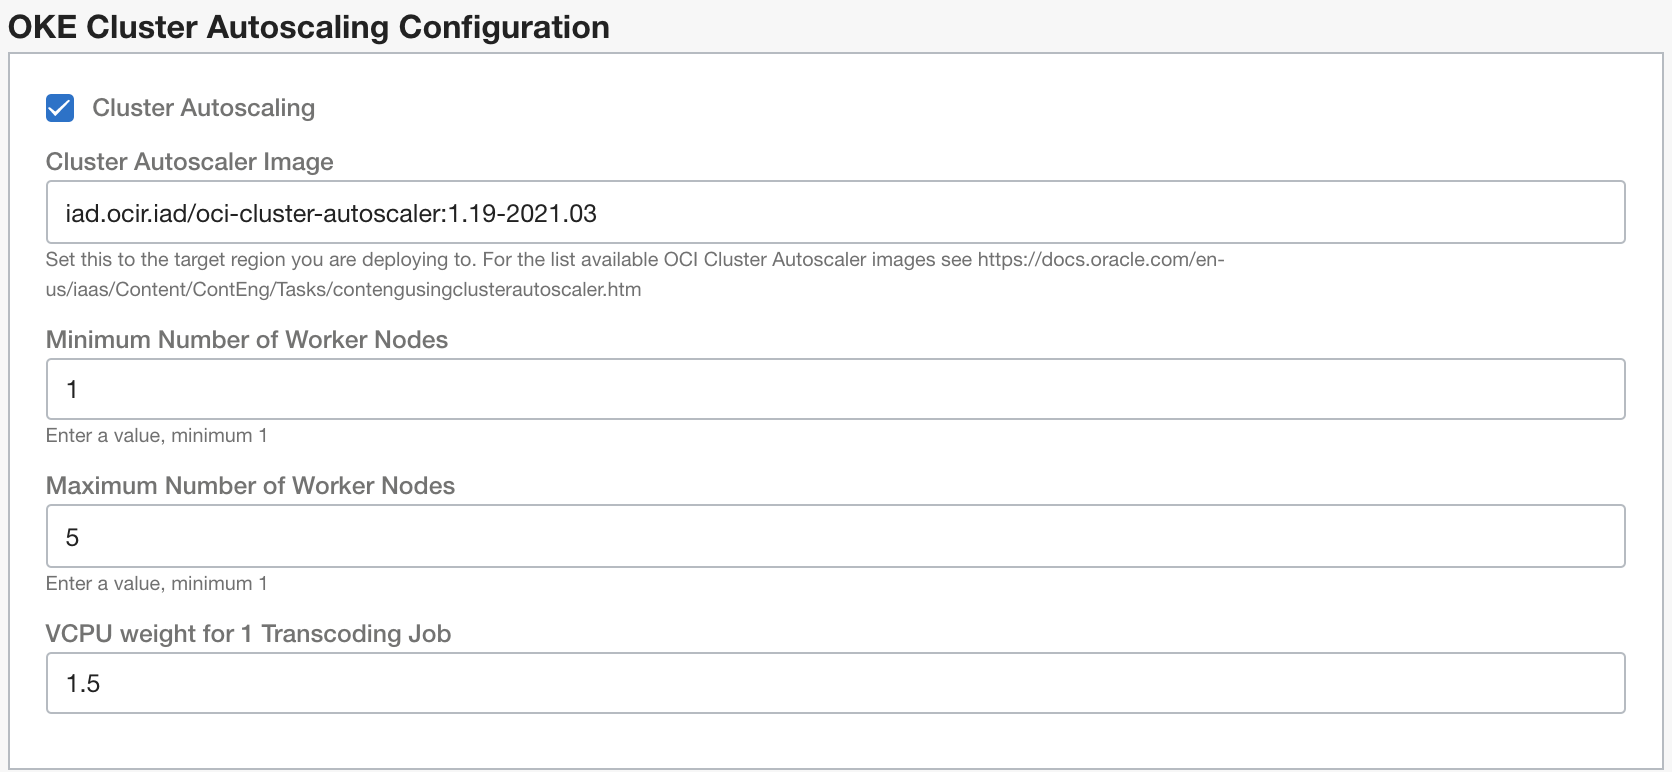
OCI Cluster Autoscaler image name depends on the region. For the list of available images per region see Cluster Autoscaler
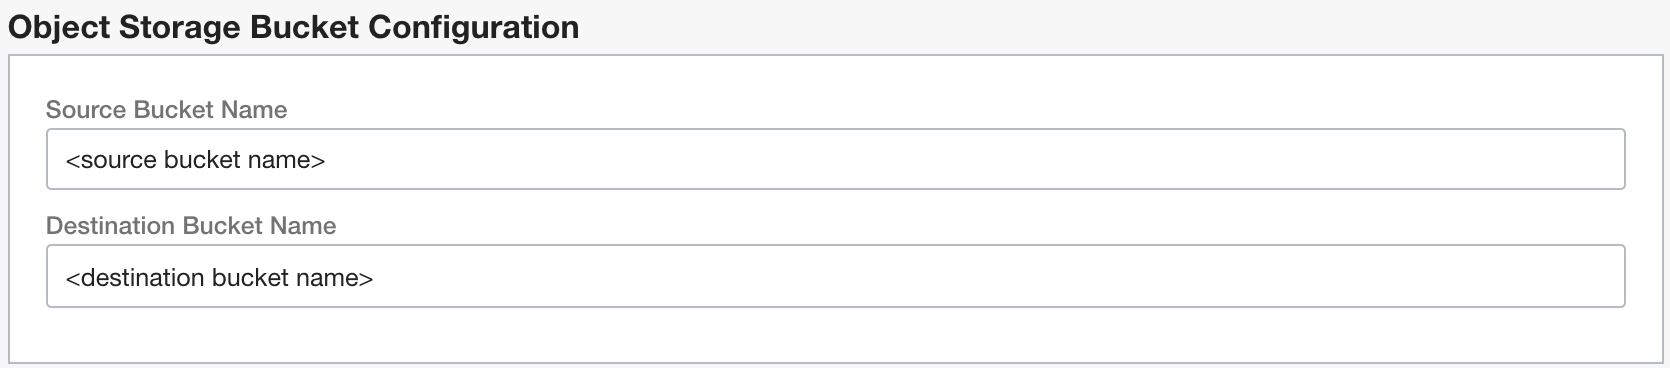
Media files to be transcoded are uploaded to OCI Object Storage Source Bucket. The transcoded files are stored in OCI Object Storage Destination Bucket. Both Source and Destination Buckets must be pre-created in advance and their names should be configured in Object Storage Bucket Configuration:
When creating the Source Bucket in OCI Object Storage make sure that you check "Emit Object Events" checkbox:

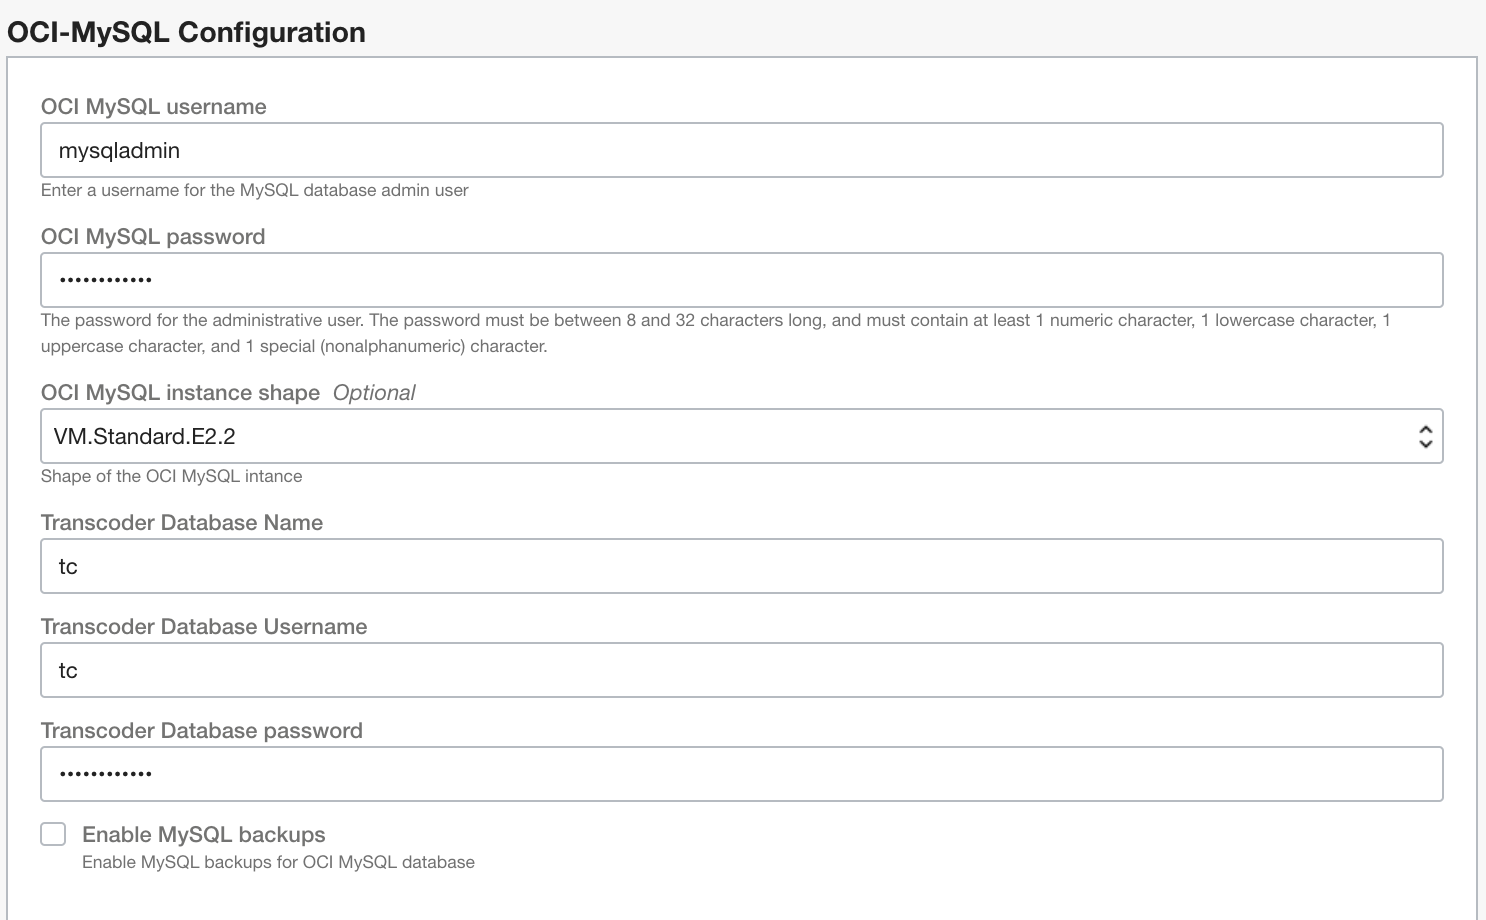
When configuring MySQL parameters specify password for both the mysql admin and transcoder database user accounts.
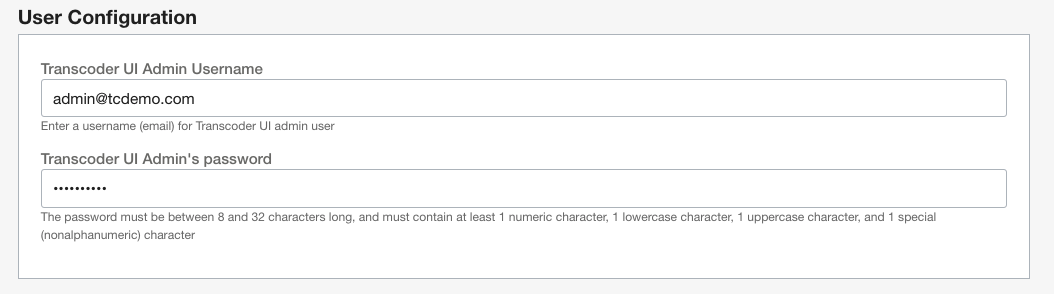
In User Configuration enter user credentials of the administrative user. This user credentials will allow you to access transcoder UI and manage other users.
By default ffmpeg is set with HLS transcoding to 3 different resolutions
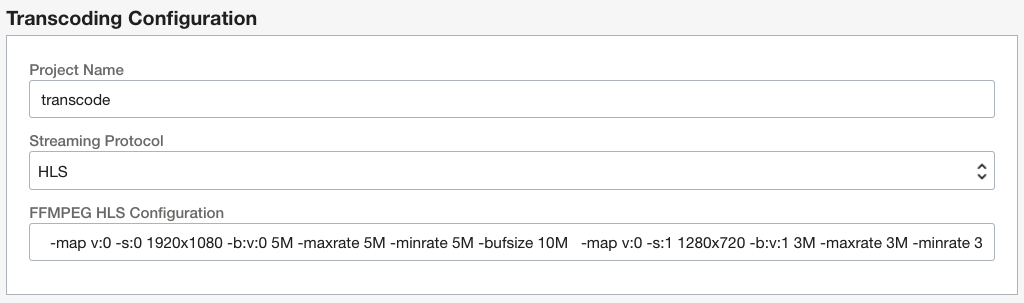
Here is a complete set of ffmpeg parameters used by the default project "transcode":
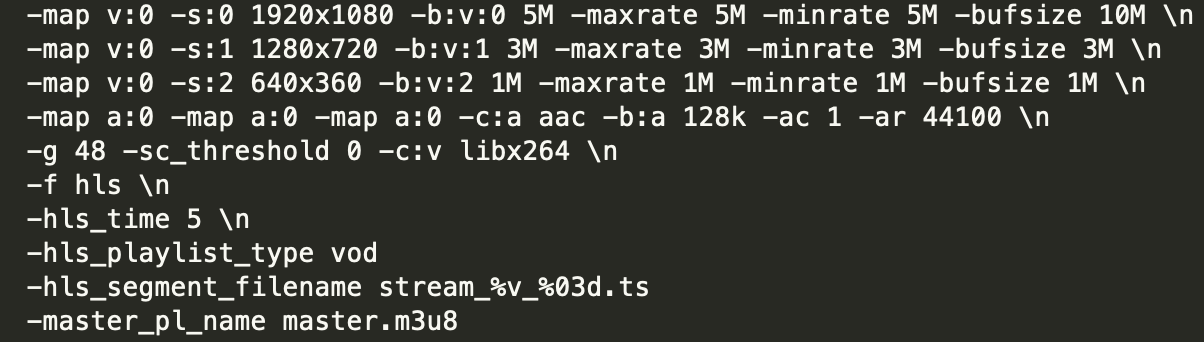
It is recommended to leave ffmpeg default settings intact. If you change ffmpeg transcoding parameters and set them incorrectly, the transcoding jobs may start failing. After the deployment of the stack you'll be able to create new projects with a different configuration from the transcoder UI.
Setting CDN Base URL is optional. Set it only if you are integrating it with a CDN and you know the CDN base URL

This deployment template uses Oracle Resource Manager.
It deploys the following:
- Virtual Cloud Network
- Public (Edge) Subnet
- Private Subnet
- Internet Gateway
- NAT Gateway
- Service Gateway
- Route tables
- Security Lists
- TCP 22 for Edge SSH on public subnet
- Ingress to both subnets from VCN CIDR
- Egress to Internet for both subnets
- OCI Virtual Machine Staging-Server Instance
- OCI MySQL as a Service with a database where the list of transcoded filed is stored (transcoded-files table)
- OCI Streaming Service (OSS) stream for transcoding requests
- Event rule that sends a transcoding request to OSS stream when a new file is uploaded to OCI Object Storage Source Bucket
- OKE Cluster with a nodepool with enabled cluster autoscaler
- Scheduler container checking OSS stream for transcoding requests
- Transcoding container is started when a new media file is uploaded
- API-server container with LB service (serving REST API requests with a public endpoint)
Simply click the Deploy to OCI button to create an ORM stack, then walk through the menu driven deployment. Once the stack is created, use the Terraform Actions drop-down menu to Plan, then Apply the stack.

When applying the stack remote execution logging is done in terraform output directly. When the stack is successfully applied it prints SSH key and public IP address of the staging-server VM. SSH access is enabled to the staging-server VM.
After the stack is successfully applied to check that the transcoder is working
-
Upload a new video file to the OCI Object Storage Source Bucket
-
Check in Event Metrics that a new event is emitted
-
Open OSS stream and check in OSS Metrics that a new request is added to the stream queue
-
SSH the staging-server VVM and check that a new transcoder job is created:
kubectl -n transcode get pods
You should see a transcoder pod with the status running or completed

If the transcoder job fails to start describe the associated pod to check the log
kubectl -n transcode describe pod <pod name>
If the transcoder pod STATUS is ERROR check the pod log
kubectl -n transcode logs <pod name>
If transcoder pod started successfully attach to the container log and monitor the status
kubectl -n transcode logs "pod NAME" --follow
If the transcoder pod status is COMPLETED check OCI Object Storage Destination Bucket. For each transcoded file it creates a folder in the Destination Bucket with HLS manifest files (.m3us) and segment files (.ts)
SSH to the staging server and run
kubectl -n transcode delete svc --all
Copy EXTERNAL-IP from the output of this command and connect to it from your web browser:
During the deployment it creates and installs a self-signed SSL certificate that will not be recognized by the browser. In the browser window click on Advanced button. MAC users using Chrome may not be able to open it. You can configure Chrome to trust the self-signed certificate or just type 'thisisunsafe' in Chrome window. After that it should open the Transcoder UI login page:
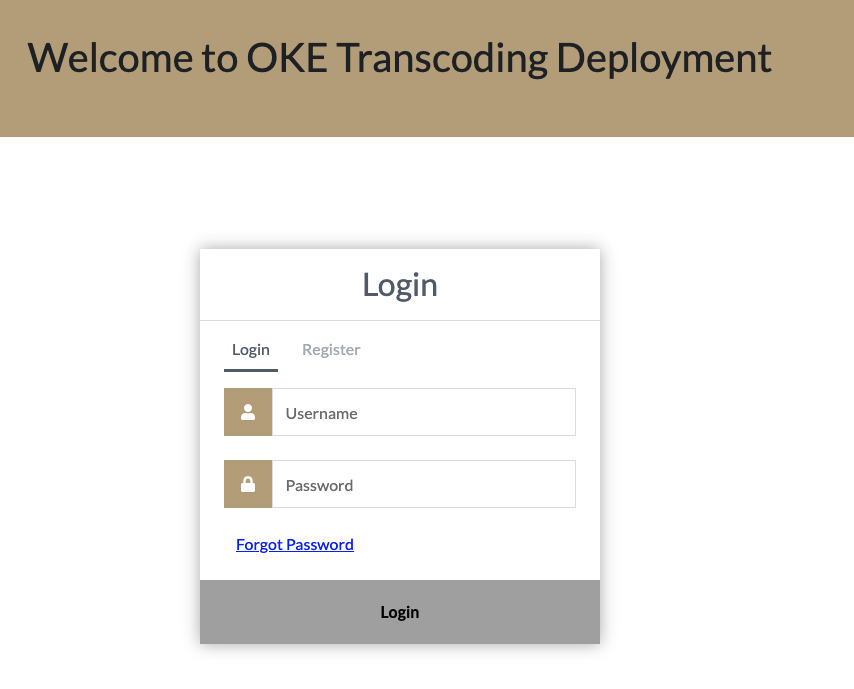
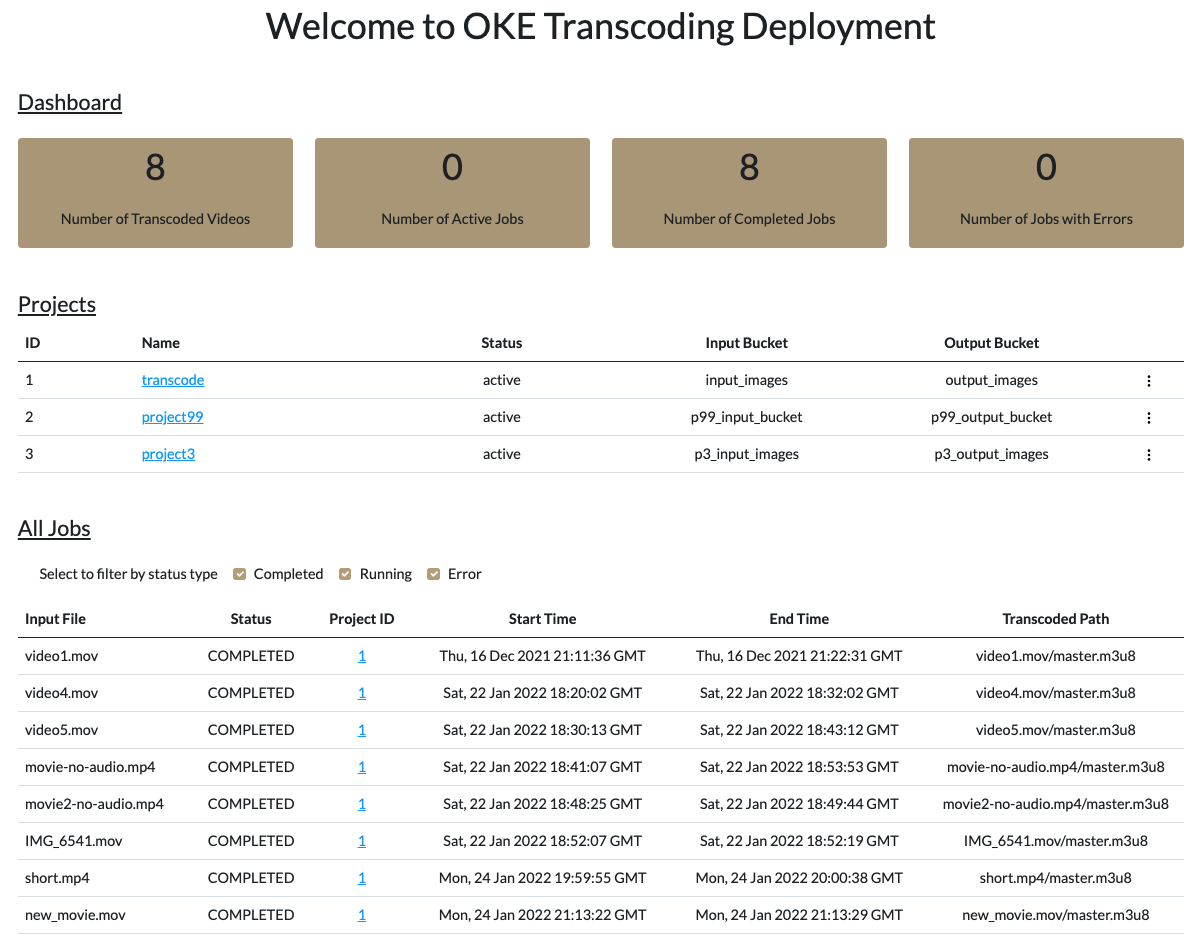
Login with the admin user credentials and you'll be redirected to the dashboard page:
SSL certificate can be updated on the staging server. To update SSL certificate replace ssl.crt and ssl.key files in /home/opc/transcoder/build directory and run:
kubectl -n transcode delete configmap ssl-config

kubectl -n transcode create configmap ssl-config --from-file ssl.key --from-file ssl.crt

kubectl -n transcode get pod | grep api
The last command will return the name of api-server pod. After that run
kubectl -n delete pod "name of api-sever pod"
A new nginx container will be automatically created and it will use the updated certificate
Transcoder REST API documentation
To destroy RM stack and delete all resources it is recommended to delete the load balancer first. SSH to the staging server and run
kubectl -n transcode delete svc --all
This command deletes the load balancer associated with the transcoder service. After that you can open RM stack in OCI console and destroy it.
This project welcomes contributions from the community. Before submitting a pull request, please review our contribution guide
Please consult the security guide for our responsible security vulnerability disclosure process
Copyright (c) 2021 Oracle and/or its affiliates.
Released under the Universal Permissive License v1.0 as shown at https://oss.oracle.com/licenses/upl/.