![]()
Warmasters (alpha-release) is the proof of concept to use Django to build a fantasy role playing game with a shop to purchase items for in-game use.
- UX
- Features
- Testing -Testing Webhooks -ngrok method -Stripe CLI method
- Deployment
- Technologies
- Tools Used
- Known Bugs
- Version Control
- Credits
Welcome to Warmasters - the alpha testing for the shopfront and user profile, game profile, and storage of items. The game is in the development stage, with the proof of concept being released in this alpha version. Users will be able to login, create a profile, create a game profile, purchase items for up and coming missions and move items between storage, bags (for missions) and trade.
Access the site: https://warmasters.herokuapp.com/

This is the fourth and final Milestone Project in Code Institute's Fullstack Development program. The purpose of this project was to create an e-commerce site using the Django framework, static file hosting with AWS, and a functional payment system with Stripe. The e-commerce section of the site is fully functional, Stripe payments and webhooks are operational and all static files, including media (images) are located at Amazon Web Services (AWS). The site is ready for the second alpha phase, setting up the game play. This will still use Django's framework.
The site's frontend and payment system was inspired by Code Institute's Boutique Ado project: Boutique Ado Code
Table 1: User Stories for Customers at Warmasters
| A gamer would like to: | So the gamer can: | Page(s) associated: |
|---|---|---|
| Browse for products to use in the game | Purchase products to use in game | https://warmasters.herokuapp.com/products/ |
| Register using email or Google accounts | Easily access an account and receive an email to confirm registration | https://warmasters.herokuapp.com/accounts/social/signup/ |
| Login to an account using email or Google (dependent on registration method) | Keep logged in permanently with a "remember me" checkbox | https://warmasters.herokuapp.com/accounts/login/ |
| Search products | Choose products best suited for the game mission | https://warmasters.herokuapp.com/products/?q=sword |
| Filter products based on categories | Sort through items that are needed for a mission | https://warmasters.herokuapp.com/products/?q=sword&sort=price&direction=asc |
| Filter products by price | Game on a budget | https://warmasters.herokuapp.com/products/?sort=price&direction=asc |
| Filter products based on an admin rating | Choose products that will serve best in a mission | https://warmasters.herokuapp.com/products/?sort=rating&direction=asc |
| Sort products by their name | Find products based on a name | https://warmasters.herokuapp.com/products/?sort=rating&direction=asc |
| Read product descriptions | Get a better understanding of the purpose of the item | https://warmasters.herokuapp.com/products/33/ |
| See special offers | Get a free gift with purchases over a set price | https://warmasters.herokuapp.com/ |
| Buy a product for in game use and view in a shopping cart before purchase | Use the item during game play | https://warmasters.herokuapp.com/bag/ |
| Update the number of items in the shopping cart before purchase | Purchase more items needed for game play | https://warmasters.herokuapp.com/bag/ |
| Pay by using a credit card in from a safe and reputable source | Instantly purchase game items and have them delivered to the game profile | https://warmasters.herokuapp.com/checkout/ |
| Buy a product and have the item delivered instantly to the game profile | Login to their account to have the item delivered to their storage | https://warmasters.herokuapp.com/game/game_item_storage/ |
| Create a profile | Return and purchase items without needing to fill in details again | https://warmasters.herokuapp.com/profile/ |
| Create a game profile | Use an in-game profile to have items delivered to instantly | https://warmasters.herokuapp.com/game/make_profile/ |
| Create a character | Make a character to use during play based on one of four mythical characters | https://warmasters.herokuapp.com/game/create_character/ |
| Update profile information | Keep up to date data | https://warmasters.herokuapp.com/profile/ |
| View previous purchases | See purchase history on the profile | https://warmasters.herokuapp.com/profile/ |
| Receive an email confirming a purchase | Have a receipt and confirmation of purchase in an email | *Purchase an item and have the email sent |
| See items in storage, bag or trade locations | Use the items in an appropriate location | https://warmasters.herokuapp.com/game/game_item_bag/ https://warmasters.herokuapp.com/game/game_item_storage/ https://warmasters.herokuapp.com/game/game_item_trade/ |
- Table 1 provides details of customer's wants and outcomes with the associated page links.
Table 2: Admin Stories for site administrators at Warmasters -- note: some pages may not be accessible without being an administrator or superuser. Request access via email
| An admin would like to: | So the admin can: | Page(s) associated: |
|---|---|---|
| Add/Update/Delete a product | Keep the store up to date with the latest items for missions - only admins have access to these features | https://warmasters.herokuapp.com/products/add/ -- delete and edit can be done from the product page: https://warmasters.herokuapp.com/products/ (only viewable when logged in as an administrator) |
- Table 2 details the types of actions an administrator can do from the website, however, all administrators will also have access to the database through Django's admin panel.
All new game items' images are added to AWS automatically. Currently the administration page is located at the default Django admin link. This will be altered during beta release as a security measure.
The original urls.py location for the Django administration panel:
path('admin/', admin.site.urls),
This will be updated to a random key and administrators will need to bookmark the page.
Following the user stories, wireframes were drawn to provide a starting point and guidance throughout the development process. Some minor changes occurred based on new outcomes and limitations in the code.
Image 1: The game profile page on desktop
 Image 2: The game profile page on mobile

Other wireframes: All pages are set up to mimic one and other, even in the game and shop pages. The backpack, storage and trade pages are identical except the headings.
Image 2: The game backpack/storage/trade page on mobile
 Image 3: The products page on mobile
 Image 4: The user profile page on mobile

Image 5: The game backpack/storage/trade page on desktop
 Image 6: The products page on desktop
 Image 7: The user profile page on desktop

The application was built using Bootstrap and its responsive grid system with a mobile-first precedent. The font, colours and design were all to give a dark fantasy feel about the site. Colours were chosen to best suit those with colour deficiency vision.
One Google Font was used throughout the site; Medieval Sharp: https://fonts.google.com/specimen/MedievalSharp?preview.text_type=custom The site also uses Fontawesome icons throughout.
Colours were chosen to best reflect the dark fantasy theme that the site was portraying. This includes the colour of text, background, imagery, overlays and headers.
 - Background - #555
 - Overlay - #4e342e
 - Product badges - #212529
 - Button hover effect - #b71c1c
 - Horizontal rule - #dce775
 - Text headings - #ffea00
 - Light coloured text - #e0e0e0
 - Darker coloured text -#bdbdbd
 - Lime coloured text - #c6ff00
- Flame icons - #b71c1c
 - All Auth forms (login) - #6c757d
 - Placeholder text - #aab7c4
 - Border colours on forms - #222
 - Text info - #17a2b8
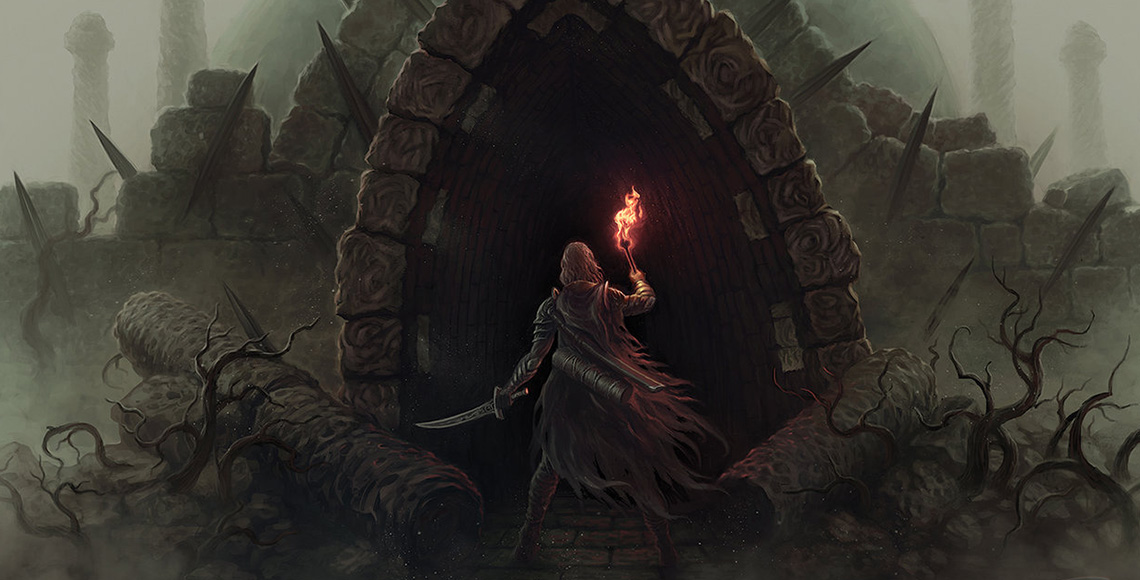
- The first thing a user will see when entering the site is a large full-cover background picture depicting a lone warrior about to enter a dungeon (source: https://theinnergamer.net/wp-content/uploads/2017/03/what-is-dungeons-dragons.jpg)
- A large banner spreading the width of the page with red flame icons indicate a current special on purchases
- A large welcome and button with "Login to Play" or "Fight Now" (dependent on login status respectively) is displayed
- Users can access all products in the top navigation banner and access their own game profile through the "Fight Now" button or on the user My Account navigation icon
- Users can search through the Warmaster's site for items that are available to purchase
- Products are shown with an image against a white card background and a large "Add to Bag" button located bottom left
- Administrators will have access to Edit and Delete options on products
- Product images link to the product detail page where a product description is also available
- Products all display:
- Product Image
- Product Name
- Price (in $US)
- Category tag
- Add to Bag button
- Star rating (set by admin)
- If admin:
- Edit button
- Delete button
- If admin:
- Clicking on "add to bag" brings up a toast which allows a user to go their bag and adjust their purchase accordingly
- Scroll to top function located bottom right as an arrow
- A larger, clickable display picture
- A modal displaying the picture of the item
- Name of item
- Price of item
- Decorated with a fantasy map background
- Name of item
- Price (in $US)
- Category tag
- Add to Bag button
- Star rating (set by admin)
- Full description
- Quantity to add to bag
- Return to shop page button
- Add to bag button
- User's name displayed at the top
- Your information updatable form
- Phone number
- Address
- Address 2
- Town or city
- County, state, or locality
- Postal code
- Country
- Update Information button
- Order history (right hand panel on large screens)
- Order number
- Date
- Item name
- Quantity
- Order total
- Clickable order number with ink to the order
- Login via email or Google account
- Sign up with email, an encrypted password is stored for security
- Sign up with Google, no password required
- Notifies user when empty
- Displays:
- Product image
- Product name
- Price
- Updatable quantity
- Subtotal
- Remove item
- Bag total
- Grand total
- Link to secure checkout or back to shopping
- User information form:
- Name
- Phone number
- Country
- Card information (secured by Stripe)
- Order summary:
- Product image
- Item name
- Quantity
- Subtotal
- Order total
- Free gift (if applicable)
- Grand total
- Complete order button or back to shopping
- Character profile
- Link to:
- Backpack
- Items in backpack
- Move or delete items
- Storage
- Items in storage
- Move or delete items
- Trade
- Items in trade
- Move or delete items
- Backpack
- On product pages, an administrator has additional links to edit a products information or delete the product from the shop
- Administrators have access to Django's Admin Panel
This site is in an alpha production phase and currently is standing as a proof of concept. The game page will lead to missions which will allow the user to utilise their purchased items and build an army to adventure through a fantasy world designed fully by the imagination of the author.
Users may be able to purchase physical game-paraphernalia and fan products, this will require using Stripe's already implemented address system check-up.
A trading post will be set up where users can purchase other user's equipment and items using gold they have earned in the game or purchased from the shop. Users will be restricted in bag size, storage size and the amount of items they can have in their trading post. The code is there for the limitation of size already, however, code to allow for the increase in size is in the next phase of coding. Users wil be able to purchase bigger backpacks, storage areas and more items able to be traded. Items currently have a weight and size associated with them. This will form part of the limits in the backpack for instance (both size and weight).
A friend system will be implemented too, so users can follow their friends and join in battles as well as missions together.
Testing was done manually throughout the development process. The full rundown of the testing can be found here.
Additionally, all code was validated in the following ways:
HTML - All pages were successfully run through the W3C HTML Validator to ensure compliance with the standards set by the W3C. Some errors unavoidably occur due to common ID names which are re-used according to Django. For instance this allows users to be either on a mobile or desktop device and still have access to identical features. A second set of errors were generated from Django's built in code, especially for log in purposes. This was subsequently ignored and no further changes were necessary.
CSS - CSS validation with the W3C Jigsaw Validator returned some expected and necessary flags from vendor extensions. Other than that, the code complies to the W3C standards.
Python - All Python code was checked using VS Code's PyLinter. Some "no 'objects' member" errors occurred in the linter. On careful scrutiny and consultation with Django experts, this flag is picked up by the linter, but is not an error and can be ignored. Other linters, specialized in Django, can be installed and used which will not pick up and flag these as an error.
1. For a Windows based VS Code download the ngrok zip file from ngrok
2. Unzip and run ngrok anywhere (it's stand-alone)
3. type ngrok.exe http [your local server port] (this project was using either 5000 or 8000 for the port depending if other applications were open at the time)
4. Get the https address that is assigned to you
5. Add that to the hosts in: settings.py - ALLOWED_HOSTS = [your_number_here.ngrok.io"]
6. Add your Webhook to Stripe the same way as the video for eg: https://your_ngrok_site.ngrok.io/checkout/wh/
7. Send a webhook following the video and check the terminal for success!
Download the latest Stripe CLI and put it in an easy directory to access on your main computer drive

The following is for Windows based computers:

To install the Stripe CLI on Windows:

1. Download the latest windows zip file from https://github.com/stripe/stripe-cli/releases/latest
2. Unzip the stripe_X.X.X_windows_x86_64.zip file
3. Run the unzipped .exe file in your terminal

From there follow the instructions: https://stripe.com/docs/stripe-cli/webhooks#forward-events
Before deploying the application, ensure the following are installed (production was completed using VSCode):
- Python 3
- PIP
- Git
- Heroku CLI
- Stripe CLI (if using the Stripe CLI method for testing webhooks)
The application relies on the following services, and accounts will have to be created for them:
- Amazon AWS
- Stripe
- An email account, GMail is ideal as it is reliable and easy to set up.
These are the steps to deploy Warmasters locally.
- From the application's repository, click the "code" button and download the zip of the repository.
Alternatively, you can clone the repository using the following line in your terminal:
git clone https://github.com/pauld0051/warmasters
- Access the folder in your terminal window and install the application's required modules using the following command:
python -m pip -r requirements.txt
- Create a file containing your environmental variables called
env.pyat the root level of the application. It will need to contain the following lines and variables:
import os

os.environ.setdefault('DEVELOPMENT', 'True')
os.environ.setdefault('SECRET_KEY', '[YOUR_SECRET_KEY]')
os.environ.setdefault('STRIPE_PUBLIC_KEY', '[YOUR_STRIPE_PUBLIC_KEY]')
os.environ.setdefault('STRIPE_SECRET_KEY', '[YOUR_STRIPE_SECRET_KEY]')
os.environ.setdefault('STRIPE_WH_SECRET', '[YOUR_STRIPE_WEBHOOK_SECRET_KEY]')
os.environ.setdefault('EMAIL_HOST_USER', '[YOUR_EMAIL]')
os.environ.setdefault('EMAIL_HOST_PASS', '[YOUR_EMAIL_SECRET_KEY]')
os.environ.setdefault('DEFAULT_FROM_EMAIL', '[YOUR_EMAIL]')
# If Deployed on Heroku using Postgres:
os.environ.setdefault('DATABASE_URL', '[YOUR_POSTGRES_KEY]')
Please note that you will need to update the SECRET_KEY with your own secret key, as well as the Stripe keys and secret variables with those provided by those applications.
If you plan on pushing this application to a public repository, ensure that env.py is added to your .gitignore file to protect your secrets.
- The application can now be run locally. In your terminal, type the command
python manage.py runserver. The application will be available in your browser at the addresshttp:127.0.0.1:8000. The admin panel can be located athttp:127.0.0.1:8000/admin/.
To deploy Warmasters to Heroku, use the following steps:
- In Heroku create a new application.
- From the Heroku dashboard of your application, click on "Deploy", then "Deployment method" and select GitHub to connect the application to your github repository.
- In the Heroku Resources tab, navigate to the Add-Ons section and search for Heroku Postgres. The hobby level can be selected for this application.
- Click on the "settings" tab and on the button labelled "Reveal Config Vars". The Postgres addon will have created a link to the Postgres database.
- Add the following configuration variables to the application:
| Variable | Value |
|---|---|
| AWS_ACCESS_KEY_ID | Access key provided by AWS |
| AWS_SECRET_ACCESS_KEY | Secret access key provided by AWS |
| USE_AWS | True |
| DATABASE_URL | Your Postgres URL provided by the addon |
| DEFAULT_FROM_EMAIL | Your email address you're sending from |
| EMAIL_HOST_PASS | Secret key supplied by email provider |
| EMAIL_HOST_USER | Your email address (probably the same as DEFAULT_FROM_EMAIL) |
| SECRET_KEY | Django's secret key (use https://djecrety.ir/) |
| STRIPE_PUBLIC_KEY | Stripe's public key for testing purposes |
| STRIPE_SECRET_KEY | For access to Stripe's services use the key provided |
| STRIPE_WH_SECRET | For Stripe's webhooks, use the key provided |
- In the Heroku dashboard, deploy the application.
- To view the site, click "View App"
- HTML
- CSS
- JavaScript / jQuery
- Python
- Django
- Github
- VS Code
- Pencil
- Heroku
- Windows Snip and Sketch
- Windows Paint
- Windows Paint 3D
- FontAwesome
- Google Fonts
- Favicon-converter
- 1001freefonts
- Privacy policy
- Terms and Conditions
In order to get Stripe's webhooks to operate correctly a series of hidden fields were added to the base code in the form to allow input of street address1, street address2, country, and postcode. These are hidden on the template through the forms.py using: self.fields['[field_name]'].widget = forms.HiddenInput()
Django's secret key generator: https://djecrety.ir/
To use the amiresponsive site you need to allow "clickjacking" according to Django Docs: https://docs.djangoproject.com/en/3.1/ref/clickjacking/
For this case the middleware clickjacking line remains in the main app's settings.py file:
MIDDLEWARE = [
    ...
    'django.middleware.clickjacking.XFrameOptionsMiddleware',
    ...
]
In the views.py for the index/home page:
from django.views.decorators.clickjacking import xframe_options_exemptAnd above the function:
@xframe_options_exempt
A fill list of all commits to Github can be found here: https://github.com/pauld0051/warmasters/blob/master/readme/version-control.pdf
- Warmasters logo font: Medieval Sharp
- Modal Header and Footer map images:
- Background image: what-is-dungeons-dragons
- The site was inspired by the amazing work of Code Institute's Chris Z
- Code Institute's Tutor team gave tireless help and always made an effort to see that the job they started was finished! It wasn't possible without them
- Django's "beginners" Discord channel's users provide countless hours of expertise and help
- Felipe Alarcon for his amazing feedback, help and calming nature when needed
- Lorne Ashley a Code Institute student who understands the struggles and the code!
- All the students in the Slack Channel for May 2020 start and their help in testing, support and advice