The goals / steps of this project are the following:
- Use the simulator to collect data of good driving behavior
- Build, a convolution neural network in Keras that predicts steering angles from images
- Train and validate the model with a training and validation set
- Test that the model successfully drives around track one without leaving the road
- Summarize the results with a written report
Here I will consider the rubric points individually and describe how I addressed each point in my implementation.
###Files Submitted & Code Quality
####1. Submission includes all required files and can be used to run the simulator in autonomous mode
My project includes the following files:
model.pycontaining the script to create and train the modeldrive.pyfor driving the car in autonomous modemodel.h5containing a trained convolution neural networkREADME.mdsummarizing the results
####2. Submssion includes functional code Using the Udacity provided simulator and my drive.py file, the car can be driven autonomously around the track by executing
python drive.py model.h5####3. Submssion code is usable and readable
The model.py file contains the code for training and saving the convolution neural network. The file shows the pipeline I used for training and validating the model, and it contains comments to explain how the code works.
###Model Architecture and Training Strategy
####1. An appropriate model architecture has been employed
My model consists of a convolution neural network with 3x3 filter sizes and depths between 32 and 128 (model.py lines 12-43). See next sections for a detail description of the final model.
The model uses ReLU for the nonlinearity, input images are normalized before being fed to the model.
####2. Attempts to reduce overfitting in the model
The model was intentionally kept small (~30K parameters) to avoid heavy overfitting. I didn't try dropout for data collected in the first track.
The model was trained and validated on different data sets to ensure that the model was not overfitting
(data_reader.py lines 22-23, model.py lines 63-68).
The model was tested by running it through the simulator and ensuring that the vehicle could stay on the track.
####3. Model parameter tuning
The model used Nadam optimizer, so the learning rate was not tuned manually (model.py line 54).
####4. Appropriate training data
Training data was chosen to keep the vehicle driving on the road. I used a combination of center lane driving, recovering from the left and right sides of the road.
For details about how I created the training data, see the next section.
###Model Architecture and Training Strategy
####1. Solution Design Approach
The overall strategy for deriving a model architecture was to learn the mapping between input image of the center camera to the steering angle. The throttle, brake and speed are not considered. We cast this into a regression problem where the model is trained to output the steering angle, given the input image of the center camera.
My first step was to use a convolutional neural network model. This is well-fitted because the convolutional filters in CNNs are designed to capture the visual features exhibit in the input images.
As a default start, I added BatchNorm to every layer of the architecture, thinking that it would help because I didn't
normalize the data to zero-mean and unit-variance (I only normalize them to the [-0.5, 0.5] range). But then I realized
that BatchNorm doesn't do any significant improvement to learning (probably because my model is not too deep),
while it increases the inference time. So I removed BatchNorm at the end.
Also as a default option, I used SGD with Momentum, with initial learning rate 0.01, momentum = 0.9 and decay factor = 0.8.
However with SGD, the model learns very slowly after 2 epochs. The reason was because keras reduce the learning rate
by the decay factor after every update, so with a decay rate of 0.8, probably after a few epochs, the learning rate
already becomes very small. This is surprising for me because I expected keras to reduce the learning rate only after
each epoch.
Anyway, I switched to Nadam and I don't have to tune the learning rate anymore.
I started with the original input image size of 160 x 318 x 3 (I removed the first and last columns in the images, so the size of the convolutional layers fit better), and a pretty big model (around 1024 convolutional filters and 2 fully-connected layers of size 1024). The model was able to fit both the training and validation sets well, so I thought this was easy.
Unfortunately, it does poorly when driving in autonomous mode. My suspection was because my laptop doesn't have GPUs,
so when the model is big, it takes more time to evaluate. This leads to slow respond time when driving in autonomous mode.
For every frame, the drive.py script took about 0.09 seconds to process, and I thought this is unreasonably high.
I then down-sample the input image to 80 x 160 x 3, reduce the model size significantly. On my laptop, it only takes 0.015 seconds to do inference for each frame, which is more reasonable.
However, the vehicle still fails at the first difficult turn. I realized I need to augment the dataset. I was able to make the dataset 6 times bigger using techniques described in the last section.
Keeping the model size the same and train it again on the augmented dataset, the vehicle is able to drive autonomously around the track without leaving the road.
####2. Final Model Architecture
The final model architecture (model.py lines 12-43) consisted of a convolution neural network with the following layers and layer sizes:
- Input: 80 x 160 x 3
- Convolutional: 32 filters of size 3 x 3, stride 1 x 2
- Max-pooling: 2 x 2, stride 2 x 2
- Convolutional: 64 filters of size 3 x 3, stride 2 x 2
- Max-pooling: 2 x 2, stride 2 x 2
- Convolutional: 64 filters of size 3 x 3, stride 2 x 2
- Max-pooling: 2 x 2, stride 2 x 2
- Convolutional: 128 filters of size 2 x 2
- Dense: 128 units
- Dense: 128 units
- Output: 1
The total number of parameters is around 34K.
At the time of writing this, I realize that I accidentally put ReLU right after Convolutional layer (I believe the standard is Conv -> Pooling -> Non-linearity) but since max-pooling and ReLU are commutative, the results should be the same.
####3. Creation of the Training Set & Training Process
To capture good driving behavior, I first recorded two laps on track one using center lane driving. Here is an example image of center lane driving:

The images from the left and right cameras are also recorded by the simulator (I use the beta simulator on MacOS). Those images record the left side and right sides of the road back to center so that the vehicle would learn to recover from the rear of the road:


To augment the data set, I also flipped images and angles thinking that this would increase the diversity of the dataset. For example, here is an image that has then been flipped:

After the collection process, I had around 8000 number of data points.
For the images collected from the left and right images, the steering angle of those are computed from the correct steering angle as follows:
add_image(center, steering)
add_image(center[:, ::-1, :], -steering)

if steering < 0:
    # left turn
    # we do a soft left turn for the image on the left, and hard left turn for image on the right
    add_image(left, steering * 0.9)
    add_image(left[:, ::-1, :], -steering * 0.9)
    add_image(right, steering * 1.1)
    add_image(right[:, ::-1, :], -steering * 1.1)
else:
    # right turn
    # we do a soft right turn for the image on the right, and hard right turn for image on the left
    add_image(left, steering * 1.1)
    add_image(left[:, ::-1, :], -steering * 1.1)
    add_image(right, steering * 0.9)
    add_image(right[:, ::-1, :], -steering * 0.9)
Using this technique, I was able to obtain around 6 * 8000 = 48000 data samples.
They are finally randomly shuffled, and 20% of them go to the validation set.
I used this training data for training the model. The validation set helped determine if the model was over or under fitting. The model seems to converge after 5 epochs, but I use 10 epochs, and record the best model on the validation set.
Batch size has always been kept at 64.
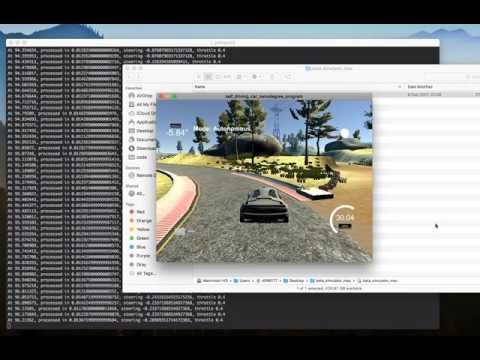
This is a recording of the vehicle in the autonomous mode with throttle = 0.2:

With throttle = 0.4, it fluctuates a bit in the beginning, but gets more stable in the second lap (or maybe because my machine was spending resource on something else in the beginning):