Getting started Board
The pygamelib must be installed on your computer. This tutorial apply to version 1.2.990 and above (1.3+).
You need to know how to execute a python program and/or to start the interactive Python terminal.
In the pygamelib, the board is a particularly important object. It is the base for a level. In the tabletop game of chess, it would be the chess board: it is the universe in which all pieces evolve.
The Board in the pygamelib is slightly more complex than a chess board though. It can hold many "objects" (we will define that notion) and do some operations on said objects. It also enforce constraints (not moving out of the boundaries of the board for example).
Let's see that in details.
The board offers the basic features to manage the game area:
- Create a board of any size.
- Customize it's look and feel.
- Place and remove objects.
- Move objects that can be moved (movable objects).
- Manage overlapping.
- Dispay the board (in its entirety or just part of it).
There is a bit more to it but that's the main features.
Important: The pygamelib displays in the terminal, so when the Board displays itself it displays printable and non printable characters in the terminal too. Most terminal uses monospace fonts to display the terminal. Monospace letters are are not square but rectangle. This means than a character's width is only half its height. So creating a board of 20 cells by 20 cells will actually looks like a rectangle map, not a square as you may think. We have a way of dealing with that but it requires some discipline from the developer. You have been warned
We will start by editing a board by hand but you should probably know that the pygamelib comes with an editor that allows for easy Board creation and edition. We won't cover the editor in that document.
First, you can test the code that we are writing here either with the interactive interpreter or by writing this code in a text file.
If you save your code in a file, you need to move to the directory of the file (cd <directory>) and then invoke python to run your script:
> python my_script.pyIf you want to use the interactive python shell just type python in a terminal window.
For the rest of this tutorial we will use the interactive shell.
The first thing you need to know is how to create a Board. It can be very easy, actually as simple as Board(). but let's dig a bit more in that.
Before being able to use the pygamelib objects, you need to import them so python knows what they are.
> python
Python 3.9.1 (default, Dec  8 2020, 00:00:00)
[GCC 10.2.1 20201125 (Red Hat 10.2.1-9)] on linux
Type "help", "copyright", "credits" or "license" for more information.
>>> from pygamelib import engine
>>>
The import is done by typing:
from pygamelib import engineNow the engine module of the pygamelib is imported. We can now use Board :
>>> my_board = engine.Board()
>>>
Nothing seemed to happens but we actually created a Board. You can check that by typing:
>>> my_board
<pygamelib.engine.Board object at 0x7f080a948a60>
This obscure feedback tells us that my_board is a pygamelib.engine.Board object (and is located in the memory at the address 0x7f080a948a60 but don't mind that for now).
But how do we see the created board? Well, that's actually very easy:
>>> my_board.display()
------------
|          |
|          |
|          |
|          |
|          |
|          |
|          |
|          |
|          |
|          |
------------
>>>
\o/ hurray!
Well, it's completly empty and not very beautiful but it works!
Now let's display the characteristics of that board:
>>> my_board.height
10
>>> my_board.width
10
>>> my_board.size
[10, 10]
>>>
As you can see the board is 10 cells by 10 cells (a square) but it is not really displaying like a square. It displays like a rectangle. and that is because of what we highlighted earlier (characters' width being half of their height). We can change that when we construct the board.
When we created the Board object, we called the constructor without any parameters, but it can actually take a lot of parameters to customize the board to your needs.
One obvious change that we could make is to have default characters that takes twice the space. Right now the board's default "model" is a space character (i.e: " "). What happens if we tell the Board to use a double space instead?
Well, let's try that! The Board object has many attributes that can be changed either dynamically or during the construction of the instance:
- name (str) – the name of the Board
- player_starting_position (list) – coordinates at which Game will place the player on change_level().
- ui_border_left (str) – A string that represents the left border.
- ui_border_right (str) – A string that represents the right border.
- ui_border_top (str) – A string that represents the top border.
- ui_border_bottom (str) – A string that represents the bottom border.
- ui_board_void_cell (str) – A string that represents an empty cell.
- parent (Game) – The parent object (usually the Game object). than 80 rows and columns.
- DISPLAY_SIZE_WARNINGS (bool) – A boolean to show or hide the warning about boards bigger than 80 rows and columns.
This is straight from the API documentation. We will see more about the attributes over time. For now, let's focus on ui_board_void_cell. This is the parameter that controls how an empty cell is represented. You can see its current value by doing this:
>>> my_board.ui_board_void_cell
' '
>>>
So right now it is a single space character, let's make it a double and see what happens:
>>> my_board.ui_board_void_cell = "  "
>>> my_board.display()
------------
|                    |
|                    |
|                    |
|                    |
|                    |
|                    |
|                    |
|                    |
|                    |
|                    |
------------
>>>
Our board now looks like a square but the borders don't fit. So let's change that too:
>>> my_board.ui_border_top = '--'
>>> my_board.ui_border_bottom = '--'
>>> my_board.display()
------------------------
|                    |
|                    |
|                    |
|                    |
|                    |
|                    |
|                    |
|                    |
|                    |
|                    |
------------------------
>>>
It almost looks like what we want but we still have a issue: now our left and right border are single characters so our top and bottom border "spills". Well, we can solve that too.
>>> my_board.ui_border_left = '| '
>>> my_board.ui_border_right = ' |'
>>> my_board.display()
------------------------
|                      |
|                      |
|                      |
|                      |
|                      |
|                      |
|                      |
|                      |
|                      |
|                      |
------------------------
Now it looks like a square. But that was a lot of work and it actually looks very blunt... Let's introduce the color rectangle and squares that we can draw in the terminal. To do that we are going to need to import the pygamelib.assets.graphics module.
The graphics module is an asset bundled with the library that allows for a common set of unicode characters to be used in the library easily (i.e: without knowing their codes...).
So let's import that module and create a new board:
>>> from pygamelib import engine
>>> from pygamelib.assets import graphics
>>> new_board = engine.Board(ui_borders=graphics.WHITE_SQUARE, ui_board_void_cell=graphics.BLACK_SQUARE)
>>> new_board.display()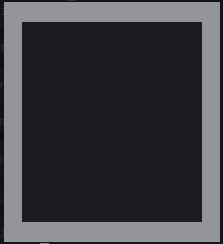
As you can see it already looks much more like a square board. Please note that ui_borders was not part of the list of the board's attributes we saw earlier. The reason is that it can only be used in the constructor. Changing it after constructing a new Board object is not going to have any effect. Likewise size is not an attribute. You can change it after construction, but you better understand what you do or else your game is likely to crash!
Next step: let's put something in that board.
A board alone is not much fun, so we need to populate it. To do so, we can use all the items (i.e objects) from the pygamelib.board_items module.
A Board object will only accept board items. Trying to place anything else will trigger an exception (and your game will crash). The reason is very simple: the board needs to know that the objects that are placed on it have a common programing interface for management.
Important: all objects placed on a Board object must be subclass of pygamelib.board_items.BoardItem.
Fortunately, the pygamelib.board_items module is full of board items already ready for you to use. Let's start by adding some walls.
We will represent walls with blue squares and we will use pygamelib.board_items.Wall. Board items have some properties that can be configurable:
- Can the item move?
- Is it overlappable, i.e: can another item go over it?
- Is it restorable? i.e: if the item is overlappable and overlapped, when the overlapping item leaves the cell, shall we put the previous item back in place or put an empty item (BoardItemVoid).
- Is it pickable? i.e: can a Character pick the item up and put it into its inventory?
You will rarely use pygamelib.board_items.BoardItem directly. The board_items module provides a lot of pre-configured items. For example, Wall is an Immovable item that is not overlappable, not pickable and not restorable. These notions will become clearer over time. But you can intuitively infer that an object that represent a wall, is not able to move (it's a wall after all), cannot be walked over (not in a 2D environment without depth at least) and therefor does not require to be restored after being walked over.
The appearance of all items can be modified through the model attribute (or the sprixel attribute but we'll see that later).
So, let's place our blue squared wall on the Board:
>>> new_board.place_item( board_items.Wall(model=graphics.BLUE_SQUARE), 0, 5)
>>> new_board.display()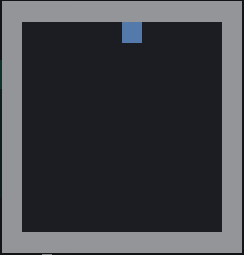
This is all fine, but it won't be much of a game without things that moves (enemies, NPC or, player). Let's add a player now. Our player will be represented by an "@-" character:
>>> new_board.place_item( board_items.Player(model="@-"), 2, 2)
>>> new_board.display()
And without too much surprise, we can now see the player on the Board:
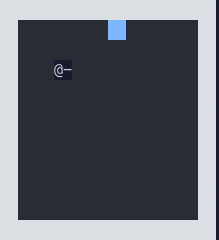
But here you can see an issue: the player does not have a background color so it is looking a bit our of place here as its background does not integrate with the board's background. To solve that issue we use "sprixels".
Briefly, a sprixel is an abstraction of a cell on the terminal. It has a model a foreground color and a background color. It is a lot more practical to manipulate than the standard ANSI sequences.
First, let's import the correct module in our interactive python terminal:
from pygamelib.gfx import coreThen let's retrieve our player and change its representation:
# This return the item at position 2,2
>>> player = new_board.item(2,2)
# Now let's create a sprixel with the same model but a different background color.
>>> player.sprixel = core.Sprixel("@-", bg_color=core.Color(40,44,52), is_bg_transparent=True)
>>> new_board.display()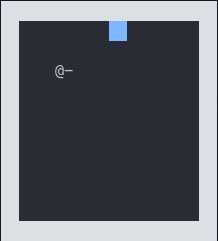
There's 2 important point here:
-
Board.item(row, column)returns the item in the cell at row,column. As it is a reference, you can modify the object and the board will display accordingly to your changes. - We use a core.Sprixel to represent the player and specify its background color to blend in the board. But we also set the
is_bg_transparentflag toTrue. This means that our player's background color is going to adapt depending on the color under it.
To illustrate this, let's talk about overlappable board items. An item has a couple of properties that alters its behavior on the map:
- overlappable: can the item be overlapped by another item (typically a door is overlappable but not a wall).
- restorable: if the item is overlappable, should it still be on the board when the overlapping item leaves the cell? Typically, a door should be restorable but a pickable treasure should not.
- pickable: can the item be picked up and put into an inventory? If a Player item is moved over a pickable objet, and has an Inventory, the Board will automatically put it into the player's inventory.
So, overlappable is a property of an item, that allows it to be overlapped by another item.
The pygamelib already has a couple of items ready to use for a specific purpose. In this case let's have a look at the Door item. A door item is a BoardItem that is already configured to be:
- Immovable: well, it cannot be moved after being placed.
- It is
overlappable. - It is
restorable. - It is non
pickable.
Let's create a Door and represent it as a red square (I promise we'll do better graphics later):
>>> new_board.place_item(board_items.Door(sprixel=core.Sprixel(" ",bg_color=core.Color(255,0,0))),2,3)
>>> new_board.display()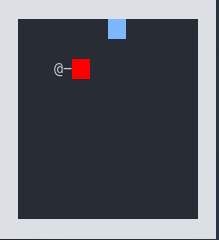
Now we have a red door in front of our player, let's see what happen when we move the player.
Obviously, items can be moved on a Board. However not every item can be moved around. Only items that inherits from Movable can be moved by a Board. Now let's be very clear: nothing prevents you from deleting an item on the board and placing it somewhere else. Even if it's not a Movable. However, to use the Board.move() method, the item that you are trying to move must be a Movable item.
The move() method does a lot more than just deleting and placing an item on the board. It checks for walls or board's borders, check the properties of an item and treat it accordingly (put pickable items into an inventory for example), etc.
This method takes 2 mandatory parameters and 1 optional. The 2 mandatory ones are:
- an item to move.
- a direction to move the item.
The optional is the number of steps to move in the given direction.
Let's talk a bit about directions, they can be of 2 types:
- A direction constant from the constants module (LEFT, RIGHT, UP, etc.).
- A 2D vector. In that case the step parameter is ignored.
Now to the code, we first need to import constants and then move the player (if step is omitted, the default value is 1):
>>> from pygamelib import constants
>>> new_board.move(player,constants.RIGHT)
>>> new_board.display()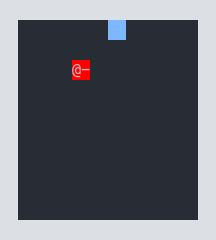
And voilà! The player is moved on the cell to the right, over the red door and his background color is automatically adjusted to match the background color of the overlapped item.
To finish, let's build a line of wall and try to move our player across that line:
>>> for row in range(1,5):
...     new_board.place_item( board_items.Wall(model=graphics.BLUE_SQUARE), row, 5)
...
>>> new_board.display()
This gives us the following modifications:
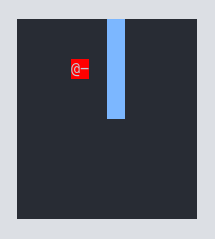
The blue squares are walls. There's only one free cell between the door and the wall, let's try to move the player across the wall:
>>> for _ in range(5):
...     new_board.move(player,constants.RIGHT)
...
>>> new_board.display()
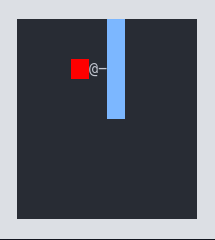
In this code we are trying to move the player 5 times to the right. But, when we look at the board the player is blocked by the wall. The move() method prevents the player from crossing the wall.
Here is a small list of useful method from the Board object:
-
get_movables/get_immovable: Return the list of all movable or immovable items. It is automatically updated for you. -
place_item: place an item on the board. -
remove_item: remove an item from the board. -
neighbors: return all the neighbors of an item in a given radius. -
item: return the item at a given coordinate. -
move: move a movable item in the given direction.
This tutorial went in quite a lot of details through a simple example. Hopefully you now understand the Board for what it is: a 2D plane to place and manage items. It has a lot of pre-built logic that helps you write you game more quickly and focus on the gameplay instead of the mechanic.
Please note that very quickly you will switch from editing your Boards by hand to using the pgl-editor. However, the editor cannot do everything for you and particularly it is not taking care of any game logic. You will need to do that yourself. Therefor you need to know how to interact with a Board to be able to do that.
In that tutorial we went through the basics of the Board object, however this is far from being the extend of the Board capabilities. Particularly in term of graphics, the pygamelib can do much much better like that:
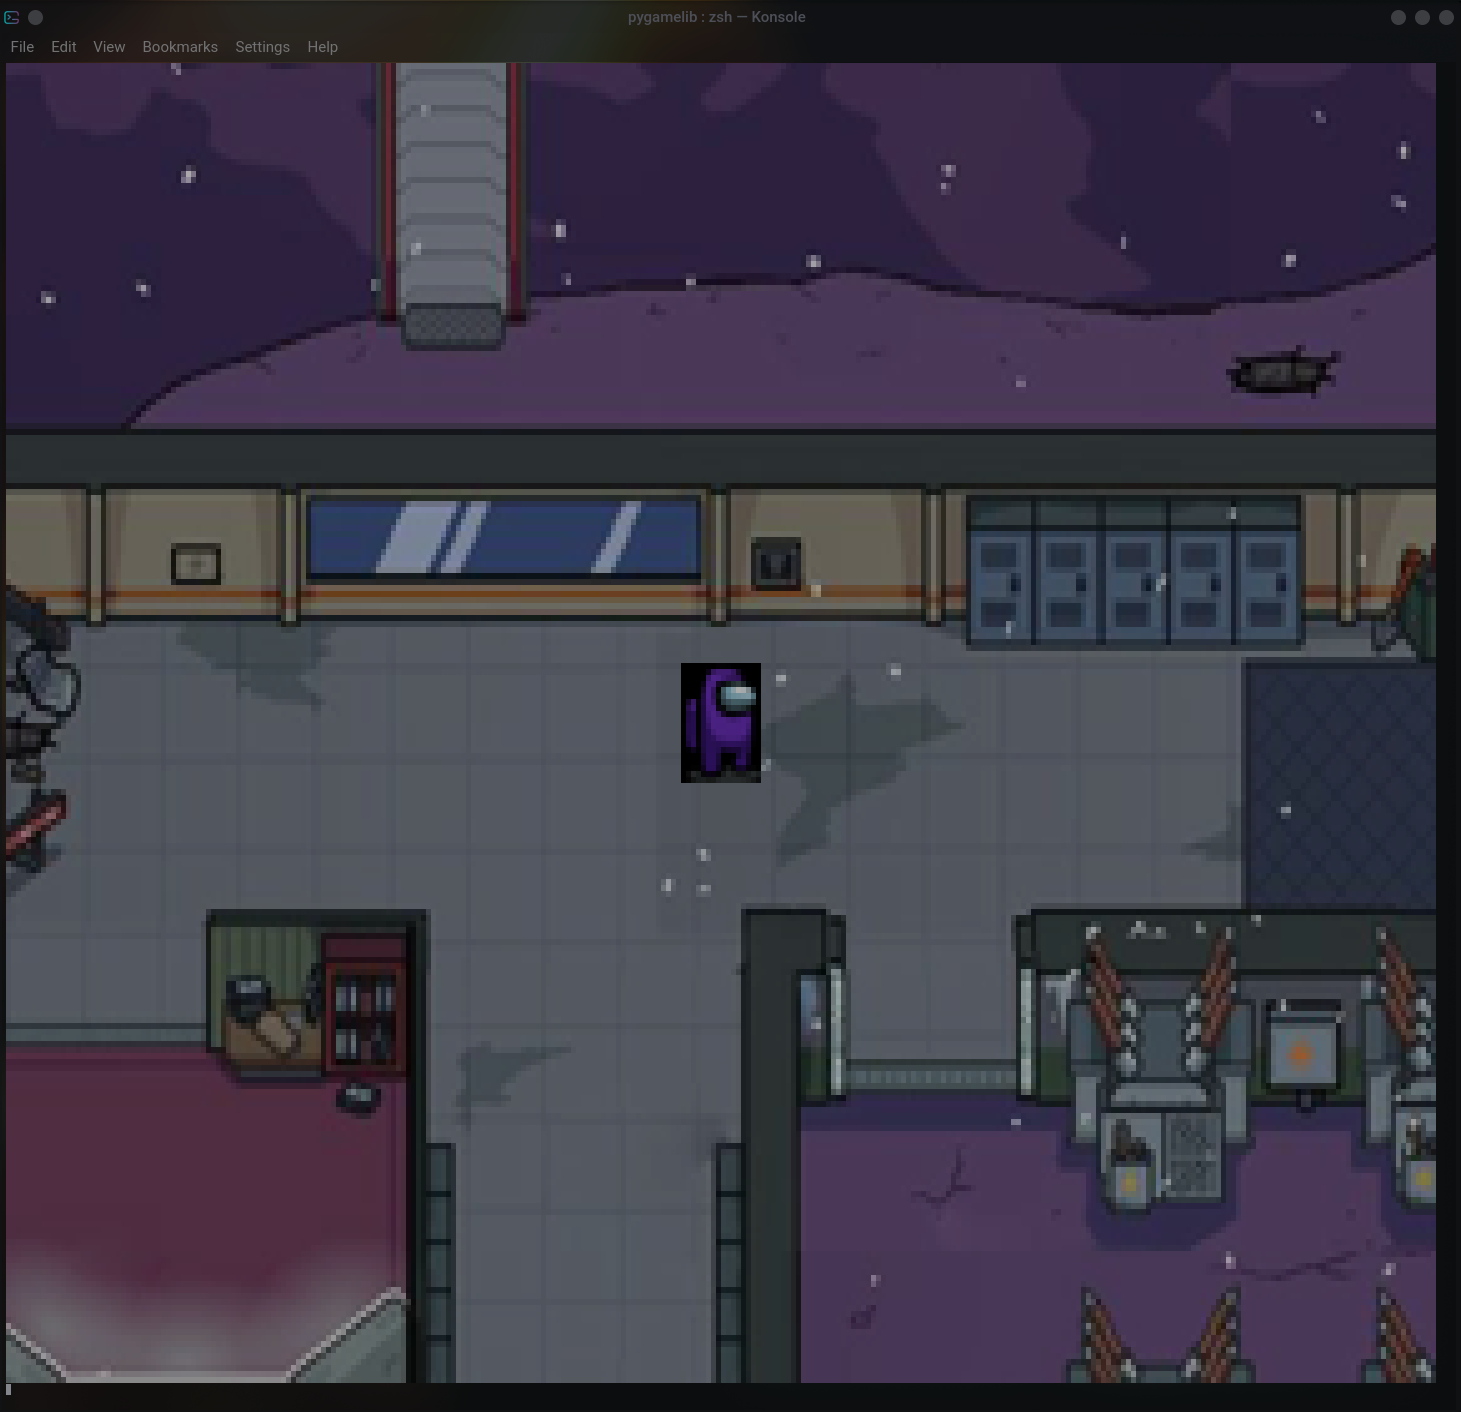
In that board, sprites are converted from a famous game (Among Us) for example (files are not available on the repository).
I'm not good with GIF...
The full documentation for the Board object is available on readthedocs.
If you have issues and want some help, you can either ask in the Discussion tab of the Github repository or come ask your question on Discord.
The next page that you should consult is the Game object.