Mac OS X development environment
This article discusses how to configure your Mac OS X to retrieve sources, build and debug such a project.
In Mac OS world, the default IDE is Xcode. The other packages are installed via Homebrew.
In Mac OS X world, the default IDE is Xcode. When you have a Mac it is free. I know plenty of people who hate it, and they have their reasons. If you know better, then use the IDE you prefer. If not, then use Xcode:
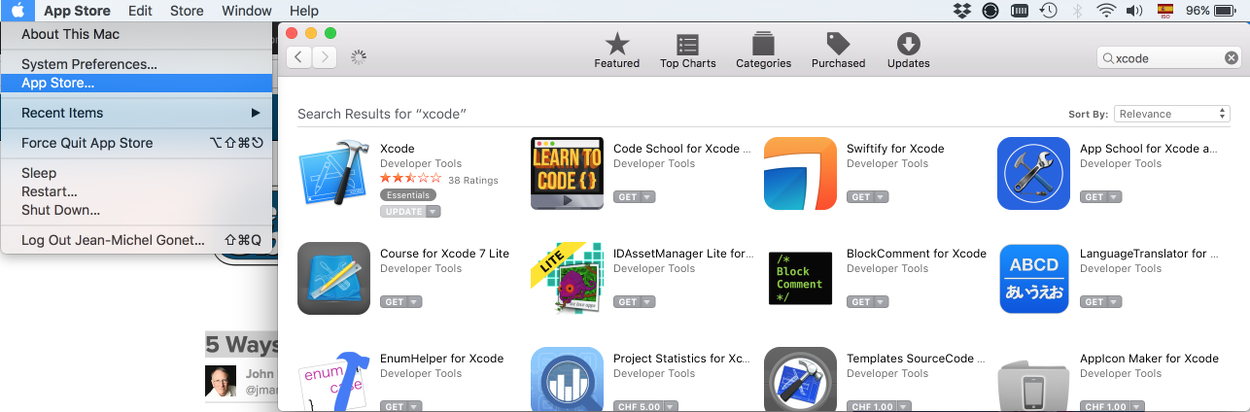
- From your Mac, open App Store.
- Browse or search Xcode.
- Get it or update it.
- At first launch, it will propose to install more things. Accept them.
Homebrew is a package manager for Mac OS X. Most often, it is the easiest way to install developer tools:
- Go visit https://brew.sh/
- Follow instructions
If you have already an installed version of Homebrew, now it is a good moment to verify, update and fix all that is needed. Following command will give you plenty of suggestions:
brew update
brew upgrade
brew doctor
Follow instructions until you have all of them fixed (well, don't get too paranoid in any case; fix all that you can).
Finally, you can remove old discarded packages with the following command:
brew cleanupThis package helps CMake to link your project to the OpenCV and GtK libraries (see Wikipedia on pkg-config).
To install it:
brew install pkg-configWhen installation is finished, you can check if all is right by typing (version number may vary):
pkg-config --version
> 0.29.2
pkg-config --list-all
> zlib                                zlib - zlib compression library
> ...                                 etc...
> ...                                 etc...
> ...                                 etc...
> harfbuzz-icu HarfBuzz text shaping library ICU integrationWe install OpenCV with third parties contributions. You won't need them at the beginning, but they won't bother you either. And we use Gtkmm3, which is the GtK for C++:
brew install opencv3 --with-contrib
brew install gtkmm3
To verify that libraries are now in place:
pkg-config --list-all | grep opencv
> opencv                              OpenCV - Open Source Computer Vision Library
pkg-config --list-all | grep gtkmm
> gtkmm-3.0 gtkmm - C++ binding for the GTK+ toolkitYou probably have it already because brew doctor requires it. It comes with Xcode selected tools, which you can verify with:
xcode-select --installTo double-check that you indeed have it (version number may vary):
git --version
git version 2.17.2 (Apple Git-113)Install it with brew:
brew install cmakeThe simplest way to build the project is to use terminal:
cd navigate/to/your/project/folder
git clone https://github.com/cpp-tutorial/raspberry-cpp-gtk-opencv.git
cd raspberry-cpp-gtk-opencv
mkdir build
cd build
cmake ../src/
make
open -a rascapp
You can replace open -a [...] by navigating to the appropriate folder with Finder and double-click the rascapp application.
If all is right, a dialog should ask your permission for the application to access the camera, and then you should see yourself in a window.
Open your terminal and type:
cd navigate/to/your/project/folder
git clone https://github.com/cpp-tutorial/raspberry-cpp-gtk-opencv.git
cd raspberry-cpp-gtk-opencv
mkdir xcode
cd xcode
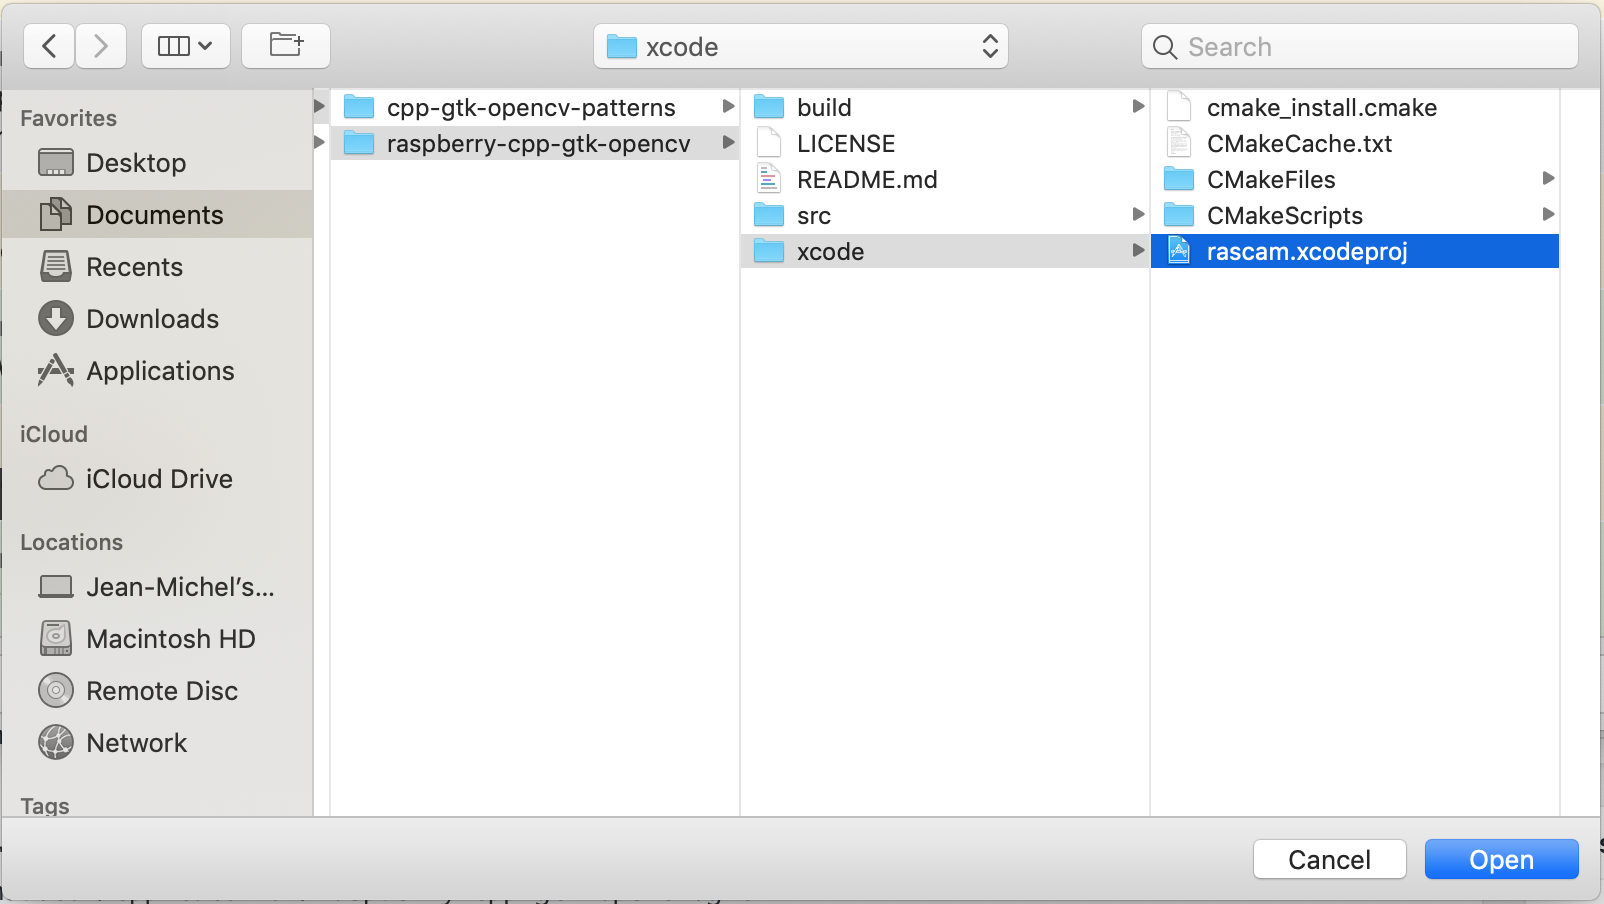
cmake -GXcode ../src/Open Xcode, go to the main menu and File → Open..., and look for the rascam.xcodeproj file:
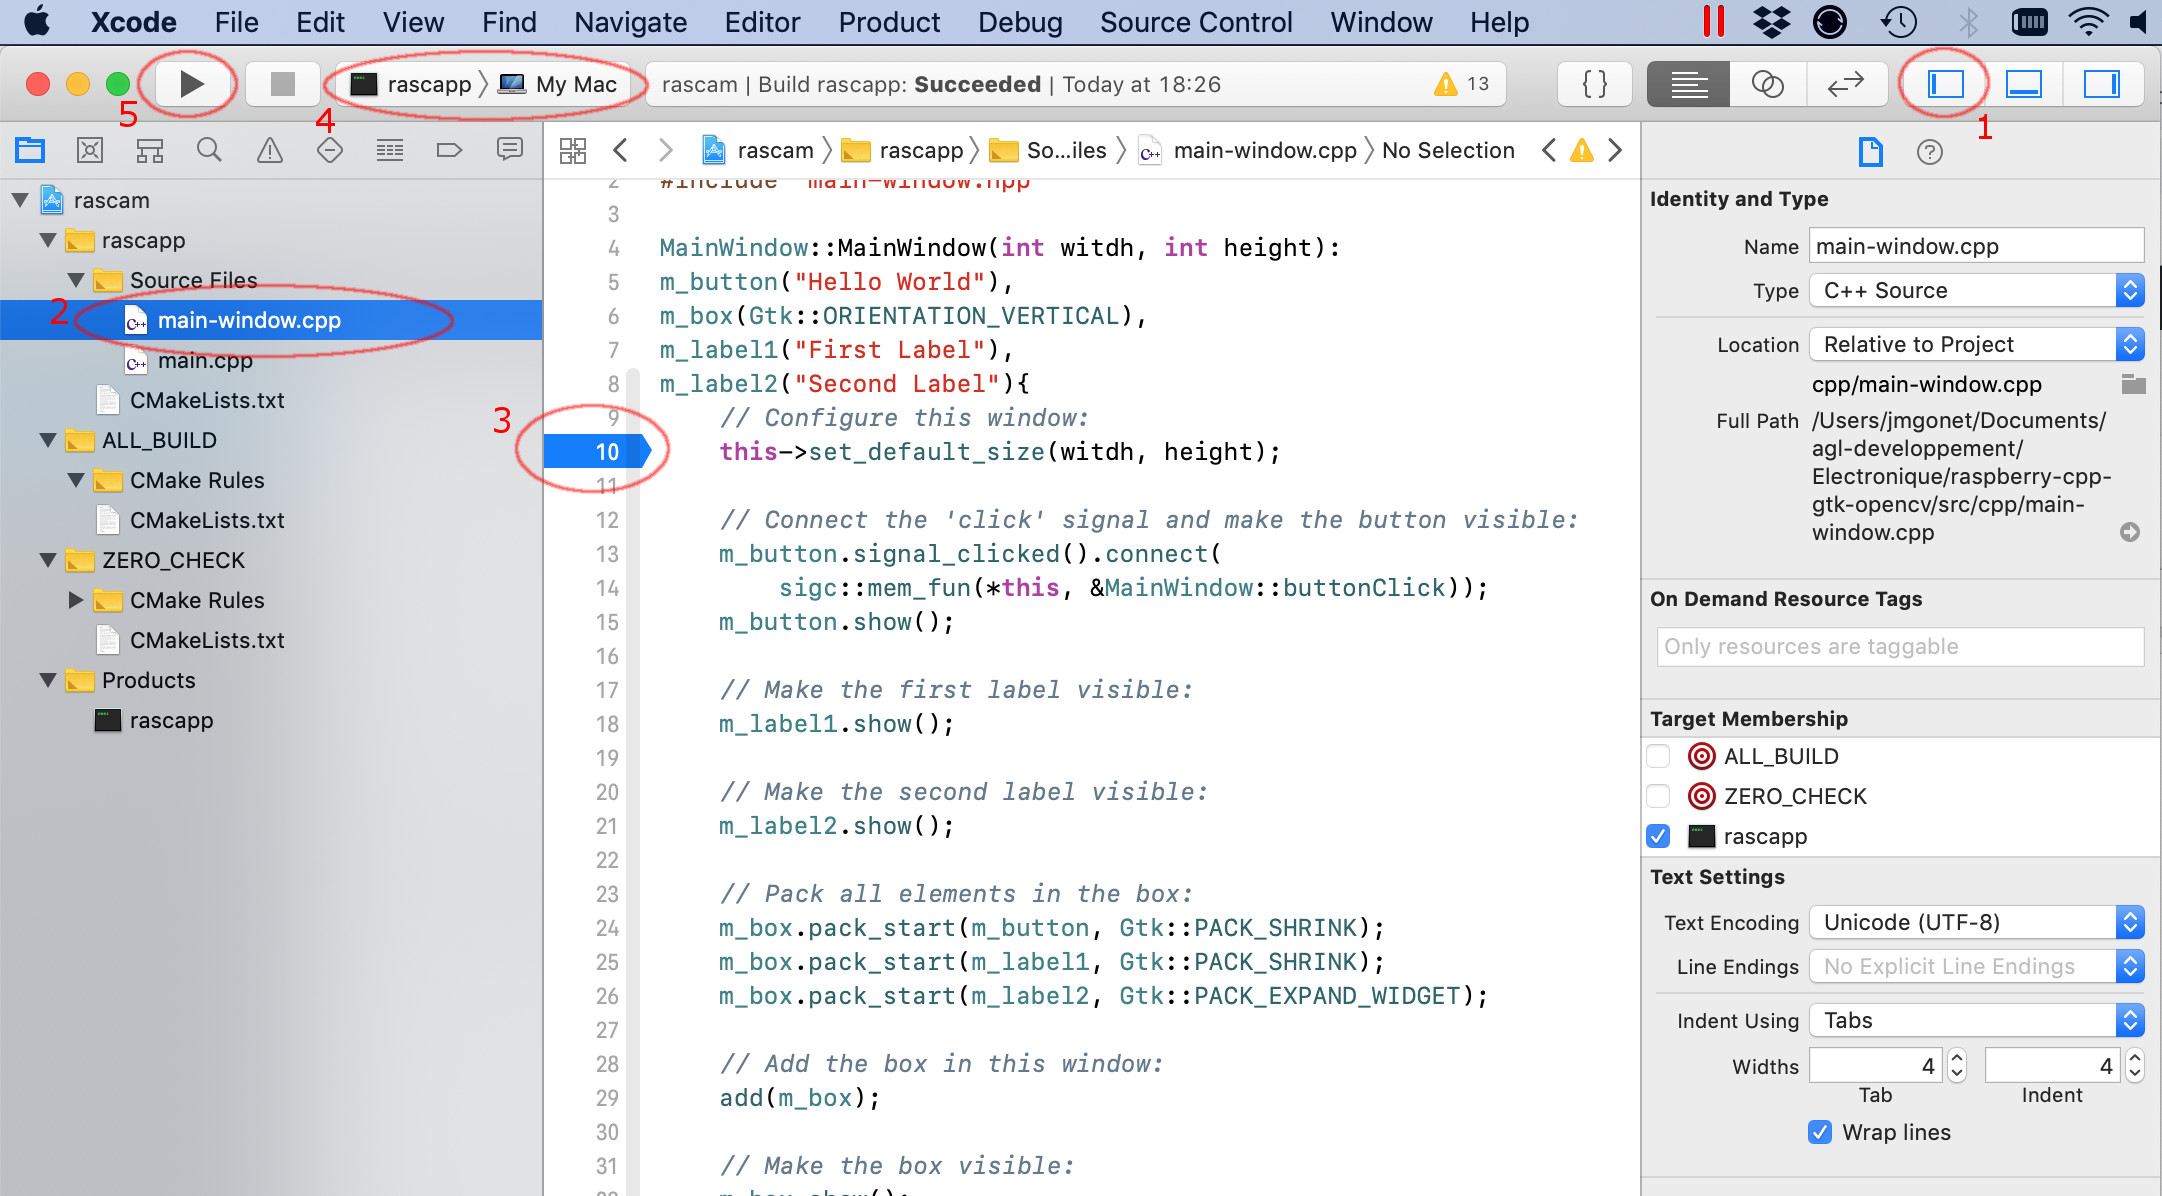
The project will load:
- Select the desired target from the list. You should find here all the targets declared in
CMakeLists.txtconfiguration. Additionally, ZERO CHECKS and ALL BUILD are CMake targets are always present when you load a CMake project. - Click on the project explorer tab. Again, there is one folder per target, plus the default ZERO CHECKS and ALL BUILD.
- Expand the rascapp folder, then the Sources folder, open one of the files, and click on the side to set a break point
- Launch the application by clicking on the triangle button.
- If all goes well, you should find yourself debugging in the selected line.
Hopefully, you don't need this section. It is by no means complete; I just described here the errors I've discovered in my own experience.
Sometimes, probably because of a new release in either OpenCV or Gtk, a dependency is missing in the Homebrew package. In that case, at launching or testing the application, you may encounter an error similar to the following:
./lib/tst/rasctest
dyld: Library not loaded: /usr/local/opt/glog/lib/libglog.0.3.5.dylib
  Referenced from: /usr/local/opt/opencv/lib/libopencv_sfm.3.4.dylib
  Reason: image not found
Abort trap: 6
The reason is the missing library. You can try to specifically install the missing library. Finding the right package name may be challenging, but most of the time it is very close to the library name:
brew install glogWhen building the Xcode project with the following command:
cmake -GXcode ../src/If you obtain the following error:
-- The CXX compiler identification is unknown
CMake Error at CMakeLists.txt:5 (project):
  No CMAKE_CXX_COMPILER could be found.
Try resetting the xcode-select configuration with:
sudo xcode-select --resetDelete the xcode folder, and start again.
See more about CMake error no CMAKE_C_COMPILER could be found using Xcode and GLFW.