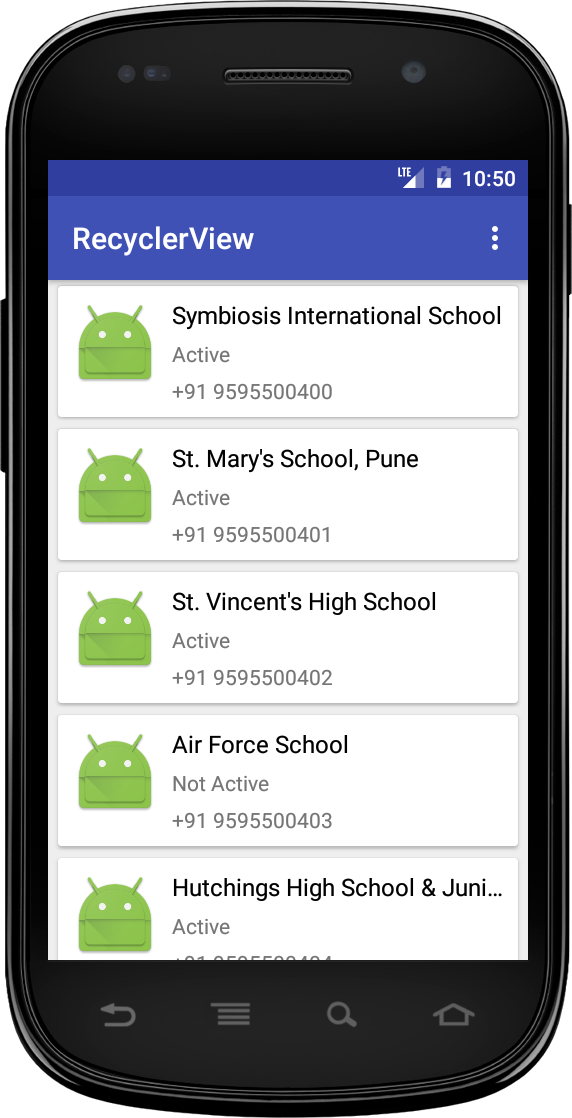
Android RecyclerView is more advanced version of ListView with improved performance and other benefits. Using RecyclerView and CardView together, both lists and grids can be created very easily. Here is the complete information about RecyclerView and other examples. In this tutorial we are going to learn how to render a simple RecyclerView with a custom layout. We’ll also learn writing a adapter class, adding list divider and row click listener. The recycler view we are going to design contains list of image, school name, status, mobile
activity_main.xml
<android.support.design.widget.CoordinatorLayout xmlns:android="http://schemas.android.com/apk/res/android" android:layout_width="match_parent" android:layout_height="match_parent" android:background="@color/MaterialGray200">
<RelativeLayout
    android:layout_width="match_parent"
    android:layout_height="match_parent">

    <android.support.v7.widget.RecyclerView
        android:id="@+id/recyclerView"
        android:layout_width="match_parent"
        android:layout_height="match_parent"
        android:paddingRight="@dimen/margin_4"
        android:paddingEnd="@dimen/margin_4"
        android:paddingLeft="@dimen/margin_4"
        android:paddingStart="@dimen/margin_4"
        android:clipToPadding="false"/>

</RelativeLayout>
</android.support.design.widget.CoordinatorLayout>
Adapter
@Override
public void onBindViewHolder(RecyclerView.ViewHolder holder, int position) {
    DataModelMainActivity model = items.get(position);
    MessageViewHolder messageViewHolder = (MessageViewHolder) holder;
    messageViewHolder.imageViewIcon.setBackgroundResource(model.getImage());
    messageViewHolder.textViewName.setText(model.getName());
    messageViewHolder.textViewStatus.setText(model.getStatus());
    messageViewHolder.textViewMobile.setText(model.getMobile());
}

@Override
public int getItemViewType(int position) {
    return  super.getItemViewType(position);
}

@Override
public RecyclerView.ViewHolder onCreateViewHolder(ViewGroup parent, int viewType) {
    View rootCategoryView = mInflater.inflate(R.layout.row_item, parent, false);
    return new MessageViewHolder(rootCategoryView, this);
}

private class MessageViewHolder extends RecyclerView.ViewHolder implements View.OnClickListener {

    private ImageView imageViewIcon;
    private TextView textViewName;
    private TextView textViewStatus;
    private TextView textViewMobile;
    private CardView cardView;

    private MessageViewHolder(View itemView, AdapterMainActivity adapter) {
        super(itemView);
        imageViewIcon = (ImageView) itemView.findViewById(R.id.imageViewIcon);
        textViewName = (TextView) itemView.findViewById(R.id.textViewName);
        textViewStatus = (TextView) itemView.findViewById(R.id.textViewStatus);
        textViewMobile = (TextView) itemView.findViewById(R.id.textViewMobile);
        cardView = (CardView) itemView.findViewById(R.id.cardView);

        cardView.setOnClickListener(this);
    }

    @Override
    public void onClick(View v) {
        final int pos = getAdapterPosition();
        if (pos >= 0) {
            Toast.makeText(mActivity, "Selected Item Position "+pos, Toast.LENGTH_SHORT).show();
        }
    }
}
MainActivity
    @Override
    protected void onCreate(Bundle savedInstanceState) {
    super.onCreate(savedInstanceState);
    setContentView(R.layout.activity_main);

    recyclerView = (RecyclerView) findViewById(R.id.recyclerView);

    gridLayoutManager = new GridLayoutManager(getApplicationContext(), 1);
    recyclerView.setLayoutManager(gridLayoutManager);

    data = new ArrayList<DataModelMainActivity>();
    for (int i = 0; i < nameArray.length; i++) {
        data.add(new DataModelMainActivity(imageArray[i], nameArray[i], statusArray[i], mobileArray[i]));
    }

    mAdapter = new AdapterMainActivity(data, MainActivity.this);
    recyclerView.setAdapter(mAdapter);