PID
PID may be different from case to case and plays a very important role in the flight stability. PID controls:
- roll movement;
- pitch movement;
- yaw movement.
In the next steps hold the quadcopter with your hand.
Go in the Globals.h file and set
PID_P_GAIN_ROLL             0.0
PID_I_GAIN_ROLL             0.0
PID_D_GAIN_ROLL             0.0
PID_MAX_ROLL                400

PID_P_GAIN_YAW              0.0
PID_I_GAIN_YAW              0.0
PID_D_GAIN_YAW              0.0
PID_MAX_YAW                 400
Increment the yaw P parameter in steps of 0.5, upload the sketch and start the drone. Hold firmly in your hand the copter, possibly stay on a soft surface, like a carpet. Move the throttle until it seems to take fly and test its movements while the drone is still in safe in your hand. Increment the P until the drone scrambles. Reduce the P at the value it acts quietly.
Do the same with the I, incrementing in steps of 0.005.
This part must be done in an open space, like your garden. You can try to fly your drone and look at its behavior.
Stay low, the throttle can act violently at this point
Increment the roll P parameter in steps of 0.5, upload the sketch and start the drone.
You may observe that the copter acts unpredictably. Increment the value until this behavior reduces.
Do the same with the D and I, incrementing in steps of 0.002.
After a while you may observe that the behavior depends widely on the PID parameters, and you may find your own way to set properly these parameters.
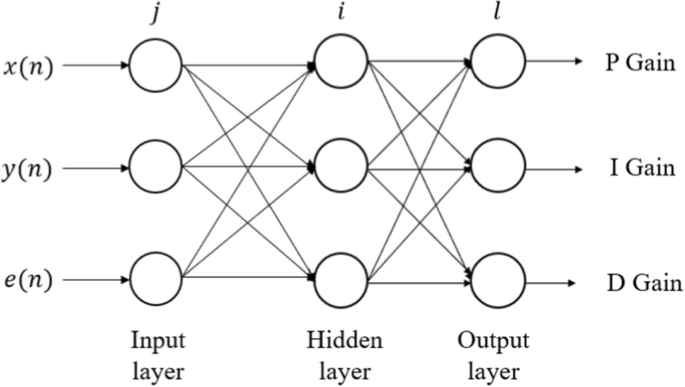
If you are tired of manually tune the PIDs of the quadcopter you should try the auto-tuning PID feature. (I recommend you to set at least once the PID manually to see the behaviour of each parameter). The PIDs gains are continuously updated by a neural network (NN) and sent to the control system. The architecture of the NN is presented in the following image.
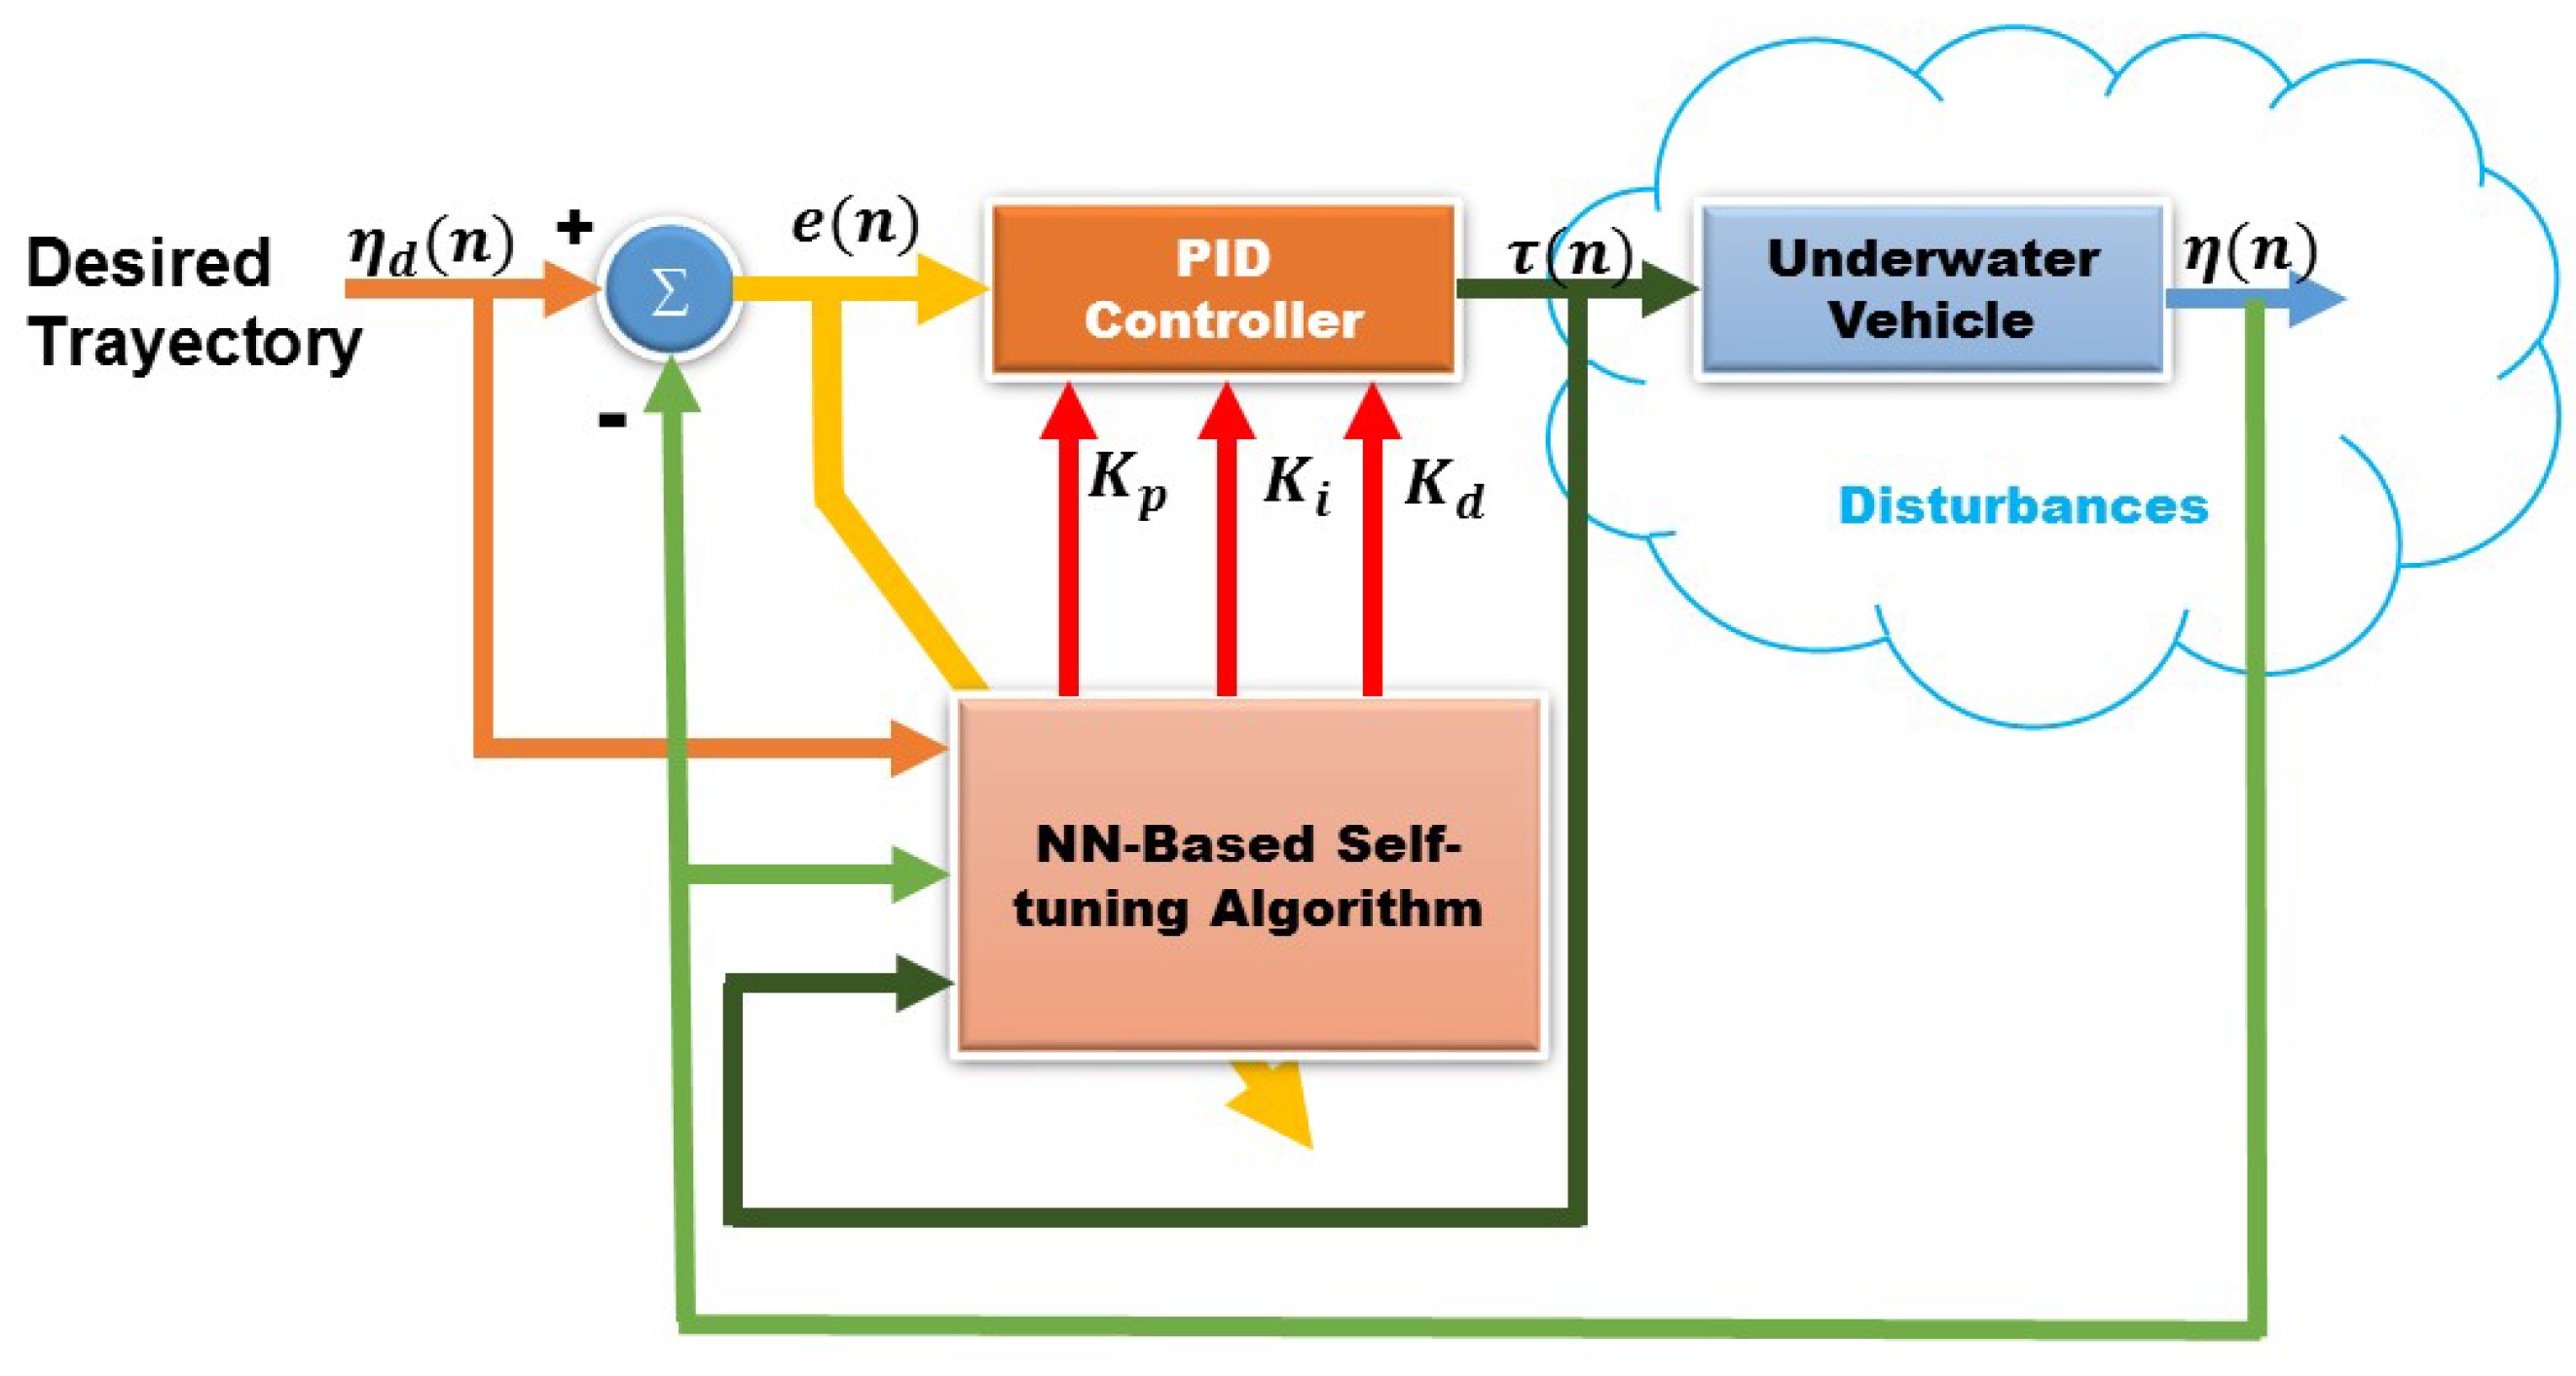
Neural network simulate non linear systems givin very few inputs. The NN is composed by three layers: input, hidden and output layers. The input layer is composed by 4 neurons: set point, gyroscope readings, the error and the error speed The neural network must be trained to output relevant values. I used an online back propagation (BP) learning method, the functions are in this lib.
DroneIno uses two NN, one for the roll (pitch) and one for the yaw.
Upload the CALIBRATION sketch (as usual by #define UPLOADED_SKETCH CALIBRATION in the config.h).
After the initial dialogue, press p on the serial monitor. It will print the values of the PID provided by the neural network (NN).
Now, roll and rotate with your hands (the motors must be TURNED OFF) the drone around the three axis to train the NN.
You will see that the parameters change.
Do that until the integrative parameters for both the PIDs are less than 0.09.
Pressing ENTER the loop stops and the weights of the NN are saved in the flash memory.
On the serial will appear the estimated weights and biases. If they are ALL zeroes the NN has faced a gradient vanishing problem, so you have to try other learningRate and momentumFactor (defined in the Globals.h) and retry the training.
Once you have calculated your weights, set in the config.h file AUTOTUNE_PID_GYROSCOPE to true and upload the FLIGHT_CONTROLLER sketch. The weights are automatically taken from the memory, so you do not need to train the NN anymore. Now DroneIno can fly.