Signup Wizard Setting Things Up
The easiest way to get to know the signup wizard plugin is to review some instructions on how to set up a sample volunteer signup. In this example, we will be configuring a sample event where we will be serving breakfast in a separate room during each service on a normal Sunday morning. This will be hosted at 2 different campuses. We will have 4 different roles and it will be served during 3 different services. Follow these steps to get started:
First off, we'll need a specific group type for this event so we can define the roles. This is done the standard way of creating a group type in Rock by going to "General Settings" -> "Group Types":
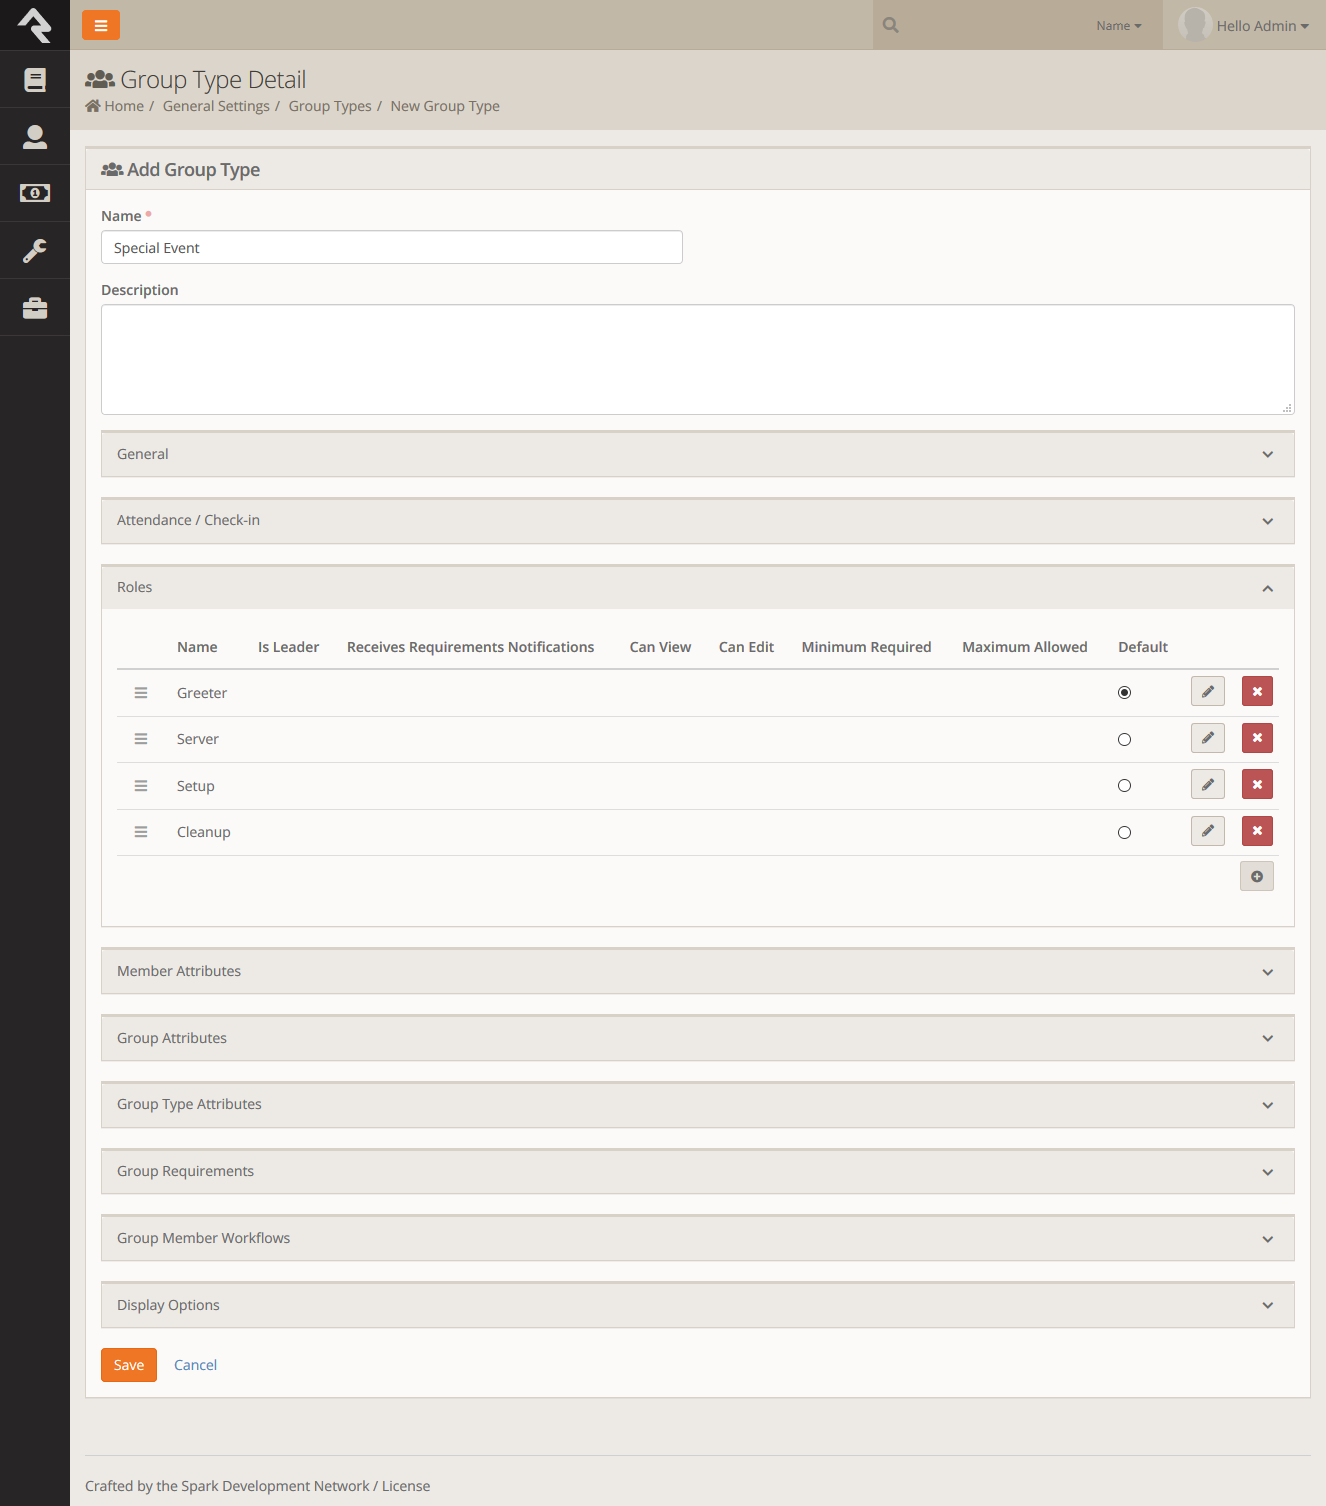
This group has the following 4 roles:
- Setup
- Greeter
- Server
- Cleanup
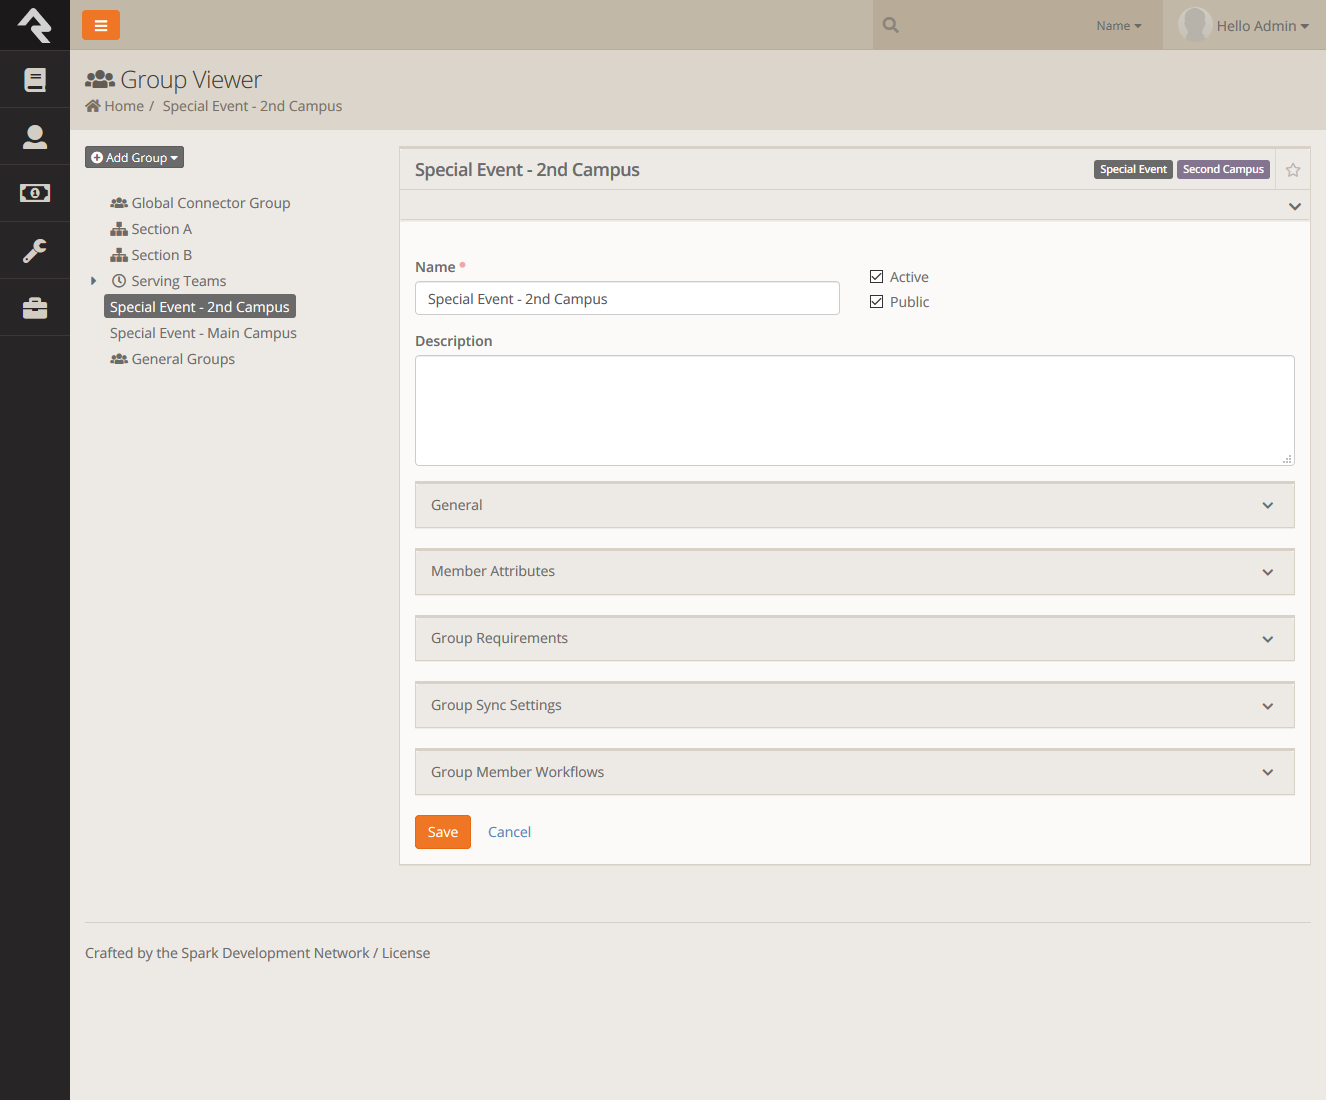
In this example, prior to creating the groups, we first created another campus called "Second Campus" and then created a new group for each campus using the group type we created in Step 1:
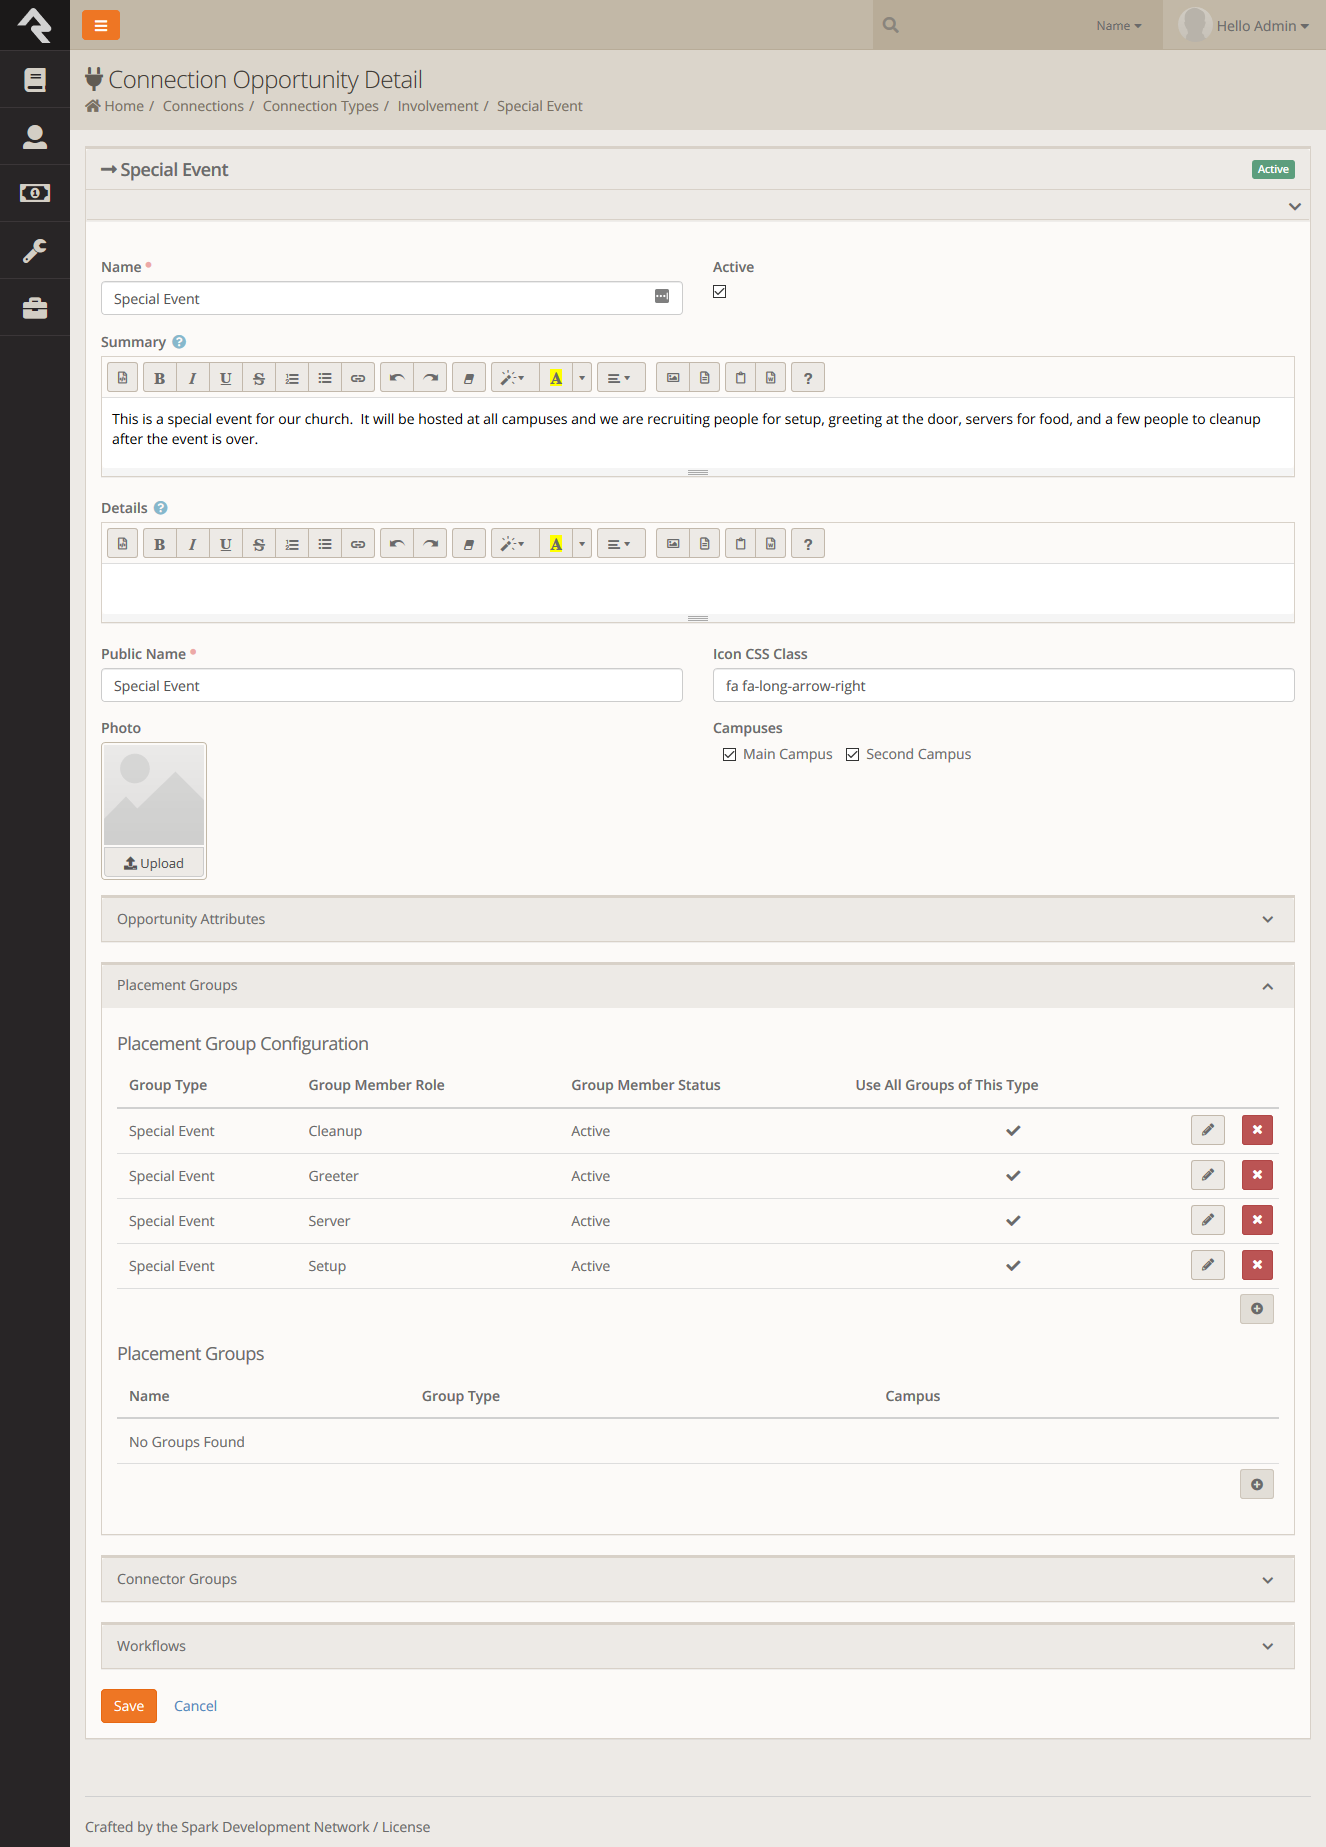
Next, create a new connection opportunity by going to "Connections" -> Click the "Gear" Icon at the Top Right -> "Involvement" -> "+" Icon. Make sure to map the connection group types and roles to the newly created group type:
After getting the connection opportunity completed, the next step is to actually create a couple pages for the actual signup. The pages will be a page for the Signup Wizard and a separate page for the Signup Form which adds them to the connection opportunity. In this example the page was created in the "Connect" section in the Rock Solid Church Demo site. The page structure looked something like the following:
Home > Connect > Special Event
Home > Connect > Special Event > Signup
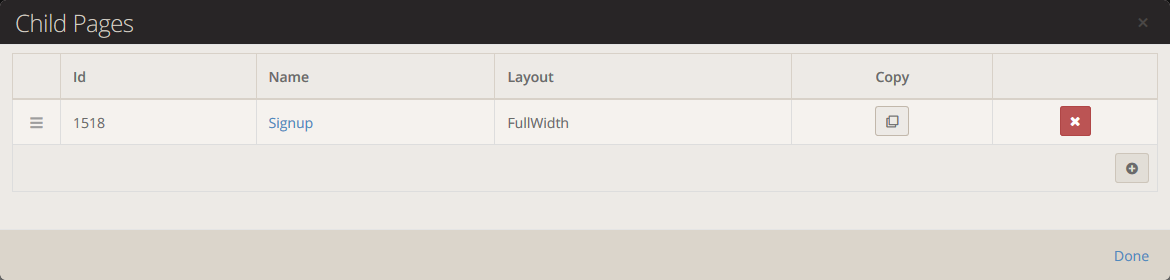
The following screenshot shows the modal adding the signup page as a child to the Special Event page:
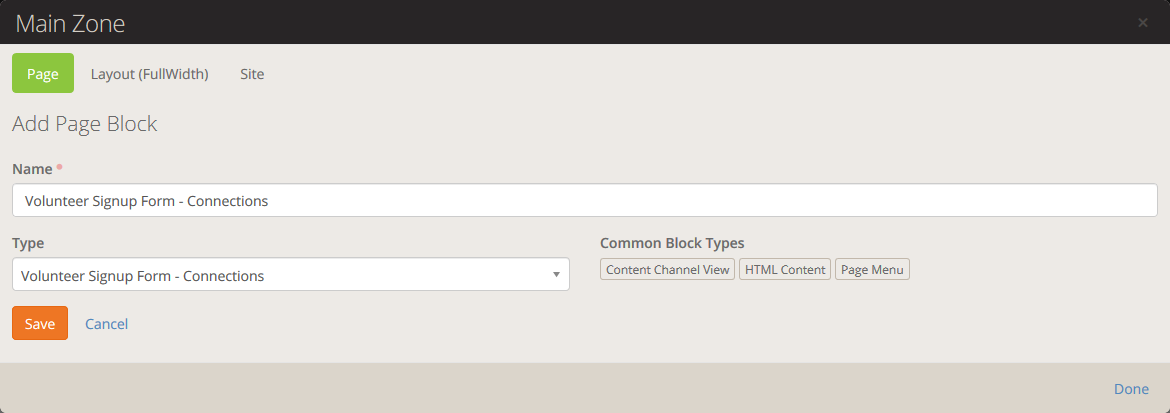
Next add the Signup Form block to the Signup page. While this page is a child of the Event page, it's easier if it gets configured first. Adding the block will look something like this in the Modal:
Next add the Signup Wizard block to the "Special Event" page that was created in the previous step. This will require some basic configuration which is detailed out here:
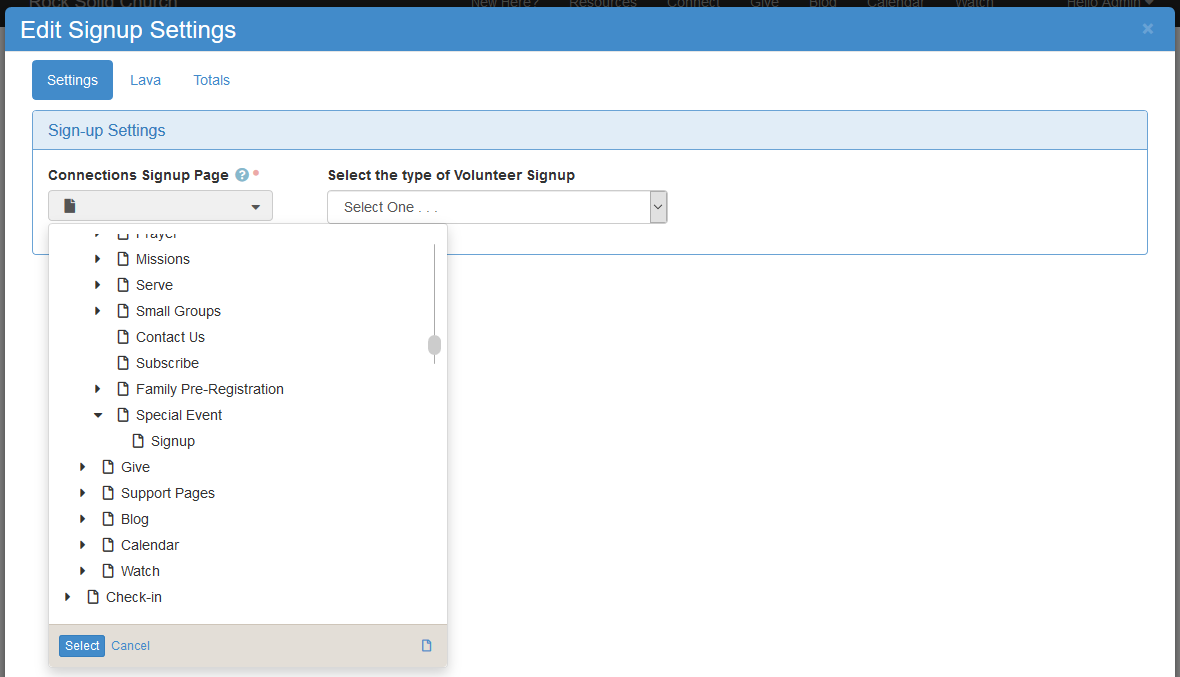
Set the Connections Signup Page
Pick the signup form page from this list (Home > Connect > Special Event > Signup)
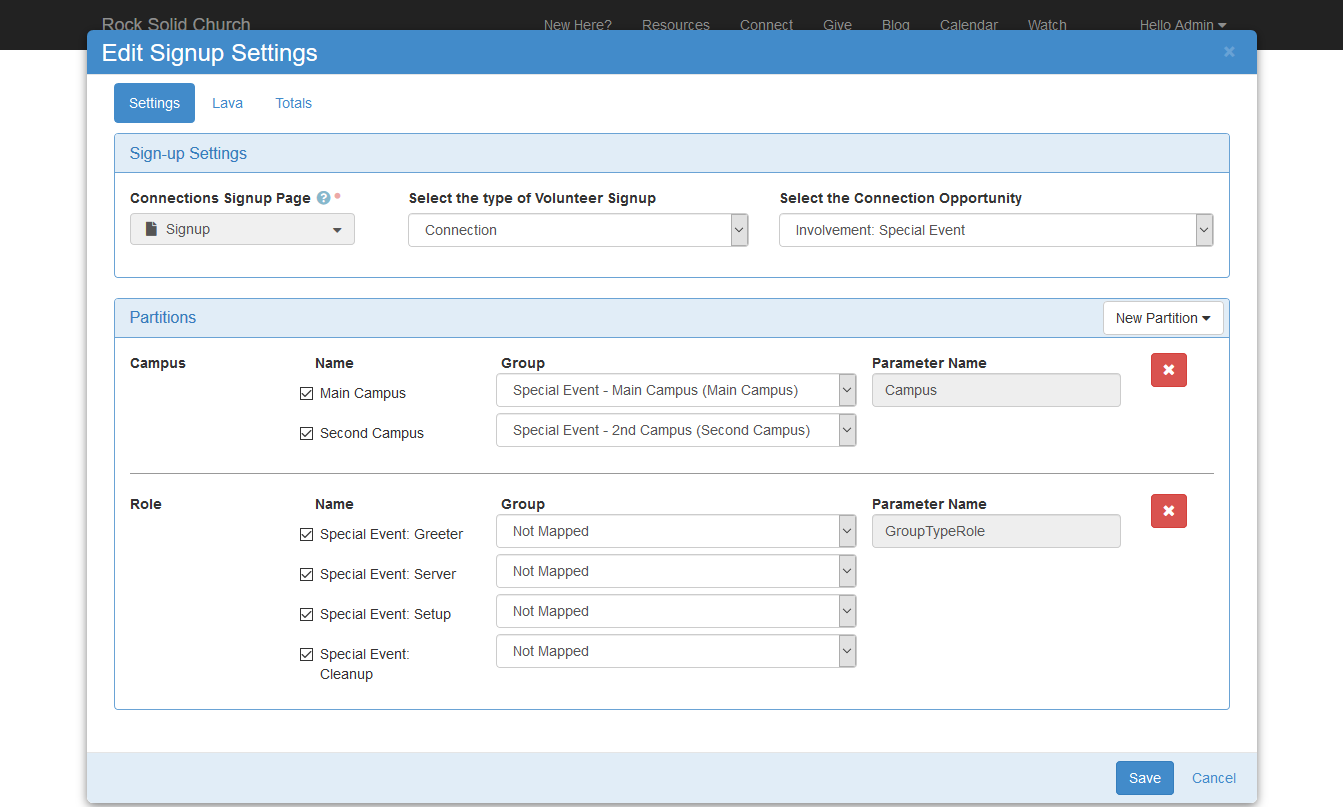
Set the Block Settings
The rest of the block settings will need to be set as follows. Please note, more information about how these block settings work can be found here: Signup Wizard Block Settings
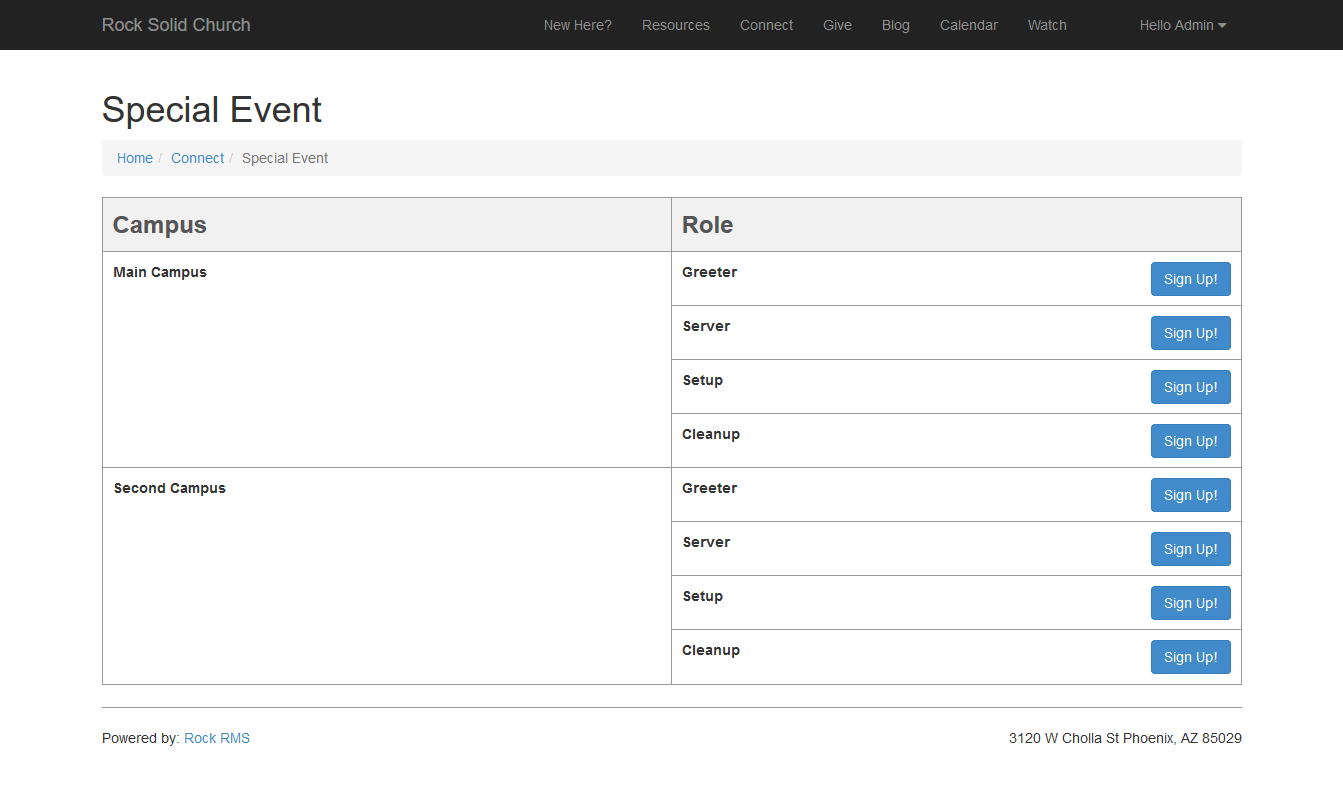
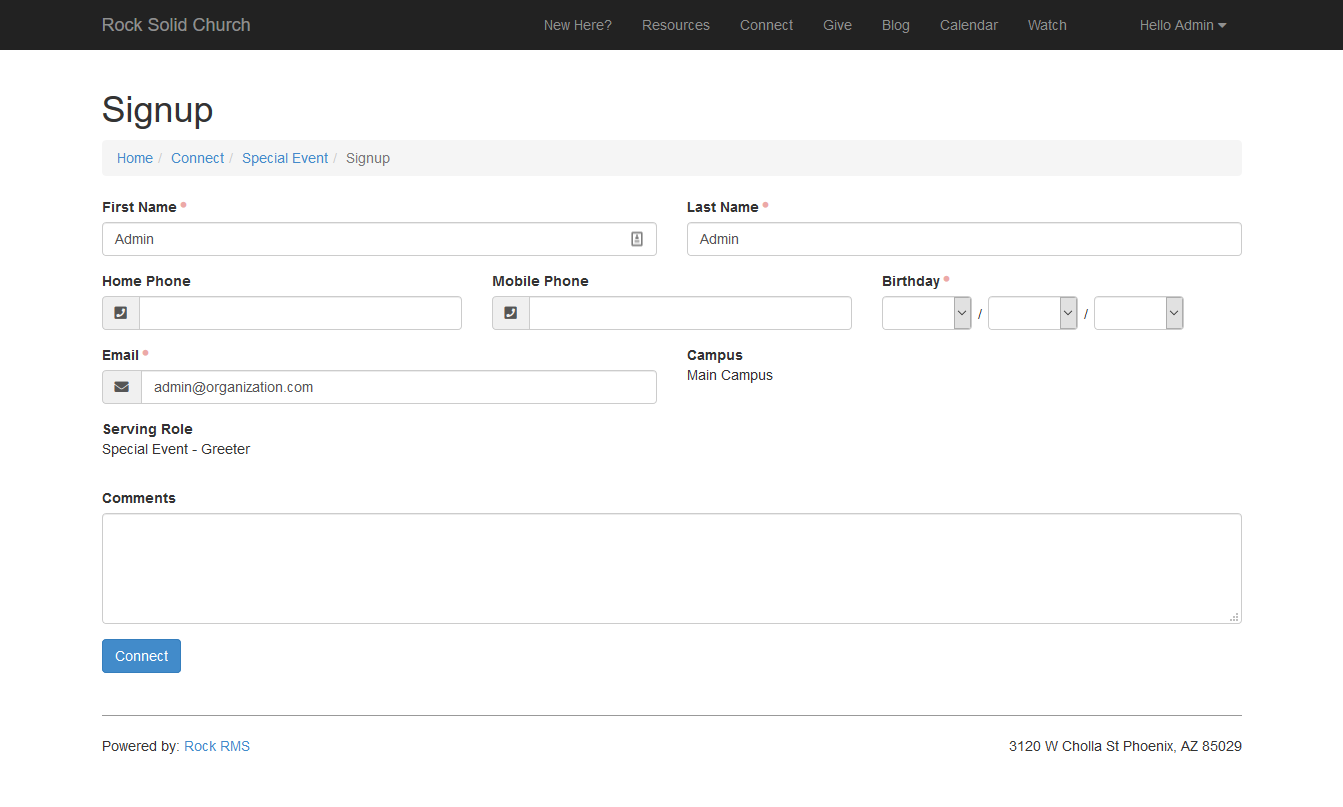
Now just save the block settings and you should get something like this! If you click signup on any of these options, it should take you to the signup form and drop the person into connections like expected. Congratulations, you've just created your very first Signup Wizard!
To learn more, please click here to dive deeper into the Volunteer Genius Signup