- Webcourses - Course code: CMPU2016
- Processing
- The Processing language reference
- Learning Processing: A Beginner's Guide to Programming Images, Animation, and Interaction (Morgan Kaufmann Series in Computer Graphics)
- The Nature of Code
- Eclipse
- The git manual - read the first three chapters
- A video tutorial all about git/github
- The Java Tutorial from Oracle
- Games Fleadh
- The Imagine Cup
- Email: bryan.duggan@dit.ie
- Twitter: @skooter500
Some assignments from previous years:


-
14 November 2017 Lab Test 10%
-
12 December 2017 Assignment 1 submission 15%
-
14 February 2018 Lab Test 2 - 10%
-
5 February 2018 Team project proposal submission
-
25 April 2018 - Team project demos - 15%
-
End of Year exam - 50%
Semester 2 Assignment Choice form
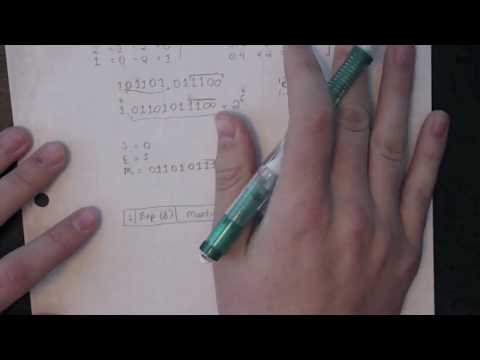
Here are some 32 bit bit patterns of floating point numbers in IEEE 754 format:
01000010010101010110011000101010 11000000110010000101010001110100
01000010010000110111010110100011 01000000000101011111000110011101
01000010000110111000111011001100 11000010100110100001000111011001
Convert the bit patterns to base 10 numbers. To do this, you will have to work backwards from the process we used in the class to convert base 10 numbers to IEEE 754 format.
The numbers represent lat and long coordinates for locations on the Earth. Use this Google maps page to figure out where on the earth these lat and long coordinate pairs are.
Start with the code we wrote in the class on Monday that implements the complete music retrieval system and returns the closest matching tune. Write a method on the TuneIndex class that returns the top 10 closest matching tunes with their confidence scores. You should add a field to the tune to hold the confidence score. I use the following equation to calculate the confidence score:
1 - (ed / ts)
Where ed is the edit distance and ts is the length of the transcrided string. In our case, 60. For example if the edit distance was 5, then the confidence score would be:
1 - (5 / 60) = .91
If you got these numbers, you could say that the algorithm was 91% confident it got the coprrect matching tune as just 5 out of the 60 notes were wrong. You can use Collections.sort to do this, in a similar way to how we sorted the dictionary entries in the lab in week 5 this semester.
You an use either Eclipse or the JDK to complete today's lab. You should clone/pull the repository for the course to get the code we worked on in Monday's class. This uses an FFT to identify the frequencies of the notes in the audio files we are processing and it uses the pitch spelling algorithm we made in last weeks lab. What we are trying to do is extract a string of music notes from the wav file so we can compare with our database of tunes (coming up soon!). If you run the program from Monday, you will see that currently because we are looking at 2048 samples from the wav file at a time, the program will transcribe multiple notes even though only a single note is being played. Hence for the file Scale.wav, we get a transcription of:
CCCAAADDDDDDDDDDDDDDDDDDDDDDDDDDDDDDDDDDEEEEEEEEEEEEEEEEEEEEEEEEEEEEEEEEEEEEEEEEFFFFFFFFFFFFFFFFFFFFFFFFFFFFFFFFFFFFFFFFFFFFFFGGGGGGGGGGGGGGGGGGGGGGGGGGGGGGGGGGGGGGGGAAAAAAAAAAAAAAAAAAAAAAAAAAAAAAAAAAAAAAAAAAAAAABBBBBBBBBBBBBBBBBBBBBBBBBBBBBBBBBBBBBBBBBBBCCCCCCCCCCCCCCCCCDDDCCCCCCCCCCCCCCCCCCCCCCCCDDDDDDDDDDDDDDDDDDDDDDDDDDDDDDDDDDDDDDDDDDDDDDDDDDDDDDDDDDDDDDDDDDDDDDDDDDDDDDDDDD
The task today is to filter the transcription to remove the duplicate notes, so that we get this:
CADEBEFGFABCAD
The algorithm should work like this:
Whenever we get a new note, instead of just appending it to the transcription string, we first check the last character in the transcription string and only append a new character if it is different. We can use the String methods substring, indexOf, chatAt, equals etc. to do this.
There are still going to be errors in the transcription that we could potentially fix with more string parsing, but thats ok, because the Levenstein distance algorithm will take care of any errors we have in the transcription.
I have included a couple of extra audio files you can try out to test your transcription algorithm.
Try and use the Eclipse debugger to complete todays lab:
- F11 - Starts debugging
- Ctrl + F8 - Switches perspective between Debug and Java
- Ctrl + Shift + B - Toggles a breakpoint in your code
- F6 - Steps over a line of code
- F5 - Step into a method
Also you can try making your own audio files to test by singing
Bonus!
If you want to test your transcriptions against the Tunepal collection of tunes, you can paste the transcription to the end of this URL in your browser:
https://tunepal.org/index.html#!/notesSearch/
And see if it comes up with the correct tune name. I have named the WAV files the tune name.
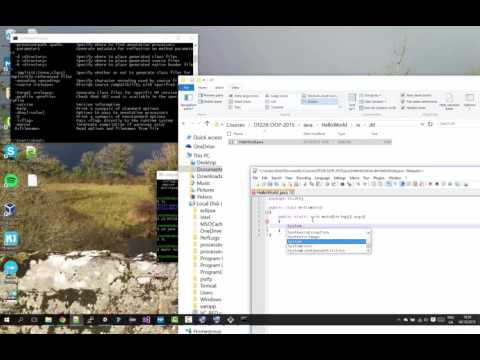
You an use either Eclipse or the JDK to complete today's lab. I rewote the code we worked on for the past couple of weeks using the Processing and Minim libraries instead of using the Java native libraries as the code is much cleaner and easier to understand. To get the code, clone/pull the repo for the course.
If you want to try and use Eclipse, you can start Eclipse from the desktop of the lab computers and choose the option File | Open projects from File System and navigate to the Java folder in the repo you just cloned. Do not choose the root of the repository - make sure you choose the Java folder instead!. That should import all the code we worked on this semester into an Eclipse project. If you find the Package Explorer Window right click on Main and choose Debug As | Java Application you will get a black rectangular window popping up. For subsequent launches, you can click on the little bug symbol on the toolbar to launch the application.
If you want to use the JDK command line tools you can type:
javac -classpath "./;./lib/minim.jar;./lib/core.jar" -d bin src/ie/dit/*.java
java -classpath "./bin;./lib/minim.jar;./lib/core.jar;./lib/jsminim.jar;./lib/mp3spi1.9.5.jar;./lib/tritonus_share.jar;./lib/tritonus_aos.jar;./lib/jl1.0.1.jar" ie.dit.Main
From the java folder in the bash shell.
I recommend you copy and paste these commands! You can copy these using Ctrl + C and paste into the Windows command line using Shift + Insert. If you are on the Mac or Linux, you will need to replace the ; with :
The -classpath option is adding jar files (the compiled and zipped Processing libraries) to the build and Java runtime of the program. Now the java runtime will be able to find the Processing libraries.
Hit the spacebar and the program will stream an audio file and show you the waveform of the audio being played along with the output of the zero crossings algorithm. This should be around 880Hz - the frequency of the note A played on a tinwhistle:

If you look at the code in the method tuneFinder1 in Main.java you will discover this code:
String[] a = {"MAIN"};
processing.core.PApplet.runSketch( a, new TuneFinder1());
This is "boilerplate" code required to run a Java/Processing sketch. All the code we are interested in is located in the setup and draw methods on the class TuneFinder1. I recommend you study that code carefully and see how it maps onto the code we wrote in Monday and last week. Now instead of accessing the signal array, we can access the signal via the audioInput object. audioInput.bufferSize() gives the size of the audio buffer and audioInput.left.get(i) gives the signal array at position i. You can see this code:
for (int i = 1; i < audioInput.bufferSize(); i++) {
  line(i, mid, i, mid + audioInput.left.get(i) * mid);
  average += Math.abs(audioInput.left.get(i));

  if (audioInput.left.get(i - 1) > 0 && audioInput.left.get(i) <= 0) {
    count++;
  }

}
average /= audioInput.bufferSize();
Is drawing the waveform, calculating the average amplitude of the signal and also calculating the number of zero crossings.
This code:
float frequency = count * (SAMPLE_RATE / FRAME_SIZE);is calculating the frequency of the note in the audio file. If you have speakers or headphones plugged into the computer, you will hear the audio being played.
Your task today is to convert this frequency value to a music note value. This is called "spelling" the note. Music notes are designated the letters ABCDEFG. In the ABC language (remember the lab test?), notes can be upper case characters, lower case characters and also have ' and , symbols. Here is code that gives music notes in ABC for the D Major scale with their corresponding frequencies. For any musicians in the class, you will know that D Major has 2 sharps. F# and C#, so the frequencies for the notes F and C are those for F# and C#:
float[] frequencies = {293.66f, 329.63f, 369.99f, 392.00f, 440.00f, 493.88f, 554.37f, 587.33f
			, 659.25f, 739.99f, 783.99f, 880.00f, 987.77f, 1108.73f, 1174.66f};
String[] spellings = {"D,", "E,", "F,", "G,", "A,", "B,", "C", "D", "E", "F", "G", "A", "B","c", "d", "e", "f", "g", "a", "b", "c'", "d'", "e'", "f'", "g'", "a'", "b'", "c''", "d''"};- Write a class called PitchSpeller that has the above arrays as fields. It should have a method
public String spell(float frequency)that takes a frequency as a parameter and returns the closest note to the frequency. - Call the method passing in the calculated frequency and print the result to the screen (which should be "a")
- There is another audio file D.wav. See if your algorithm can identify the note in that file as the note d.
- Have a look the TuneFinder class
- No lab due to the snow
- Learn how to sort an ArrayList using the Collections framework
- Learn how to implement an interface from the JDK
- Get practice constructing an algorithm
In this lab we will implement the ability to print the top 10 closest words from the dictionary instead of just printing the closest match. Here is what the output of the final program might look like:
$ java ie.dit.Main
Enter a word or quit:
hello
Did you mean:
bell
help
hollow
jelly
well
yellow
all
ball
fall
full
Enter a word or quit:
milk
Correct match
Enter a word or quit:
moon
Correct match
Enter a word or quit:
yellow
Correct match
Enter a word or quit:
bryan
Did you mean:
bread
brown
bad
bag
band
basin
boat
boy
brake
branch
Enter a word or quit:
quit
To complete this lab:
- Clone the repo to get the code worked on in the class and study it carefully. You will be modifying the dictionary method in Main.java and also modifying the Dictionary class. You can create a branch for your work:
git checkout -b lab5
- Read this article that explains how to sort an ArrayList. If you need to, read it several times!
- You will notice there is an unimplemented method
public String[] findClosest(String toFind, int howMany)in the class Dictionary. At the moment it just returns null, but you should implement this method. - Modify the dictionary method in Main.java. You should ask the user to type in a word. Then check the spelling of the word using the findClosest method, printing out the closest 10 matching words if the word is not in the dictionary or printing "Correct match" if the word is in the dictionary. The program should repeat this process until the user types quit.
- I strongly suggest you take the time to think about how you would do this. If you can't figure it out, here are step by step instructions. Only use these if you can't figure it out
Also! The source code we are working on is now in the src folder and the class files are in a folder called bin. That will make it easier to import the project into Eclipse next week.
To compile code, start a bash shell from the java folder and type:
javac -d bin src/ie/dit/*.java
The -d flag is used to specify the output directory
To run code in the bin folder type:
java -classpath bin ie.dit.Main
- File IO in Java tutorial
- Javadocs
- Big file of English words
- Clone the repo to get the code we worked on
For todays' lab test, you will be writing a parser for ABC music files in Java. ABC music files are plain text ascii files that store sheet music notation. ABC music files can contain the notation for multiple tunes in one file and tunes are seperated by one or more blank lines. The file you will be parsing today has 100 tunes in it. Each tune consists of headers which are the letters X, T, R etc followed by a :. The actual music notes follow the headers. The X header is called the index number of the tune and is always an integer. The T header is the tune title. Tunes always begins with an X header and there is always at least one title, though there can be optionally multiple T headers as tunes can have multiple titles. There are other headers, but we are only interested in the tites and the index numbers for the purpose of this test.
Here is an extract from the file you will be parsing today that shows the ABC notation for two tunes:
X:3
T:Banish Misfortune
R:jig
H:First bar also played |^fed cAG|
D:Tommy Keane & Jacqueline McCarthy: The Wind among the Reeds
D:Chieftains Live.
Z:id:hn-jig-3
M:6/8
K:Dmix
fed cAG | AGd cAG | ~F3 DED | ~F3 GFG |
~A3 cAG | AGA cde | fed cAG | Ad^c d2e :|
|: f2d d^cd | f2a agf | e2c cBc | ece gfe |
f2g agf | e2f gfe | fed cAG | Ad^c d2e :|
|: f2g e2f | ded cdc | ~A3 GAG | ~F3 ded |
c3 cAG | AGA cde | fed cAG | Ad^c d2e :|
P:variations
|: =fed cAG | A2d cAG | F2D DED | FEF ~G3 |
AGA cAG | ~A3 cde | fed cAG | Ad^c d2e :|
|: f2d d^cd | f2g agf | e2c cBc | e2f gfe |
f2g agf | e2f gfe | fed cAG | Ad^c d2e :|
|: f2g e2f | d2e c2d | ABA GAG | F2d ded |
c3 cAG | AGA cde | fed cAG | Ad^c d2e :|

X:4
T:Piper's Chair, The
T:Cathaoir an Ph\'iob\'aire
R:jig
D:Bobby Gardiner: His Master's Choice.
Z:id:hn-jig-4
M:6/8
K:G
DGG GFD|c2c cAc|ded cAG|FAG FEF|DGG GFD|c2c cAc|ded cAF|1 AGF G3:|2 AGF GBd||
|:~g3 agf|d2g gfg|GFG =fef|A2B cBA|GBd g2f|d2e fdc|Bdd cAF|1 AGF GBd:|2 AGF G3||
If we take the second tune, "the Pipers Chair" as an example, we can see that tune has an index number of 4 (X:4) and has two titles "Piper's Chair, The" (T:Piper's Chair, The) and "Cathaoir an Ph'iob'aire" (T:Cathaoir an Ph'iob'aire).
Instructions:
- Create a new Java git repository on github and call it JavaTest. Make sure you specify Java as the language on github so you get a Java .gitignore file
- Clone the repository to your computer
- Create the folder structure for a java package in the project you cloned, called
ie.ditand download this abc file to the root of the folder structure you created. - Create a class called
Tunein the package ie.dit with private fields forx,title,altTitleandnotation.xshould be of typeint,title,altTitleandnotationshould beStrings. Create public accessor methods for these private fields. - Write a
toStringmethod on theTuneclass. This should return the fields formatted as "x, title, altTitle". If the tune does not have analtTitle, then you should leave this part out. For example, the above tunes would be printed as:
    3, Banish Misfortune
    4, Piper's Chair, The, Cathaoir an Ph\'iob\'aire
-
Write a class called
TuneBookthat has a field calledtunesof typeArrayListofTuneobjects. To use anArrayList, you should typeimport java.util.ArrayList;at the top of your Java file. -
Write a constructor for the
TuneBookclass that takes a singleStringas a parameter representing the name of the abc file to load. Write the code in this constructor that loads the file line by line and populates the tunesArrayListfrom the contents of the ABC file. There should be oneTuneobject in theArrayListfor each tune in the file and you should set thex,title,altTitleandnotationfields on eachTuneobject from the file. You can use the accessor methods for this.titleshould be set from the first T header in each tune and thealtTitlefield should be set from the second T header if one exists. If a tune has only one T header, then thealtTitlefield of the tune should be null. If there are more than two titles for a tune (more than two T headers), then you can ignore the third and subsequent titles.notationshould contain the full tune including the headers and the music notes.Here is some example code that loads and prints a text file you can use to get started writing this method. Also fee free to have a look at the code from Monday's class
BufferedReader inputStream = null;
try {
    inputStream = new BufferedReader(new FileReader("words.txt"));

    String l;
    while ((l = inputStream.readLine()) != null)
    {
        System.out.println(l);
    }
}
catch (IOException e)
{
    e.printStackTrace();
}
finally
{
    if (inputStream != null) {
        try
        {
            inputStream.close();
        }
        catch(Exception e)
        {
            e.printStackTrace();
        }
    }
}
-
Write a
toStringmethod on theTuneBookclass that returns aStringversion of the tunesArrayList, with each element of theArrayListon a seperate line in the returnedString. -
Write a method
public Tune findTune(String title)on theTuneBookclass that returns the first matchingTunefrom the ArrayList that contains the parametertitlein the title of the tune. -
Create an
interfacecalledPlayerthat has one method calledvoid play() -
Implement the interface on the
Tuneclass. The play method should just print the notation for the tune to the console. -
Put a
mainmethod on theTuneBookclass that has the following code on it to test your solution. It's best to test your code as you go along and don't wait until you have all the parts completed before compiling and running your code.
    public static void main(String[] args)
    {
        TuneBook tb = new TuneBook("hnj0.abc");
        System.out.println(tb);

        Tune t = tb.findTune("Scotsman over the Border");
        t.play();
    }
Below is sample of what your program should output:
1, Bride's Favourite, The
2, Irish Washerwoman, The
3, Banish Misfortune
4, Piper's Chair, The, Cathaoir an Ph\'iob\'aire
5, Scotsman over the Border, The
...
(lines omitted)
...
97, O'Broin's Flightcase
98, Wheels of the World, The
99, Peter O'Byrne's Fancy, Peter Byrne's Fancy
100, Humours of Drinagh, The

X:5
T:Scotsman over the Border, The
R:jig
H:Related to The Carraroe Jig, #181
D:Music at Matt Molloy's.
D:Noel Hill & Tony Linnane.
D:Molloy, Peoples, Brady.
Z:id:hn-jig-5
M:6/8
K:D
DED FDF | AFA d2A | ~B3 BAB | dgf edB |
ADD FDF | AFA d2A | ~B3 AFA | dAF ~E3 :|
|: dfa afa | bag fef | dfa afe | def edB |
dfa afa | bag fed | B2B AFA | dAF ~E3 :|
P:variations
|: ~D3 FDF | AFA d2A | ~B3 BAB | def edB |
ADD ~F3 | AFA d2A | BdB AFA |1 dAF EFE :|2 dAF EFA ||
|: dfa afa | bag fge | dfa afe | def edB |
dfa af/g/a | bag fge | d2B AFA |1 dAF EFA :|2 dAF EFE ||
Commit your code whenever you get something completed. Submit the URL to your git repository here.
| Description | Marks |
|---|---|
Writing the Tune class, with private fields & public accessors |
15 marks |
toString method on the Tune class |
10 marks |
TuneBook class with an ArrayList of Tune objects |
10 marks |
Loading tunes into the ArrayList |
25 marks |
toString method on the TuneBook |
10 marks |
Writing the findTune method |
10 marks |
| Writing and implementing the interface | 10 marks |
| Correct use of git | 10 marks |
-
All about the Levenshtein Distance from my PhD thesis. This might be a bit complicated to read
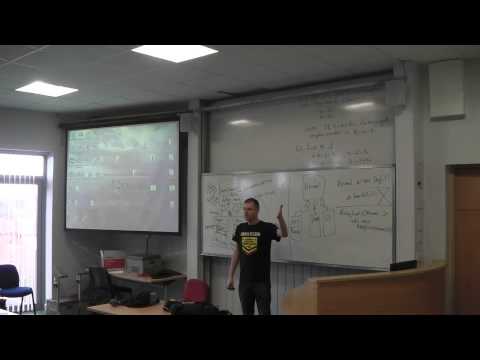
-
A lecture I gave about the Levenshtein Distance algorithm from a few years ago:
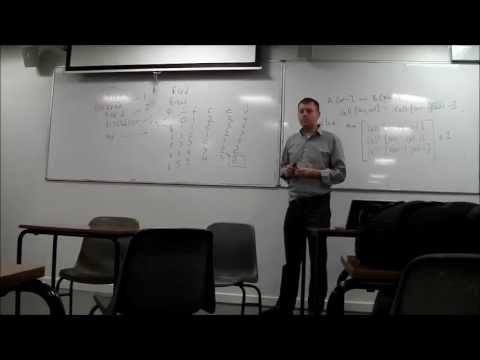
- Have fun implementing the Levenshtein Distance. Its a cool algorithm when you get it to work :-)
- See what matrices are used for
- Build a component of a music information retrieval system
Today lets implement the Levenstein Distance algorithm (also known as the Edit Distance) in Java. Of course you can Google this and you will find lots of solutions online in 5 seconds. But don't do this. Instead, try and implement it from your memory and your notes from the class on Monday. If you weren't here then try asking one of your classmates to explain it to you instead of Googling the solution, or watch the video I put up.
Here is how I suggest you do it:
- Take the Matrix Java project we were working and use it as starter code. You can clone the repo to get it.
- Create a new branch for this weeks work:
cd OOP-2017-2018
git checkout -b lab3
- Create a new class called EditDistance.java in the same package as the other classes.
- Create a static method on the class called min3 that takes three float parameters and returns the minimum of these three numbers
- Create a static method on the class called MinimumEditDistance that takes two String parameters, needle and haystack that evaluates the minimum edit distance between needle and haystack. Implement the Levenstein Distance algorithm to calculate this. You should probably print out the matrix by calling the toString method to verify that it is set up correctly
- In the Main class, add this code:
String sa = "I love DIT";
String sb = "I love Tunepal";
System.out.println("Edit distance between: " + sa + " and: " + sb + " is " + EditDistance.MinimumEditDistance(sa, sb));

sa = "Games Fleadh";
sb = "Imagine Cup";
System.out.println("Edit distance between: " + sa + " and: " + sb + " is " + EditDistance.MinimumEditDistance(sa, sb));- It should print the following:
$ java ie.dit.Main
0.0 1.0 2.0 3.0 4.0 5.0 6.0 7.0 8.0 9.0 10.0 11.0 12.0 13.0 14.0
1.0 0.0 1.0 2.0 3.0 4.0 5.0 6.0 7.0 8.0 9.0 10.0 11.0 12.0 13.0
2.0 1.0 0.0 1.0 2.0 3.0 4.0 5.0 6.0 7.0 8.0 9.0 10.0 11.0 12.0
3.0 2.0 1.0 0.0 1.0 2.0 3.0 4.0 5.0 6.0 7.0 8.0 9.0 10.0 11.0
4.0 3.0 2.0 1.0 0.0 1.0 2.0 3.0 4.0 5.0 6.0 7.0 8.0 9.0 10.0
5.0 4.0 3.0 2.0 1.0 0.0 1.0 2.0 3.0 4.0 5.0 6.0 7.0 8.0 9.0
6.0 5.0 4.0 3.0 2.0 1.0 0.0 1.0 2.0 3.0 4.0 5.0 6.0 7.0 8.0
7.0 6.0 5.0 4.0 3.0 2.0 1.0 0.0 1.0 2.0 3.0 4.0 5.0 6.0 7.0
8.0 7.0 6.0 5.0 4.0 3.0 2.0 1.0 1.0 3.0 3.0 5.0 5.0 7.0 7.0
9.0 8.0 7.0 6.0 5.0 4.0 3.0 2.0 2.0 2.0 3.0 6.0 6.0 6.0 7.0
10.0 9.0 8.0 7.0 6.0 5.0 4.0 3.0 2.0 3.0 3.0 7.0 7.0 7.0 7.0

Edit distance between: I love DIT and: I love Tunepal is 7.0
0.0 1.0 2.0 3.0 4.0 5.0 6.0 7.0 8.0 9.0 10.0 11.0
1.0 1.0 3.0 3.0 5.0 5.0 7.0 7.0 9.0 9.0 11.0 11.0
2.0 2.0 2.0 3.0 6.0 6.0 6.0 7.0 10.0 10.0 10.0 11.0
3.0 3.0 2.0 4.0 4.0 5.0 6.0 8.0 8.0 9.0 10.0 12.0
4.0 4.0 3.0 3.0 4.0 6.0 6.0 6.0 7.0 8.0 9.0 10.0
5.0 5.0 4.0 4.0 4.0 7.0 7.0 7.0 7.0 9.0 9.0 11.0
6.0 6.0 5.0 5.0 5.0 5.0 6.0 7.0 7.0 10.0 10.0 10.0
7.0 7.0 6.0 6.0 6.0 6.0 6.0 8.0 8.0 8.0 9.0 10.0
8.0 8.0 7.0 7.0 7.0 7.0 7.0 7.0 8.0 9.0 9.0 11.0
9.0 9.0 8.0 8.0 8.0 8.0 8.0 7.0 9.0 9.0 10.0 10.0
10.0 10.0 9.0 8.0 9.0 9.0 9.0 8.0 8.0 9.0 11.0 11.0
11.0 11.0 10.0 9.0 9.0 10.0 10.0 9.0 9.0 9.0 12.0 12.0
12.0 12.0 11.0 10.0 10.0 10.0 11.0 10.0 10.0 10.0 10.0 11.0

Edit distance between: Games Fleadh and: Imagine Cup is 11.0
- Unity Tutorials
- Download a build of Infinite Forms
- The Unity project we worked on in the class, with some extra stuff
Important Unity stuff to know (there are great tutorials online for all this stuff):
- The Unity editor
- Using Unity with Visual Studio
- GameObjects, GameComponents
- Vector3, Quaternions
- Transforms & parenting
- Exposing c# properties to Unity
- Start & Update methods
- Using tags
- Using the input manager
- Instianting GameObjects from prefabs
- Colliders & triggers
- Rigidbodies, forces & torque
This Unity project has examples of all of these.
- Learn how the most popular game engine in the world uses OO principles in the design of it's classes
- Make a simple tank game in Unity
- Use Visual Studio
Clone the repo for the course and create a branch for your work today
git clone https://github.com/skooter500/OOP-2017-2018
cd OOP-2017-2018
git checkout -b lab2
Launch Unity and open the project that's part of the course repository in the folder OOP-2017-2018/Unity/UnityIdioms. There are three scenes in this project. You can switch scene in Unity by going File | Open Scene and navigating to the Assets folder that's part of the project hierarchy.
scene1 is the player controlled tank with the 3rd person camera. This scene will also spawn enemy tanks that the player can shoot at.
sceen2 is the player controlled tank with a physicsSpawner object that has a script attached that makes a wall that the player tank can crash into or shoot at.
You can open the Visual Studio project associated with the Unity project by going to the Assets | Open C# Project and it will open Visual Studio so you can edit your code. Take a good read through the C# code associated with this project and make sure and open each scene and run it to see what it does.
You should open scene3 which just has a player controlled tank and a fixed camera. You control the tank by using wasd and space to shoot.
The aim of today's lab is to create a second player controlled tank, controlled with the ijkl and enter keys for shooting. You can make it a different colour to the first player controlled tank and have it shoot differently coloured bullets. Try and get each tank to explode when it gets hit by the opponents bullets. You can have a look at the code in EnemyTanik.cs to se how I achieved the explosion.
-
Study this project for examples of encapsulation, inheritance, polymorphism, interfaces and abstract classes
-
Compiling and running your first Java program:
-
The Matrix code we wrote in the class
- Get practice writing and calling a static method on a class
- Develop your computational thinking skills by implementing methods to do matrix addition and multiplication
Today we will be adding methods to the Matrix class to allow matrix addition, and (optionally) multiplication.
Clone the repository for the course by starting a bash shell and cd'ing to where you want to work and typing:
git clone https://github.com/skooter500/OOP-2017-2018
Create a branch for your work today:
cd OOP-2017-2018
git checkout -b lab1
Compile the code we wrote on Monday:
cd java
javac ie/dit/*.java
Run the code by typing:
java ie.dit.Main
Open the file Matrix.java in Notepad++
This class has two methods signatures for matrix addition that allows us to perform the following operations:
- A+= B - This is the non-static method add that takes one parameter
- A = B + C - This is the static method that takes two parameters.
Read this article on static in Java if you missed the class.
- Write the implementation for a non-static method add(Matrix b) that adds the b parameter matrix to the current matrix.
- Write the implementation for static method add(Matrix a, Matrix b) that adds the a and b matrices together and returns a new matrix. It currently returns null. Replace this!
- Put the following test code into your Main method:
Matrix a = new Matrix(4, 4);
a.identity();
a.setElement(2, 3, 7);
a.setElement(3, 1, 2);
a.setElement(3, 0, 4);

Matrix b = new Matrix(4, 4);
b.identity();
b.setElement(2, 3, 1);
b.setElement(3, 1, 9);
b.setElement(3, 0, -7);

a.add(b); // Add b to a. This is like a+= b;

Matrix c;
// Add b to a, without changing a. Instead create a new matrix and return it
// This is like c = a + b
c = Matrix.add(a, b); // How to call a static method

System.out.println(a);
System.out.println(b);
System.out.println(c);
Your program should output the following:
2.0     0.0     0.0     0.0
0.0     2.0     0.0     0.0
0.0     0.0     2.0     8.0
-3.0    11.0    0.0     2.0

1.0     0.0     0.0     0.0
0.0     1.0     0.0     0.0
0.0     0.0     1.0     1.0
-7.0    9.0     0.0     1.0

3.0     0.0     0.0     0.0
0.0     3.0     0.0     0.0
0.0     0.0     3.0     9.0
-10.0   20.0    0.0     3.0
Read all about matrix multiplication and implement the static and non-static methods for multiplying two matrices together.
You can add this code to the end of the main method:
a.mult(b);
c = Matrix.mult(a, b);
System.out.println(a);
System.out.println(b);
System.out.println(c);
And now your program should print:
2.0     0.0     0.0     0.0
0.0     2.0     0.0     0.0
0.0     0.0     2.0     8.0
-3.0    11.0    0.0     2.0

1.0     0.0     0.0     0.0
0.0     1.0     0.0     0.0
0.0     0.0     1.0     1.0
-7.0    9.0     0.0     1.0

3.0     0.0     0.0     0.0
0.0     3.0     0.0     0.0
0.0     0.0     3.0     9.0
-10.0   20.0    0.0     3.0

2.0     0.0     0.0     0.0
0.0     2.0     0.0     0.0
-56.0   72.0    2.0     10.0
-17.0   29.0    0.0     2.0

1.0     0.0     0.0     0.0
0.0     1.0     0.0     0.0
0.0     0.0     1.0     1.0
-7.0    9.0     0.0     1.0

2.0     0.0     0.0     0.0
0.0     2.0     0.0     0.0
-126.0  162.0   2.0     12.0
-31.0   47.0    0.0     2.0
You can commit your changes by typing:
git add .
git commit -m "My changes"
- We made a Powerup interface and made an AmmoPowerup and a HealthPowerup implementation
- Updated YASC code
- Interfaces in Processing
Today you should check out the code we worked on in the class and you can make the following additions:
- Make the keys used to control the player ships fields in the Player class and construct two instances that use different keys so that two players can play at the same time
- Make the the powerups spawn offscreen and move onscreen. Currently they spawn at random positions
- Remove the powerups when they go off screen
- Make it possible for the bullets to collide with the player ships. A bullet collision should remove 1 health. You can do this by modifying the update method in the Player class
- When the players health gets to 0, the other player should win the game.
- You can make the bullets wrap around the screen and get removed after 5 seconds rather than get removed when they go offscreen
- Learn how to use PVectors
- Learn how to implement realistic physics by implementing Newton's Laws of Motion
Modify the code we worked on on the class on Monday so that the ship moves with realistic physics. You should use PVectors in your solution. The three equations you need to implement are:
A = F / m
V = V + A * t
P = P + V * t
Where A = Acceleration, V = Velocity, P = Position, t = time
Force is measured in Newtons and is a vector quantity, so it has magnitude and direction. When you press the w and s keys, instead of moving the position vector, you should create force vector in the direction of the forward vector. To do this, take the forward vector and multiply by the newtons of force you want to apply. I used 100 Newtons of force in my solution.
After you generate the force you need to write code to implement the 3 equations above.
- Calculate the acceleration due to the force
- Calculate the new velocity
- Update the position based on the velocity and time.
I added the following fields to the Player class to do this:
- force, power, timeDelta, velocity and acceleration
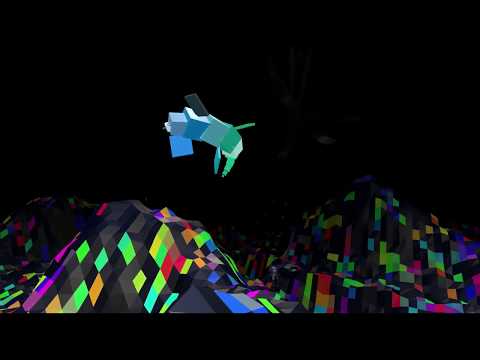
If you implement this correctly, your ship will accelerate and move realistically. If you want to implement friction, so that the ship slows down, a simple way to do this is to just multiply the velocity by 0.99f each frame. This removes 1% of the velocity. Here is what my sketch looks like:

Some ideas to try:
- Make the keys used to control the ship fields in the Player class, so you can instantiate several ships controlled with different keys
- Have the player ship draw a trail
- Implement gravity
- We made a path following player ship

- All about git
- Learn how to use the main features of git via the git bash shell
This lab is all about practicing using git and github. This will work best if you for a group of 2, so that you can get experience collaborating with someone on a project through git. Firstly, make sure you know what the following bash commands do. Fire up the bash shell and try them out. There are lots more, but these are the most common ones I use. Google them and try them out!
pwd
ls
ls -a
cd
mkdir
mv
find
grep
Note, folders in the bash shell are seperated using / and in Windows explorer you should have the following options checked:
- Show file name extensions
- Hidden files
You will find these options on the View tab of any Windows Explorer window
Also from the bash shell, you can use TAB to complete commands.
Setting up git
- I recommend you install git for Windows rather than the github client. You can optionally install SourceTree which is a nice git gui program that allows you to diff commits (view the changes) amongst lots of other cool stuff.
- The first time you try and do a commit or a push you may have to run come commands to set up your email address and username. Just follow the instructions to do this.
- At some stage you should read the first 3 chapters of the git manual. This is pretty much all you need to know.
Note! Select the text using your mouse in the bash shell window and it will get copied to the clipboard. Press Ctrl + Ins to paste.
Basic stuff
- Create a project in Processing and save it somewhere
- Fire up the bash shell and use cd to navigate to the project folder
- Type
git initin the project folder to create an empty git repo. Notice that a new hidden folder called .git will appear in the folder - Create the project on your github account on github.com. Dont forget to create a .gitignore and a readme.
- Get the url of the new repo and type:
git remote add origin THE_URL_OF_YOUR_REPO
- Type
git pull origin masterto get the changes from the server. Typela -aand you should see the new files listed. - Type
git add .to add your local changes to the staging area - Type
git commit -m "some message"to make a commit - Type
git push --set-upstream origin masterThis creates the connection between your master branch and the master branch on the server - Type
git pushto send your changes to the server
Rolling back to a previous commit
-
Make a few more commits and push them
-
Type
git logto see the history of your branch and see the 40 digit hexedecimal id's of your commits. It should look something like thiscommit 7ccd905733dc710ecf38b0431d1143528b5dc1c7 Author: skooter500 <skooter500@gmail.com> Date: Thu Apr 14 10:03:17 2016 +0100 Added todays lab commit 4b46bea9d2ccd434076310049a5553ccc241adc6 Author: Bryan Duggan <skooter500@gmail.com> Date: Fri Mar 25 12:55:44 2016 +0000 classes and bullets example commit 6e949c599f038209c9b22da99d5b014a7c47387a Author: Bryan Duggan <skooter500@gmail.com> Date: Thu Mar 3 09:15:18 2016 +0000 broken link -
Copy one of the 40 digit ids and type
git checkout THE-40-DIGIT-IDOpen up your sketch and you should see it has reverted to the old version. -
Type
git checkout masterand the head pointer will move to the head of the branch (the latest commit). Open up your sketch and you should see it has changed to the latest version
Rolling back to a previous commit and making a new branch
- If you want to go back to an old version of a project and make changes, you will often see articles on stack overflow etc saying that you should hard reset the head. I recommend that you don't do this as this will delete the subsequent commits on the branch and you might want to get these changes back sometime. Instead, the best thing to do is make the changes on a new branch.
- Checkout one of the old commits again. Make some changes to the sketch
- Type
git checkout -b my_new_branchYou can call the branch something different if you want! The -b flag means create the new branch. - Add and commit your changes to the new branch
- Now switch back to the master branch by typing
git checkout master. Open your sketch and verify that you are at the latest version of the project on the master branch. - You can switch branches at anytime by typing
git checkout THE_BRANCH_NAME - If you want to send this new branch to the server, checkout the branch (no -b flag this time) and type:
git push --set-upstream origin my_new_branchgit push
Deleting files
- git will normally just store files that have been added or modified in a commit. Files that are deleted don't get deleted in the commit so that if you checkout that commit, the files that you deleted will reappear. If you have deleted files in a commit you should use
git add . --all. Try it!
Branching
- You can create multiple branches in git if you want to try new stuff without screwing up your project. In fact it is common to create a new branch every time you want to add a new feature and then merge the branch into the master branch when the feature is completed. Lets try this.
- Type
git checkout masterto switch to the head of the master branch - Type
git branchThis shows you what branch you are currently on. You can also type ```git branch --all`` to show all the branches. - Type
git checkout -b test_branchto create a new branch and switch to it - Make some changes to to your Processing sketch and save them
- Add and commit these changes.
- To send this new branch to the server type:
git push --set-upstream origin test_branchgit push
- Type
git checkout masterto switch to the master branch and check your Processing sketch to make sure your changes are gone. - Type
git checkout test_branchand open the Processing sketch to make sure your changes are back again - Type
git checkout masterto switch to the master branch again - Now lets merge the test_branch changes into the master branch. Type
git merge test_branchto do this - Open your sketch and see that the changes you made on the test_branch have been merged in.
- Add and commit your merged changes.
Dealing with merge conficts
-
Often, git will merge edits in files automatically, but merge conflicts can occur whenever commits have edits on the same line of the same file. This can happen even when only one person is working on a project. When this happens, git will tell you what files are causing problems and mark up the files with the changes from both commits.
-
Give your team mate permission to commit to the repository. To do this, go to Settings | Collaborators and add their github id. Your team mate can clone the repository by typing:
git clone THE_URL_OF_THE_REPO
-
Now both of you should make some edits to the same file. Make some edits on the same lines of the file and on different lines of the file
-
Your team mate should add, commit an push their changes. You can jump onto the github website and verify that their changes have been pushed
-
Now you should add commit and try and push your changes. You will get a message that looks like this:
To https://github.com/skooter500/TestGit ! [rejected] master -> master (non-fast-forward) error: failed to push some refs to 'https://github.com/skooter500/TestGit' hint: Updates were rejected because the tip of your current branch is behind hint: its remote counterpart. Integrate the remote changes (e.g. hint: 'git pull ...') before pushing again. hint: See the 'Note about fast-forwards' in 'git push --help' for details. -
What this is saying is that there are changes on the server that you dont have and you need to pull and merge them before you can send your commit. To do this type:
-
git pull -
Now the changes from the head of the master branch on the server will get merged into your local git repository. git will attempt to merge files, but in this case you should get a merge conflict. It looks like this:
Auto-merging TestGit/TestGit.pde CONFLICT (content): Merge conflict in TestGit/TestGit.pde Automatic merge failed; fix conflicts and then commit the result. -
If you open the file in question, you will see that it has been edited to look something like this:
<<<<<<< HEAD // Hello from Bryan! ======= // Hello from Tara! >>>>>>> c365e047b35d76bf3b2d48f38980db4b68746825 void setup() { } -
The bits between <<<<<<< HEAD and ======= are the changes from your commit and the changes between ======= and >>>>>>> c365e047b35d76bf3b2d48f38980db4b68746825 are the changes from your team mates commit. Decide which bit you want to keep and delete the unwanted bits from the file and then add, commit and push your changes.
Merge conflicts on binary files
-
Git can merge text files, with source code, but it cant merge binary files such as images. Lets see how to handle this
-
Add an image to your project and have your team mate, commit and push this change.
-
Have your team mate pull the repo to get the image.
-
Now you should both have the image. Both of you should edit the image and save the changes
-
Both you and your team mate should add and commit this change, but have your team mate push first
-
When you try to push, you will get a message saying that your push has been rejected and you need to do a pull first
To https://github.com/skooter500/TestGit ! [rejected] master -> master (fetch first) error: failed to push some refs to 'https://github.com/skooter500/TestGit' hint: Updates were rejected because the remote contains work that you do hint: not have locally. This is usually caused by another repository pushing hint: to the same ref. You may want to first integrate the remote changes hint: (e.g., 'git pull ...') before pushing again. hint: See the 'Note about fast-forwards' in 'git push --help' for details. -
When you do a pull, you will get a merge conflict on the image file:
From https://github.com/skooter500/TestGit c365e04..43b59e5 master -> origin/master warning: Cannot merge binary files: TestGit/test.JPG (HEAD vs. 43b59e5d2c53c909fb227a02b6e65681fa91e42a) Auto-merging TestGit/test.JPG CONFLICT (content): Merge conflict in TestGit/test.JPG Automatic merge failed; fix conflicts and then commit the result. -
git doesn't know how to deal with these edits and so to resolve this conflict, you have to decide which version of the file you want to keep, the one from the server, or your version. If you want to keep your version, you type:
git checkout --ours THE_FILE_NAME- Don't forget to use / to seperate paths and use TAB to complete commands
- If you want to keep the version from the server you can type
git checkout --theirs THE_FILE_NAME- You can type these commands multiple times if you want to just swicth between the two versions to compare them.
-
When you are done, add, commit and push your changes
Congratulations! I suggest you finish the lab by setting your assignment up on git
-
Stephen Hawkings on the Game of Life:
-
John Conway on the Game of Life:
-
Epic Conway's Game of Life:
-
My project - Infinite Forms
-
And finally, Alan Watts


- Complete the game of life code
- Practice iterating over a 2D array
- Discover the amazing power of cellular automata
Try and complete the Game of Life we started in the class today. Here is the code from the class. Ive given a list of methods you could implement. If you get your basic game of life to evolve, you could try these additions:
-
The method
void mousePressed()gets called in your sketch whenever the mouse is pressed. The methodmouseDraggedgets called whenever you hold the mouse down and move it over your sketch. You can get the mouse x and y coordinates by using the built in variablesmouseXandmouseY. You can use these methods to implement mouse drawing. To do this you need to calculate which row and column in the 2D array the mouse is over and then set this cell to be true. -
When you press the space key, the game should pause and unmpause, in other words, not update the game board while the game is paused
-
When you press the c key, the board should clear. In otherwords, you should set every element in th 2D array to be false.
-
When you press the r key, you should randomly set 50% of the elements to be true. To do this, you need to iterate through the array and generate a random number between 0.0f and 1.0f. If the number is > 0.5f, you set the element to be true otherwise set it to be false.
-
Here is a modification to have colours
There some interesting starting patterns you can program also. You could write code so that when you press a number key it creates the starting pattern at the mouse x and y. I used the mouse x and y to be the top left of the shape.
| Pattern | Description |
|---|---|
 |
Gosper Gun |
 |
Lightweight spaceship |
 |
Tumbler |
 |
Glider |
 |
I'm not sure what this is called, but it makes amazing patterns |
- Partial solution to the lab test from last year. This has an example of using a class, an ArrayList and it draws the grid.
- Our implementation of the Processing map function

- Make classes
- Use an ArrayList
- Use the Processing map function
- Get familiar with loading a CSV dataset
- Get practice for the lab test
Today, try to finish off the last part of last years lab test, which is being able to click on stars and calculate the distance in parsecs between the two stars.
- Have a go at completing the lab test from 2014. It's not as much fun, but you can get the chance to practice a lot of the concepts we have learned in the class in the past couple of weeks:
- Making a class with constructors
- Loading a dataset
- Using an ArrayList
- Iterating over an ArrayList
- Visualising a dataset
- Using the map function
- Here is a link to the dataset you need
- Last years lab test
- Download the star dataset
- loadTable refererence
- map reference
- Classes in Processing
- ArrayList reference
- Make classes
- Use an ArrayList
- Use the Processing map function
- Get familiar with loading a CSV dataset
- Get practice for the lab test
Here is the code that we wrote in the class today. It has:
- A star class with multiple constructors
- loadTable to load a csv file of data
- An ArrayList of Star objects
See how far you get in completing last years lab test. Don't be tempted to look at the solution straight away, try and code a solution yourself.


- Practice iterating over arrays in Java
- Practice in using the for loop and variables to generate sequences of numbers
- Understand how a line graph is made
- Practice constructing alogorithms as part of a system
- Practice presenting data visually
Here is some starter code with examples of arrays
Here is what you can try and make today:

These are the steps I suggest you follow:
- Figure out how to draw a trend line graph first
- Then figure out how to leave horizontal and vertical borders around the graph. I would suggest making a variable called border to control this.
- Then figure out how to scale it so that it scales the data when drawing to the range 0-150. You could make this a variable
- Then figure out how to draw the horizontal axis. This will be a for loop obviously. You might find the following Java/Processing methods useful:
- The Processing map method
- text - Prints text to the screen at x and y coordinates
- textAlign
- substring
- Finally figure out how to draw the vertical axis. Another loop! This is the trickiest part I think
Try and parameterise as much of your sketch with variables, so that you could reuse the code to graph other types of data. For example, I found it useful to write a method:
void drawAxis(float[] data, String[] horizLabels, int verticalIntervals, int maxVertical, float border)to draw the horizontal and vertical axes. You might like to write seperate methods for the horizontal and vertical axis. This took me about an hour to complete today, so it's tricky enough to get everything working, but worth it!
Try and draw this pie chart:

You can use the Processing arc method to do this!
There is a bug running Processing through Java 9, so you have to run Processing with Java 8 instead To change the version of Java to Java 8 on the Mac:
export JAVA_HOME=`/usr/libexec/java_home -v 1.8`
package ie.dit;
import processing.core.PApplet;

public class AudioViz extends PApplet {

	public void setup()
    {
    }

    public void settings()
    {
        size(500, 500);
    }

    public void draw()
    {
    	background(0);
    	stroke(255);
    	line(100, 100, 200, 200);
    }

    public static void main(String[] args)
    {
        String[] a = {"MAIN"};
        PApplet.runSketch( a, new AudioViz());
    }
}
This is how to compile and run a Processing Java program on Mac:
javac -classpath /Applications/Processing.app/Contents/Java/core.jar ie/dit/*.java
java -classpath /Applications/Processing.app/Contents/Java/core.jar:. ie.dit.ProcessingTest

- Use what you learned in class to build a complete game system in Processing
- Practice drawing stuff and working out relative co-ordinates
- Practice using variables and compound if statements
- Gain experience thinking computationally
- Learn how to use random numbers
- Learn how to get input from the keyboard
- Learn how to import libraries into Processing
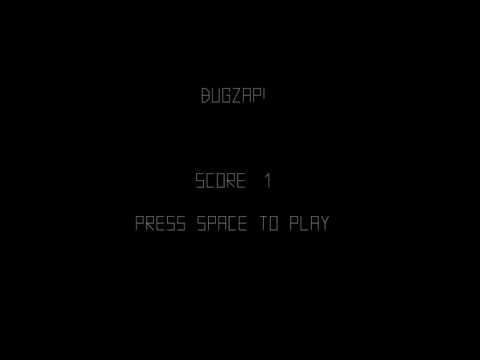
This is a video of a game called Bugzap that you can try and make in Processing today. There is a fair bit to it, so don't worry if you don't manage to complete everything.
How you should do it:
-
Get the main game working first and then if you have time, add fonts, sound, the splash screen and the game over screen.
-
Write some code to draw the bug. You can write a method to do this if you like (but it's not essential). Here is an article on using methods in processing. Also make global variables for the bug position and size.
-
Get the bug moving. The bug moves a random amount either to the left or the right and it also moves down the screen. Use the random method in Processing to generate random numbers. Also the bug can't move off the screen. You can use the % operator to make something happen on an interval. For example:
if (frameCount % 60 == 0)
{
  // Code in here will happen once per second
}
-
Write some code to draw the player. Use variables to control the player position and size. A method is good here too!
-
Write code to move the player in response to a key presses. This is one way to do keyboard handling in Processing:
if (keyPressed)
{
  if (keyCode == LEFT)
  {
    // This will happen if the left key is pressed
  }
}-
Now add the player lazer. I used to UP key for this. I just drew a line for the lazer.
-
Make a variable for score and check for collisions between the lazer and the bug. Add a variable for score. You can print stuff to the screen using the text method in Processing. In my version, I actually used this processing library which makes wireframe text.
-
Make some sound effects and add them to the game. I used BFXR to make the sounds and the Minim library to play them, but you might prefer to use the built-in audio methods in Processing.
-
Add the splash screen and game over screen
- Clone the repository for the course by typing:
git clone https://github.com/skooter500/OOP-2017-2018
- If you already have the course cloned, you can pull the latest changes by cd'ing to the folder where you cloned the course and typing:
git pull
- Open the rick_n_morty.pde sketch. This sketch loads the background image and sound. Complete the sketch so that it does this:

- Enroll on Webcourses
- Become familiar with the syntax of Processing
- Become familiar with writing and running sketches in Processing
- Clone a git repository!
- Install Processing libraries
-
Log onto Webcourses and enroll on the module CMPU2016.
-
Check out the Processing reference
-
Check out these Sci-Fi user interfaces made by last years OOP students
-
Check out these music visualisers made in Processing by last years game programming students
-
If you are curious, check out some of my creature videos
-
Look up the following methods in the Processing language reference to make sure you are clear about the syntax and parameters:
- noStroke
- noFill
- line
- ellipse
- rect
- background
- stroke
- fill
- size
- arc
- triangle
Write a processing sketch to draw the following shapes:


I prefer to draw the shapes on paper first before I try and work out the coordinates. Try experimenting with different colours!
Clone the course website:
- Install git if you need to. It should be installed on the lab computers already
- Start git bash
- Type
pwdto print the current working directory - Type
cd ˜to cd to your home directory - Type
cd DocumentsAlso you can start typing the path and then press TAB and bash will autocomplete the command - You can use the command mkdir to make a directory if you want to make a subdirectory
- Type
git clone https://github.com/skooter500/OOP-2017-2018to clone the course website - Now navigate to the OOP-2017-2018 folder in windows explorer and have a look at the files that were cloned
Clone NILL, a game I programmed in Processing and get it running:
- Type
git clone https://github.com/skooter500/NILLThis will clone the repository - Find the NILL folder that was created and double click on the file NILL.pde. It should open in Processing
- You need to install the Minim library and the Game control libraries to make NILL work. Go to Sketch | IMport Library | Add library to do this
- See if you can collect all the pods
- Have a look through the source code for NILL and see if you can figure out the following
- What are the Java datatypes?
- What classes are in the project?
- How is the landscape drawn?
- How does the game keep track of all the objects on screen?
Clone the repository for NILL and get the game working as described above. Create a new branch by typing:
git checkout -b tutorial
Now make the following changes to the game:
- Change the colour of the Ship
- Change the movement speed of the ship
- Change how fast the ship rotates
- Change the force of gravity on the ship
- Increase the amount of fuel the ship starts with
- Make the powerups spawn twice as fast
- Make the game spawn fuel twice as frequently as asteroids
- Change the bumpiness of the terrain
- Add more pods
- Draw the fuel pods as octogons instead of pentagons
- Increase the number of stars in the background
- Change the keys used to control the ship to be A, D and W instead of left, right and up
- Disable collisions between the ship and the terrain
Commit your changes to the new branch by typing:
git add . -- all
git commit -m "tutorial changes"