This repository has the source code and a simple test dataset for the paper "Interactive Ray Casting of Geodesic Grids" (EuroVis13). The paper and errata is available for download.
GeodesicGridDVR is an open source, GPU based high-performance direct volume rendering of spherical geodesic grid.
The GeodesicGridDVR core rendering code is based on OpenGL GLSL, and runs on anything from laptop, to workstations.
The rendering algorithm is based on the publication Interactive Ray Casting of Geodesic Grids.

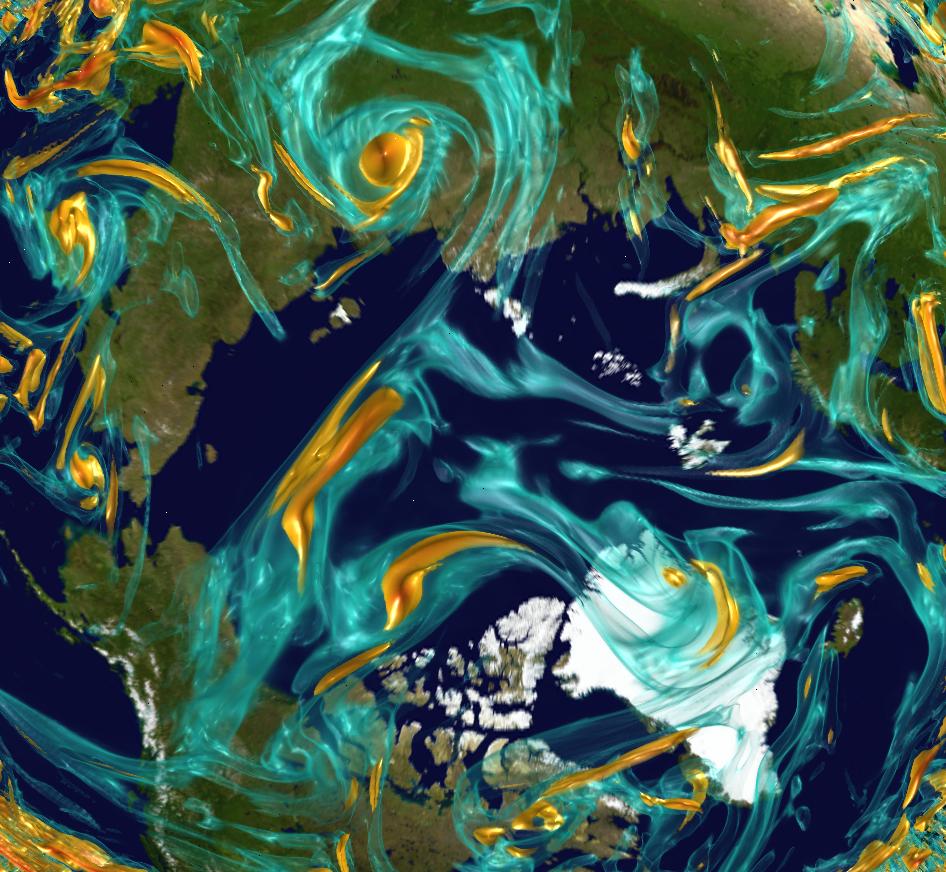


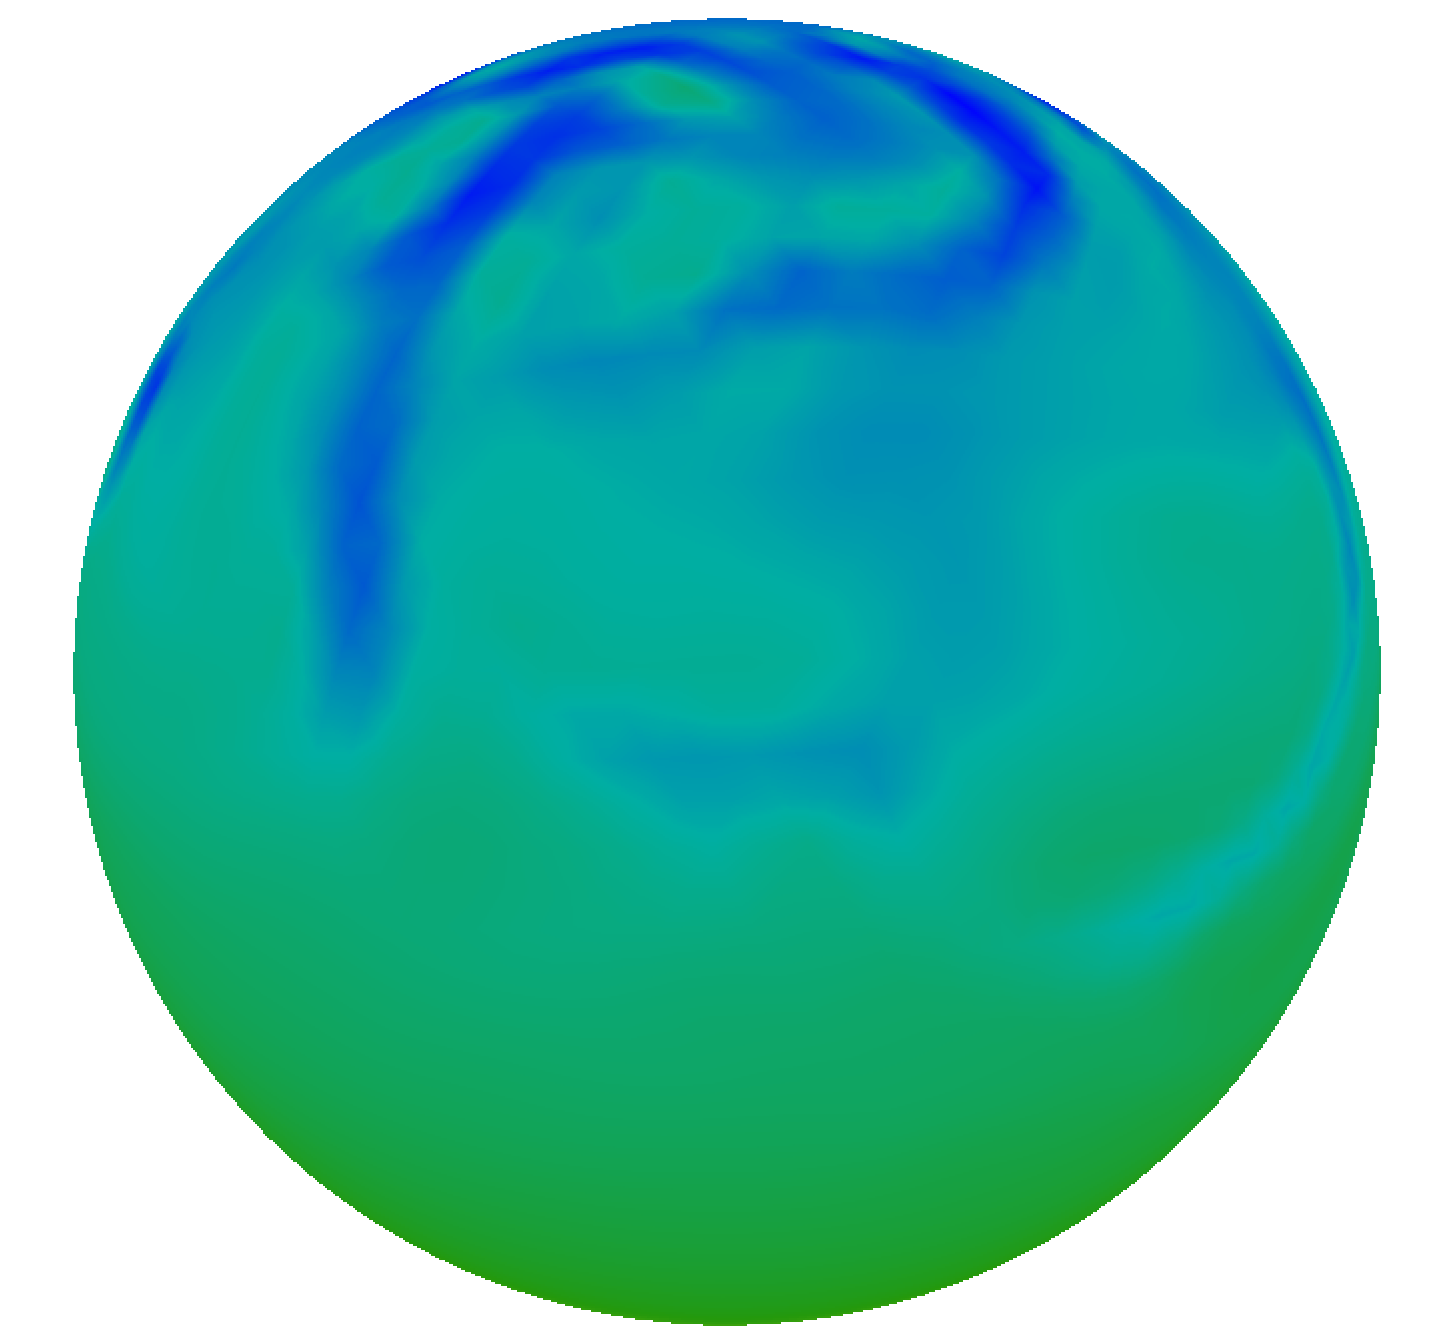
Image rendered by the GeodesicGridDVR. Note that the first two images above are rendered using high resolution dataset which is not available in this repository.
If you find this work useful in your research, please consider citing:
Xie, Jinrong, Hongfeng Yu, and Kwan‐Liu Ma.
"Interactive ray casting of geodesic grids."
Computer Graphics Forum. Vol. 32. No. 3pt4. Blackwell Publishing Ltd, 2013.
BibTeX citation
@inproceedings{xie2013interactive,
  title={Interactive ray casting of geodesic grids},
  author={Xie, Jinrong and Yu, Hongfeng and Ma, Kwan-Liu},
  booktitle={Computer Graphics Forum},
  volume={32},
  number={3pt4},
  pages={481--490},
  year={2013},
  organization={Wiley Online Library}
}
Xie, Jinrong, Hongfeng Yu, and Kwan-Liu Maz.
"Visualizing large 3D geodesic grid data with massively distributed GPUs."
Large Data Analysis and Visualization (LDAV), 2014 IEEE 4th Symposium on. IEEE, 2014.
BibTeX citation
@inproceedings{xie2014visualizing,
  title={Visualizing large 3D geodesic grid data with massively distributed GPUs},
  author={Xie, Jinrong and Yu, Hongfeng and Maz, Kwan-Liu},
  booktitle={Large Data Analysis and Visualization (LDAV), 2014 IEEE 4th Symposium on},
  pages={3--10},
  year={2014},
  organization={IEEE}
}
GeodesicGridDVR uses cmake for cross-platform build. We do our best to guarantee stable release versions. However, a certain number of bugs, as-yet-missing features, inconsistencies, or any other issues are still possible. Should you find any such issues please report them via the issue tracker
GeodesicGridDVR is designed to support Linux, Mac OS X, and Windows. In addition, before you build GeodesicGridDVR from source you need the following prerequisites:
- You need any form of C++11 compiler and build tool CMake
- You need glew a cross-platform library to expose OpenGL core and extension functionality.
- You need freeglut to provide a simple cross-platform window system. This demo is based on lightweight freeglut, you're encouraged to use other full fledged library such as Qt
- You need netcdf-c library to load netcdf data file. You may also find NASA's Panoply data viewer helpful to inspect the netcdf file content.
- Finally, you need Davinci, a lightweight object-oriented 3D library that makes programming OpenGL easier. Note that Davinci also depends on glew and freeglut.
Depending on your Linux distribution you can install these dependencies
using yum or apt-get. Some of these packages might already be
installed or might have slightly different names.
Type the following to install the dependencies using yum:
sudo yum install cmake.x86_64
Type the following to install the dependencies using apt-get:
sudo apt-get install cmake-curses-gui
Under Mac OS X these dependencies can be installed using HomeBrew:
brew cask install cmake (note that `brew install cmake` only includes the CLI version)
brew install glew
brew install freeglut
brew tap homebrew/science
brew install netcdf
brew install cdo
brew install nco
brew install ncview
Building from the source code through CMake is easy:
        mkdir geodesic_grid_dvr/build
        cd geodesic_grid_dvr/build
I do recommend having separate build directory from the source directory, so that you won't accidentally checked in the temporary files generated during the build process.
From this step beyond you have two options to run cmake, choose one of the following two.
cmake ../path/to/geodesic_grid_dvr_source
In case cmake cannot find the dependencies, you can alway tell cmake where they can be found by defining the root of the library installation as follows
        cmake -DGLEW_ROOT_DIR="path/to/glew_root"
              -DFREEGLUT_ROOT_DIR="path/to/freeglut_root"
              -DNETCDF_ROOT_DIR="path/to/netcdf_root"
              -DDAVINCI_ROOT_DIR="path/to/davinci_root"

              ../path/to/geodesic_grid_dvr_source
CMake would try it best to guess what is the most appropriate build system generator you need based on your machine OS, for example, Unix Makefile for linux OS, Visual Studio for Windows. If you don't like the default build system generator, you can overide it by passing additional cmake parameter -G"generator name"
For example, on Windows with Visual Studio 2013 x64:
cmake -G"Visual Studio 12 2013 Win64"
on Linux:
cmake -G"Unix Makefiles"
Type cmake --help for more options.
Besides CLI tool, CMake also provides an user friendly GUI to configure your build.
The following screen shot is an example of how to run and configure the cmake through its GUI on Windows machine.
 In case CMake cannot find the aforementioned dependencies, you can manually specify the root of the installation of each library on the UI just like you can define the cmake variable through its CLI in step 2.1.
Once the pathes are correctly set, hit
In case CMake cannot find the aforementioned dependencies, you can manually specify the root of the installation of each library on the UI just like you can define the cmake variable through its CLI in step 2.1.
Once the pathes are correctly set, hit Configure. If this is your first time to configure the project, you will be prompted to select appropriate generator for this project.
Click Generate to create makefile or Visual Studio sln file based on your selection in the last step.
Lastly, navigate to the build directory and build the project using
make
or launch Visual Studio.
-
Data dependency
The application requires as input a sample test data (stored indatafolder) and a colormap (transfer function) file (stored inconfigfolder). During launch, it'll look for them in thedatafolder andconfigfolder respectively. The project CMake file is configured to automatically copy those two folders to location where the exectutable is generated. In case the automation step fails, you need to manually do so. -
Dynamic linkage library dependency
Make sure the *.dll or *.so lib files from glew, freeglut, and netcdf can be found by your application. Or else please export their path to LD_LIRARY_PATH on linux machine
export LD_LIBRARY_PATH="$LD_LIBRARY_PATH:path/to/*.so"
or add them to the environment variable Path for Windows machine
This application provides direct volume rendering of scientific simulation data based on spherical geodesic grid. It also visualizes the structure either as hexagon or its dual triangular mesh.
Here is a list of keyboard mapping
key 'v': toggle between volume rendering and mesh visualization
key 'h': toggle between hexagon and dual-triangular mesh visualization
key 'f': toggle between solid and wire frame mesh
key 'l': toggle between enabling and disabling lighting for both volume render and mesh visualization
key '+': increase raycasting stepsize (higher frame rate)
key '-': decrease raycasting stepsize (better quality)
key 'w': move camera forward
key 's': move camera backward
key 'a': move camera to the left
key 'd': move camera to the right
key ' ': move camera upward
key 'z': move camera downward
mouse dragging: rotate object
mouse wheel: scale object
This work was made possible by the support of the ViDi lab at University of California Davis.
Data courtesy of Karen Schuchardt at Pacific Northwest National Laboratory.
The source available on GitHub is under MIT license. Images used in the repository are licensed under Creative Commons Attribution CC-BY 2.0 unless noted otherwise. Some figures that have been reused from other sources don't fall under this license.