Revolutionary app for record time in a completely automatic way. Used for athletic races of 100.
- 2x Nucleo board STM32F401
- 2x Proximity sensors HC-SR04
- 3x Bluetooth module HC-05
- 3x Led (optional)
- Some cable.
- Chronosmart Application


We use 3 bluetooth module. Two module are connected with master and slave method.
Outside

Inside

Outside

Inside

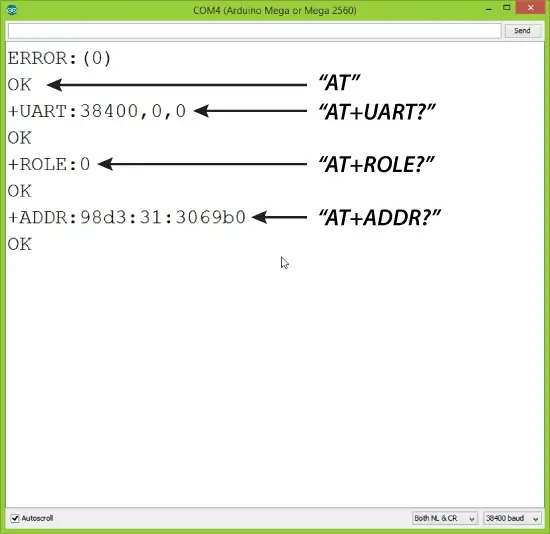
Most useful AT commands are
- AT : Ceck the connection.
- AT+NAME : See default name
- AT+ADDR : see default address
- AT+VERSION : See version
- AT+UART : See baudrate
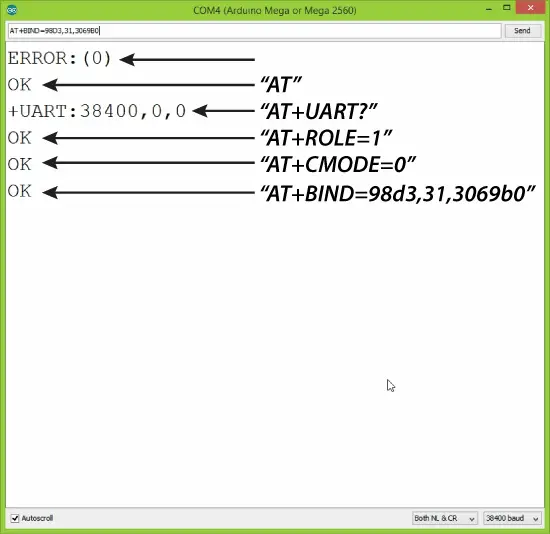
- AT+ROLE: See role of bt module(1=master/0=slave)
- AT+RESET : Reset and exit AT mode
- AT+ORGL : Restore factory settings
- AT+PSWD: see default password
Slave configuration
Master configuration
The arduino code for make work the project "Chronosmart". There are two file that you have to load on the boards after pairing them each other through the AT mode.
The master waits for the start signal from the slave wich in turn waits for the start of the app hence when the user click on the button "start" the slave send "1" to master and the system is turn On. When the runner is positioned in front of the first sensor the master turn on the green Led to signal that it will start to record time when the run starts. Once the runner starts the Master send a signal to make the slave start to record time.
The slave send the "1" to the master (when the user click on the "start button") and wait the signal (always from the master) to start the stopwatch. When the runner passes in front of the sensor, the slave stop the stopwatch and send the time to the Android app.
We took the times of the same phenomenon in two different ways:
- Connection by cable
- Connection via Bluetooth
We have made 10 attempts and the average delay time between the two connections is: 92.5 ms
as shown in this screen:

How to make serial connection:
- RX of first Nucleo connected with TX of second Nucleo.
- TX of first Nucleo connected with RX of second Nucleo.
- GND between the two Nucleo.

The components of our project are:
- Android application
- database on hosting service
- Firebase Authentication and Firebase Realtime

The athlete positions the two devices, one on the starting line, respectively, while the other on the finish line. The athlete from the Chronosmart app, enables the device. Next it is positioned near the sensor and the light on the device comes on. When the athlete starts the light goes out and the device starts counting the time. When the rider passes in front of the sensor at the end of the race, the time is sent to the app and the runner will choose whether to save or reject it.

The user must register in the app and login for use all the functionality. You can set up a training session (enabling the Nucleo board to record the time) and can check the results.

The user must press "Start" button, and after , when athlete finish to run, the time appears on the screen, along with two buttons, one to save the session and one to delete it.

The user can access his statistics by clicking on the menu in the appropriate button. The statistics are shown as a graph, with the possibility of being zoomed, containing the times, dates and weather information.

Links to our LinkedIn accounts:
- First presentation - Idea : https://www.slideshare.net/AntonioIonta/my-fitness-system-initial-ideas
- Overview and user evaluation : https://www.slideshare.net/AntonioIonta/chronosmart-overview-user-evaluation
- MVP: https://www.slideshare.net/AntonioIonta/chronosmart-mvp
- Final presentation - Chronosmart : https://www.slideshare.net/AntonioIonta/chronosmart-final-presentation-101093689