This project is a MIDI controller, based on an Arduino Pro Micro. It can generate and send MIDI messages based on user input from potentiometers, a keypad, and various configuration parameters. In other words it is DIY launchpad!
I'm using here BandLab - easy-to-use platform for creating music.
The following libraries are used in this project:
- MIDIUSB: This library provides MIDI functionality over USB.
- Keypad: This library facilitates interfacing with a keypad matrix.
- Mux: This library supports multiplexing analog inputs.
- FastLED: This library allows control of addressable LEDs.
The Arduino Pro Micro MIDI controller supports the following features:
-
Modes of Operation:
- The controller supports multiple modes, such as SETUP_MODE, NORMAL_MODE, and AUTO_MODE.
- Modes can be changed using a specific keypad sequence - hold down-left + down-rigth keys for 2 seconds.
-
MIDI Note Generation in NORMAL_MODE:
- Potentiometers are used to generate MIDI control change messages.
- Keypad buttons trigger MIDI note on and note off events.
-
Tonality, Tonic and Chord Control in SETUP_MODE:
- The tonality and tonic note can be selected using potentiometers. The same with number of notes to play. Increasing potentiometer value equals stacking more notes on top of each other in thirds, max 4 notes which gives us 7th chords eg. c e g h -> C maj7.
- Different scale modes (Major, Natural Minor, Harmonic Minor, Pentatonic, Chromatic) can be chosen.
-
LED Visualization:
- LEDs are used to visualize potentiometer values and sending notes.
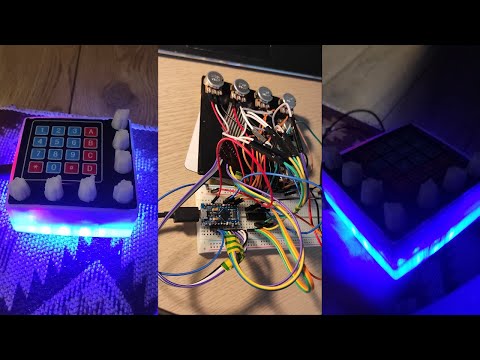
- Assemble Hardware: Wire up the potentiometers, keypad, and LEDs according to the circut schematic. Print 3D parts from launchpad_parts folder, I used black PLA for top part and lucent PETG for rest, so light from LEDs was visible.
- Install required libraries.
- Connect the Arduino device using USB and upload code.
- Have fun and be creative!
Changing code structure to OOP approach- work in progress:)