Integrating WordPress Roles with UH Groupings
Aloha! For our users in the University of Hawai‘i System, we offer here a short guide on using Authorizer to integrate UH Groupings membership with the WordPress role assigned to users when they log into your WordPress site.
This guide is meant for UH members managing their own WordPress installations (e.g., departmental websites, course materials, research groups, etc.) who want to be able to allow other UH members to log into their WordPress sites. Reasons for doing this may include:
- restricting sensitive materials to specific UH members;
- providing a different experience to different groups of users (e.g., faculty vs. students);
- allowing students to save their progress with course materials.
For security reasons, we recommend that UH members who have to log into any WordPress sites do so using the Authorizer integration with UH Logins. This prevents users having to store multiple passwords for the different WordPress sites they use, and also isolates the handling of passwords onto the central CAS server maintained by UH ITS.

Once the Authorizer plugin is installed and configured to support UH Logins, it can also be configured to integrate with UH Groupings, so that users who log in with their UH IDs can get assigned a WordPress role that is relevant to their use of the site. This guide provides instructions on how to make that happen.
To get us started, let's use the following example scenario:
Ikaika manages a WordPress site that acts as a public calendar for all the college's upcoming events. He would like to allow all faculty and staff in his college to add events to the calendar, and decides to use Authorizer and UH Groupings to make this work. By integrating the two, he will allow faculty and staff in his college to log in using their UH Logins, and be assigned a role that allows them to create calendar events.
- Follow the instructions in our guide for Configuring Authorizer for UH Logins.
-
If you don't already have a UH Grouping created, request one here: https://uhawaii.atlassian.net/wiki/spaces/UHIAM/pages/13403213/UH+Groupings
-
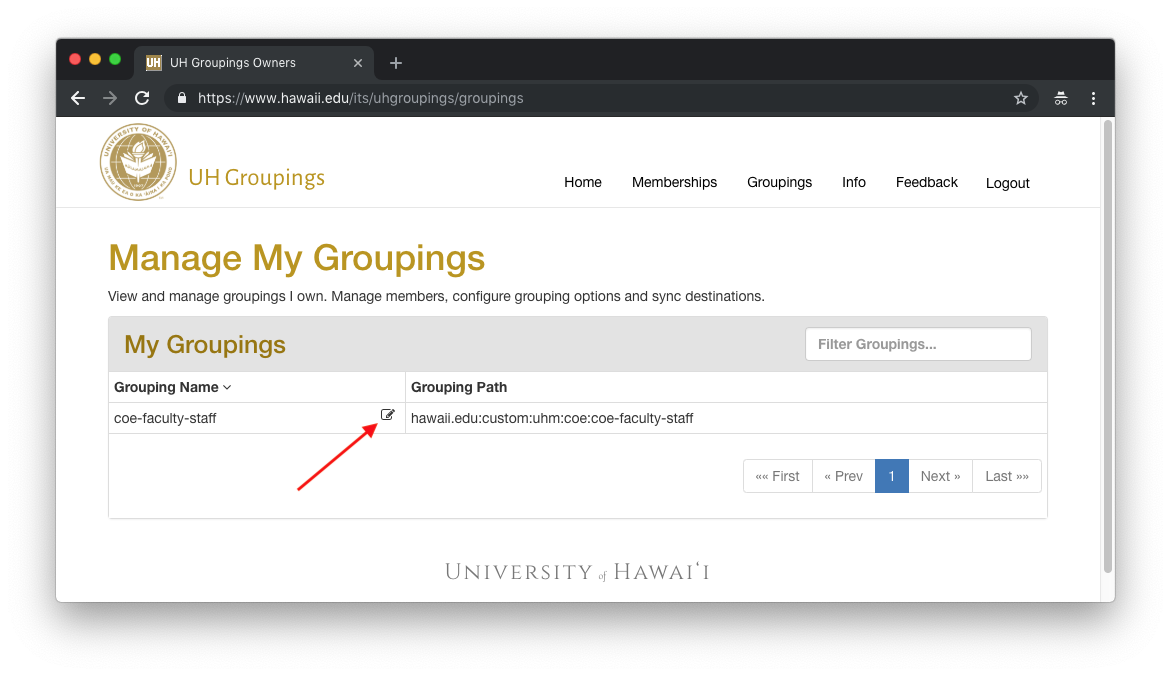
Log into UH Groupings and click on Groupings:

-
Find your grouping and click the Edit icon next to it:
-
Click on the Gear icon and make sure that CAS/LDAP: uhReleasedGrouping is selected. This allows your grouping to be included in the
uhReleasedGroupingattribute when a user logs in via UH Logins.
- In your active WordPress theme, add the following PHP code to create the role that you want to link to your UH Grouping. Make sure to adjust the specific capabilities to match what you want the new role to have access to by uncommenting them (by default, all capabilities are turned off). (If you don't know where else to put it, add this code to your theme's
functions.phpfile.)
/**
 * Create custom roles.
 *
 * @see https://codex.wordpress.org/Roles_and_Capabilities
 */
function add_custom_roles() {
	// Add "Faculty/Staff" role.
	remove_role( 'facstaff' );
	$result = add_role( 'facstaff', 'Faculty/Staff', array(
		// ### Administrator capabilities:
		// 'update_core'            => true,
		// 'manage_options'         => true,
		// 'edit_dashboard'         => true,
		// 'install_plugins'        => true,
		// 'activate_plugins'       => true,
		// 'update_plugins'         => true,
		// 'edit_plugins'           => true,
		// 'delete_plugins'         => true,
		// 'install_themes'         => true,
		// 'switch_themes'          => true,
		// 'update_themes'          => true,
		// 'edit_themes'            => true,
		// 'delete_themes'          => true,
		// 'edit_theme_options'     => true,
		// 'create_users'           => true,
		// 'list_users'             => true,
		// 'edit_users'             => true,
		// 'promote_users'          => true,
		// 'remove_users'           => true,
		// 'delete_users'           => true,
		// 'edit_files'             => true,
		// 'export'                 => true,
		// 'import'                 => true,
		// ### Editor capabilities:
		'unfiltered_html'           => true,
		// 'manage_categories'      => true,
		// 'manage_links'           => true,
		// 'moderate_comments'      => true,
		'edit_pages'                => true,
		'delete_pages'              => true,
		'publish_pages'             => true,
		'edit_published_pages'      => true,
		'delete_published_pages'    => true,
		// 'edit_others_pages'      => true,
		// 'delete_others_pages'    => true,
		// 'read_private_pages'     => true,
		// 'edit_private_pages'     => true,
		// 'delete_private_pages'   => true,
		// 'edit_others_posts'      => true,
		// 'delete_others_posts'    => true,
		// 'read_private_posts'     => true,
		// 'edit_private_posts'     => true,
		// 'delete_private_posts'   => true,
		// ### Author capabilities:
		'upload_files'              => true,
		'publish_posts'             => true,
		'edit_published_posts'      => true,
		'delete_published_posts'    => true,
		// ### Contributor capabilities:
		'edit_posts'                => true,
		'delete_posts'              => true,
		// ### Subscriber capabilities:
		'read'                      => true,
	));
}
add_action( 'after_switch_theme', 'add_custom_roles' );
if ( defined( 'WP_DEBUG' ) && true === WP_DEBUG ) {
	add_action( 'init', 'add_custom_roles' );
}
Note: if you have
WP_DEBUGenabled inwp-config.php, the role will be updated on every page load, which is not performant. WithoutWP_DEBUGenabled, the role will only be created/updated when you activate the theme.
- In your active WordPress theme, add the following PHP code to assign the
facstaffWordPress role to any users logging in via UH Logins that have the UH Groupingmycollege-faculty-staff. (If you don't know where else to put it, add this code to your theme'sfunctions.phpfile.)
/**
 * Filter the default role of the currently logging in user based on any of
 * their user attributes.
 *
 * @hook authorizer_custom_role
 *
 * @param string $default_role Default role of the currently logging in user.
 * @param array $user_data     User data returned from external service.
 */
function update_authorizer_custom_role( $default_role, $user_data ) {
	// Don't change role for administrators.
	if ( 'administrator' === $default_role ) {
		return $default_role;
	}

	// Assign custom roles to users with uhReleasedGrouping attributes.
	if ( isset( $user_data['cas_attributes']['uhReleasedGrouping'] ) ) {
		// Mapping for UH Grouping attributes to WordPress roles. If a user has
		// multiple UH Groupings, the last one in the array below takes precedence.
		$group_to_role_mapping = array(
			'mycollege-faculty-staff' => 'facstaff',
			// Add more mappings here, if needed, in this format:
			// 'uh-grouping' => 'wordpress_role',
		);
		foreach ( $group_to_role_mapping as $group => $role ) {
			if (
				$group === $user_data['cas_attributes']['uhReleasedGrouping'] ||
				(
					is_array( $user_data['cas_attributes']['uhReleasedGrouping'] ) &&
					array_search( $group, $user_data['cas_attributes']['uhReleasedGrouping'] ) !== false
				)
			) {
				$default_role = $role;
			}
		}
	}

	return $default_role;
}
add_filter( 'authorizer_custom_role', 'update_authorizer_custom_role', 10, 2 );
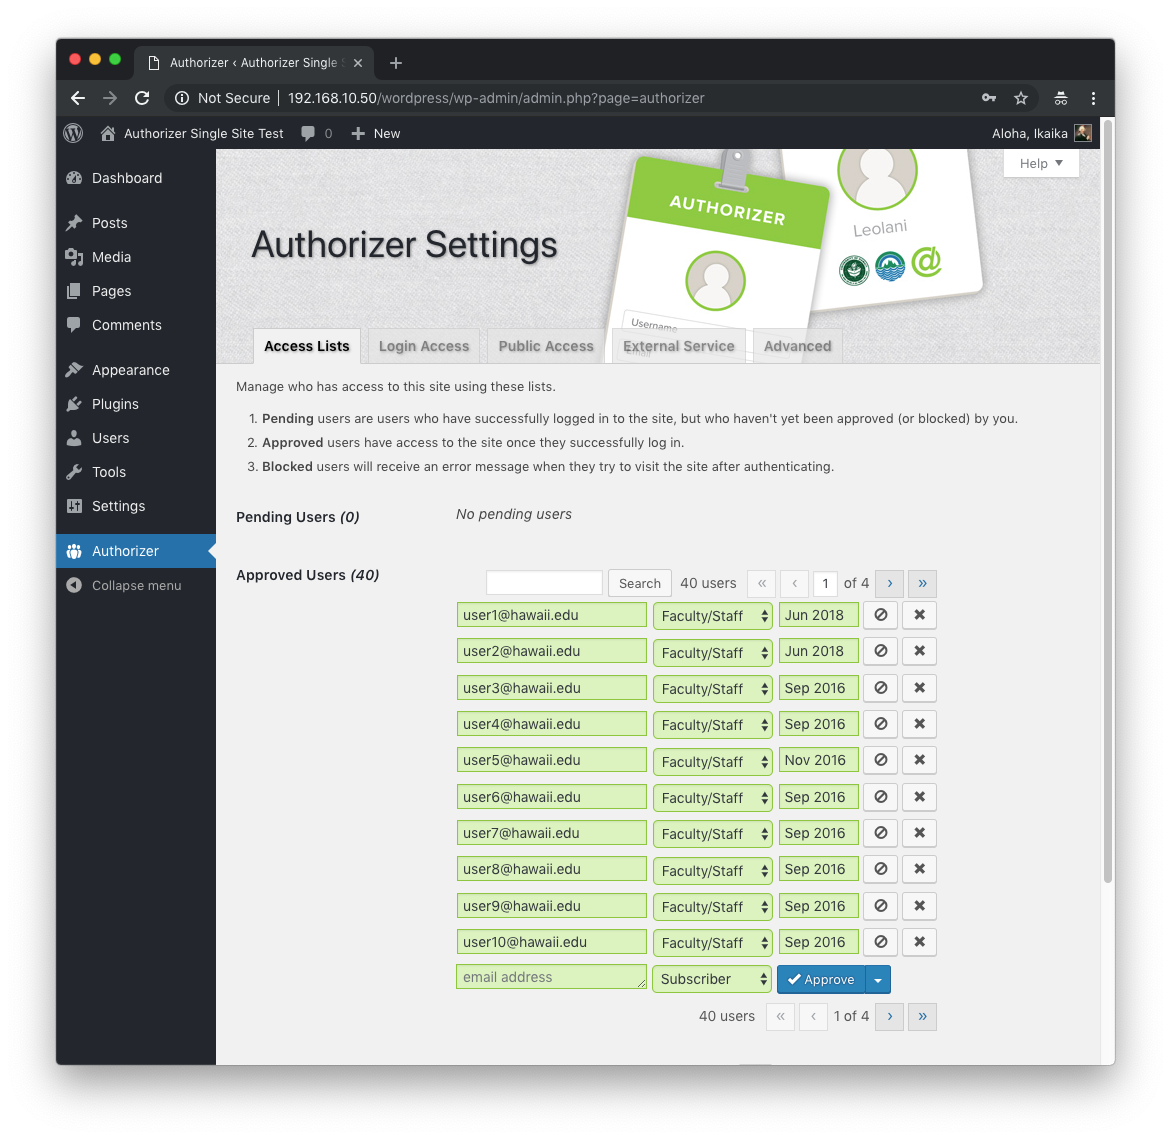
Everything should be configured now, so go ahead and test with a new user logging in to verify that they got their role correctly assigned. After they log in, you should see their entry listed in the Authorizer Approved User list, with their new role correctly assigned:
You can also configure Authorizer to only allow new logins from members of a specific UH Grouping:
- Navigate to
WordPress Dashboard > Authorizer > Login Access. - Configure the following options:
- Who can log into the site?: 🔘 Only approved users
- In your active WordPress theme, add the following PHP code to automatically approve new users if they have the specified UH Grouping in their CAS attributes. _(If you don't know where else to put it, add this code to your theme's
functions.phpfile.)
/**
 * Filter whether to automatically approve the currently logging in user
 * based on any of their user attributes.
 *
 * @hook authorizer_automatically_approve_login
 *
 * @param bool  $automatically_approve_login
 *   Whether to automatically approve the currently logging in user.
 * @param array $user_data User data returned from external service.
 */
function approve_uh_groupings( $automatically_approve_login, $user_data ) {
	// Automatically approve logins for CAS users with any of the following
	// uhReleasedGrouping values:
	if ( isset( $user_data['cas_attributes']['uhReleasedGrouping'] ) ) {
		$approved_groups = array(
			'mycollege-faculty-staff',
			// Add more UH Groupings here, if needed, in this format:
			// 'uh-grouping',
		);
		foreach ( $approved_groups as $approved_group ) {
			if (
				$approved_group === $user_data['cas_attributes']['uhReleasedGrouping'] ||
				(
					is_array( $user_data['cas_attributes']['uhReleasedGrouping'] ) &&
					array_search( $approved_group, $user_data['cas_attributes']['uhReleasedGrouping'] ) !== false
				)
			) {
				$automatically_approve_login = true;
			}
		}
	}

	return $automatically_approve_login;
}
add_filter( 'authorizer_automatically_approve_login', 'approve_uh_groupings', 10, 2 );