In this tutorial, you'll learn how to build a sales landing page:
- Build an entire sales-page with NextJS.
- Make payments via Stripe.
- Save their details to an Airtable database.

Trigger.dev is an open-source library that enables you to create and monitor long-running jobs for your app with NextJS, Remix, Astro, and so many more!
If you can spend 10 seconds giving us a star, I would be super grateful 💖
https://github.com/triggerdotdev/trigger.dev

Here, I'll walk you through creating the user interface for the course landing page.
Create a new TypeScript Next.js project by running the code snippet below.
npx create-next-app course-pageInstall the React Icons package to enable us to use different kinds of icons within the application.
npm install react-icons --saveThe application is divided into two pages: the Home page, representing the course landing page, and the Success page, which is displayed to the user after making a payment.
The Home page is divided into five sections - the navigation bar, header, features, purchase, and footer sections.
Update the index.tsx file, as done below. The placeholders represent each section of the landing page.
import { Inter } from "next/font/google";
const inter = Inter({ subsets: ["latin"] });

export default function Home() {
    return (
        <main className={` ${inter.className}`}>
            {/* --- Navigation bar --- */}
            <p>Hello world</p>
            {/* --- Header --- */}

            {/* --- Features Section --- */}

            {/* --- Purchase Now Section--- */}

            {/* --- Footer Section --- */}
        </main>
    );
}
Replace the Navigation bar placeholder with the code snippet below.
<nav className='md:h-[12vh] w-full md:p-8 p-4 flex items-center justify-between border-b-[1px] border-b-gray-200 bg-white sticky top-0 z-20'>
<h2 className='text-2xl font-bold text-purple-600'>TechGrow</h2>
<button className='bg-purple-600 hover:bg-purple-800 text-white px-5 py-3 rounded-2xl'>
Get Started
</button>
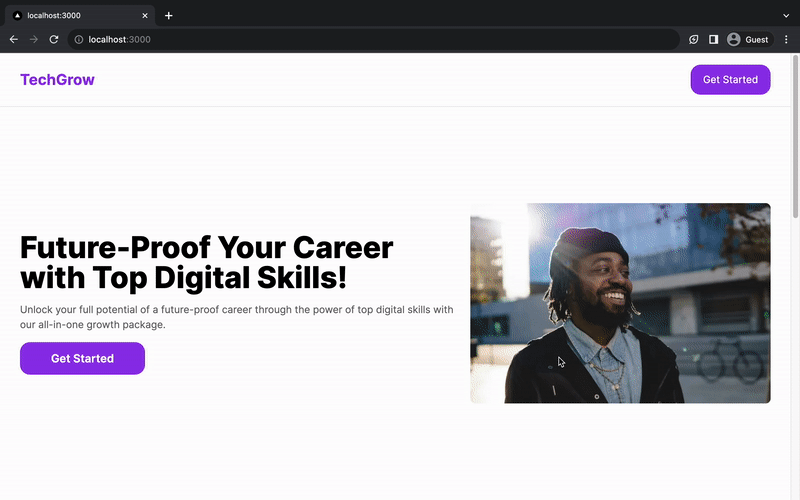
</nav>Copy the code snippet below into the Header section. You can get the image from its GitHub repository.
<header className='min-h-[88vh] w-full md:px-8 px-4 py-12 flex md:flex-row flex-col items-center justify-between'>
    <div className='md:w-[60%] w-full md:pr-6 md:mb-0 mb-8'>
        <h2 className='font-extrabold text-5xl mb-4'>
            Future-Proof Your Career with Top Digital Skills!
        </h2>
        <p className='opacity-60 mb-4'>
            Unlock your full potential of a future-proof career through the power of
            top digital skills with our all-in-one growth package.
        </p>
        <button className='bg-purple-600 hover:bg-purple-800 w-[200px] text-white px-5 py-3 rounded-2xl text-lg font-semibold'>
            Get Started
        </button>
    </div>
    <div className='md:w-[40%] w-full'>
        <Image src={headerImage} alt='Man smiling' className='rounded-lg' />
    </div>
</header>
The Features Section displays some of the reasons why a customer should purchase the course.
<section className='w-full min-h-[88vh] bg-purple-50 md:px-8 px-4 py-14 '>
    <h2 className='font-extrabold text-3xl text-center mb-4'>Why Choose Us?</h2>
    <p className='opacity-50 text-center'>
        Unlock your full potential of a future-proof career
    </p>
    <p className='opacity-50 mb-14 text-center'>
        that surpasses your expectation.
    </p>
    <div className='flex w-full items-center justify-between md:space-x-6 md:flex-row flex-col'>
        <div className='md:w-1/3 md:mb-0 mb-6 w-full bg-white rounded-xl px-5 py-8 hover:border-[1px] hover:border-purple-600 hover:shadow-md'>
            <div className='rounded-full p-4 bg-purple-50 max-w-max mb-2'>
                <FaChalkboardTeacher className='text-2xl text-purple-800' />
            </div>
            <p className='font-bold text-lg mb-2'>Expert instructors</p>
            <p className='text-sm opacity-50'>
                Learn from industry experts, gaining unique insights which cannot be
                found elsewhere.
            </p>
        </div>
        <div className='md:w-1/3 md:mb-0 mb-6 w-full bg-white rounded-xl px-5 py-8 hover:border-[1px] hover:border-purple-600 hover:shadow-md'>
            <div className='rounded-full p-4 bg-purple-50 max-w-max mb-2'>
                <IoDocumentTextSharp className='text-2xl text-purple-800' />
            </div>
            <p className='font-bold text-lg mb-2'>Hands-On Projects</p>
            <p className='text-sm opacity-50'>
                Learn practical, real-world digital skills through relevant projects and
                interactive sessions.
            </p>
        </div>
        <div className='md:w-1/3 md:mb-0 mb-6 w-full bg-white rounded-xl px-5 py-8 hover:border-[1px] hover:border-purple-600 hover:shadow-md'>
            <div className='rounded-full p-4 bg-purple-50 max-w-max mb-2'>
                <BsFillClockFill className='text-2xl text-purple-800' />
            </div>
            <p className='font-bold text-lg mb-2'>Lifetime Access</p>
            <p className='text-sm opacity-50'>
                Unlimited lifetime access for continuous learning and personal growth.
            </p>
        </div>
    </div>
</section>
Copy the code snippet below into the Purchase Now Section placeholder.
<div className='w-full min-h-[70vh] py-14 md:px-12 px-4 bg-purple-700 flex md:flex-row flex-col items-center justify-between'>
    <div className='md:w-[50%] w-full md:pr-6 md:mb-0 mb-8'>
        <h2 className='font-extrabold text-5xl mb-4 text-purple-50'>
            Start learning and grow your skills today!{" "}
        </h2>
        <p className='mb-4 text-purple-300'>
            Unlock your full potential of a future-proof career through the power of
            top digital skills with our all-in-one growth package.
        </p>
        <div className='mb-6'>
            <div className='flex items-center space-x-3 mb-2'>
                <AiFillCheckCircle className='text-2xl text-green-300' />
                <p className='text-purple-50 text-sm opacity-80'>24/7 availability</p>
            </div>
            <div className='flex items-center space-x-3 mb-2'>
                <AiFillCheckCircle className='text-2xl text-green-300' />
                <p className='text-purple-50 text-sm opacity-80 '>
                    Expert-led tutorials
                </p>
            </div>
            <div className='flex items-center space-x-3 mb-2'>
                <AiFillCheckCircle className='text-2xl text-green-300' />
                <p className='text-purple-50 text-sm opacity-80 '>
                    High-quality contents
                </p>
            </div>
            <div className='flex items-center space-x-3 mb-2'>
                <AiFillCheckCircle className='text-2xl text-green-300' />
                <p className='text-purple-50 text-sm opacity-80 '>
                    Hands-on practical and interactive sessions
                </p>
            </div>
        </div>
        <button className='bg-purple-50 hover:bg-purple-100 w-[200px] text-purple-600 px-5 py-3 rounded-2xl text-lg font-semibold'>
            Purchase Now
        </button>
    </div>
    <div className='md:w-[50%] w-full flex items-center justify-center'>
        <Image src={buy} alt='Man smiling' className='rounded-lg' />
    </div>
</div>
Finally, update the Footer section as done below.
<footer className='w-full flex items-center justify-center min-h-[10vh] bg-white'>
<p className='text-purple-800 text-sm'>
Copyright, © {new Date().getFullYear()} All Rights Reserved Tech Grow
</p>
</footer>After a successful payment, users are redirected to the Success page.
Create a success.tsx file and copy the code below into the file.
import React from "react";
import Link from "next/link";

export default function Success() {
    return (
        <div className='w-full min-h-[100vh] flex flex-col items-center justify-center'>
            <h2 className='text-3xl font-bold mb-4'>Payment Sucessful!</h2>
            <Link
                href='/'
                className='bg-purple-50 hover:bg-purple-100 text-purple-600 px-5 py-3 rounded-2xl text-lg font-semibold'
            >
                Go Home
            </Link>
        </div>
    );
}
Congratulations!🎉 You've successfully created the user interface for the application.
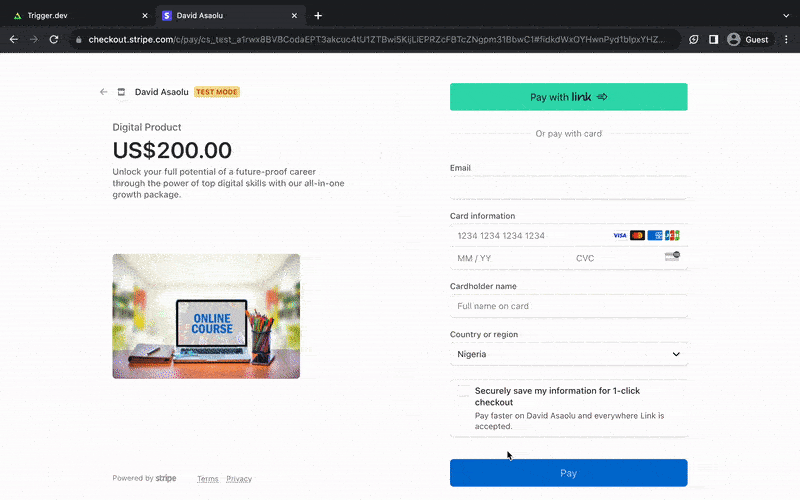
Stripe is a popular online payment processing platform that enables you to create products and integrate both one-time and recurring payment methods into your application.
Here, I'll walk you through how to create a product on Stripe and how to add the Stripe checkout page to your Next.js application.
First, you need to create a Stripe account. You can use a test mode account for this tutorial.

Select Products from the top menu and click the Add Product button to create a new product. Provide the product name, price, description, and payment option. Select one-time as the payment option.
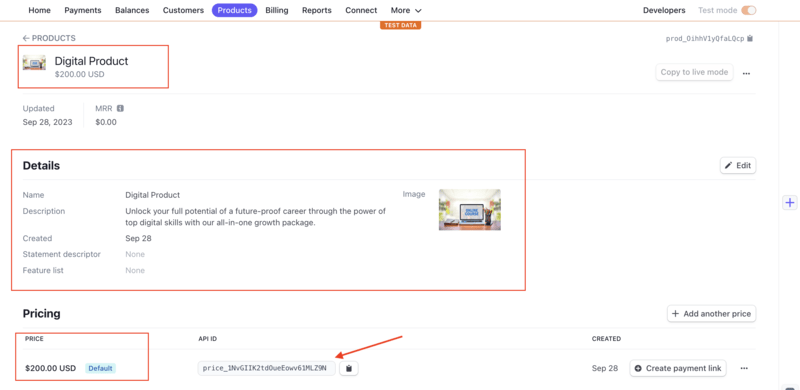
Create a .env.local file and copy the product ID into the file.
PRODUCT_ID=<YOUR_PRODUCT_ID>Next, click Developers from the top menu, select API keys, and create a new secret key.

Save the secret key into the .env.local file. It authenticates and enables you to access Stripe from the application.
STRIPE_API_KEY=<YOUR_STRIPE_SECRET_KEY>To do this, install the Stripe Node.js library.
npm install stripeCreate an API endpoint - api/payment within the Next.js application and copy the code below into the file.
//👉🏻  Within the api/payment.ts file
import type { NextApiRequest, NextApiResponse } from "next";
import Stripe from "stripe";

const stripe = new Stripe(process.env.STRIPE_API_KEY!, {} as any);

export default async function handler(
    req: NextApiRequest,
    res: NextApiResponse
) {
    const session = await stripe.checkout.sessions.create({
        line_items: [
            {
                price: process.env.PRODUCT_ID,
                quantity: 1,
            },
        ],
        mode: "payment",
        success_url: `http://localhost:3000/success?session_id={CHECKOUT_SESSION_ID}`,
        cancel_url: "http://localhost:3000",
    });

    res.status(200).json({ session: session.url });
}
The code snippet above creates a checkout session for the product and returns the session URL. The session URL is the link where payments for a product are collected, and you need to redirect users to this URL.
Create a function within the index.tsx file that retrieves the session URL from the API endpoint and redirects the user to the page. Execute the function when a user clicks any of the buttons on the web page.
const handlePayment = async () => {
    try {
        const data = await fetch("/api/payment");
        const response = await data.json();
        window.location.assign(response.session);
    } catch (err) {
        console.error(err);
    }
};
Congratulations!🎉 You've successfully added the Stripe checkout page to your application.
In the upcoming sections, you'll learn how to handle payments and save users' details to an Airtable database using Trigger.dev.
Trigger.dev is an open-source library that enables you to create and monitor long-running jobs for your app with NextJS, Remix, Astro, and so many more! With Trigger.dev, you can automate, schedule, and delay tasks within your codebase and in services like GitHub repositories, Slack channels, etc.
Here, you'll learn how to handle Stripe payments within your application using Trigger.dev webhooks.
Trigger.dev webhooks are user-friendly, managing both the registration and un-registration processes for you. Additionally, if there's an error, it attempts to resend the event until successful.
All you have to do is specify the service and events you want to listen to; Trigger.dev takes care of the configurations.
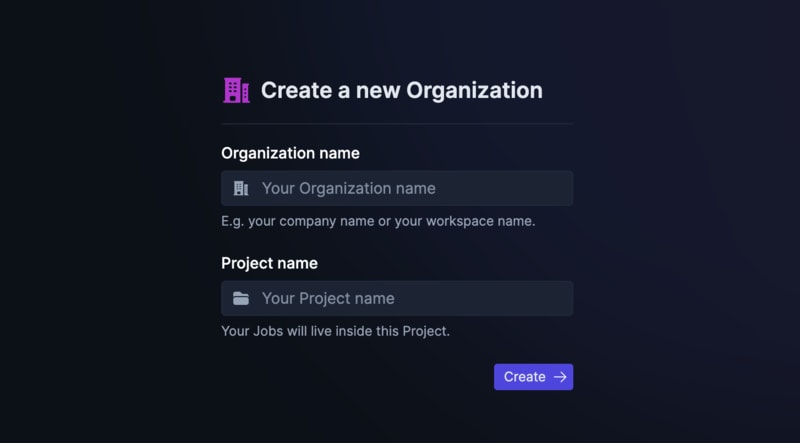
Before we proceed, you need to create a Trigger.dev account.
Create an organization and project name for your jobs.
Follow the steps provided. Once you've completed them, feel free to move on to the next section of this article.
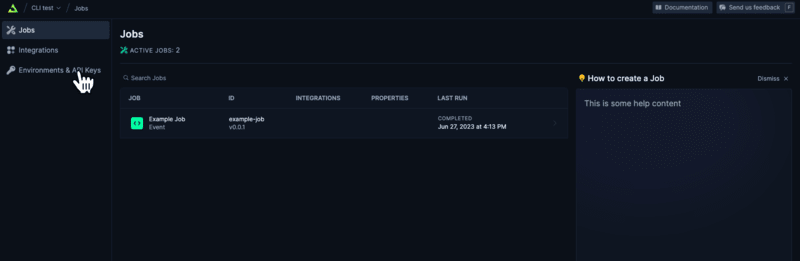
Otherwise, click Environments & API Keys on the sidebar menu of your project dashboard.
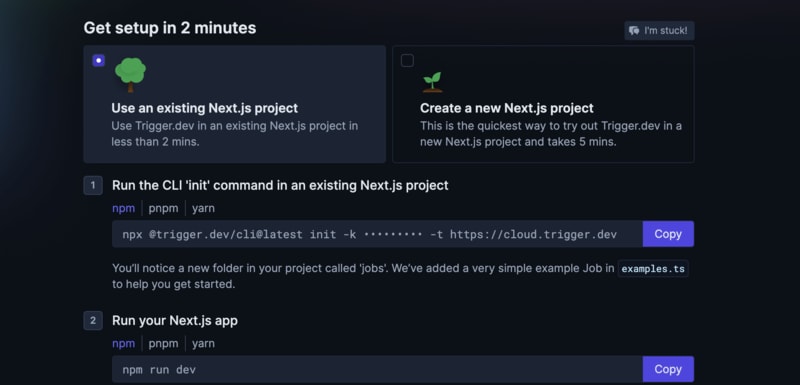
Copy your DEV server API key and run the code snippet below to install Trigger.dev. Follow the instructions carefully.
npx @trigger.dev/cli@latest initStart your Next.js project.
npm run devIn another terminal, run the following code snippet to establish a tunnel between Trigger.dev and your Next.js project.
npx @trigger.dev/cli@latest devFinally, rename the jobs/examples.ts file to jobs/functions.ts. This is where all the jobs are processed.
Congratulations!🎉 You've successfully added Trigger.dev to your Next.js app.
Install the Stripe package provided by Trigger.dev.
npm install @trigger.dev/stripe@latestUpdate the jobs/functions.ts file as shown below.
import { client } from "@/trigger";
import { Stripe } from "@trigger.dev/stripe";
const stripe = new Stripe({
id: "stripe",
apiKey: process.env.STRIPE_API_KEY!,
});
client.defineJob({
//👇🏻 job properties
id: "save-customer",
name: "Save Customer Details",
version: "0.0.1",
//👇🏻 event trigger
trigger: stripe.onCheckoutSessionCompleted(),
run: async (payload, io, ctx) => {
const { customer_details } = payload;
await io.logger.info("Getting event from Stripe!🎉");
//👇🏻 logs customer's details
await io.logger.info(JSON.stringify(customer_details));
await io.logger.info("✨ Congratulations, A customer just paid! ✨");
},
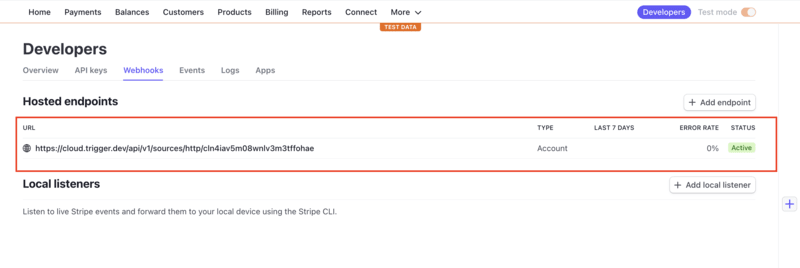
});The code snippet automatically creates a Stripe webhook that listens for checkout completion events, triggered when a user makes a payment.
After the user makes a payment, their details are logged to the job console on Trigger.dev.
After retrieving the customer's details from the Stripe webhook, the next step is to save these details to a database. In this section, you will learn how to integrate Airtable into a Next.js app and interact with it using Trigger.dev.
Airtable is an easy-to-use cloud-based software that helps you organize information into customizable tables. It's like a mix between a spreadsheet and a database, allowing you to manage data, tasks, or projects collaboratively in a visually appealing way.
To get started, create an Airtable account and set up a workspace and a base. An Airtable workspace serves as a folder containing multiple databases, known as bases. Each base can contain several tables.
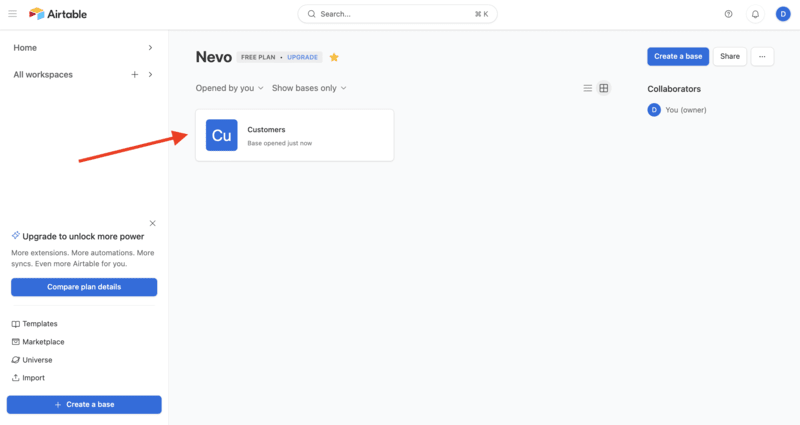
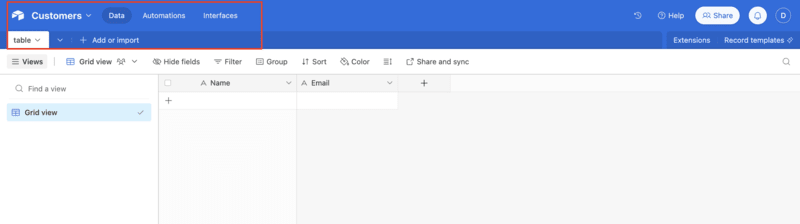
Within the base, create a table containing a Name and Email columns. This is where the customer's name and email retrieved from Stripe will be stored.
Click the Help button on the navigation bar, and select API Documentation.
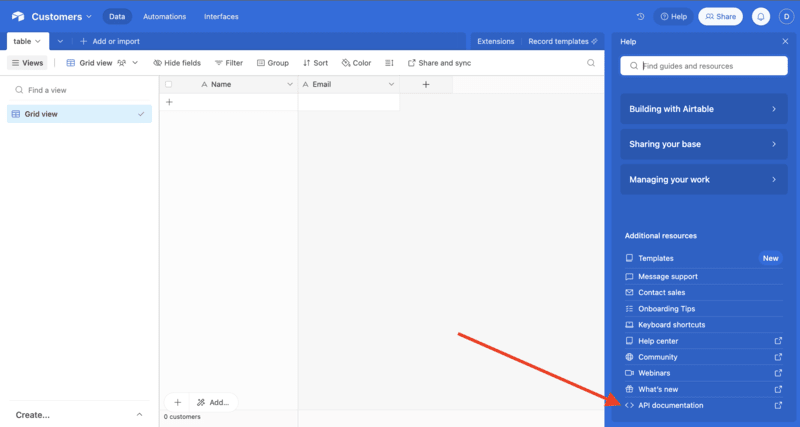
Scroll through the page, find and copy the base and table ID, and save them into the .env.local file.
AIRTABLE_BASE_ID=<YOUR_AIRTABLE_BASE_ID>
AIRTABLE_TABLE_ID=<YOUR_AIRTABLE_TABLE_ID>
Next, create a personal access token by clicking on your avatar and selecting Developer Hub. Give the token a read-and-write scope.

Save the newly generated token into the .env.local file.
AIRTABLE_TOKEN=<YOUR_PERSONAL_ACCESS_TOKEN>Then, install the Airtable package provided by Trigger.dev.
npm install @trigger.dev/airtableUpdate the jobs/functions.js file to save the user's name and email to Airtable after completing the payment checkout.
import { Airtable } from "@trigger.dev/airtable";
import { client } from "@/trigger";
import { Stripe } from "@trigger.dev/stripe";

// -- 👇🏻 Airtable instance --
const airtable = new Airtable({
    id: "airtable",
    token: process.env.AIRTABLE_TOKEN,
});
// -- 👇🏻 Stripe instance --
const stripe = new Stripe({
    id: "stripe",
    apiKey: process.env.STRIPE_API_KEY!,
});

client.defineJob({
    id: "save-customer",
    name: "Save Customer Details",
    version: "0.0.1",
    // -- 👇🏻 integrates Airtable --
    integrations: { airtable },
    trigger: stripe.onCheckoutSessionCompleted(),

    run: async (payload, io, ctx) => {
        const { customer_details } = payload;
        await io.logger.info("Getting event from Stripe!🎉");
        await io.logger.info(JSON.stringify(customer_details));

        await io.logger.info("Adding data to Airtable🎉");

        // --👇🏻 access the exact table via its ID --
        const table = io.airtable
            .base(process.env.AIRTABLE_BASE_ID!)
            .table(process.env.AIRTABLE_TABLE_ID!);

        // -- 👇🏻 adds a new record to the table --
        await table.createRecords("create records", [
            {
                fields: {
                    Name: customer_details?.name!,
                    Email: customer_details?.email!,
                },
            },
        ]);

        await io.logger.info("✨ Congratulations, New customer added! ✨");
    },
});
The code snippet above integrates Airtable to Trigger.dev, access the table, and it with the customer's name and email.
Congratulations! You have completed the project for this tutorial.
So far, you've learned how to
- add a Stripe checkout page to your Next.js app,
- handle payments with Trigger.dev, and
- save data to Airtable via Trigger.dev.
Trigger.dev offers three communication methods: webhook, schedule, and event. Schedule is ideal for recurring tasks, events activate a job upon sending a payload, and webhooks trigger real-time jobs when specific events occur.
As an open-source developer, you're invited to join our community to contribute and engage with maintainers. Don't hesitate to visit our GitHub repository to contribute and create issues related to Trigger.dev.
The source for this tutorial is available here: https://github.com/triggerdotdev/blog/tree/main/sales-page
Thank your for reading!
掘金翻译计划 是一个翻译优质互联网技术文章的社区,文章来源为 掘金 上的英文分享文章。内容覆盖 Android、iOS、前端、后端、区块链、产品、设计、人工智能等领域,想要查看更多优质译文请持续关注 掘金翻译计划、官方微博、知乎专栏。