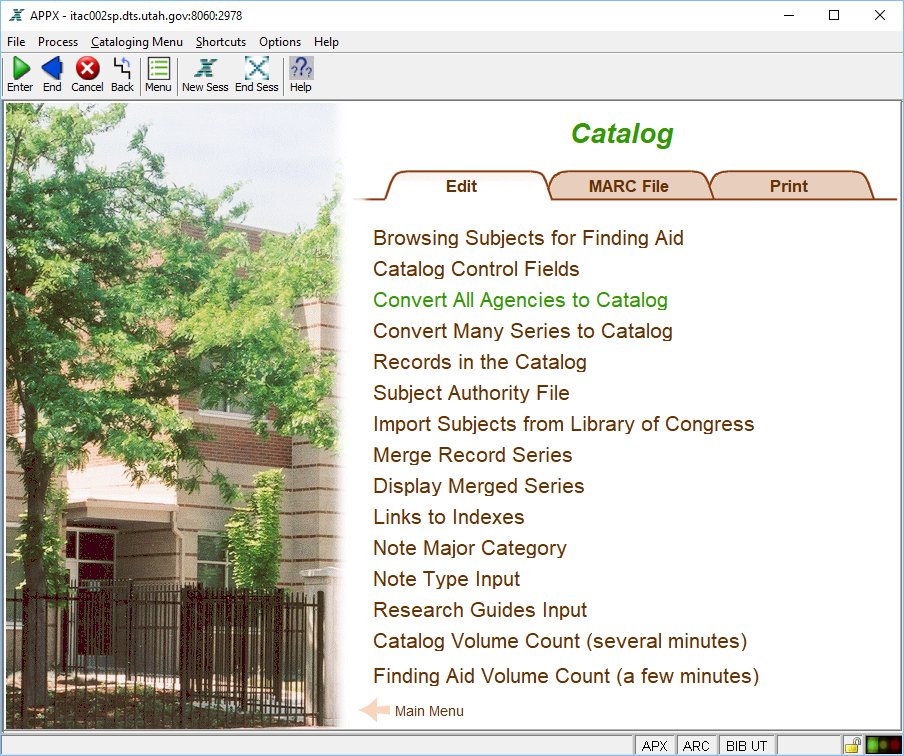
Catalog
The Catalog Menu brings together many disparate functions that are related to describing records and producing a catalog output. The Merge Record Series function is described in a separate document.

Click Browsing Subjects for Finding Aid.

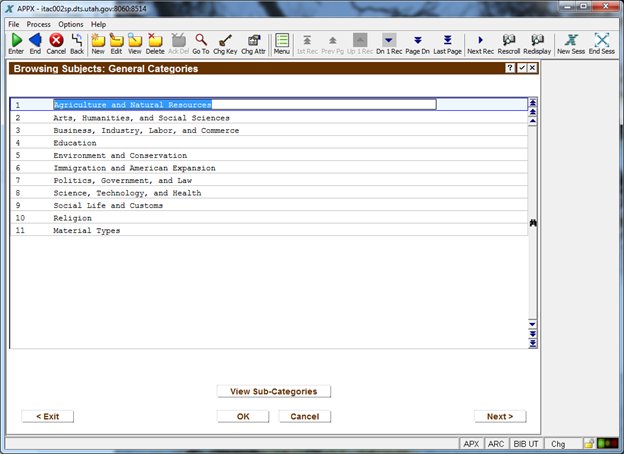
Browsing subjects are part of a local initiative among Utah archival institutions to come up with some common terms to be used within finding aids. This is where the “authority file” of these terms are stored, providing data lookup values when interacting with series. These terms are two-tiered: broad and narrow. The broad terms currently consist of:
- Agriculture and Natural Resources
- Arts, Humanities, and Social Sciences
- Business, Industry, Labor, and Commerce
- Education
- Environment and Conservation
- Immigration and American Expansion
- Politics, Government, and Law
- Science, Technology, and Health
- Social Life and Customs
- Religion
- Material Types
Users may apply terms at either the broad or narrow level. Click Sub-Categories. Some narrower terms associated with the Agriculture and Natural Resources option include:
- Agriculture
- Fisheries and Wildlife
- Forestry and Logging
- Mines and Mineral Resources
- Ranching
- Water and Water Rights
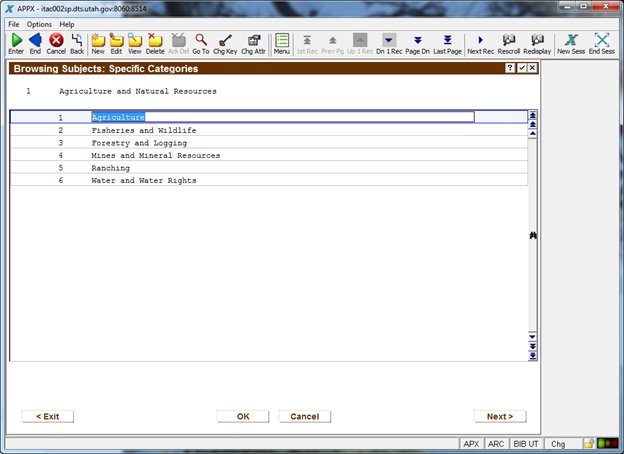
Click Cancel to return to the previous screen. Click Cancel again to return to the Catalog Menu.
Click Catalog Control Fields.


These field elements are used in catalog output. Only three fields from this screen appear to be used anywhere in the code. The RLIN Identification Code is used when creating the catalog record as part of the master file ID. And the Last Converted series and How Many To Convert fields are also used when updating the catalog work file from the live series data. The remaining field appear to be obsolete. Click Cancel in the toolbar to return to the Catalog Menu.
Click Convert All Agencies to Catalog.

This process produces a catalog work file containing agency records that can be uploaded into a MARC-based cataloging system. It will cycle through as many agencies as contained in the How Many Agencies to Convert field, and will keep track of the last agency number converted. To run the conversion, click OK.
Click Convert Many Series to Catalog.


This process takes the live data from a series, and converts it to a catalog work file, which can then be uploaded into a MARC-catalog system. Click Convert.
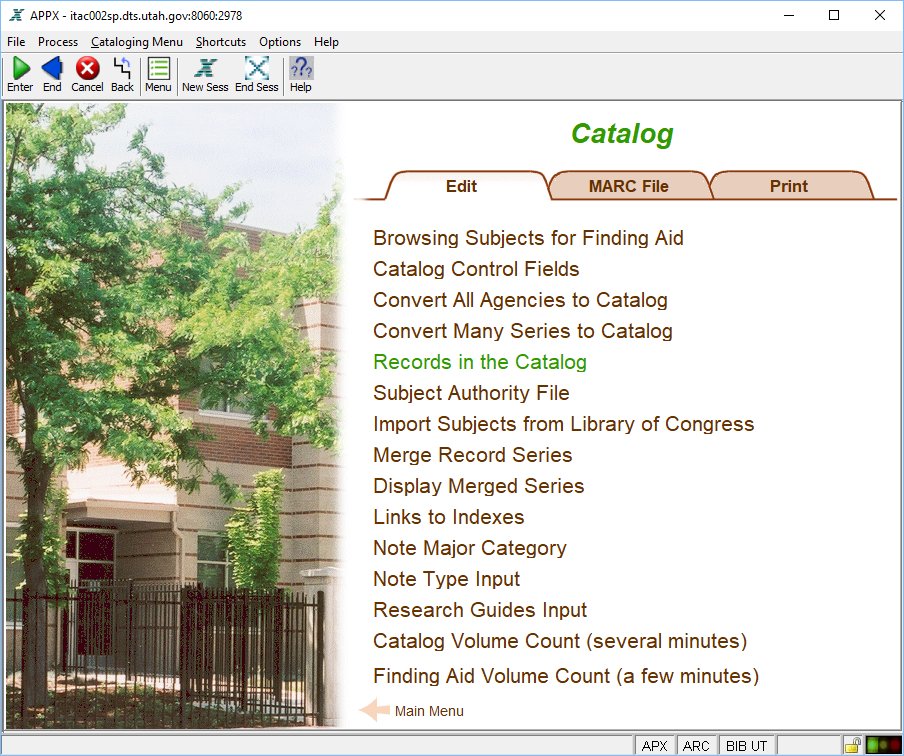
Click Records in the Catalog.

This screen provides a view of all the records in the catalog work file, including agency records. Note that the resulting catalog record in relation to an agency appears to treat the agency as if it were a bibliographic record, rather than an authority file. Select a record, then click Leader Record.
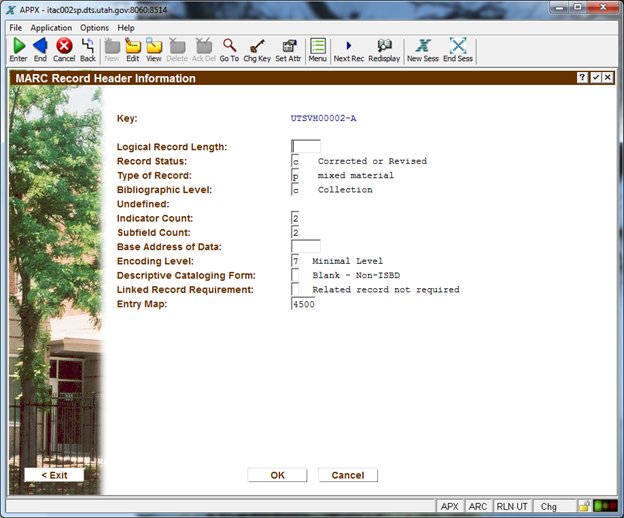
Some of the values here could be adapted for the values needed in an authority record, but other values for additional positions in the leader record would need to be defined.
Current MARC leader records require:

Click OK or Cancel to return to the previous screen. Click 001 and 003 Records.
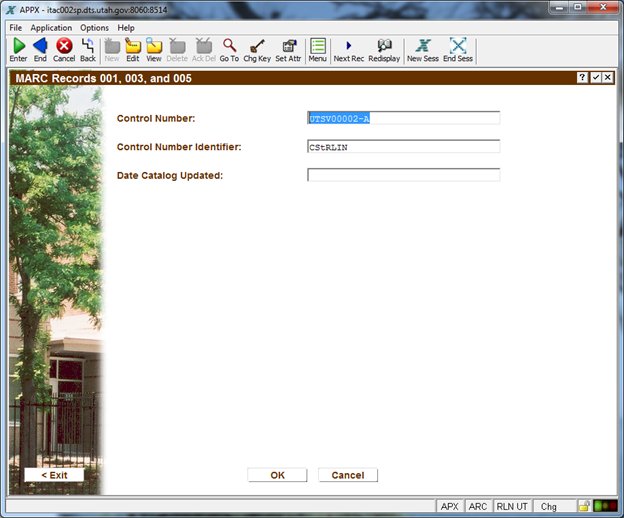
These fields correspond with the 001, 003, and 005 MARC fields. Click Cancel to return to the previous screen. Click 008 Record.

These fields are describing the needs for a bibliographic record in the 008 field, not an agency authority file. Agencies would instead need:

Click Cancel to return to the previous screen. Click Directory.
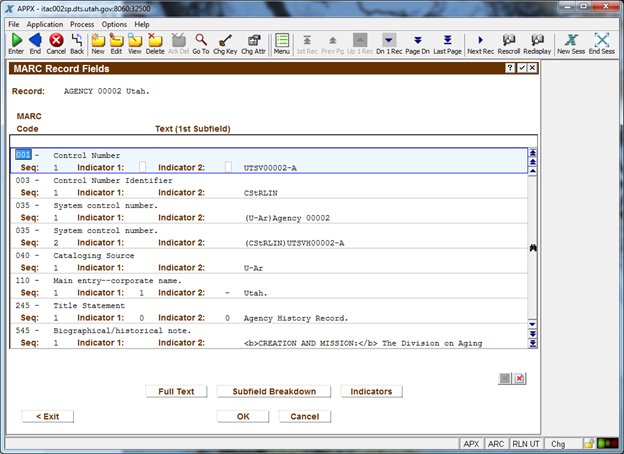
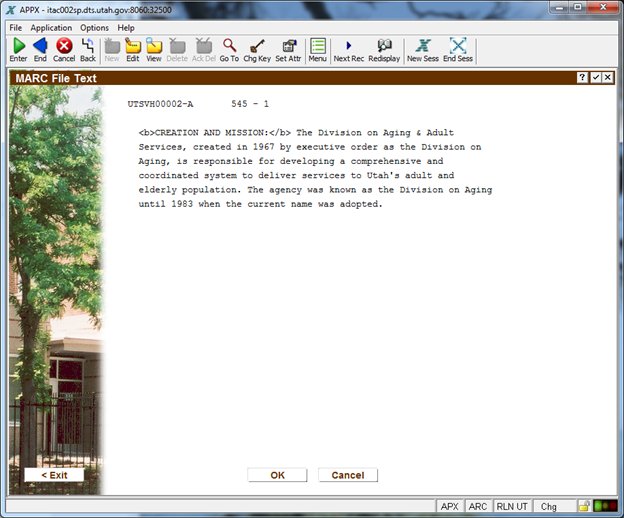
This screen scrolls through all of the MARC tags that are included for this record. To see further information on a tag, select a row and click Full Text.
Click Cancel to return to the previous screen. Click another row and then click Subfield Breakdown.

Each subfield piece is recorded in its own row. Click The Rest of the Text.

If the field length of the subfield is not long enough to contain the necessary text, type the remainder here. Press Enter to save your changes or click Cancel in the toolbar to return to the previous screen. [Bug report: the old version of this screen is linked to the input process instead of the newer RLN MARCSUBM BROWN.]
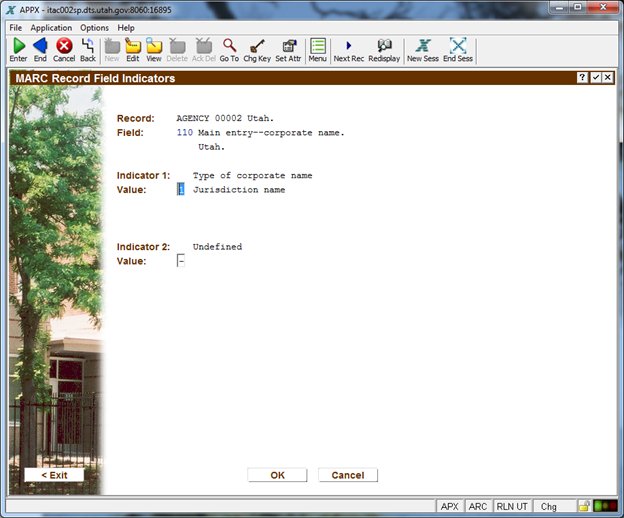
Click Indicators on the MARC Directory screen.
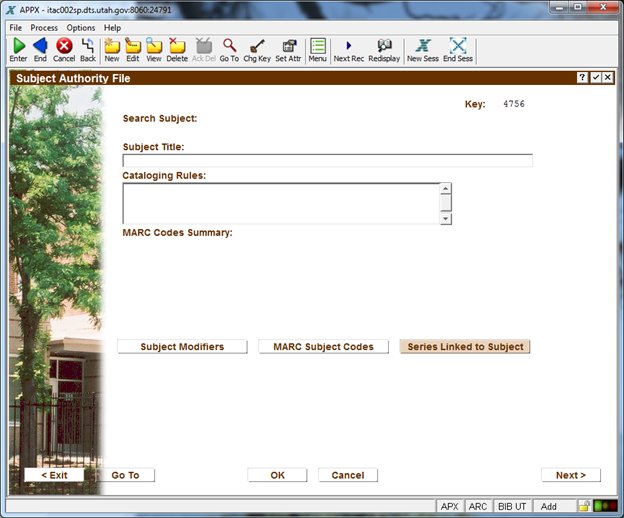
Click Cancel again to return to the Catalog Menu. Click Subject Authority File.


These subject terms are used to formulate full access points. Each part of a term is added separately, and then joined together when adding the access point. For example, “Commercial vehicles—Utah” uses two subjects terms to come up with the one access point. These subject terms provide an authority file, and if a term is updated as to spelling or replaced if a newer term is now in favor, all the access points utilizing that term are automatically updated. These subject terms are a subset of the Library of Congress subject terms, and changes to those terms by the Library of Congress must be made manually here. Click a row and choose Go To Subjects.

Provide the subject title. The cataloging rules are instructions that accompany the term, as noted in the Library of Congress subject headings. If a term can be modified, click Subject Modifiers.

Provide the modifier: BT = Broader Term NT = Narrower Term RT = Related Term UF = Used For US = Use Instead
And then provide the subject term related to the modifier. Click OK to save your changes, or Cancel to return to the Subject Authority File screen.
For each subject term, it may appear in one or more MARC codes. Click MARC Subject Codes.
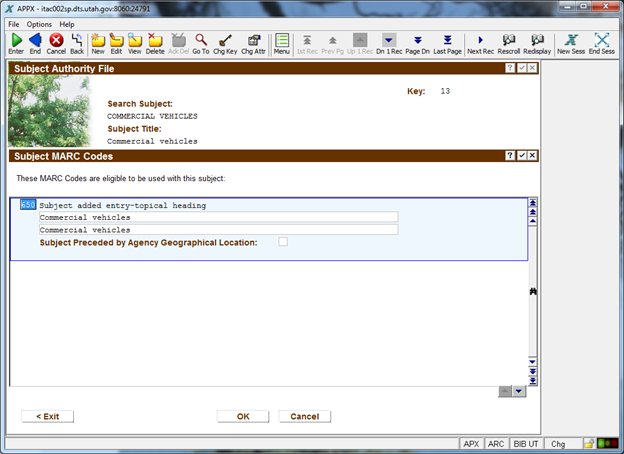
Provide the MARC code’s numerical value. In the fields underneath that value, the subject term will automatically appear. If the subject term should be preceded by the agency’s geographical location, check the checkbox. Click OK to save your changes, or Cancel to return to the Subject Authority File screen.
Click Series Linked to Subject.
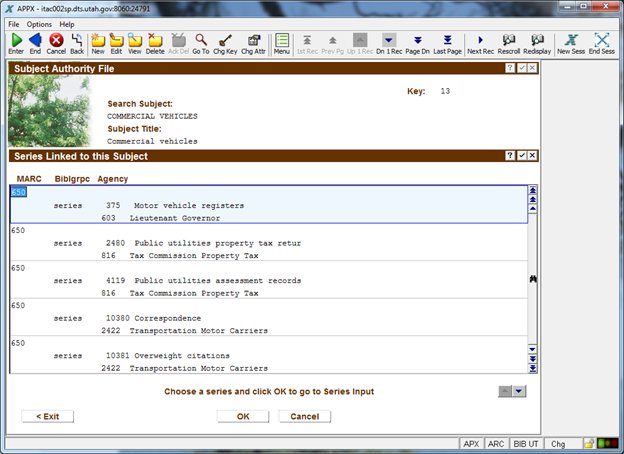
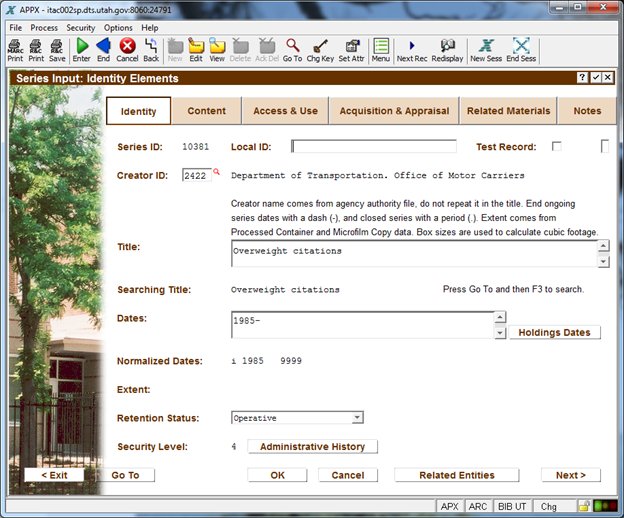
A list of series using this subject is displayed. Choose a row and click OK to drill down to Series Input.
Click Cancel to return to the previous screen. Click Cancel again to return to the Subjects Table.
To add a new subject term, click Add New Subject.
Type the Subject Title and define the MARC Subject Codes. Click OK to save your changes or Cancel to return to the Subjects Table. Click Cancel again to return to the Catalog Menu.
The Merge Record Series and Display Merged Series options on the menu are discussed in a separate document. Click Links to Indexes.


In finding aids, when references are made to other series inventories, indexes, or agency histories, this file stores the base location and the file extension. The programming will automatically insert the series or agency number as needed. Click OK to save your changes, or Cancel to return to the Catalog Menu.
Click Note Major Category.

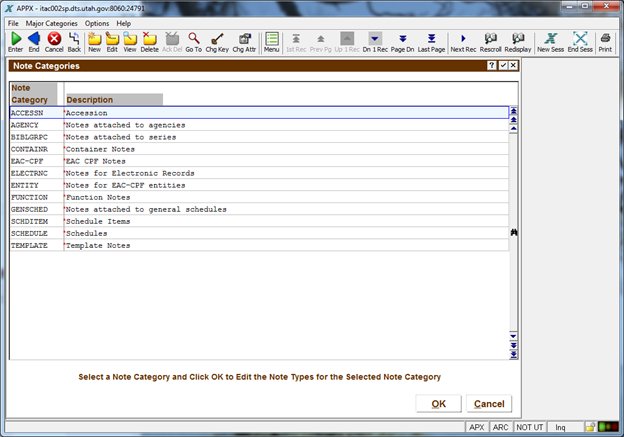
There are many types of note categories used in different parts of the system. For each category, there are several different note types. Choose a row and click OK to see the note types.

To add a new note type, click New in the toolbar. Or click Cancel to return to the Catalog Menu.
Click Note Type Input.
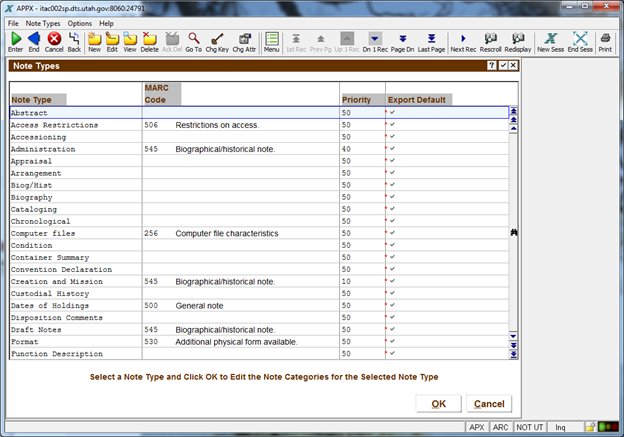
This screen shows all the note types at once, regardless of the note category they are a part of. To associate a note type with a note category, click on a note type and then click OK.

You may add a note category to this list by clicking New. The Note Format field offers these options:
- Text
- EAD
- EAC
- Plain Text
Depending on the format you choose, that will cause the note text to be formatted a certain way for output. The difference between Text and Plain Text is that if something is plain text, the HTML editor for the note field will be disabled. If you use the Text option, you can add XML to the source code and the note will be formatted correctly for output. The EAD and EAC options should wrap the correct tags around note fields that are of a certain type, provided those note types have been identified in system parameters as linked to certain types of content. The EAD notes will produce chronological lists in HTML, and the EAC notes will produce a bulleted list, also in HTML, for editing in the HTML editor.
Click Cancel to return to the Catalog Menu.
Click Research Guides Input.

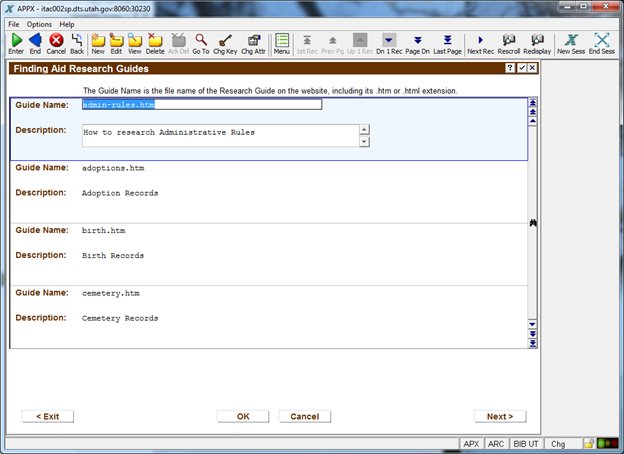
For each research guide that has been created, list them here, including the file name as it appears on the website. These research guides are linked to series inventories through the Finding Aids process within Series Input. Click OK to save your changes, or Cancel to return to the Catalog Menu.
Click Catalog Volume Count (several minutes).

This option runs a process that looks at all series, then looks in Format Management to see if there is any retention for film or fiche, and if so, is it to come to the Archives. If the film is, then the actual master film is counted. Boxes in Versatile are also counted, provided they have a disposition of Custody and the disposition date has been met. This process takes a few minutes to run.

[Bug report: it’s not counting film because the BEG AT/END AT statements are using BIBLGRPC KEY instead of BIBLGRPC RECORD ID when reading MIC PROCFILM.]
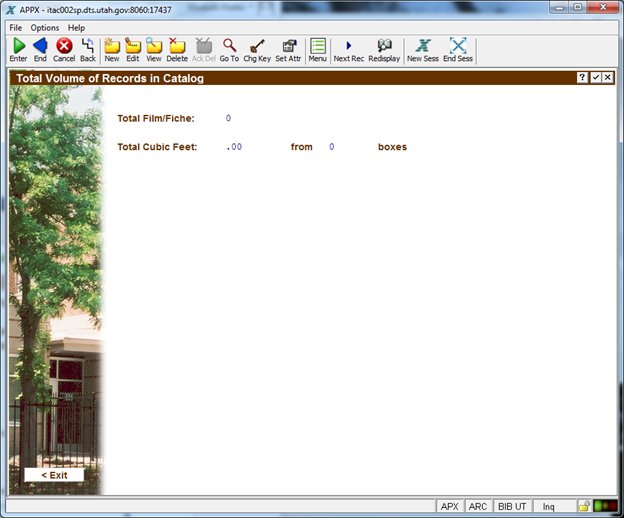
Click Exit to return to the Catalog Menu. Click Finding Aid Volume Count (a few minutes).
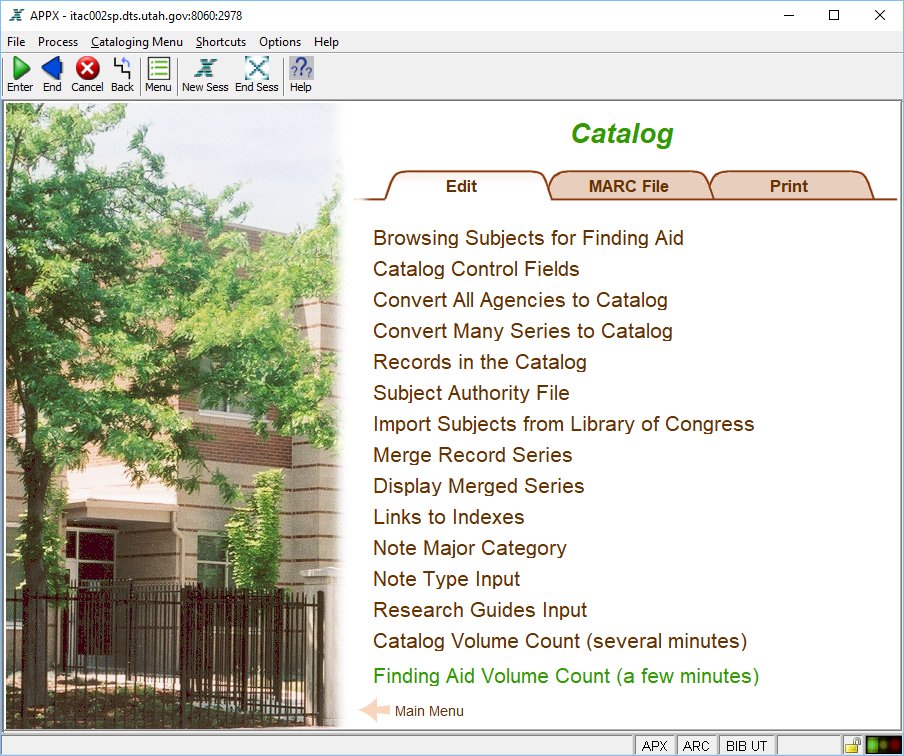
This report is similar to the Catalog Volume Count above, but it first checks to see if the series has a series inventory finding aid before it counts the containers associated with it. [Bug report: BIB subr FINDAIDS VOLUME COUNT uses BIBLGRPC KEY instead of BIBLGRPC RECORD ID when reading MIC PROCFILM and BIB FINDAIDS.]
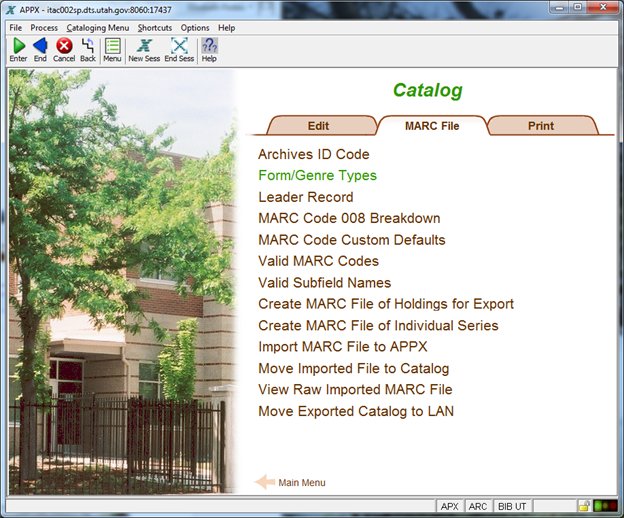
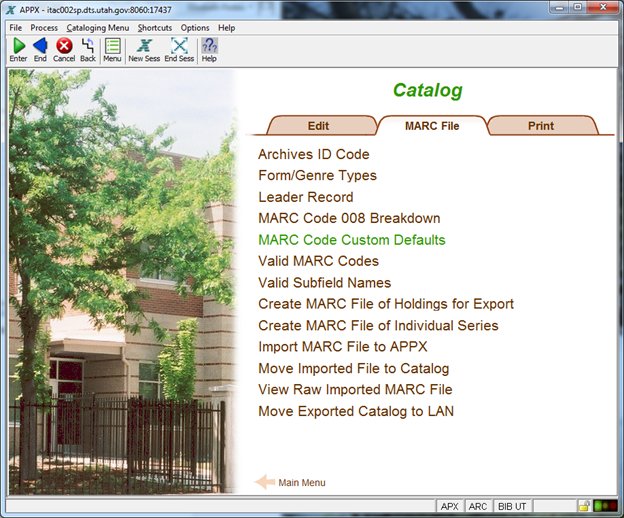
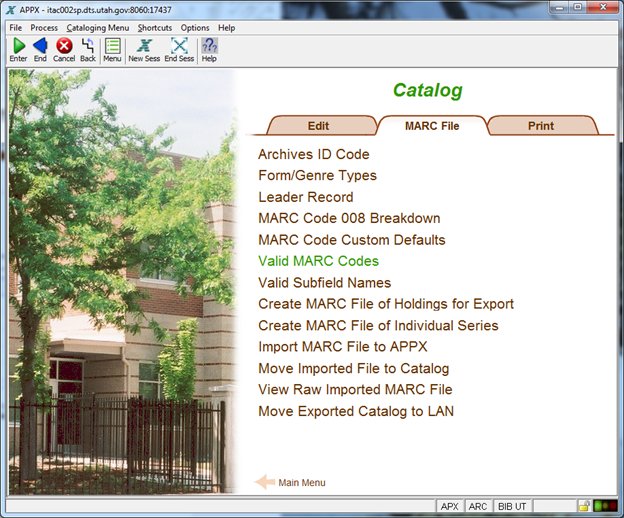
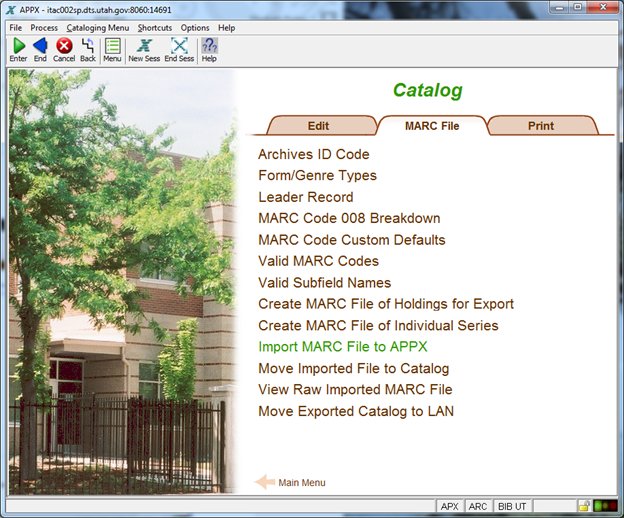
Click the MARC File tab in the Catalog Menu.

Click Archives ID Code.
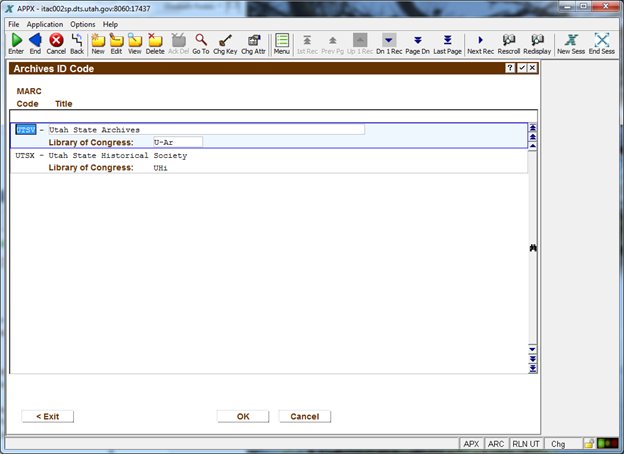
These codes are used to uniquely identify an institution to cataloging systems shared among institutions. The ID used in MARC Code to identify the Utah State Archives is UTSV, while the ID used by the Library of Congress is U-Ar. These codes preface record id numbers, such as the series number, to provide a unique identifier for the catalog entry. Click OK to save your changes or Cancel to return to the Catalog Menu, MARC File tab.
Click Form/Genre Types.

The form/genre types as used in the current MARC cataloging standard are listed here for use when adding access points to a series related to form or genre. To keep this list up-to-date, reference changes at www.loc.gov/marc and Library of Congress Subject Headings. Click OK to save your changes, or Cancel to return to the Catalog Menu, MARC File tab.
Click Leader Record.

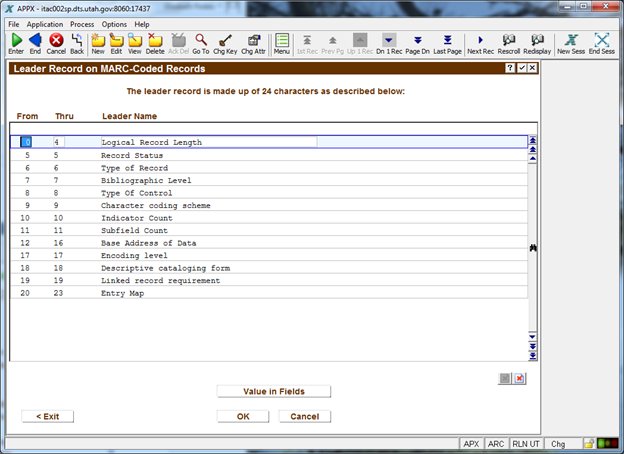
The leader record of a MARC catalog record is a set number of characters within the beginning of the MARC file that has certain meaning, as defined in http://www.loc.gov/marc/bibliographic/bdleader.html. Select a row and click Value in Fields.
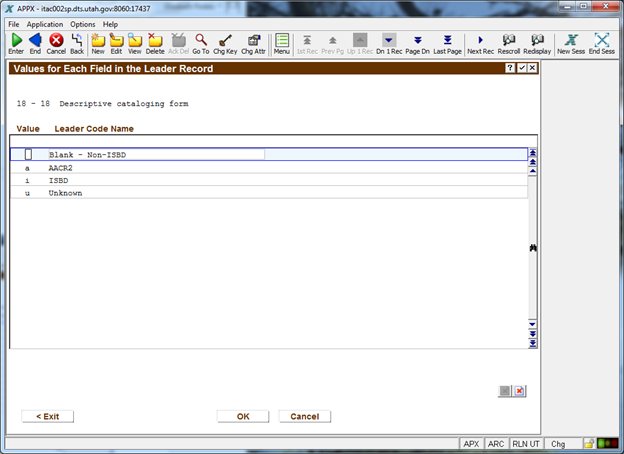
Add the values as found in the MARC standard so that they are known within the system and available for data lookup. Click OK to save your changes or Cancel to return to the previous screen. Click Cancel again to return to the Catalog Menu, MARC File tab.
Click MARC Code 008 Breakdown.

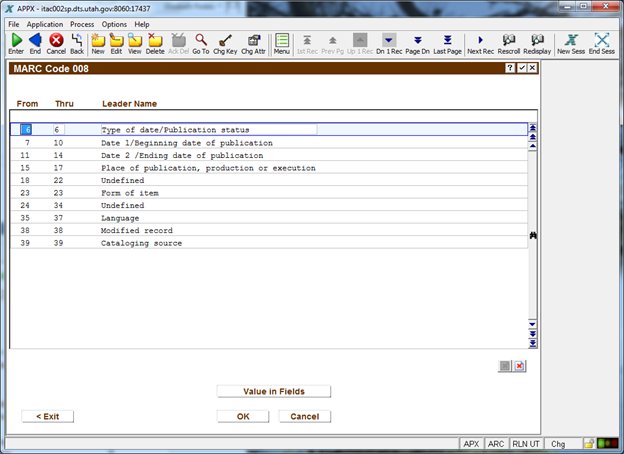
The MARC code 008 has elements located in certain positions of the MARC file. This screen defines what they are. See http://www.loc.gov/marc/bibliographic/bd008.html for more information. Choose a row and click Value in Fields.

Click OK to save your changes or Cancel to return to the previous screen. Click Cancel again to return to the Catalog Menu, MARC File tab.
Click MARC Code Custom Defaults.

Provide a MARC code and press Enter to bring up any system defaults that have been established for that code. Defaults available to be set include the indicator values, whether or not indicators should be used, if something should be appended to the MARC code, and whether or not the output should automatically capitalize the first letter of the field. To view subject terms from the Subject Authority File that may be used with this MARC code, press Enter.
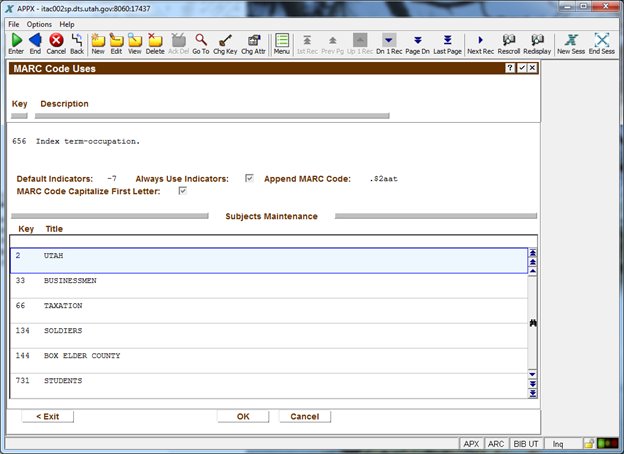
Click Cancel to return to the Catalog Menu, MARC File tab.
Click Valid MARC Codes.
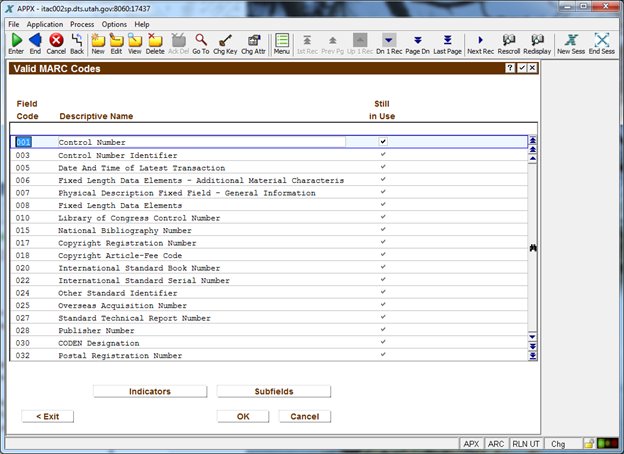
This lists all of the MARC codes available in the standard, with a checkbox indicating whether or not the code is still in use. The indicator and subfield values available for each code are also recorded here. As cataloging standards change and are updated, these field values should also be updated. Click Indicators.
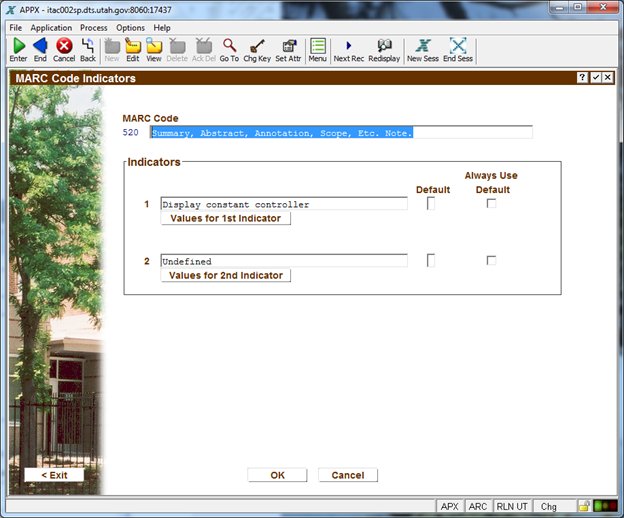
You may set defaults for each position. To view values associated with each indicator position, click the associated button.
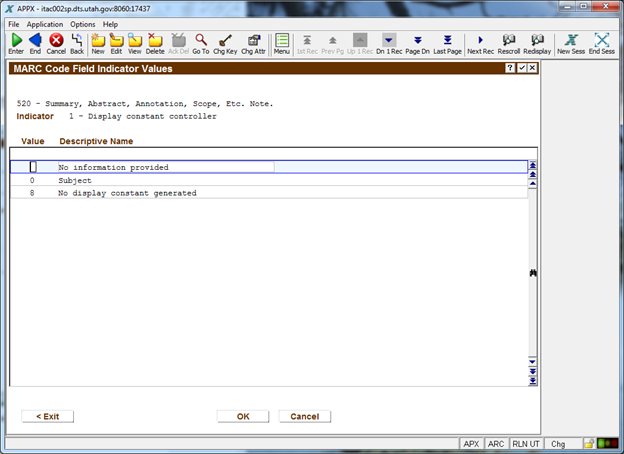
This screen is for the first indicator of the 520 field. Note that the MARC standard has updated these options considerably, so data entry needs to happen for the system to be aware of new options, particularly the difference between a Scope of Content 520 field and an Abstract 520 field:

Click Cancel to return to the previous screen. Click Cancel again, and then click Subfields.

Click OK to save your changes or Cancel to return to the previous screen. Click Cancel again to return to the Catalog Menu, MARC File tab.
Click Valid Subfield Names.


All of the available types of subfields are listed here. To see what MARC codes are associated with them, click MARC Codes.

Click OK to save your changes or Cancel to return to the previous screen. Click Cancel again to return to the Catalog Menu, MARC File tab.
Click MARC File of Holdings for Export.
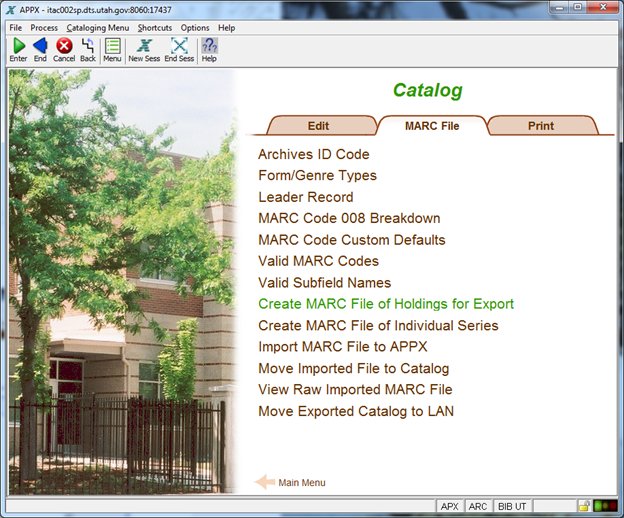
Note that this option could take significant time to complete (at least 20 minutes, and possibly more), as it formats all cataloged records into a MARC file that can be uploaded to any MARC-compliant cataloging system. The exported file is located on the APPX server. To move it to the LAN server, click Move Exported Catalog to LAN.

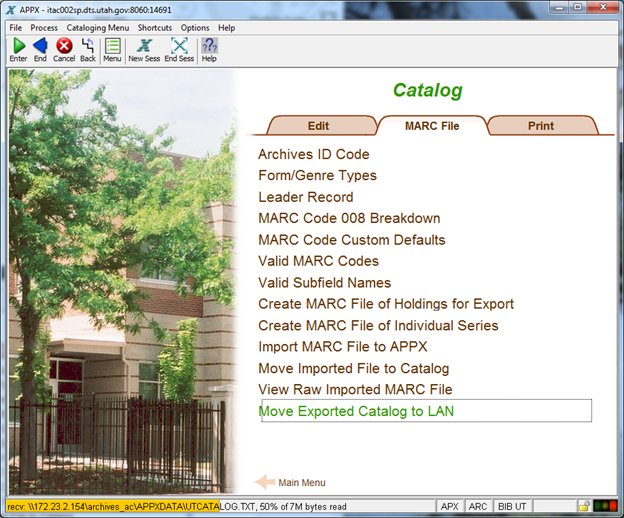
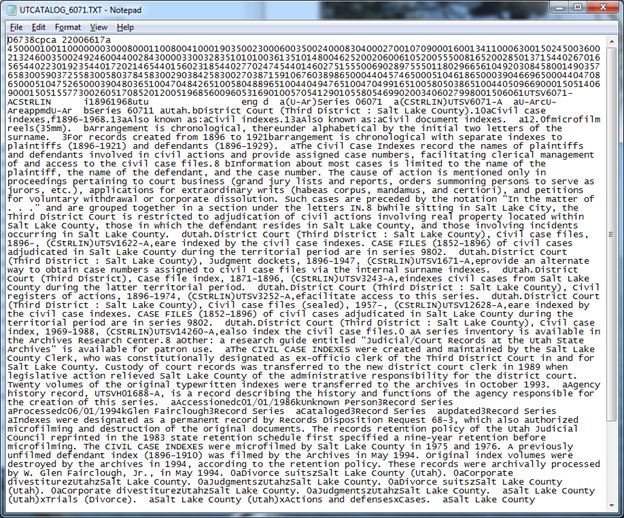
The file being uploaded to the LAN server is called UTCATALOG.TXT. It can be opened in Notepad or a MARC-file editor such as MARC Report:
In Notepad, a MARC file looks like this:
Click Create MARC File of Individual Series.

Provide the series number(s) that you want to export, click OK twice to save the choice, then click Exit or End (in the toolbar) to run the export. If you click Cancel, the export will not take place. The exported file will automatically be sent to the LAN server, also named UTCATALOG.TXT and overwrite any other file that might be named the same thing. If you do not want a previous export to be overwritten, give it a new file name.
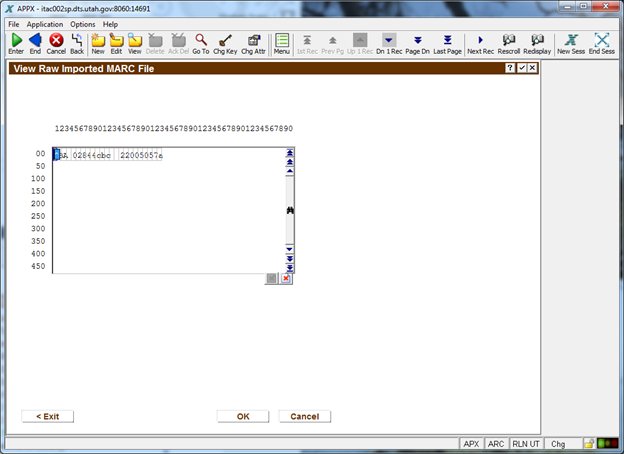
Click Import MARC File to APPX.
This option is expecting a file called “marcfile” to exist in the /tmp directory on the APPX server, and then it copies it to /home/appx/data/ARC/RLN/Date/MARCFILE.dat. The beginning string of that path does not exist, so the code is out-of-date, and the process itself is likely obsolete, along with the Move Imported File to Catalog and View Raw Imported MARC File options. [Bug report: fix path as noted in RLN subr COPY MARCFILE.]

Click Cancel to return to the Catalog Menu, MARC File tab.
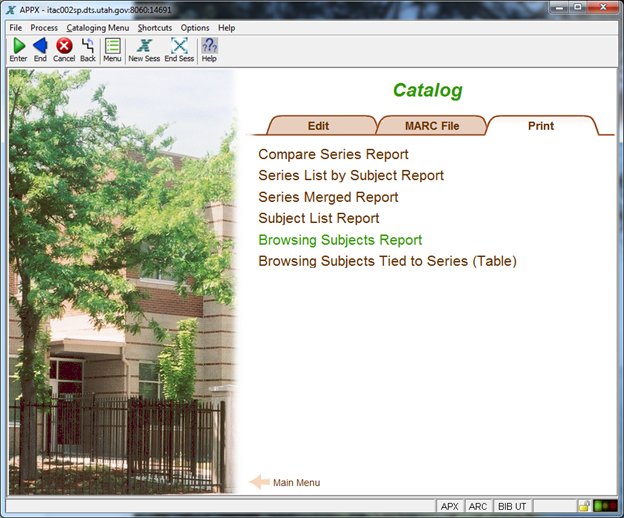
Click the Print tab in the Catalog Menu.

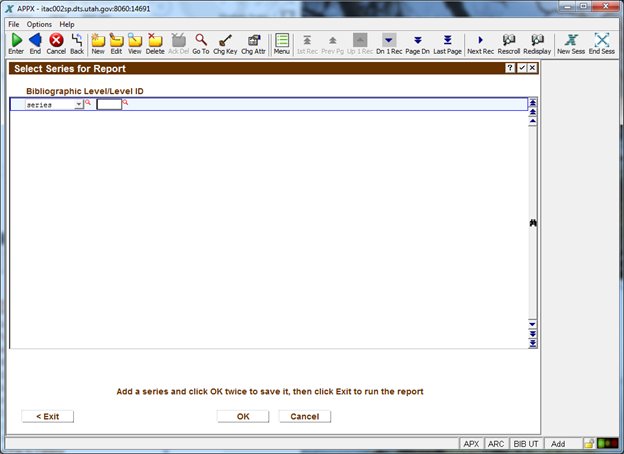
Click Compare Series Report.

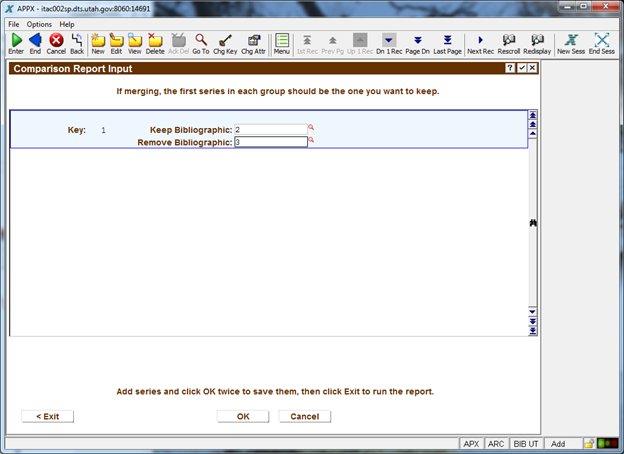
This report is generally used when deciding to merge one series into another. When this is the case, the first series provided should be the one intended to be kept. The second series is the one to be merged away. When printed, the first series will appear on the left-hand side of the page, and the second will appear on the right. Provide the series number values for both fields, and click OK twice to save your choices. Then click Exit or End (on the toolbar) to run the report.
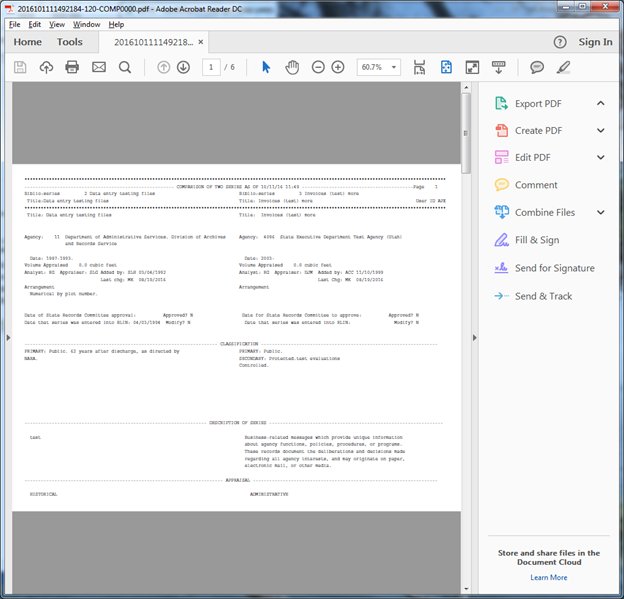
- PDF Report
- Data includes:
-
- Series number
-
- Series title
-
- Agency number
-
- Agency name
-
- Series dates
-
- Volume appraised
-
- Records analyst assigned to the agency
-
- Person who appraised the records
-
- Who added the series
-
- Who last changed the series
-
- Series arrangement
-
- Date approved by the State Records Committee
-
- Date cataloged
-
- Whether considered scheduled
-
- Primary and secondary classification/designation
-
- Series description
-
- Appraisal
-
- Series relationships
-
- Old box location data
-
- Microfilm accession numbers
-
- Custody history
-
- Variant titles
-
- Number of finding aids the series has
-
- Changes requested to be made to the series over the years
-
- Cataloging notes
-
- Format retention
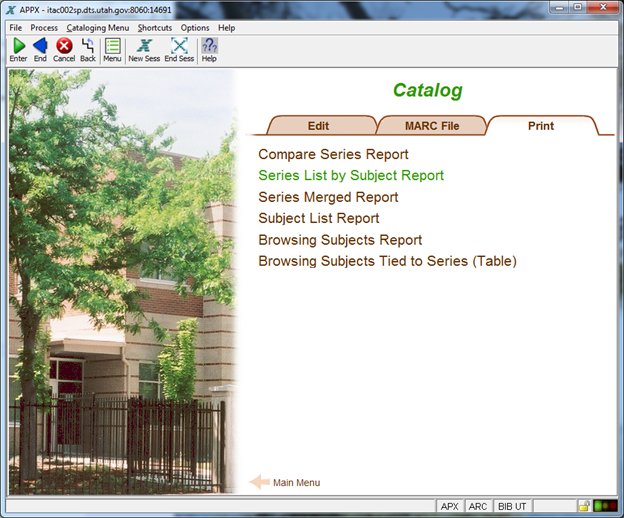
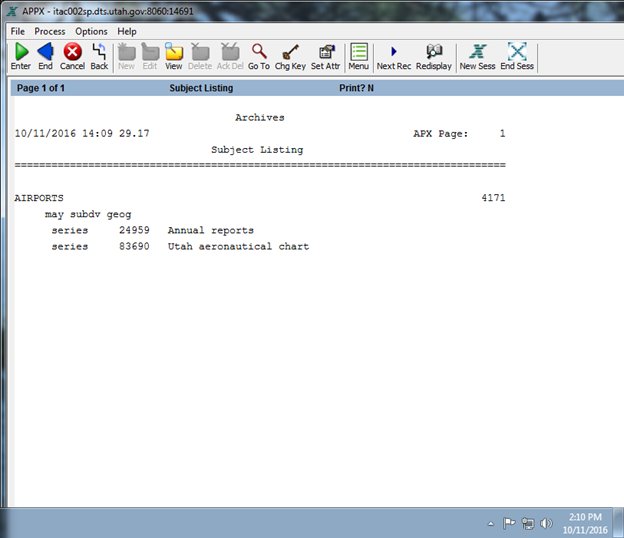
Click Series List by Subject Report.
- Text report
- Query asks for:
-
- Subject term range
- No sort
- Data includes
-
- Subject term
-
- Subject key
-
- Series number
-
- Series title
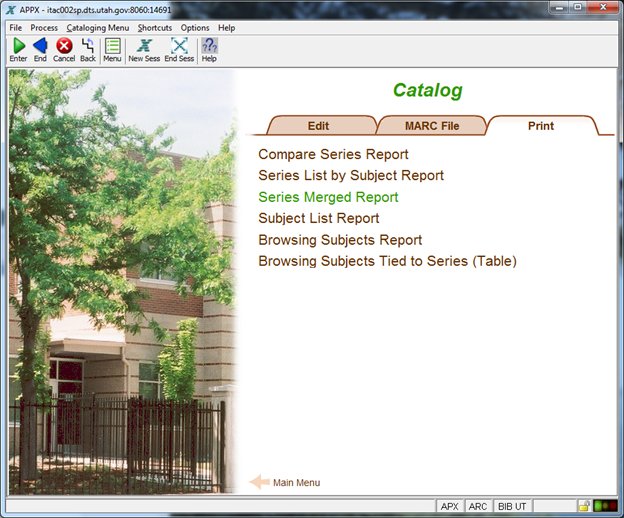
Click Series Merged Report.
- Text report
- Query asks for:
-
- Date merged range
-
- Agency number of series merged
- Sort by:
-
- Date merged
-
- Series number merged
- Data includes:
-
- Series number merged
-
- Series title
-
- Agency number
-
- Date merged
-
- Series number merged into

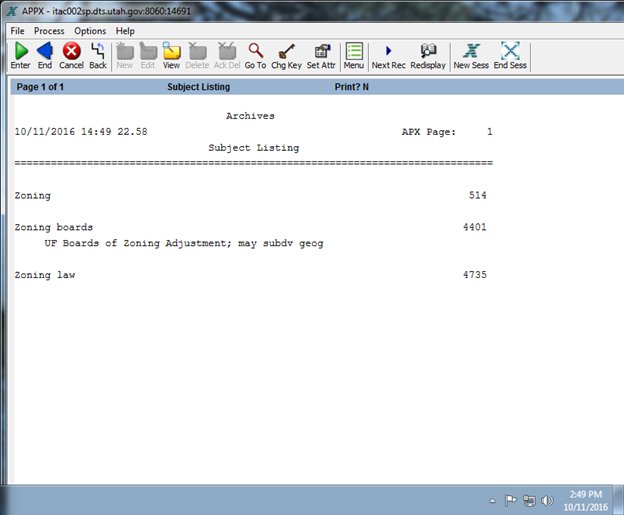
Click Subject List Report.

- Text report
- Query asks for:
-
- Subject term range
- No sort
- Data includes:
-
- Subject term
-
- Subject key
-
- Subject qualifiers
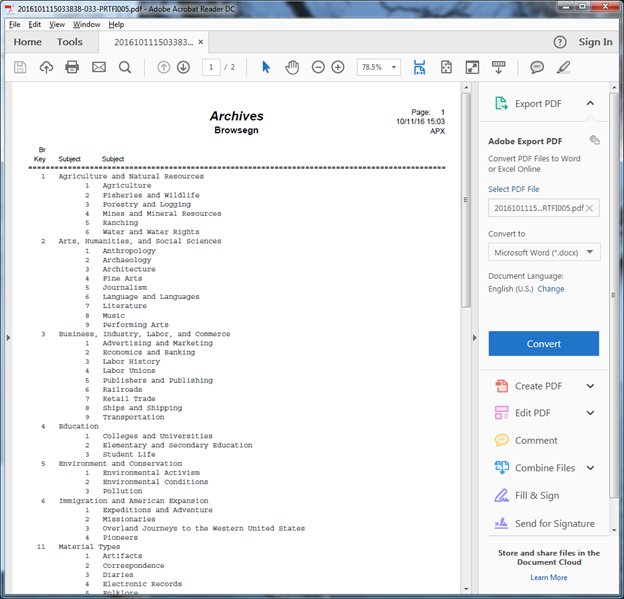
Click Browsing Subjects Report.
- PDF report
- Query asks for subject term
- Sort by subject term
- Data includes:
-
- Broader browsing subject term
-
- Subject term key
-
- Narrower browsing subject term
Click on Browsing Subjects Tied to Series (Table).
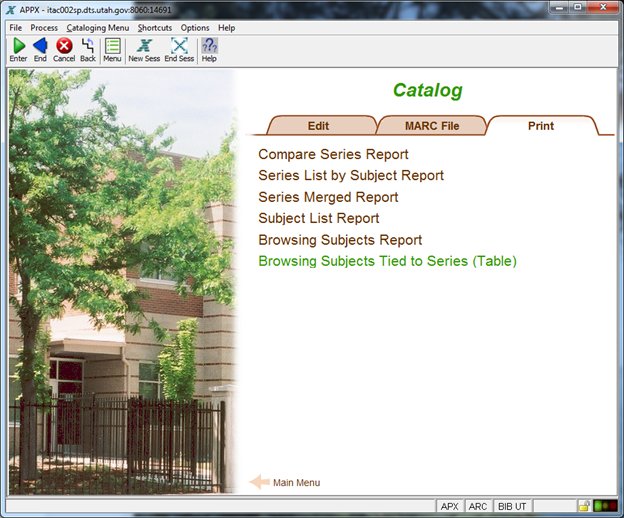
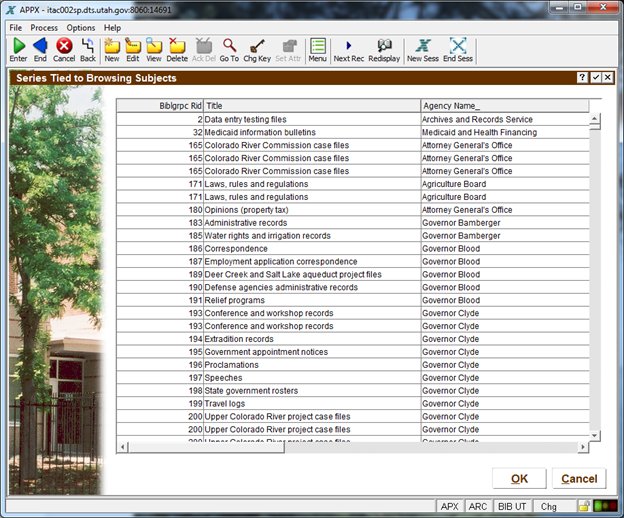
This table includes both broader and narrower subject terms. Data includes:
- Series number (aka bibliographic record id)
- Series title
- Agency short name
- Narrow (specific) subject term
- Broad (general) subject term
Double-click a row and you will be taken to Series Input. Click Cancel to return to the Catalog Menu, Print tab.