Bela IDE
The Bela Wiki has moved to learn.bela.io. This material has been superseded. Click here for the maintained version.
The Bela IDE (Integrated Development Environment) is browser-based. This means that you don't need to install any additional software to get it working - just open your browser and go to http://192.168.7.2. There is no need for an internet connection.
Please note: The IDE should work fine on the most up-to-date versions of Chrome, Firefox and Safari, so if you encounter any issue please update your browser and your board before looking up if it is a known issue that we are currently working on or fill-in a new issue in order to help us improve it.
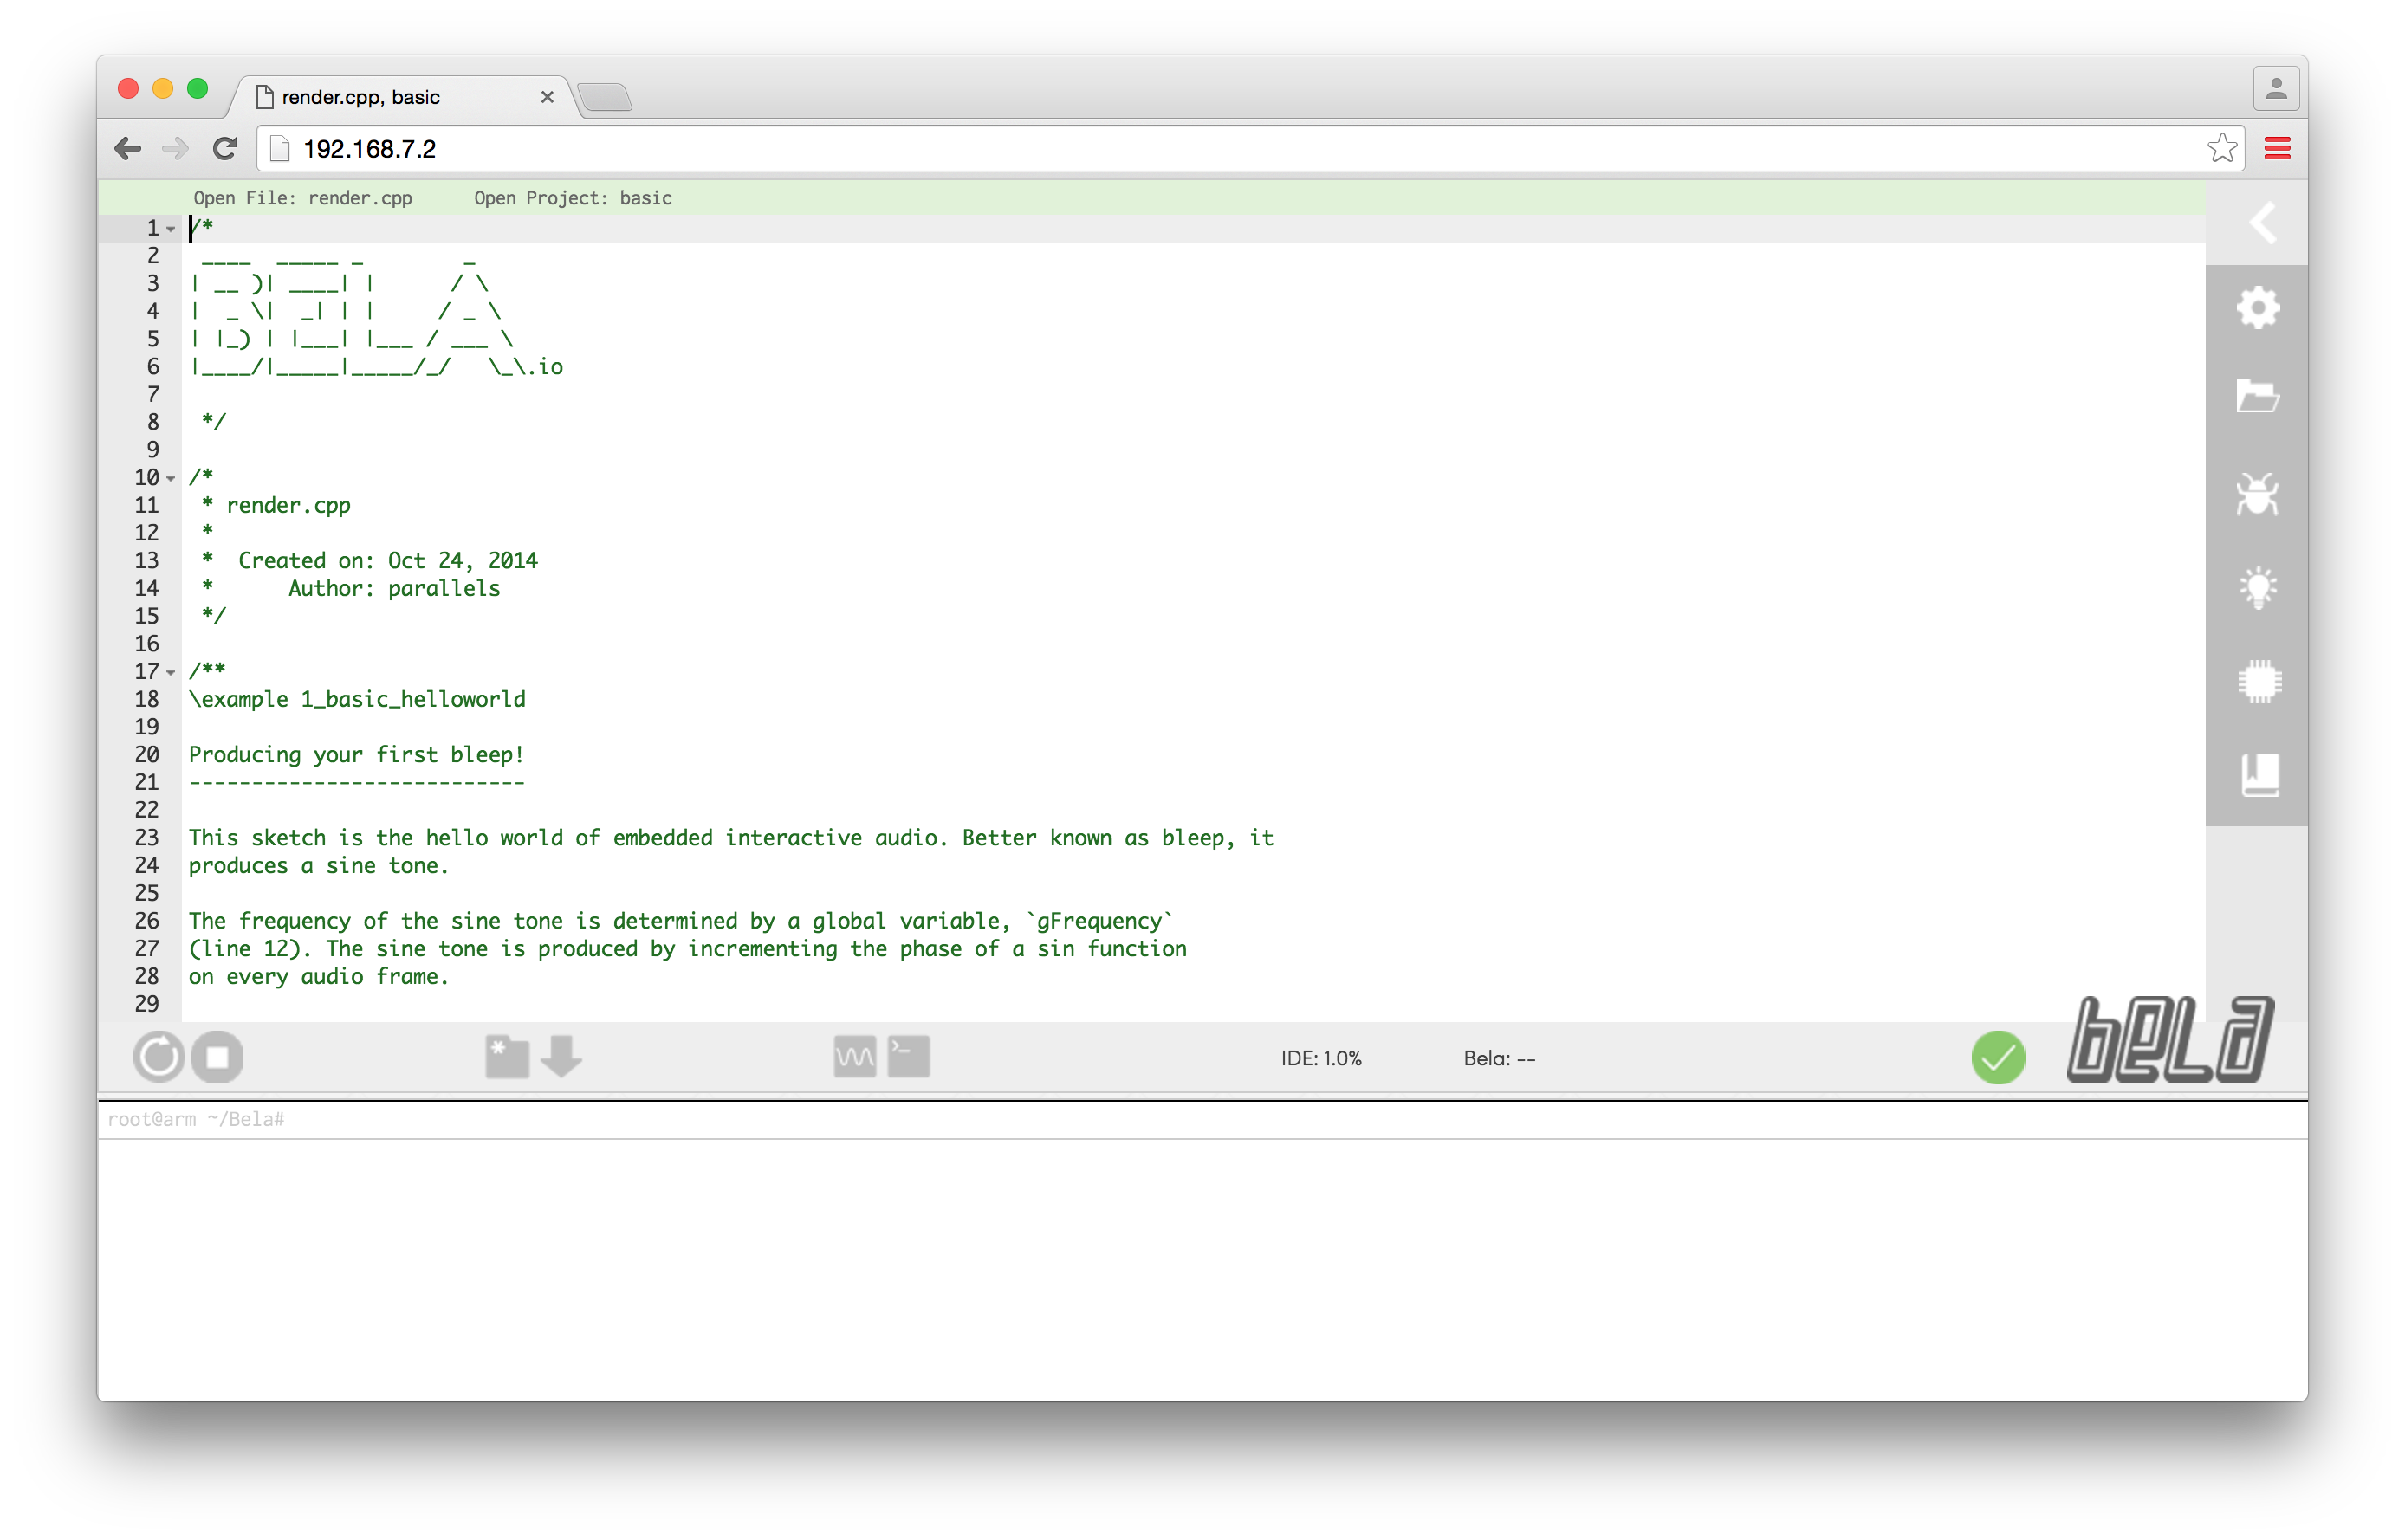
The IDE has been designed to provide everything that is necessary for editing, compiling and running code on Bela in the most intuitive and convenient way possible. The front-end editor of the IDE is built using Ace.js, and the back-end is powered by a node.js application running on the BeagleBone.
The IDE has the following features: a text editor for writing code; a console window and terminal prompt; a main toolbar for running and monitoring projects; a side toolbar with access to file management, project settings, examples, in-built documentation; plus a fully functional oscilloscope.
The text editor on the left hand side of the window allows you to edit your code. It is capable of autocomplete and syntax checking which you can toggle on or off in the settings window of the righthand tab. The editor is powered by Ace.js which provides a number of convenient keyboard shortcuts (see here).

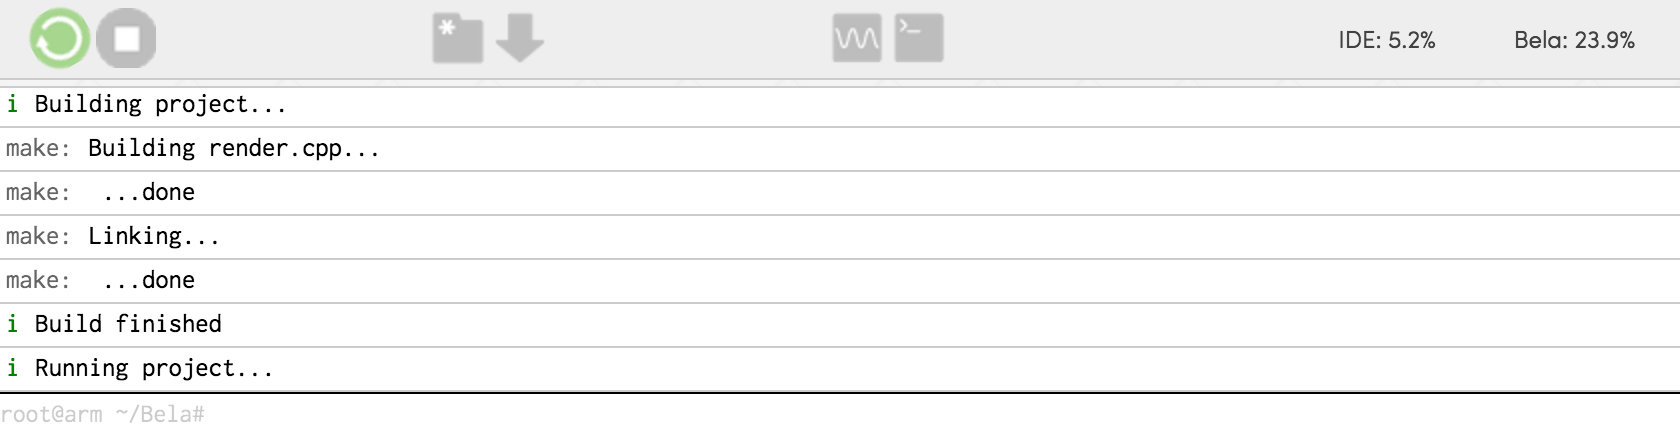
To run a project click the Run button on the bottom toolbar. This compiles and runs the current project.
![]()
To stop a project from running click the Stop button.
![]()
You can open multiple tab with the Open tab button.
![]()
It is possible to download the current project files with the Download button. This allows you to backup your work or to edit the project in an external editor.
![]()
The Open scope button allows you launch the in-built oscilloscope in a new tab, giving you the ability to visualise your signals in realtime. See the (Oscilloscope)[#oscilloscope] section for more information on how the scope works.
![]()
To clear the console click on the Clear console button. This will clear all messages that have been printed to the console window from within your code or from the system.
![]()
There is also a CPU monitor both for the IDE running the browser and the project running on Bela. This is very useful for assessing the load that certain parts of your code are placing on the board.
![]()
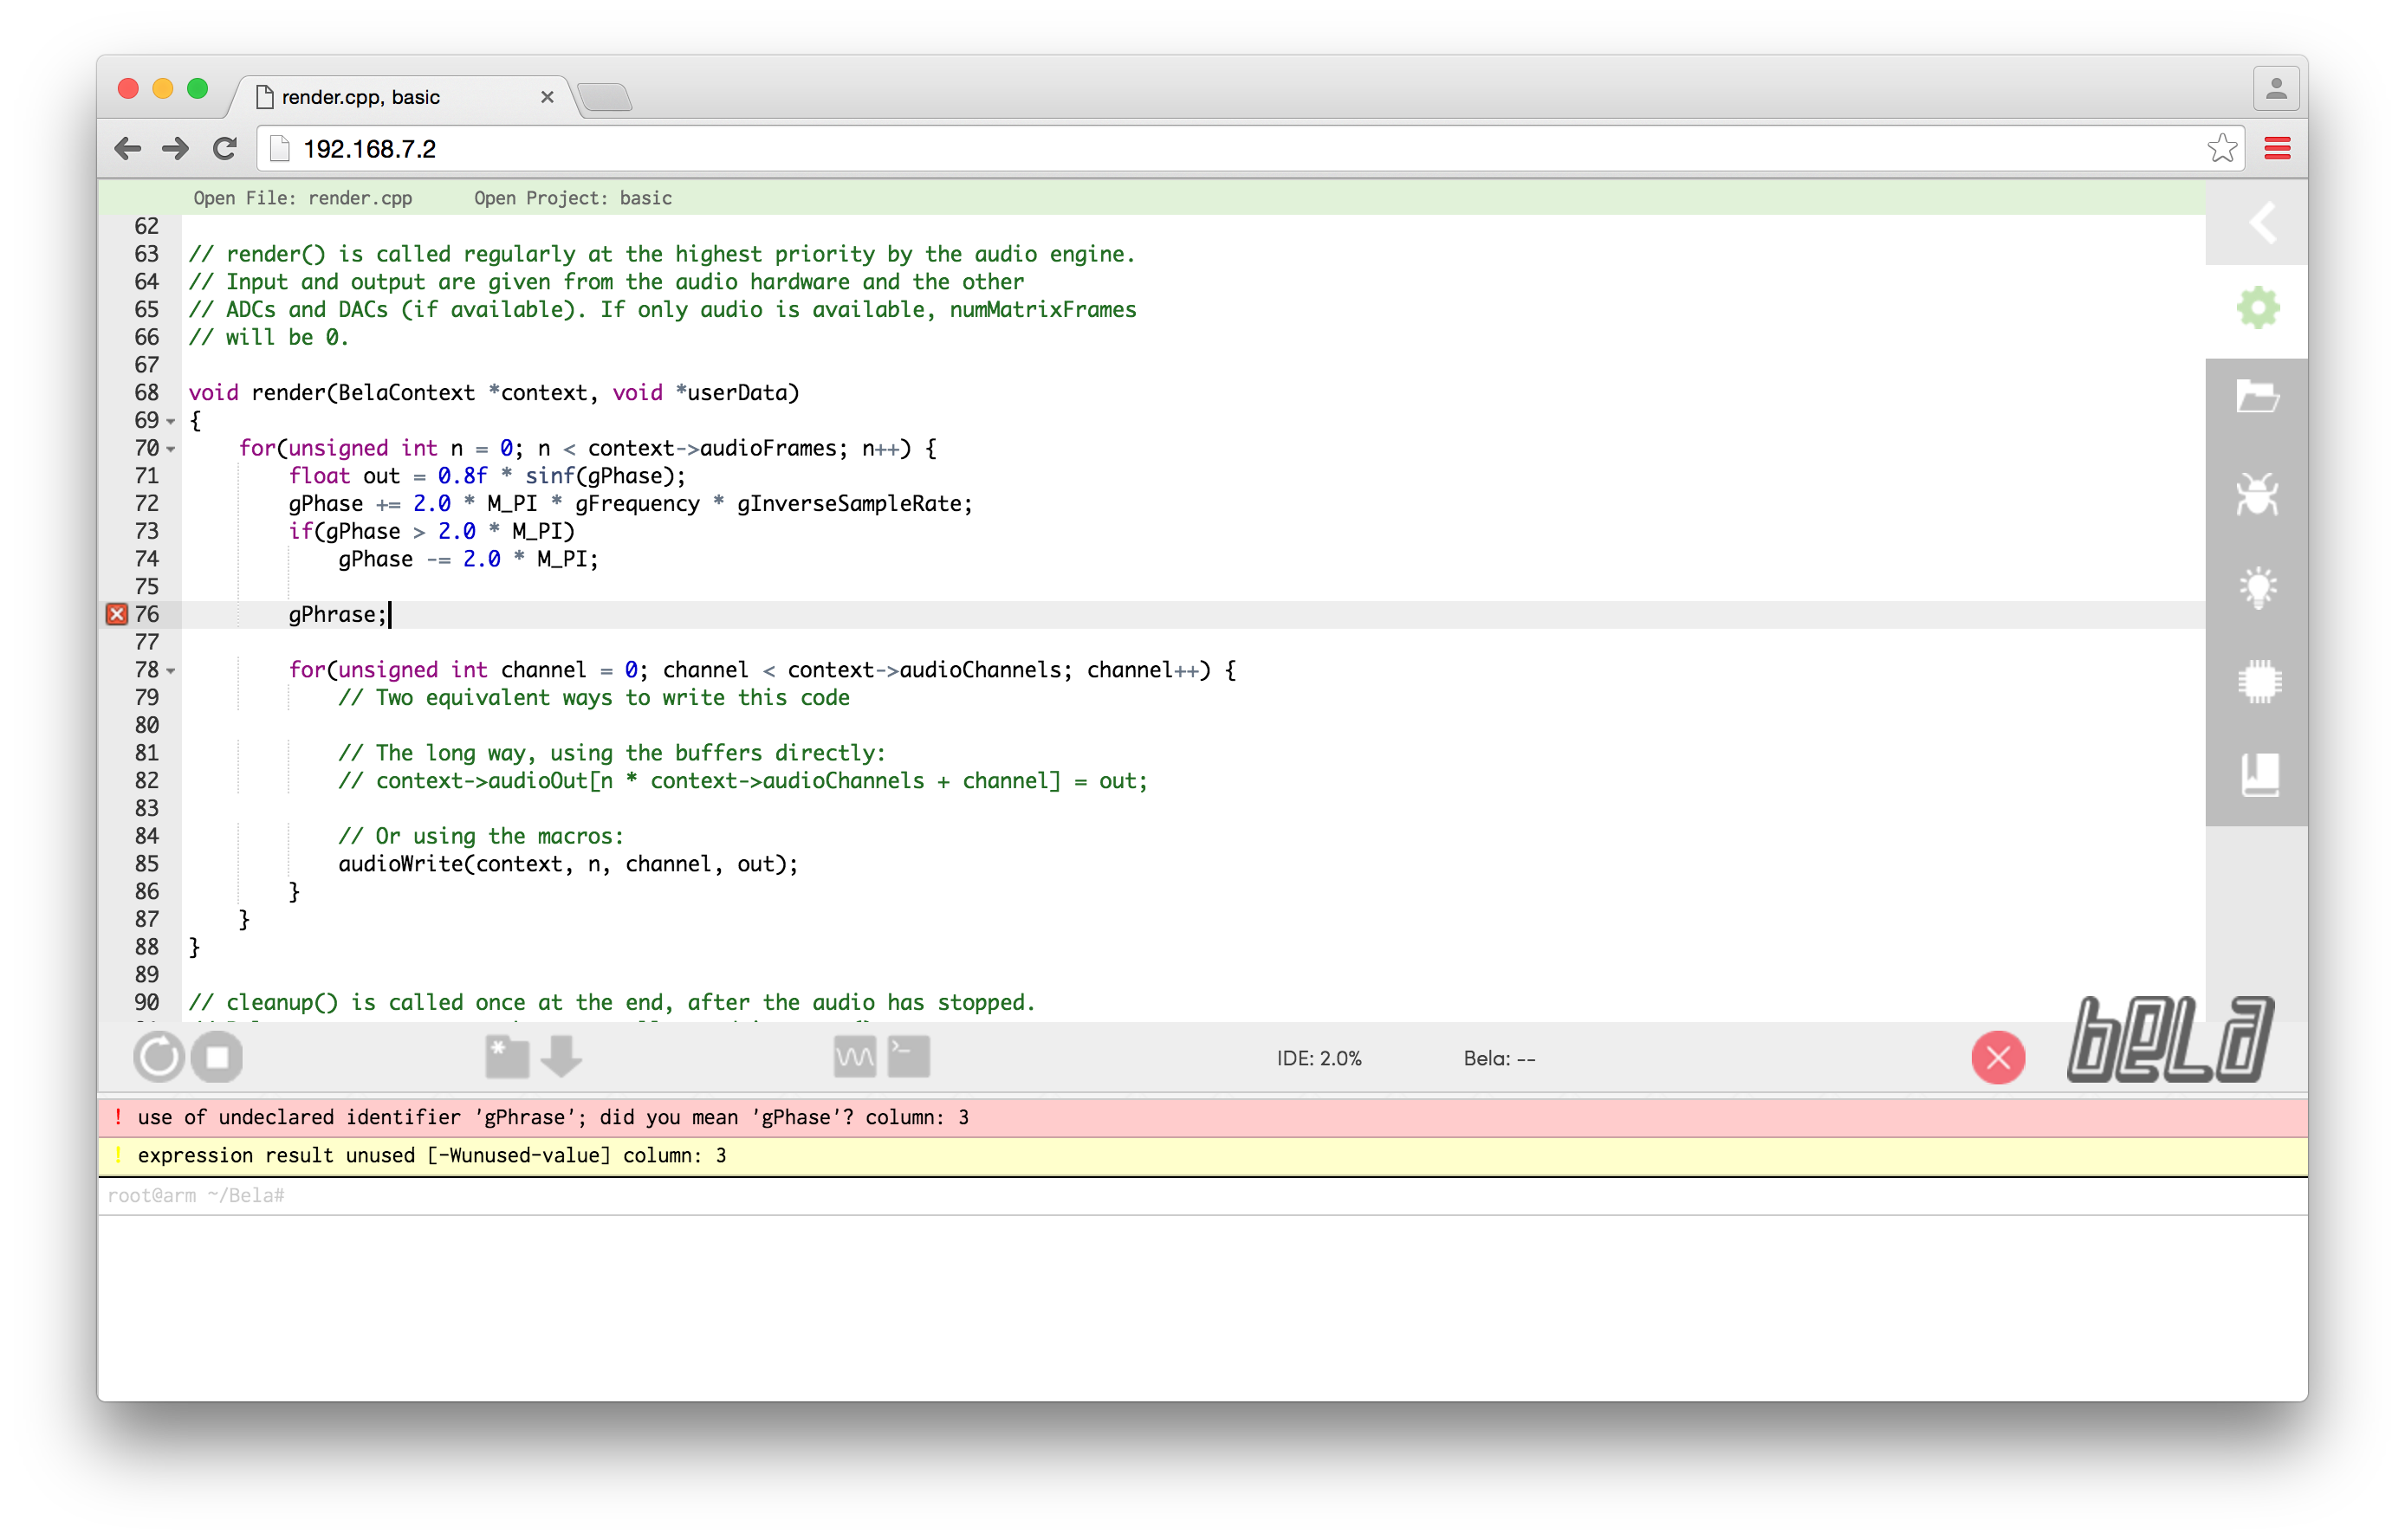
The green tick or red cross in the righthand side of the toolbar lets you know whether the syntax checker has spotted an error or not. If there is a red cross then the project will not run on the board until you have corrected the error in the code.
![]()
![]()
On the righthand side of the IDE there is a collapsable toolbar that can be expanded by clicking on the arrow in the top righthand corner.
The file explorer tab (the folder icon) is the main way of loading and saving projects. The Open existing project dropdown allows you to load projects that you have previously saved. The Manage projects section allows you to create new projects from scratch or delete or clean the current project. The Manage project files section allows you to upload additional files to a project, both files used in the core code and other media files like .wav for example.

The Current project files is an important section as it displays the files currently used in the open project and allows you to switch the file that is open in the text editor. The header above the text editor allows you to keep track of which file is open and being edited, as well as letting you know the title of the project and the project that is currently running on the board.

It is important to note that the projects saved through the IDE are stored by default on the SD card plugged into your BeagleBone. Like all forms of electronic storage, SD cards are not 100% reliable and have been known to occasionally lose or corrupt the data stored on them. For this reason it is highly recommended that you regularly back up your Bela projects by downloading them to your host computer, using either the 'download project' button located on the main toolbar next to the 'new tab' button, or alternatively with the 'download all projects' button located at the bottom of the settings tab in the sidebar of the IDE.
The console window is where you will receive messages about build status, compile errors or syntax checking. You can also print to the console to help with debugging using the rt_printf() function or the [print] object when using PureData.
At the bottom of the console is the terminal prompt. Standard bash commands can be entered here and will be executed on the BeagleBone. Note that the commands will be executed with full root privileges, and any changes to the filesystem cannot be undone, so use it with caution! Due to the issue described here interactive commands and those requiring a full terminal (e.g vim) are not currently supported.
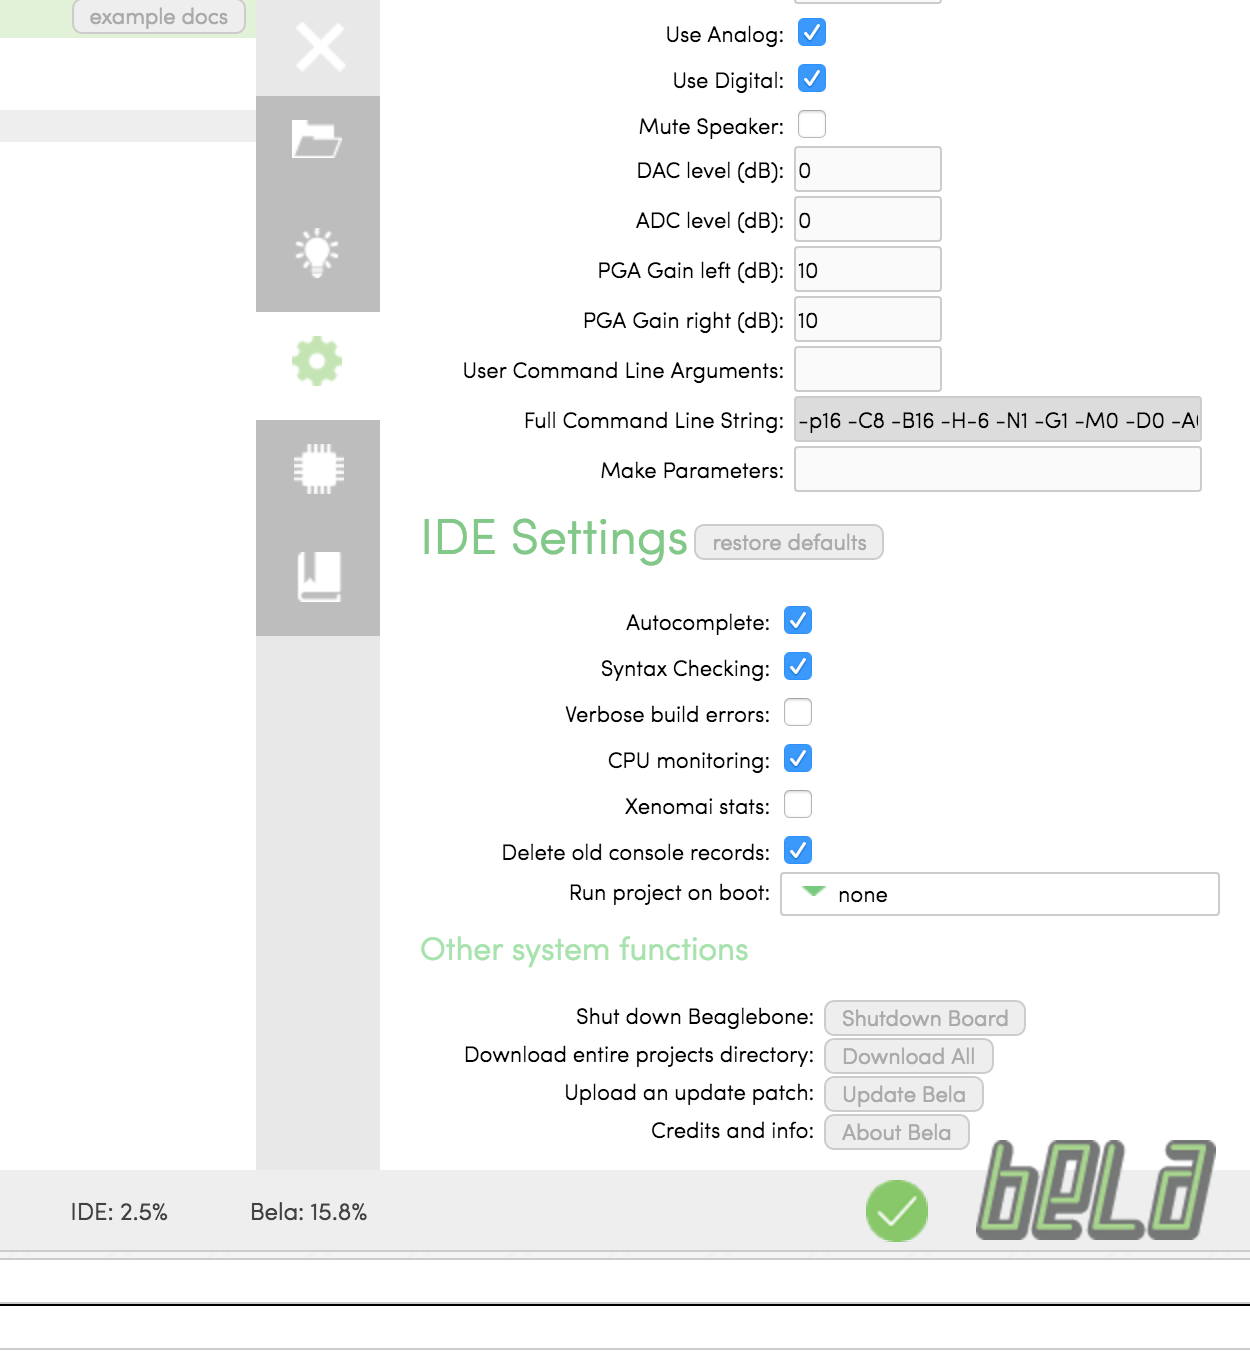
In the project settings tab it is possible to set most of the important settings that effect your project, for example the audio buffer size, the number of analog inputs and their sampling rate.

This is also where it is possible to configure the behaviour of the IDE. You can toggle syntax checking and autocomplete on or off as you prefer. Enabling verbose build errors causes the full output of the compiler to be printed to the console, which can be useful when diagnosing difficult compilation issues or linker errors. Enabling xenomai stats prints the contents of /proc/xenomai/sched/stat to the console when Bela is running. This can be useful for advanced users to monitor the CPU usage of auxiliary tasks and to track down Xenomai mode switches (see here) for more details. Disabling delete old console records prevents the IDE from removing lines printed to the console once there are over 200 present.
To update to the latest version of Bela go to https://github.com/BelaPlatform/Bela and download the latest version of the Bela core code. Click Clone or download and then Download ZIP.

In the Bela IDE go to the Settings tab and click on Upload an update patch at the bottom of the page. This window will pop up:

Choose the .zip file on your computer and click Upload. This will automatically update Bela to the version you downloaded. Once the download is complete you will need to refresh the browser - this can sometimes take ten seconds or so.
Once you have finished coding your project you can set it to launch automatically when the board powers up. This means that there is no need to have the laptop connected - you can power the board with a battery or with an external power supply.

In the settings tab of the IDE go to Run project on boot and select your project. Note that you must have saved your project for this to work. If you want to run an example on boot you will need to save it under another name and then select it from this list in the settings tab.
Once the project is set to run on boot, every time the board is powered up the project will start running automatically. Perfect for making self contained instruments without the need for a computer.
You can pass options to make using the Make parameters textbox. These options are appended at the end of the make command line.
Format
Options passed to make have to be semicolon-separated in the text box and should not include quotes. For instance, if you want the following line to be executed:
make <default arguments> AT= COMPILER=gcc CFLAGS="-I./myincludes -I./myotherincludes"
you should then write the following into the Makefile parameters textbox:
AT=;COMPILER=gcc;CFLAGS=-I./myincludes -I./myotherincludes;
Note that you will have to manually clean the project in order for the objects to be recompiled with the new flags.
Some of the command line arguments for the running program are automatically generated from the project settings. However, you can specify some additional arguments in the "User command line arguments" textbox. See here for some of the default options available, or run the program with --help once to see all those available for your specific program.
In the examples tab you will find many examples that cover most aspects of what's possible with Bela. Examples are arranged into topics to make them easy to navigate and can be loaded by clicking on the project name. These examples are good foundations to start building your own projects and we recommend saving a copy with a different name and experimenting with parameters and growing projects from there.

By clicking on the example docs button in the top toolbar you will be brought to the documentation for that example. Again, this is all stored on the board so requires no internet connection.

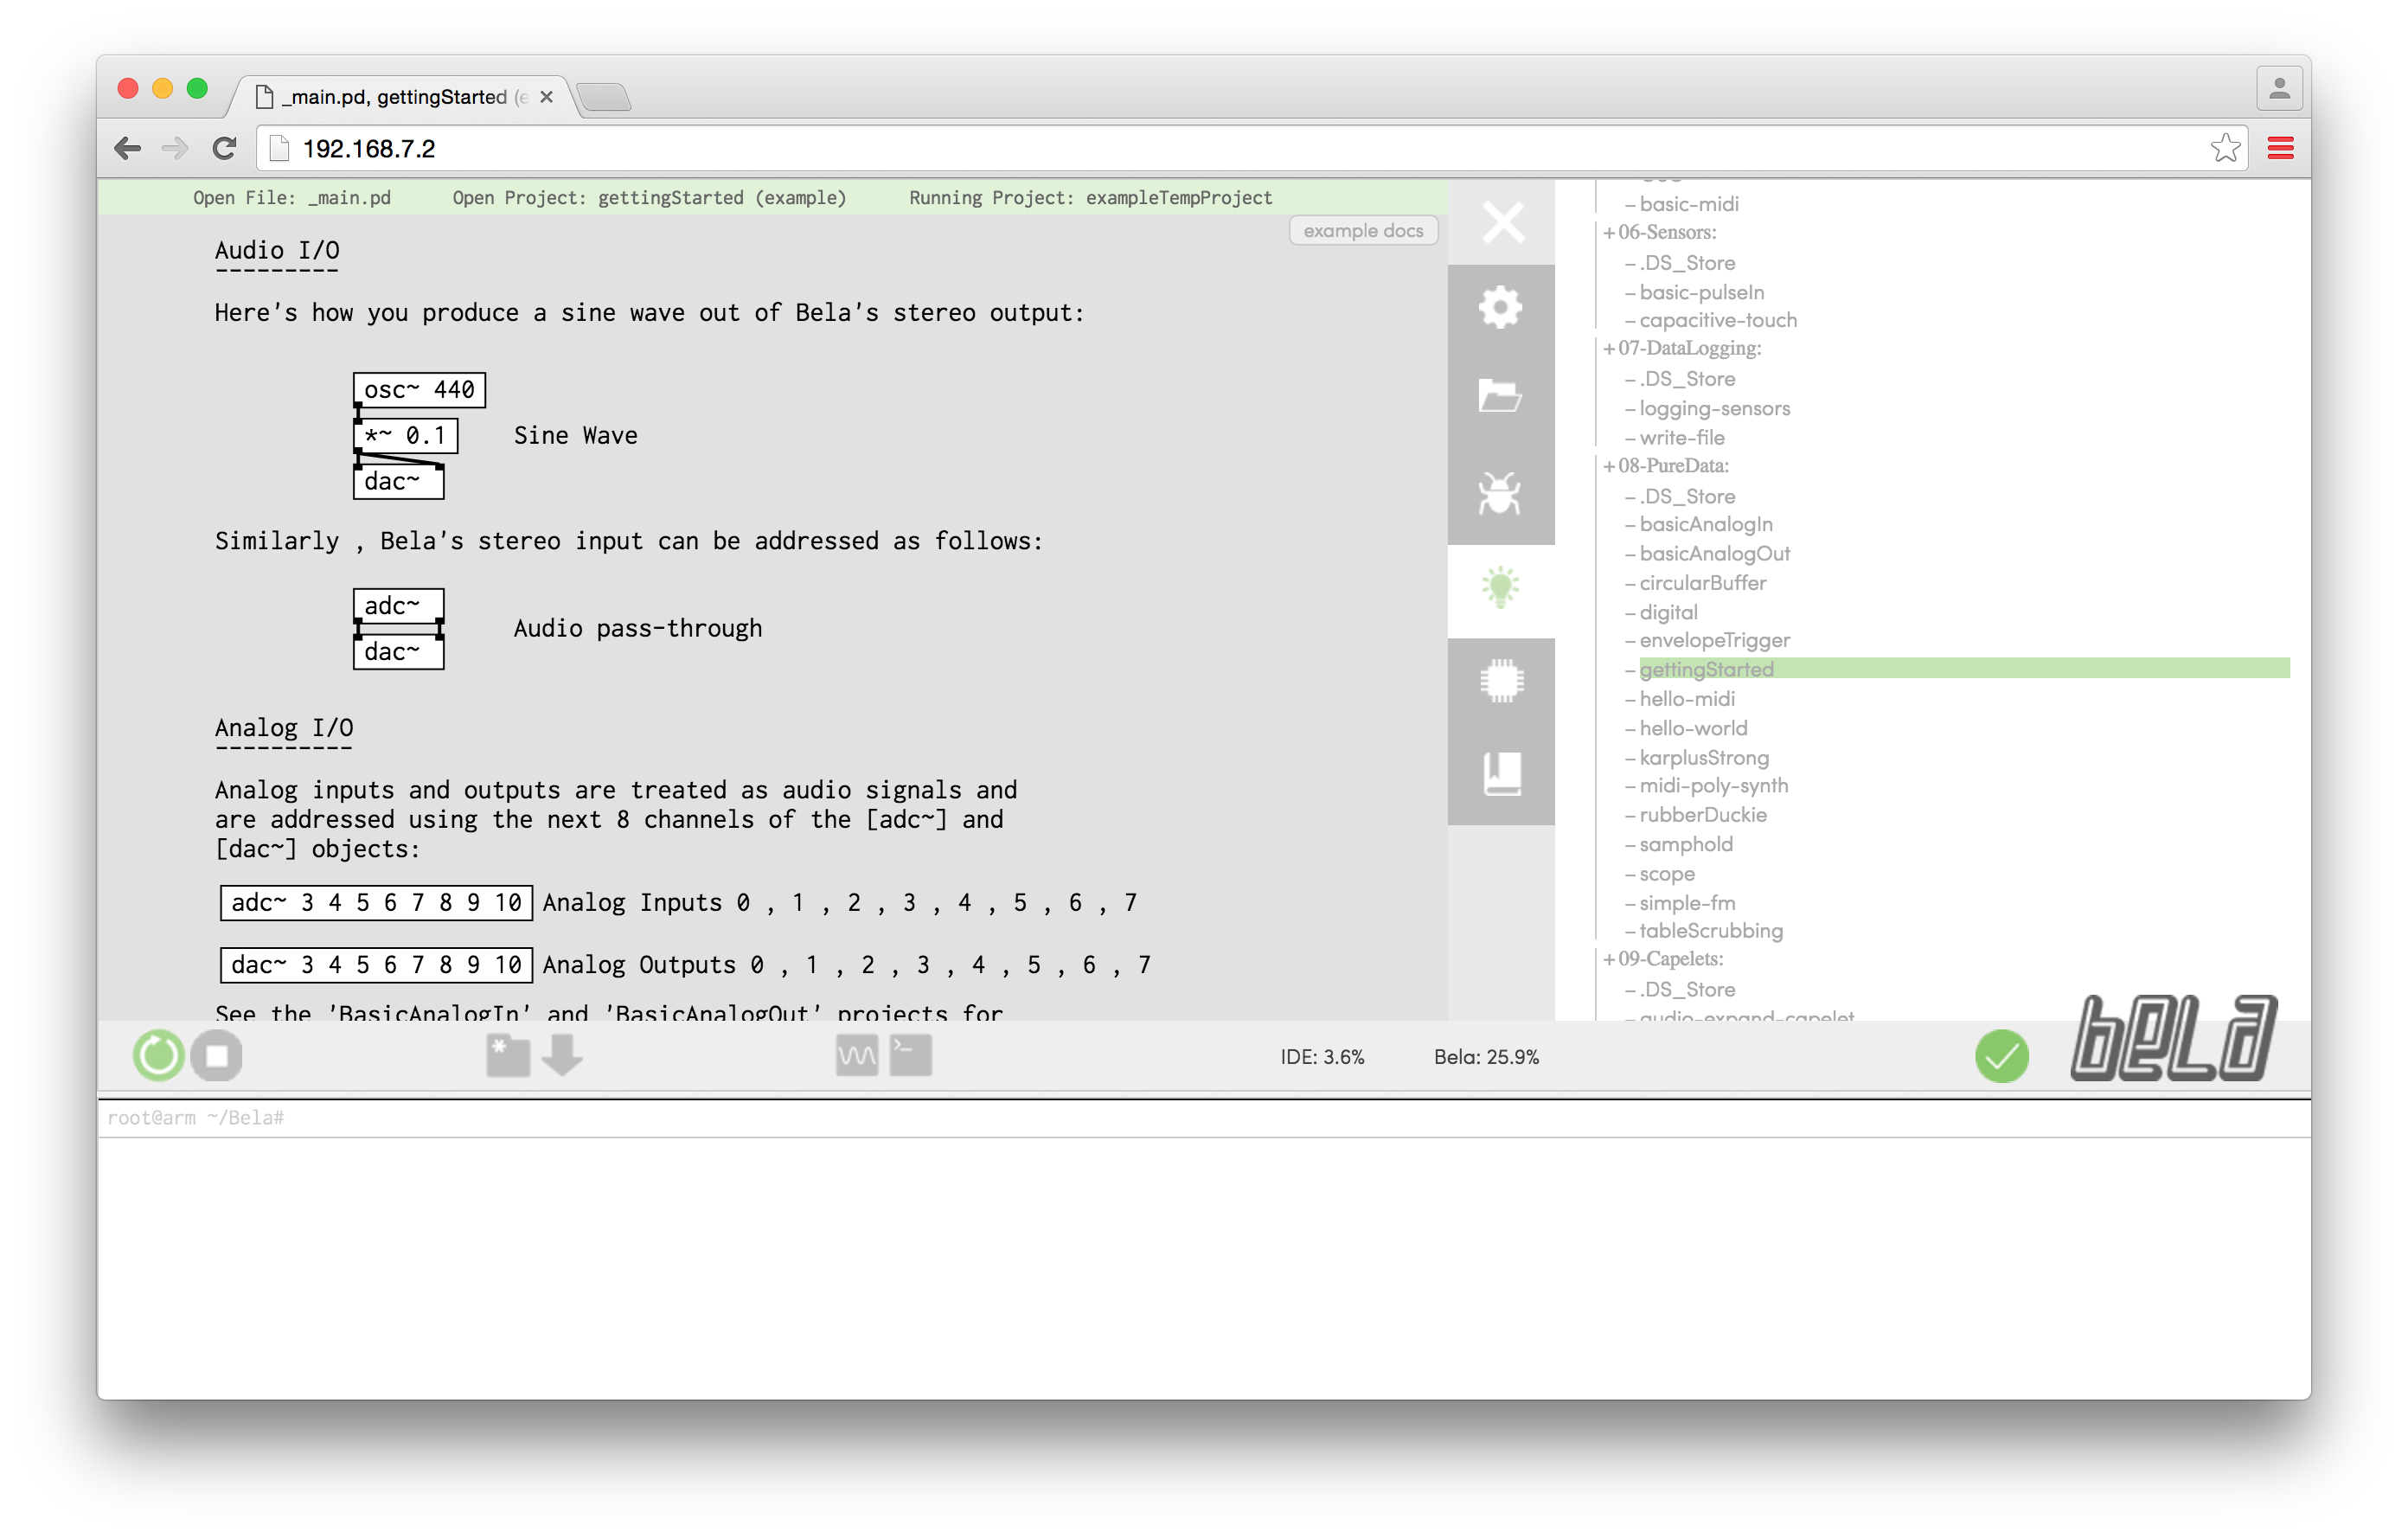
The protocol for working with PureData projects is slightly different. If you load the gettingStarted example from the PureData section of the examples you will see that the PureData patch is rendered in the text editor window. It is not possible to edit this patch (you need to use PureData for that) but it provides you with a visual reference for what's happening in the patch. If you want to use PureData the gettingStarted example is the best place to begin as it gives you a step-by-step guide on how to get PureData patches running on Bela.
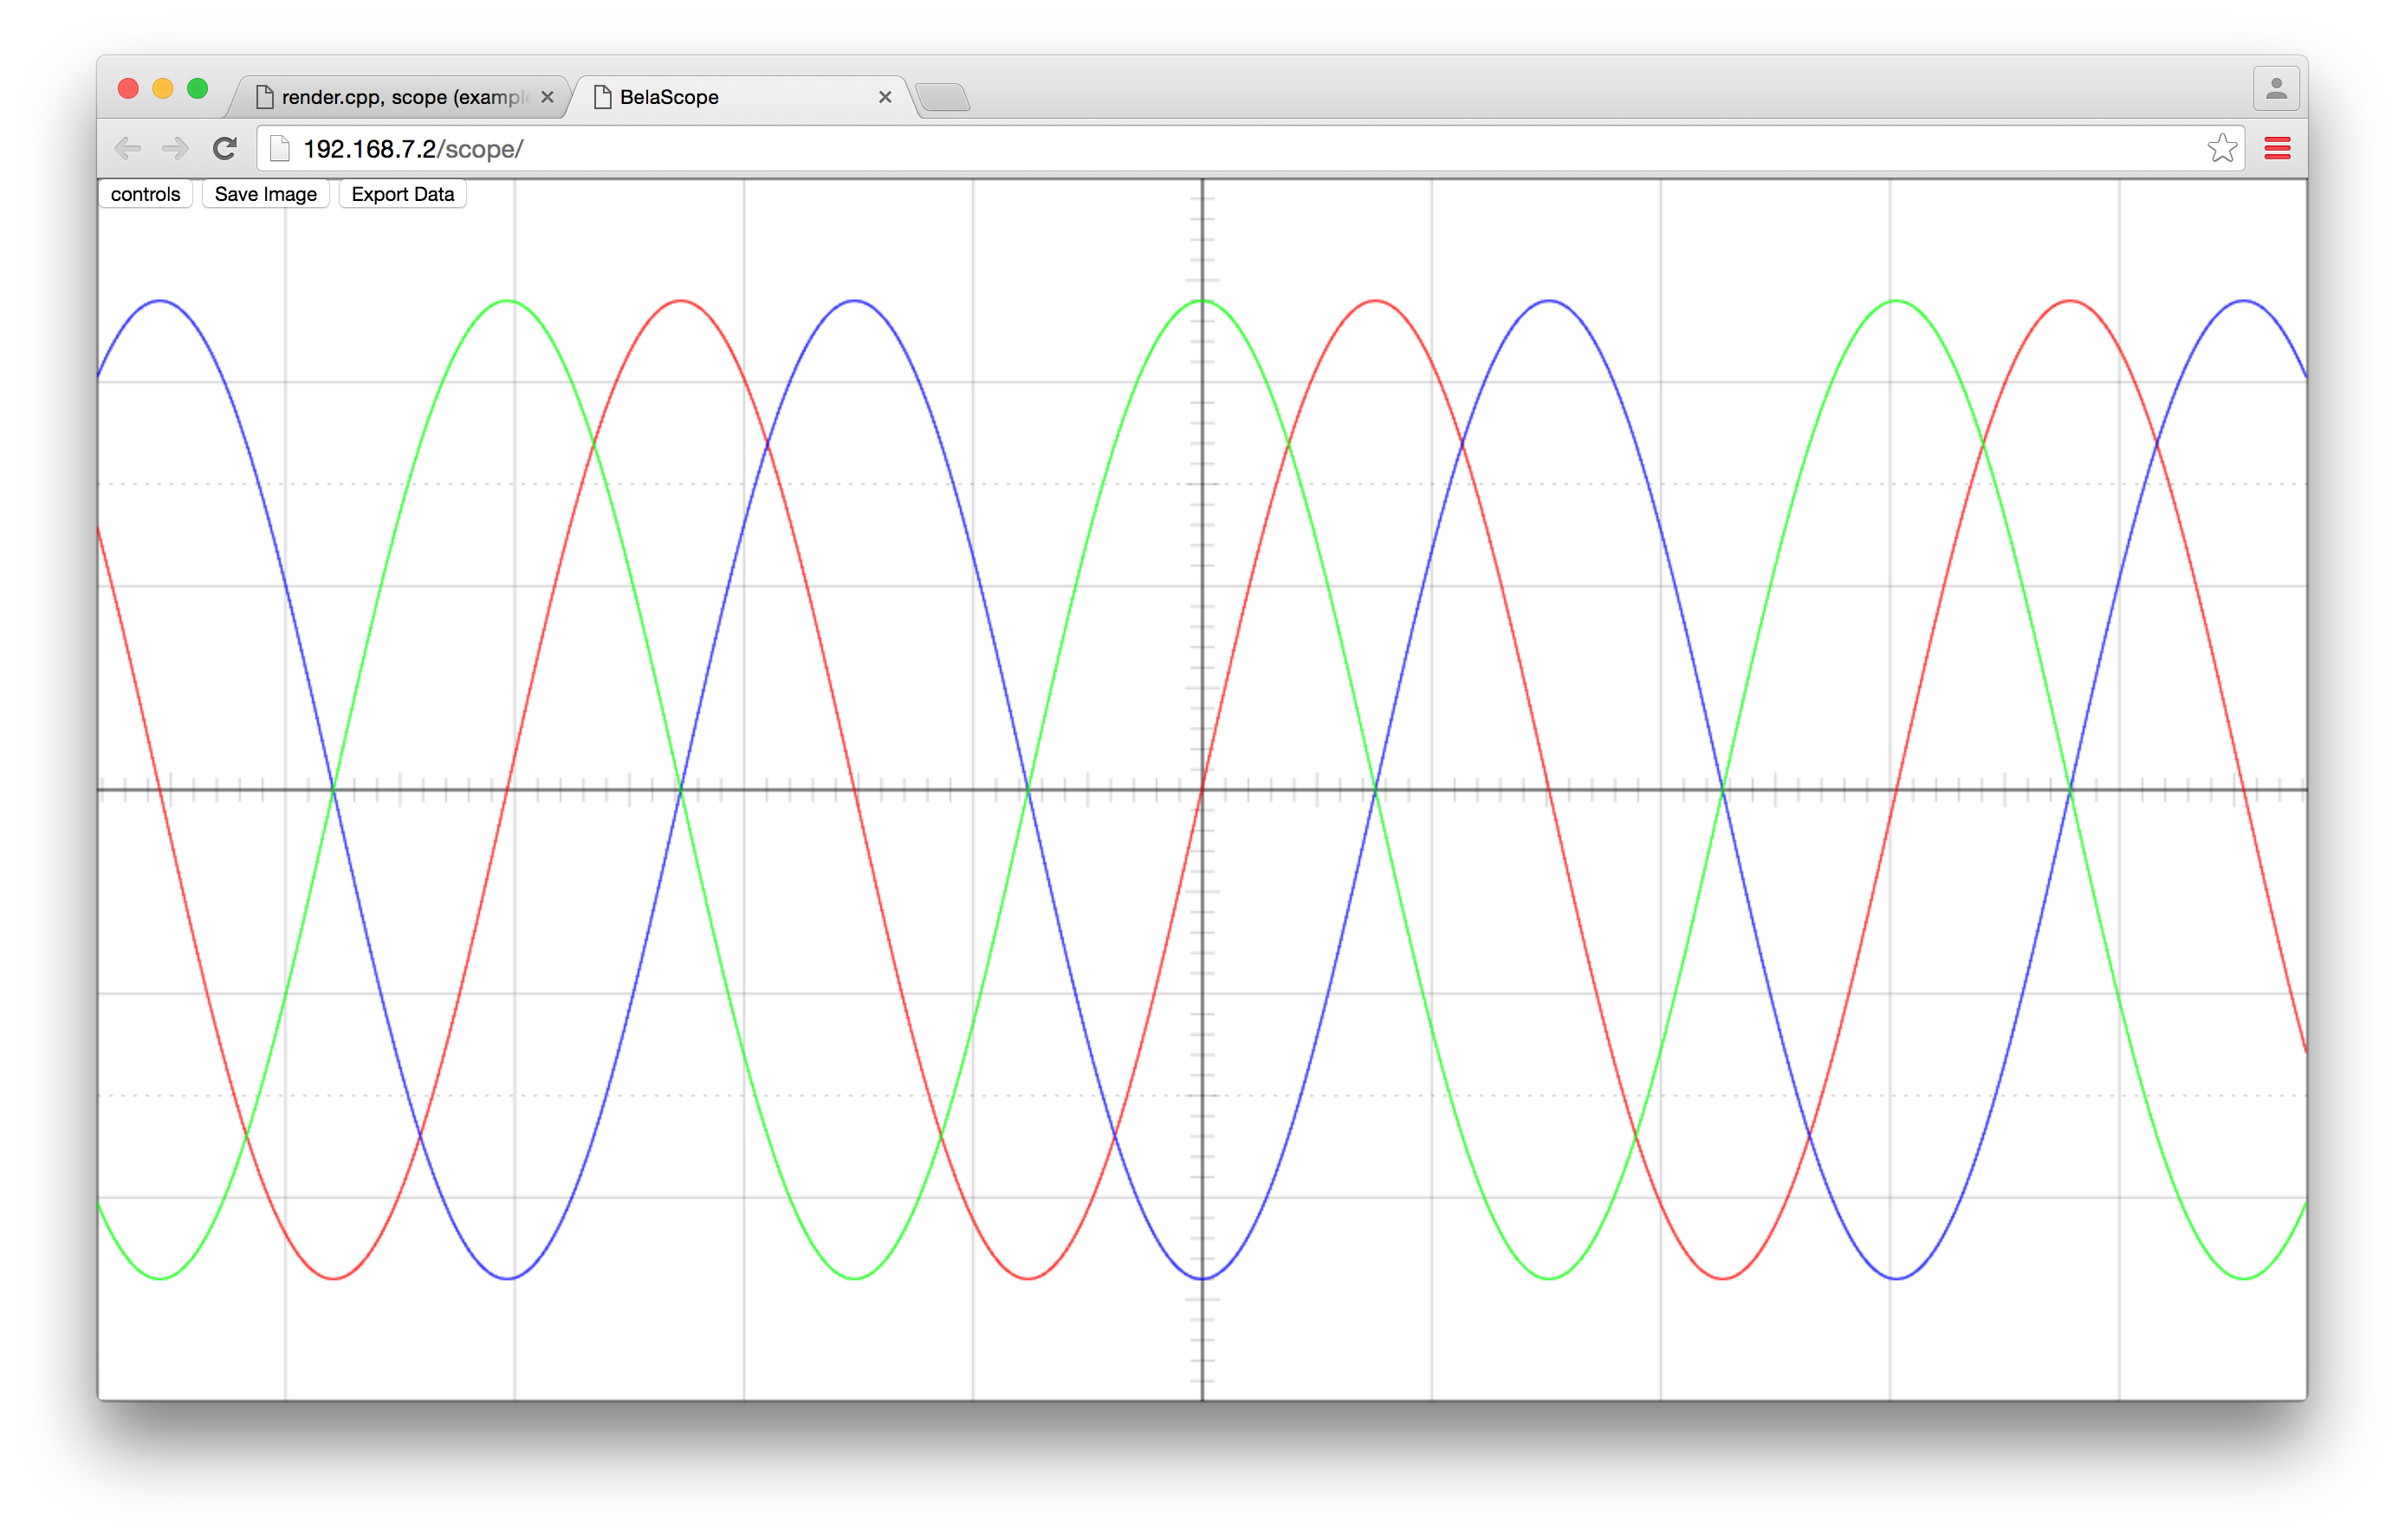
The IDE also features an in-built oscilloscope, a great tool for visualising signals and debugging details of a project. To see the scope in action load up the example 01-Basics/scope and run it on the board. Once it's running you can then press the Open scope button on the bottom toolbar to launch the oscilloscope in another tab. In this example the scope is passed three sine waves out of phase with each other. For further explanations of how to use the scope see also the 03-Analog/scope-analog example and it's documentation. To find out about using the scope with PureData look at the example 08-PureData/gettingStarted.
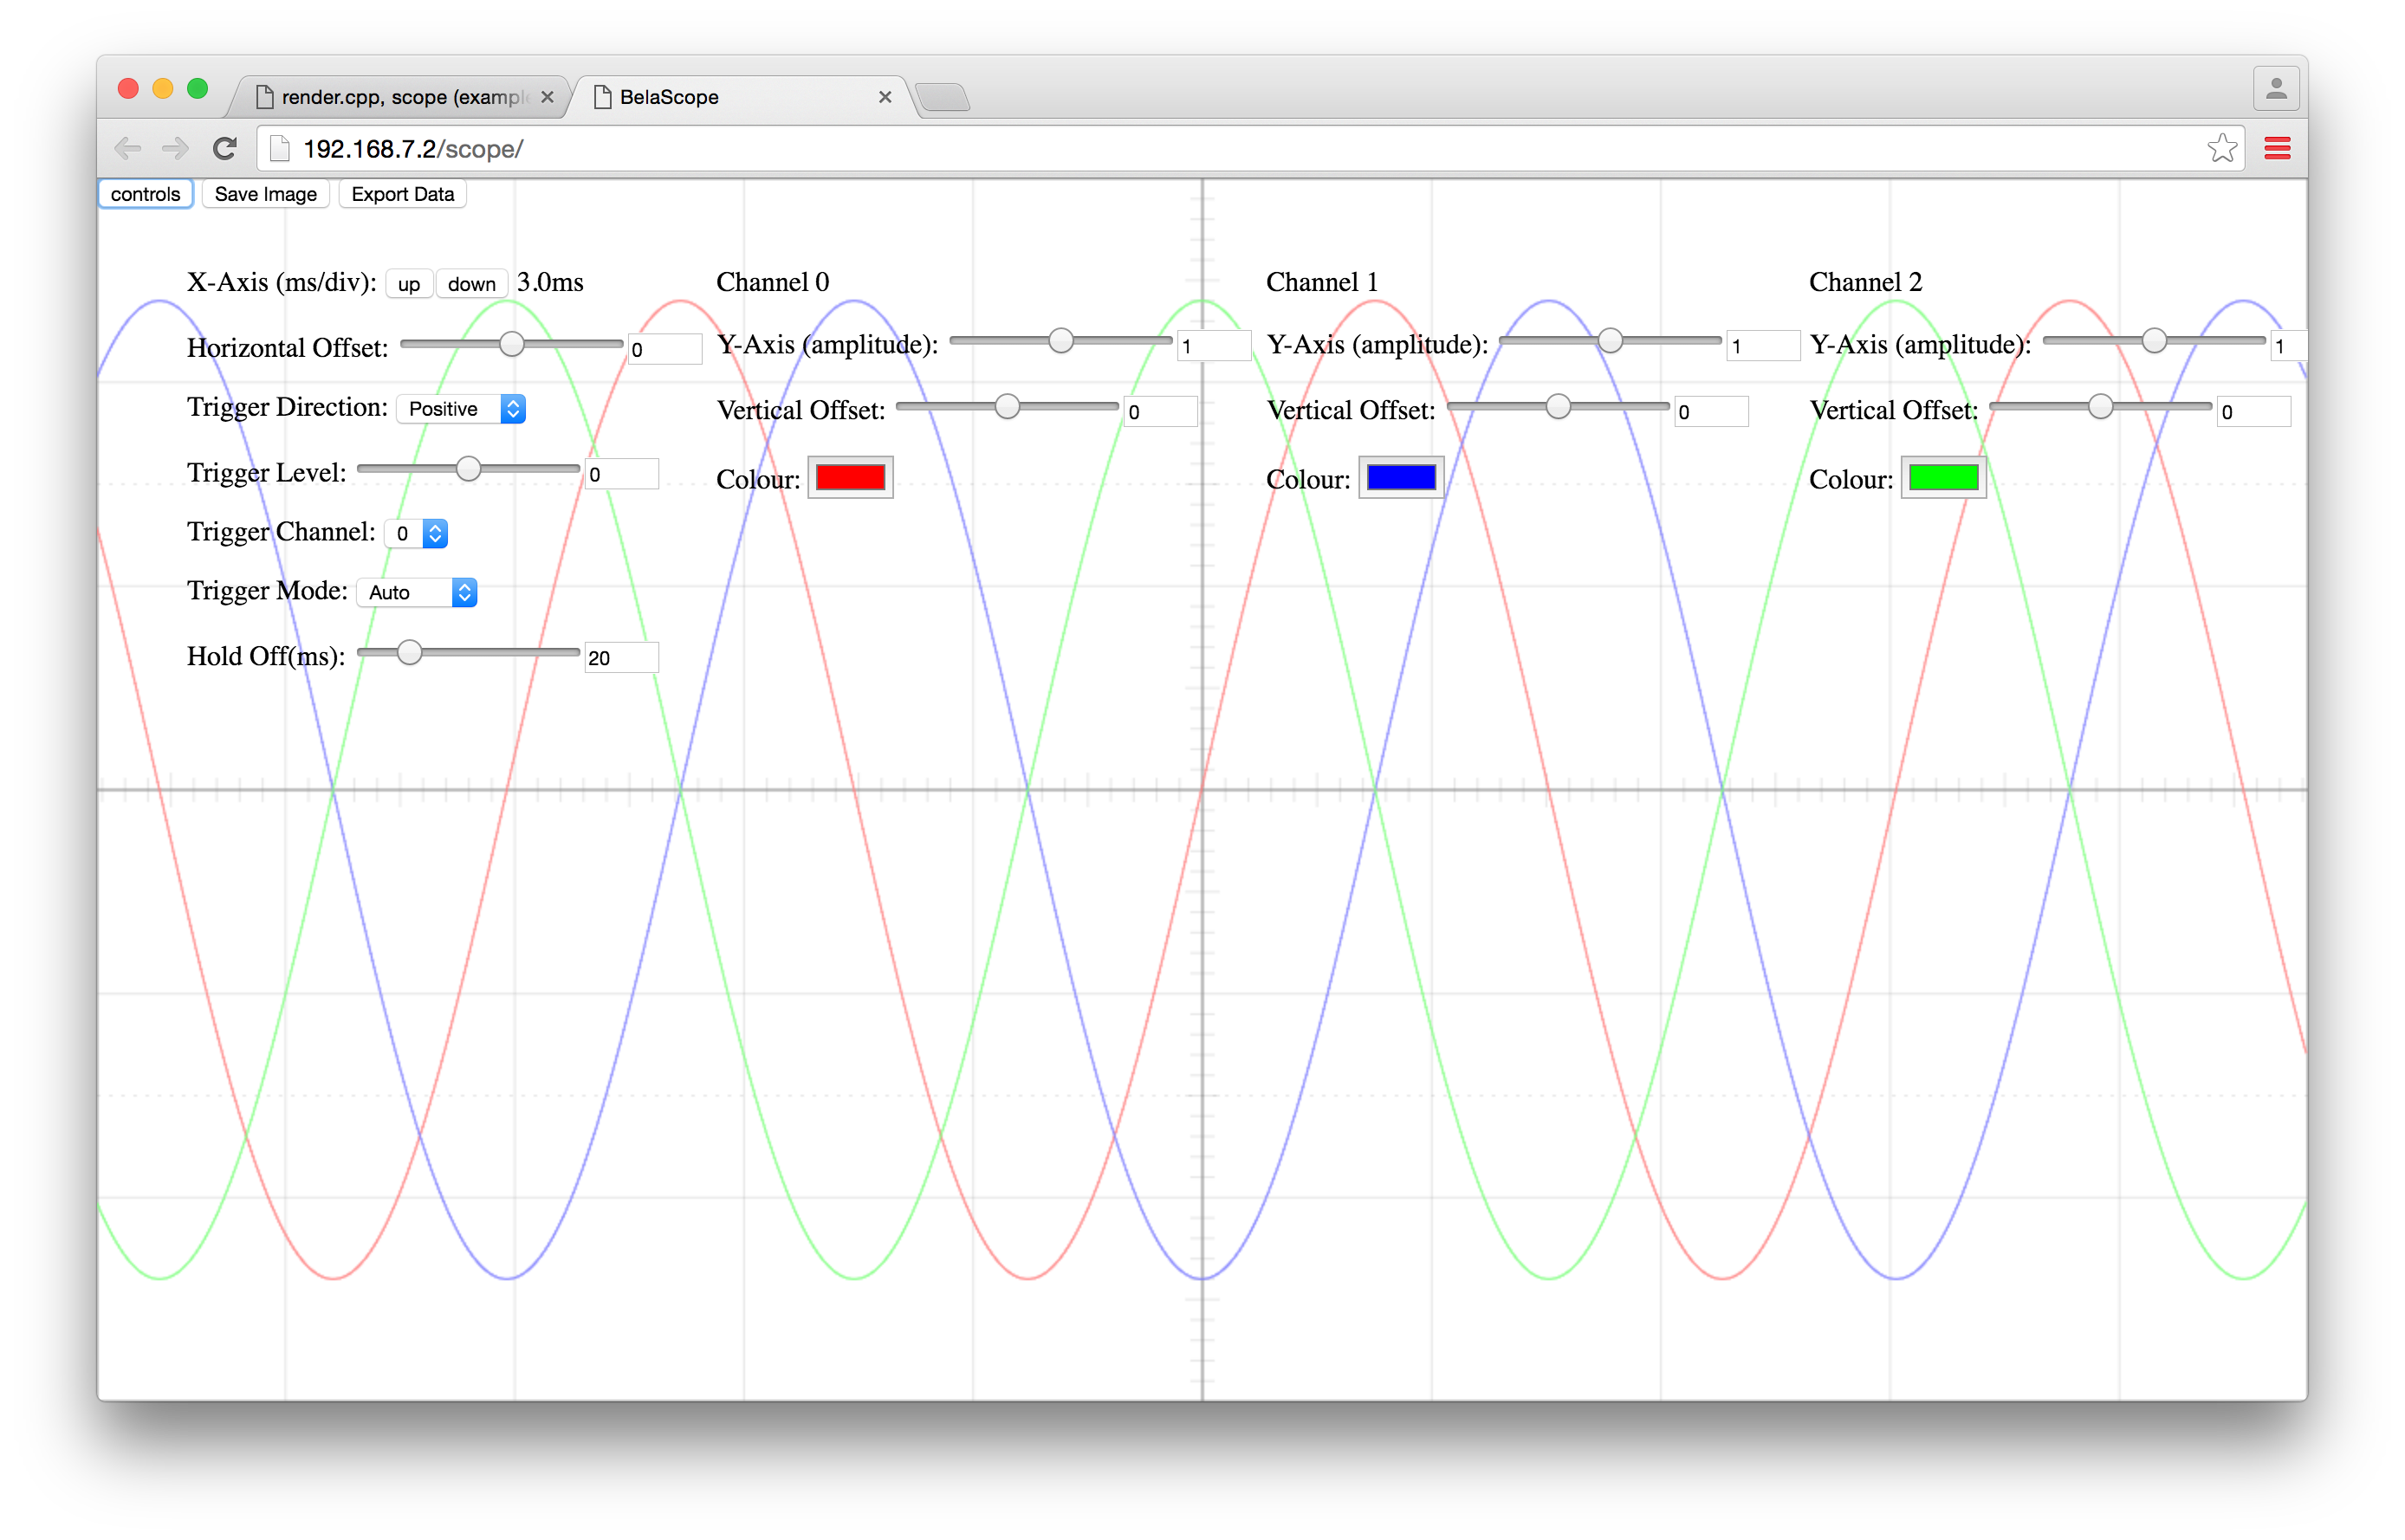
The oscilloscope has all the features you would expect from a regular scope including full triggering functionality and the ability to change the horizontal and vertical offset as well as amplitude of each of the channels. There is no upper limit to the amount of channels that you can scope simultaneously, see the examples for details of how to increase the number of channels and pass signals to the scope. You can access the settings of the scope, including triggering etc., by clicking on the controls button. It is also possible to save the current scope display as an image by clicking on the Save image button, and download the data displayed on the scope via the Export data button. The data will be formatted as a CSV (comma-separated-values) file, with the first column representing the x-axis time in seconds, and the following columns representing the y-axis scope channels. This makes it convenient to import into third-party plotting software.
The IDE also features a documentation tab where information on the Bela Context and a reference for the API can be found. This is a good place to find out information about the functions available to you and the variables you need to pass them.
