

In this workshop you'll cover the basics of securing SQL Server installations and databases, from on-premises systems to Microsoft Azure deployments.
In each module you'll get more references, which you should follow up on to learn more. Also watch for links within the text - click on each one to explore that topic.
(Make sure you check out the Pre-Requisites page before you start. You'll need all of the items loaded there before you can proceed with the workshop.)
This module builds on the previous module where you learned about securing and auditing the platform. This module focuses on the data professional's responsibilities in regard to the operation of the applications, and introduces the basics of SQL Server security controls, from the login access to the row-level and other security mechanisms they can use.
You'll cover these topics in this module:
- 01 - Accessing a SQL Server Instance
- 02 - Principals
- 03 - Securables
- 04 - Applications
- 05 - Encryption, Certificates, and Keys
- 06 - Auditing

Each SQL Server installation on a physical or virtual server computer is called an Instance. You are able to control access to the network protocol, addresses and ports for each Instance you install using the SQL Server Configuration Manager. You should always use this tool to set up the network access to your system as it does more than just change the basic settings available within other system tools - it is designed to implement the safest and most secure changes needed for each setting.
The SQL Server Configuration Management tool also allows you to set the Service Account used by the Microsoft Windows operating system. Review this article to ensure you set up that account with the lowest privileges possible. The SQL Server and other data services should not run as an administrator, Active Directory Domain administrator, or a system service account with high privileges as this opens up an operating system attack.
You should only enable the protocols you know will be in use by your clients. Any other protocols should be disabled to deny an attack vector into your system. You should also consider changing the default ports used by the SQL Server Services to further obfuscate your system from automated port scans.
SQL Server installations allow for Encrypted Connections to the Instance. If you enable this setting, encrypted connections are always enforced from the client, using Transport Layer Security. The Microsoft SQL Server service on the system will listen for TLS requests, so your applications (including management tools like SQL Server Management Studio or Azure Data Studio) are required to connect with Encryption set.
The system running the Microsoft SQL Server Instance must have a certificate provisioned to use TLS. To provision a certificate on the server computer, you first import it into Windows. In addition, the client machine must be set up to trust that certificate's root authority. You can read more about setting up connection encryption by reviewing this checklist.
Before a client or application can connect to a SQL Server Instance to begin the Authentication process, you can configure a network firewall with a rule allowing that address to connect. In general, the SQL Server Instance is unaware of the Firewall configuration, but you should check that you have a Firewall enabled, and that it allows SQL Server traffic to and from the addresses you want your clients to use.
There are two primary Firewall choices typically provisioned for a SQL Server Instance computer: Microsoft Azure Defender or the Windows Firewall with Advanced Security.
You can learn more about configuring these Firewall rules by reviewing this reference.
Accessing a SQL Server Instance continues from the Networking layer to the Application layer using the Tabular Data Stream. This provides request/response for the Instance, and allows authentication and channel encryption negotiation. This protocol sends requests to SQL Server, and uses a Remote Procedure Call (RPC) for stored procedures. It also handles returning data sets and Transaction Manager Requests.
You have multiple libraries for invoking these requests, and you will learn more about them in the Application section below.
Access to SQL is managed through Principals. Principals are users, accounts, or services that can perform some action against one or more objects, the most basic of which is the Instance itself. Principals are created with Data Control Language (DCL) statements or graphical tools.
When a Principal is created, an entry into two sets of tables is made. The first is in the master system database on the Instance, controlling the login account to the server. A corresponding entry - a database user - is made to a system table in one or more user databases that has a key dependency on the account created in the master database. If you think of a large building with many offices, the login account would be similar to a key to the building, and the database user account would be similar to having another key that gets you into a particular office. In this way, you need only one key to the building, but a separate key to each office you need access to.
Contained Database Users operate differently than this model requiring only a user account in a database, without requiring a server Login account. You can read more about that process here.
SQL has two modes of authentication for user accounts: SQL Server Authentication, where the account is managed and stored by a SQL Server Instance, or Mixed-Mode Authentication which additionally allows a link to an externally managed account - a user created with Windows Authentication or Active Directory Atuhentication. Normally this choice is set during installation of the Instance, but it can be changed later. The process to do that is described here.
A key difference between these two type of authentications is that in SQL Server Authentication, since the Instance stores the password for any non-Windows managed principals, it is up to the Database Administrator to ensure that a password and account policy is created and applied to each user. This also means that the Database Administrator will need to coordinate security policy settings to ensure consistent security policies. SQL Server Authentication provides for a limited set of security policies - you can read more about those settings here.
In Mixed-Mode Authentication, you can create internal SQL Server accounts, and you can also leverage Microsoft Windows accounts on the local system, or use Microsoft Active Directory accounts to add Principals. Microsoft Active Directory (AD) is a suite of services, and Active Directory Domain Services (AD DS) is the core Active Directory service used to manage users and resources. You can learn more about Microsoft Active Directory here.
In the following Steps you will create the database and Principals you will use for this Workshop. Run the following code in SQL Server Management Studio or Azure Data Studio on the Instance you installed for this Workshop.
If you did not have the opportunity to complete the pre-requsites or you are auditing this course without a SQL Server Instance installed, you can find all of the T-SQL exercises worked out in a Jupyter Notebook you can review here.
 Steps
Steps
 Create the Test Database we will use for this module
    CREATE DATABASE SQLSecurityTest;
    GO

    SELECT name, create_date, state_desc
    FROM sys.databases
Create a set of users on your Windows test environment
This step will need to be run at the Operating System in an elevated Command Prompt in the Operating System on your workshop system.
    net user User1 "Tes#20. Use12!" /add
    net user User2 "Tes#20. Use22!" /add
Create a set of users in your SQL environment in a new query window
Now return to SQL Server Management Studio or Azure Data Studio and run the following commands. You will need to replace -Placeholder- with your device name. Remember, these are test users and are not designed to be secure.
    USE [master]
    GO
    CREATE LOGIN [-Placeholder-\User1] FROM WINDOWS WITH DEFAULT_DATABASE=[SQLSecurityTest]
    GO

    USE [SQLSecurityTest]
    GO
    CREATE USER [-Placeholder-\User1] FOR LOGIN [-Placeholder-\User1]
    GO

    USE [master]
    GO
    CREATE LOGIN [-Placeholder-\User2] FROM WINDOWS WITH DEFAULT_DATABASE=[SQLSecurityTest]
    GO

    USE [SQLSecurityTest]
    GO
    CREATE USER [-Placeholder-\User2] FOR LOGIN [-Placeholder-\User2]
    GO

    USE [master]
    GO
    CREATE LOGIN [User3] WITH PASSWORD=N'Tes#20. Use32!', DEFAULT_DATABASE=[SQLSecurityTest], CHECK_EXPIRATION=OFF, CHECK_POLICY=OFF
    GO

    USE [SQLSecurityTest]
    GO
    CREATE USER [User3] FOR LOGIN [User3]
    GO

    USE [master]
    GO
    CREATE LOGIN [User4] WITH PASSWORD=N'Tes#20. Use42!', DEFAULT_DATABASE=[SQLSecurityTest], CHECK_EXPIRATION=OFF, CHECK_POLICY=OFF
    GO

    USE [SQLSecurityTest]
    GO
    CREATE USER [User4] FOR LOGIN [User4]
    GO
Review the created users and current role memberships
    EXEC sp_helplogins


    --Find Role Memberships
    SELECT DP1.name AS ServerRoleName,
        isnull (DP2.name, 'No members') AS ServerUserName
    FROM sys.server_role_members AS DRM
    RIGHT OUTER JOIN sys.server_principals AS DP1
        ON DRM.role_principal_id = DP1.principal_id
    LEFT OUTER JOIN sys.server_principals AS DP2
        ON DRM.member_principal_id = DP2.principal_id
    WHERE DP1.type = 'R'
    ORDER BY DP1.name;
In SQL Server installations, you can group Principals into Roles. Roles allow you to abstract the permission assisngments to a group (even if that group has only one account in it) not only for ease of management, but to prevent objects from being "orphaned" when a user is directly assigned ownership, but then leaves the organization. If you assign ownership and permissions to a Role, you can simply move another account into the Role when the other account is deactivated.
In SQL Server you have two levels of Roles: one set at the Instance level, and the other set at the Database level. There are several built-in Server and Database Roles, which allow the most common set of permissions. It is a best practice to always put Principals (users) into Roles, and apply permissions at the Role level.
Several Server and Database Roles are already created for you, and you can see the included Server Roles and their permissions at this reference. You can also make more Roles for specific purposes as you need. You should review the built-in Roles and see if they fit your needs rather than creating new ones.
SQL Server also has Application Roles, which remove the need for user permissions. Using Application Roles, the user runs a client application, which connects to the database as that user. The application switches contexts to the Application Role, runs the commands on behalf of the user, and returns the result. You can learn more about Application Roles and how to use them at this reference.
In this set of Steps, you will create Roles on your system and assign Principals to them.
Steps
Create 1 server role and 2 database roles
    -- Create a server role that will eventually own a table in the database
    USE master;
    CREATE SERVER ROLE SQLSecurityTest_Table_Owner;

    -- Create a database role that will eventually have rights to execute a stored procedure in the database
    USE [SQLSecurityTest];
    CREATE ROLE Stored_procedure_user_role;

    --Create a database role that will have permisison to query a view in the database
    USE [SQLSecurityTest];
    CREATE ROLE View_user_role;
Assign users to roles. Remember to change the computer name from '-Placeholder-' in all the relevant places if you are running this on your own device.
    --Add user 1 to the Server role
    ALTER SERVER ROLE [SQLSecurityTest_Table_Owner] ADD MEMBER [-Placeholder-\User1];
    GO

    --Add user 2 and 3 to the stored procedure user role
    USE [SQLSecurityTest]
    GO
    ALTER ROLE [Stored_procedure_user_role] ADD MEMBER [-Placeholder-\User2];
    GO

    USE [SQLSecurityTest]
    GO
    ALTER ROLE [Stored_procedure_user_role] ADD MEMBER [User3];
    GO

    --Add user 1 and 4 to the View user role
    USE [SQLSecurityTest]
    GO
    ALTER ROLE [View_user_role] ADD MEMBER [-Placeholder-\User1];
    GO

    USE [SQLSecurityTest]
    GO
    ALTER ROLE [View_user_role] ADD MEMBER [User4];
    GO
Audit all user created roles on the system, as well as role memberships
    --Server Principals
    SELECT * FROM sys.server_principals
    WHERE type = 'R' AND is_fixed_role = 0 AND name NOT IN ('public');
    GO

    --Database Principals
    SELECT * FROM sys.database_principals
    WHERE type = 'R' AND is_fixed_role = 0  AND name NOT IN ('public');
    GO

    --Find Role Memberships
    SELECT DP1.name AS DatabaseRoleName,
      isnull (DP2.name, 'No members') AS DatabaseUserName
    FROM sys.database_role_members AS DRM
    RIGHT OUTER JOIN sys.database_principals AS DP1
      ON DRM.role_principal_id = DP1.principal_id
    LEFT OUTER JOIN sys.database_principals AS DP2
      ON DRM.member_principal_id = DP2.principal_id
    WHERE DP1.type = 'R'
    ORDER BY DP1.name;
    GO
List all users by whether they are SQL or Windows users, excluding any built-in users
    -- Windows Logins
      SELECT * FROM sys.server_principals WHERE type IN ('U','G', 'E', 'X') AND name NOT LIKE '%NT%';
      GO

    -- SQL Logins
      SELECT * FROM sys.server_principals WHERE type = 'S' AND name NOT LIKE '%#%' AND name NOT LIKE 'sa';
      GO
Edit and run the sample Python application
If you did not have the opportunity to complete the pre-requsites or you are auditing this course without a SQL Server Instance installed, you can find all of the Python exercises worked out in a Jupyter Notebook you can review here.
    cd \SampleDBApp
    notepad SimpleConnection.py
Now add the contents below the previous entry:
    # ---------------------------- #
    # Declare connection variables #
    # ---------------------------- #
    string = 'DRIVER={ODBC Driver 17 for SQL Server};Server=(local);DATABASE=SQLSecurityTest;'
    user3 = 'User3'
    pw3 = 'Tes#20. Use32!'
    user4 = 'User4'
    pw4 = 'Tes#20. Use42!'

    # -------------------------------------------------- #
    # Declare the queries you want to test for each user #
    # -------------------------------------------------- #

    query1 = "SELECT 'Connecting user name = ' + suser_name()"
    query2 = "SELECT 'Select Server Name = ' + @@SERVERNAME"

    # ---------------------------------------- #
    # Declare connection strings for each user #
    # ---------------------------------------- #

    conn1 = pyodbc.connect(string+'Trusted_Connection=yes;')
    conn2 = pyodbc.connect(string+'UID='+ user3 +';PWD=' + pw3)
    conn3 = pyodbc.connect(string+'UID='+ user4 +';PWD=' + pw4)
    cursor1 = conn1.cursor()
    cursor2 = conn2.cursor()
    cursor3 = conn3.cursor()

    # ------------------------------------ #
    # This will run as the powershell user #
    # ------------------------------------ #

    cursor1.execute(query1)
    row = cursor1.fetchone()
    while row:
        print(row[0])
        row = cursor1.fetchone()
    cursor1.execute(query2)
    row = cursor1.fetchone()
    while row:
        print(row[0])
        row = cursor1.fetchone()

    # ----------------------------- #
    # Execute the Queries for User3 #
    # ----------------------------- #

    cursor2.execute(query1)
    row = cursor2.fetchone()
    while row:
        print(row[0])
        row = cursor2.fetchone()
    cursor2.execute(query2)
    row = cursor2.fetchone()
    while row:
        print(row[0])
        row = cursor2.fetchone()

    # ----------------------------- #
    # Execute the queries for User4 #
    # ----------------------------- #

    cursor3.execute(query1)
    row = cursor3.fetchone()
    while row:
        print(row[0])
        row = cursor3.fetchone()
    cursor3.execute(query2)
    row = cursor3.fetchone()
    while row:
        print(row[0])
        row = cursor3.fetchone()
Finally, run the python app to see the connection results:
python SimpleConnection.py
Note, Windows users will only be able to connect via a Trusted connection. Please run powershell as User1 and User2 to see their connection results. You can read more about how to run a command as another user at this reference.
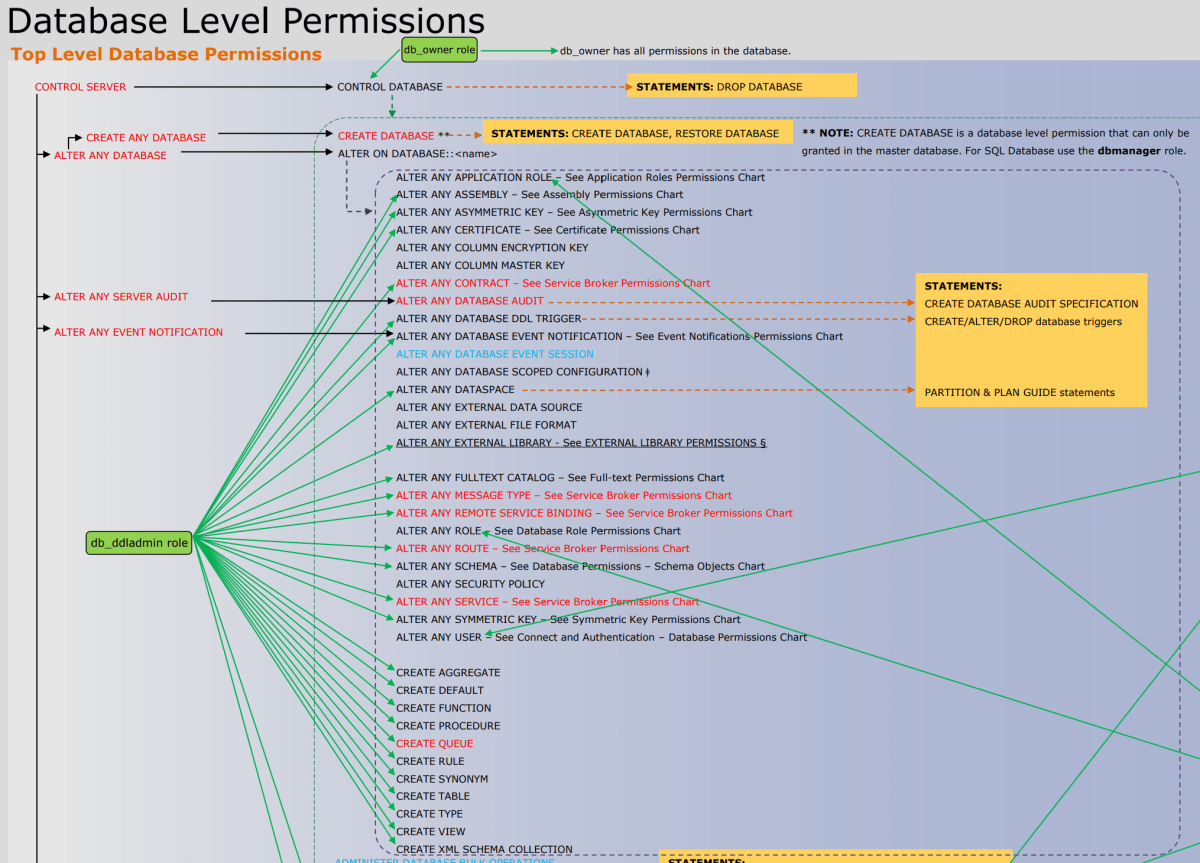
A Securable in SQL Server is a Database or Database object. Permissions and Rights can be assigned to the Securable through a series of Transact-SQL statements grouped as Data Definition Language (DDL) statements, most notably GRANT, REVOKE, DENY, and ALTER, among many others. A complete list of these permission is here.
In general, GRANT allows access to an object, REVOKE removes access to the object from a Principal - but they retain access to the object if they have it GRANTed as part of a Role they are a member of. DENY, on the other hand, removes access to the object whether the Principal has access to a GRANTed Role or not.
Each securable includes a set of permissions relevant to scope and function. Permissions can be granted, denied, or revoked. Referencing the general permissions hierarchy as well as reviewing the built in Server roles and Database roles is good start to understanding what roles are necessary for most users. Considering least privilege each time you assign a role, and cross referencing permissions granted through each role is necessary.
Creating a full set of permissions that include all angles is a complex process. This PDF details the general Permissions available in SQL Server.
An important concept to be aware of is the idea of an ownership chain. If a Principal owns objects such as a Table, and then creates a Stored Procedure over that table, they need only GRANT access to the Stored Procedure to a Principal and that Principal will be able to run the Stored Procedure, even without access to the "base" table(s) it references. You can see an explanation and example of this process at this reference.
Perhaps the best method to learn about applying Permissions to Securables for Principals is to run example code. Once you have run these code snippets as they are you can alter them to see a different behavior. Experimentation is one of the best processes to learn how Permissions work.
Steps
Run the following Steps in SQL Server Management Studio or Azure Data Studio, on the test database for this Workshop.
Add a table to the Sample 'SQLSecurityTest' database
    USE [SQLSecurityTest]
    GO
    CREATE TABLE Patient (
    LoginID tinyint
    ,   LastName varchar(255)
    ,   FirstName varchar(255)
    ,   Address varchar(255)
    ,   City varchar(255)
    ,   SSN nvarchar(11)
    ,   CardNumber nvarchar(19)
    );

    INSERT INTO Patient (loginid, lastname, firstname, address, city, ssn, cardnumber)
    VALUES
      (1,'Arbiter', 'Agatha', '111 Apple Ave.', 'Atlanta', '111-11-1111', '1111-1111-1111-1111')
      , (2, 'Bob', 'Billy', '222 Bayshore Blvd.', 'Boice', '222-22-2222', '2222-2222-2222-2222')
      , (3, 'Choice', 'Charley', '333 Castaway Ct.', 'Chesterfield', '333-33-3333', '3333-3333-3333-3333')
      , (4, 'Dangerfield', 'David', '4444 Denvue Drive', 'Denver', '444-44-4444', '4444-4444-4444-4444')
      , (5, 'Engleton', 'Edbert', '5555 Esquire Rd. E', 'Easton', '555-55-5555', '5555-5555-5555-5555')
Create a sample View and Stored Procedure
    USE SQLSecurityTest;
    GO

    CREATE VIEW Patient_Mailing_Address AS
    SELECT FirstName, LastName, Address, City
    FROM Patient;
    GO

    CREATE PROCEDURE uspGetCardInformation
        @Loginid tinyint
    AS
        SET NOCOUNT ON;
        SELECT cardnumber
        FROM Patient
        WHERE loginId= @loginId
    GO

    --Preview the result from View and Stored procedure:
    SELECT * FROM Patient_Mailing_Address
    EXEC dbo.uspGetCardInformation @loginID = 2
Grant user1 CONTROL permissions on the Table. Please replace -Placeholder- with your device name if you are running it locally.
    USE [SQLSecurityTest]
    GO
    GRANT CONTROL ON [dbo].[Patient] TO [-Placeholder-\User1]
    GO
Grant rights to execute the stored procedure to the 'Stored_procdure_user_role' role
    USE [SQLSecurityTest]
    GO
    GRANT EXECUTE ON [dbo].[uspGetCardInformation] TO [Stored_procedure_user_role]
    GO
Grant rights to use the view to the 'View_user_role' role
    USE [SQLSecurityTest]
    GO
    GRANT SELECT ON [dbo].[Patient_Mailing_Address] TO [View_user_role]
    GO
You now have a series of Securables and Principals, and you can experiment with SELECT and EXECUTE statements in T-SQL and from the Python Application to see the effects.
Securing your SQL Server Instance and Database Objects includes ensuring the applications that connect to them are also working with the highest level of security.
Apart from the Secure Coding principles your client applications should follow, there are security mechanisms within Azure SQL Database that you can leverage in your code for enhanced protections.
In SQL Server Instances you can require TLS connection encryption. There are, however, various version of TLS, and you want to implement the highest version possible when you connect to a SQL Server Instance. You can find the latest drivers and connection methods for SQL Server at this reference. Each of these connection libraries has differing security impacts, so it is important to review the latest releases and use the most secure methods of access possible. You have various options for creating a secure database program. Using Always Encrypted, you can ensure data is never decrypted by the database and is only seen decrypted on the application user side. This helps with the separation of duties, and you can read more about it here. The first step in securing your application is to implement a least-privilege approach within your permission structure, as described in the previous sections. By granting permissions only to the higher-level objects (such as Views, Functions and Stored Procedures) you are able to protect the underlying base Tables from unnecessary access by the end user.Views allow you to show only the columns and rows required for least-privilege, and Functions and Stored Procedures allow you to restrcit both columns and rows.
SQL Server provides Row-Level Security which enabled you to restrict access to different rows in specific tables based on a function. This function will check the group membership of the user or the execution context to control access to the rows in the database table.By creating a Function and a Security Policy, you can set up protections for SELECT, UPDATE and DELETE operations.
In this Activity you will explore setting up Row-Level Security on your database environment.
Steps
Navigate to this reference, and follow all the steps you see there for Scenario "A", using your sample Workshop environment.
Dynamic Data Masking allows you to substitute a standard return from a query with obfuscated characters. You can replace all or part of a result string with another character (such as the letter X). That means you could allow your users to see that there is in fact data in a field or part of a field, without showing them the data itself.In this Activity you will review an example set of scripts that implement Dynamic Data Masking, and shows the data returned. You can implement these scripts if you would like a hands-on experience in your sample workshop database, depending on the time available in the class.
Steps
Navigate to this reference, and review all the steps you see there, using your sample Workshop environment.
SQL Server 2022 and Microsoft Azure SQL Database include a new feature called Ledger that stores a one-way hash root digest of the data rows in a table. This Ledger can be kept in a secure location so that the hash of the current rows can be compared to the digest of those has values, alerting you to any differences, which indicates that the data has been tampered with.With the Ledger feature, you are able to create updatable tables, or insert-only tables depending on your application's needs.
In this Activity you will review an example of setting up and working with SQL Ledger.
Steps
Navigate to this reference, and review all the steps you see there, using your sample Workshop environment.
SQL Injection attacks occur when a T-SQL string is abnormally terminated and another script inserted in the application's context. A complete explanation of the attack, along with an example, is documented at this reference.Once again, a coding practices is best to explain the attack and how to prevent it.
 Activity: Parameterized Queries and Error Handling
Description
Steps
Run this query to retrieve data for 1 patient
    USE [SQLSecurityTest]
    GO
    SELECT *
    FROM Patient
    WHERE loginid = '1'
    -- user input = 1
Run the same query with an injection string
    USE [SQLSecurityTest]
    GO
    SELECT *
    FROM Patient
    WHERE loginid = '' or 1=1 --'
    -- user input = ' or 1=1 --
Run the query below showing how parameterizing the query helps prevent injection strings. TRY... CATCH error handling is useful when the queries are structured correctly but still returns an error with too much information. However, if there are syntax errors, these need to be handled on the application side.
    USE [SQLSecurityTest]
    GO
    DECLARE @Loginid tinyint

    SET @Loginid = '' or 1=1-- '
    --user input = ' or 1=1--
    SELECT *
    FROM Patient
    WHERE loginid = @Loginid --parameterized input


    SET @Loginid = 3
    --user input = 3
    SELECT *
    FROM Patient
    WHERE loginid = @Loginid --parameterized input
Add Error Handling
Notice that an error could be returned to a malicious actor which they could use to learn more about your environment. Adding error handling helps prevent verbose errors from giving more information for an attacker to use.
    USE [SQLSecurityTest]
    GO

    DECLARE @Loginid tinyint
    BEGIN TRY
        SET @Loginid = ''' or 1=1--'
        --user input = ' or 1=1--
        SELECT *
        FROM Patient
        WHERE loginid = @Loginid --parameterized input
    END TRY
    BEGIN CATCH
        Print 'Please use only your user ID'
    END CATCH

    BEGIN TRY
        SET @Loginid = '3'
        --user input = 3
        SELECT *
        FROM Patient
        WHERE loginid = @Loginid --parameterized input
    END TRY
    BEGIN CATCH
      Print 'Please use only your user ID'
    END CATCH
Microsoft SQL Server supports encryption of data in multiple ways: in-transit, at-rest, in-database and more.
For data-in-transit, Transport Layer Security (TLS) can be enforced for connections to the server over secure protocols. The previous section covered setting up this level of encryption on your SQL Server Instance.
For data encryption, two mechanisms are available. For data-at-rest, you can implement the SQL Server Transparent Data Encryption (TDE) feature. With no code or database changes, your database is encrypted on storage. You will turn on TDE for your sample Workshop database in an Activity that follows.
For data encryption, it's important to understand how SQL Server uses Keys to encrypt data. On creation, Each Instance creates a Service Master Key (SMK), which is then used to create a Database Master Key (DMK). These Keys are protected by either a Certificate, an Asymmetric Key or a Symmetric Key to lock and unlock the Key. An Extensible Key Management (EKM) module can also be used, holding symmetric or asymmetric keys outside of SQL Server. You can see a visual representation of this encryption hierarchy at this reference.
You can also encrypt sections of your data as you insert it using T-SQL functions, such as ENCRYPTBYPASSPHRASE and DECRYPTBYPASSPHRASE calls.
Another method of setting up encryption for your database is using the Always Encrypted feature. Always Encrypted allows applications to encrypt sensitive data wihtout revealing the encryption keys to the Database Engine. This is transparent to the application, so you don't need to write special code to take advantage of this feature. You can learn more about how Always Encrypted works at this reference, and in the next Module you will set up this feature as an Activity.
Activity: Enabling Transparent Data Encryption
Description
This activity walks you through setting up keys, certificates, and transparent data encryption of a database on your workshop environment.
Steps
Create and backup the Master key
In the Operating System, create a "C:\EncryptedDrive" folder. Grant OS permissions to that folder to the account running the SQL Server Engine Service.
    USE [master]
    GO

    CREATE MASTER KEY ENCRYPTION BY PASSWORD = 'Fl@sh G0rd0n!';
    GO

    OPEN MASTER KEY DECRYPTION BY PASSWORD = 'Fl@sh G0rd0n!';
    GO
    BACKUP MASTER KEY TO FILE = 'C:\EncryptedDrive\masterkey.mk'
        ENCRYPTION BY PASSWORD = 'S@vior Of.The Un1v3r$3!';
    GO
Create, Verify, and Backup a Certificate
Adjust the backup location in the code below of the certificate for your system
    USE [master]
    GO

    CREATE CERTIFICATE TDE_Cert WITH SUBJECT = 'TDE Certificate';
    GO

    BACKUP CERTIFICATE TDE_Cert TO FILE = 'C:\EncryptedDrive\TDE_Cert.cer'
        WITH PRIVATE KEY (
            FILE = 'C:\EncryptedDrive\TDE_Cert.pvk',
            ENCRYPTION BY PASSWORD = 'I$ @.Mirac1e!');
    GO
Verify the creation/presence of the TDE_Cert and the Database Master key
    USE [master]
    GO

    SELECT * FROM sys.certificates where [name] = 'TDE_Cert'
    GO

    SELECT name, algorithm_desc, create_date FROM sys.symmetric_keys
    GO
Encrypt the test Database
    USE SQLSecurityTest
    GO

    /*Create Encryption key*/
    CREATE DATABASE ENCRYPTION KEY
      WITH ALGORITHM = AES_256
      ENCRYPTION BY SERVER CERTIFICATE TDE_Cert;
    GO

    /* Encrypt database */
    ALTER DATABASE SQLSecurityTest SET ENCRYPTION ON;
    GO
Verify encryption
    /* Verify Encryption */
    SELECT
      DB_NAME(database_id) AS DatabaseName
    , Encryption_State AS EncryptionState
    , key_algorithm AS Algorithm
    , key_length AS KeyLength
    FROM sys.dm_database_encryption_keys
    GO

    SELECT
    NAME AS DatabaseName
    , IS_ENCRYPTED AS IsEncrypted
    FROM sys.databases where name ='SQLSecurityTest'
    GO
Microsoft SQL Server has a strong Auditing capability. You can enable a Server audit, a Database audit, or both. In general, you should choose one or another, but not both. Enabling a Server audit uses SQL Server's Extended Events to audit all the databases on that server, and any new ones you create, and sends it to a single target. Enabling a Database audit allows you to send each audit collection to a different target, such as a file, or one of the Windows Event Logs, once again using Extended Events.
An Audit on SQL Server involves multiple components:
- SQL Server Audit - The definition of a group of Server and Database actions that you want to monitor
- Server Audit Specification - Server-scoped actions you want to collect. The complete list is here.
- Database Audit Specification - Database-scoped actions you want to collect. The complete list is here.
- Target - A file, the Windows Security Event Log, or the Windows Application Event Log that stores the result of your Audit. Note that the Windows Event Log is less secure than the Security Event Log.
Once you create these elements, you can start the Audit collection, which sends the data to the specified Target.
Activity: Create a Server Audit
In this activity you will set up a server audit and a database audit specification on your test system. You will then perform an action that is included in the audit scope, and then review the Audit Log Target.
Steps
Create a SQL Server Audit for the Patient table data
    USE [master]
    GO

    CREATE SERVER AUDIT [Patient_Data_Audit]
    TO FILE
    (	FILEPATH = N'C:\EncryptedDrive'
      ,MAXSIZE = 1024 MB
      ,MAX_ROLLOVER_FILES = 10
      ,RESERVE_DISK_SPACE = OFF
    ) WITH (QUEUE_DELAY = 1000, ON_FAILURE = CONTINUE)

    GO

    ALTER SERVER AUDIT [Patient_Data_Audit]
    WITH (STATE = ON) ;
    GO
Add an Audit Specification that tracks actions on the table
    USE [SQLSecurityTest]
    GO

    CREATE DATABASE AUDIT SPECIFICATION Audit_Data_Select_On_Patient_Table
    FOR SERVER AUDIT [Patient_Data_Audit]
    ADD ( SELECT, INSERT, UPDATE, DELETE
        ON SQLSecurityTest.dbo.Patient BY Public )
    WITH (STATE = ON) ;
    GO
Perform actions that are included in the Audit Specification
    USE [SQLSecurityTest]
    GO
    INSERT INTO Patient (LoginID,FirstName,LastName,Address,City,SSN,CardNumber)
    VALUES ('6','Fred','Fernandez', '66 Freedom Fwy.', 'Fremont', '666-66-6666', '6666-6666-6666-6666')
    GO

    SELECT * FROM Patient
    WHERE LoginID > 3
    GO

    UPDATE Patient
    SET City = 'Fresno'
    WHERE City = 'Fremont'
    GO

    SELECT * FROM Patient
    WHERE LoginID > 3
    GO

    DELETE FROM Patient
    WHERE FirstName = 'Fred'
    GO

    SELECT * FROM Patient
    GO
Review the Audit Log
    SELECT event_time, server_instance_name, server_principal_name, database_name, object_name, [statement] FROM sys.fn_get_audit_file ('C:\EncryptedDrive\Pa*',default,default);
    GO
Add a few more server-audits that can be useful in your organization
NOTE: You can see the results of this audit from the events done so far in this course in the accompanying notebook.
    USE [master]
    GO
    CREATE SERVER AUDIT [Database-Wide-Audit]
    TO FILE
    (	FILEPATH = N'C:\EncryptedDrive'
      ,MAXSIZE = 1000 MB
      ,MAX_ROLLOVER_FILES = 100
      ,RESERVE_DISK_SPACE = OFF
    ) WITH (QUEUE_DELAY = 1000, ON_FAILURE = CONTINUE)

    GO

    -- This Audit is focused on Security events related to Databases
    CREATE SERVER AUDIT SPECIFICATION Database_Wide_Security_Specification
    FOR SERVER AUDIT [Database-Wide-Audit]
      ADD (DATABASE_CHANGE_GROUP),
      ADD (DATABASE_OBJECT_CHANGE_GROUP),
      ADD (DATABASE_OBJECT_PERMISSION_CHANGE_GROUP),
      ADD (DATABASE_OBJECT_OWNERSHIP_CHANGE_GROUP),
      ADD (DATABASE_PERMISSION_CHANGE_GROUP),
      ADD (DATABASE_OWNERSHIP_CHANGE_GROUP),
      ADD (DATABASE_PRINCIPAL_CHANGE_GROUP),
      ADD (DATABASE_ROLE_MEMBER_CHANGE_GROUP),
      ADD (SCHEMA_OBJECT_CHANGE_GROUP),
      ADD (SCHEMA_OBJECT_OWNERSHIP_CHANGE_GROUP),
      ADD (SCHEMA_OBJECT_PERMISSION_CHANGE_GROUP)
        WITH (STATE = ON);
    GO

    ALTER SERVER AUDIT [Database-Wide-Audit]
    WITH (STATE = ON);
    GO


    USE [master]
    GO
    CREATE SERVER AUDIT [Server-Audit]
    TO FILE
    (	FILEPATH = N'C:\EncryptedDrive'
      ,MAXSIZE = 1000 MB
      ,MAX_ROLLOVER_FILES = 100
      ,RESERVE_DISK_SPACE = OFF
    ) WITH (QUEUE_DELAY = 1000, ON_FAILURE = CONTINUE)

    GO
    -- This Audit is focused on Security events related to the server
    CREATE SERVER AUDIT SPECIFICATION Server_Security_Specification
    FOR SERVER AUDIT [Server-Audit]
      ADD (SERVER_OBJECT_OWNERSHIP_CHANGE_GROUP),
      ADD (SERVER_OBJECT_PERMISSION_CHANGE_GROUP),
      ADD (SERVER_PERMISSION_CHANGE_GROUP),
      ADD (SERVER_PRINCIPAL_CHANGE_GROUP),
      ADD (SERVER_ROLE_MEMBER_CHANGE_GROUP),
      ADD (SERVER_STATE_CHANGE_GROUP),
      ADD (TRACE_CHANGE_GROUP),
      ADD (FAILED_LOGIN_GROUP),
      ADD (SERVER_OPERATION_GROUP),
      ADD (USER_DEFINED_AUDIT_GROUP),
      ADD (DATABASE_PRINCIPAL_CHANGE_GROUP),
    	ADD (LOGOUT_GROUP)
      WITH (STATE = ON);
    GO

    ALTER SERVER AUDIT [Server-Audit]
    WITH (STATE = ON);
    GO
Disable all running audits
    USE [master]
    GO
    ALTER SERVER AUDIT [Patient_Data_Audit]
    WITH (STATE = OFF);
    GO
    ALTER SERVER AUDIT [Server-Audit]
    WITH (STATE = OFF);
    GO
    ALTER SERVER AUDIT [Database-Wide-Audit]
    WITH (STATE = OFF);
    GO
)
 For Further Study
- You can find a complete permisisons poster for download here
- An example stored procedure to fetch Server permissions is here
- An example stored procedure to fetch Database permissions is here
 Next Steps
Next, Continue to 03 - Azure SQL Database Security.